My Christmas sewing got me thinking about fabric. Specifically about what is called “directional fabric” or “one way prints”. These are fabrics where the print has a definite direction to it – a “right” way and an “upside down”.
Some fabrics have an all over pattern with no direction. These fabrics could have the same thing all over, like spots or stars, or they could have a print that has no right way. I have some kids fabric that has cars and trucks printed both upside down and right way up, so no matter which way I cut and sew that fabric, there will always be some cars that look “right” and others that don’t.
Directional fabrics have a print or design that only looks right one way. It could be that all the characters are facing one way, or it could have a scene that runs along the length or width of the fabric. When working with a fabric like this you need to be careful which way you cut and sew it. For example, you don’t want to send up with a pencil case where the fairies are standing on their heads!
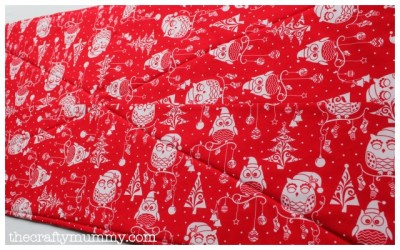
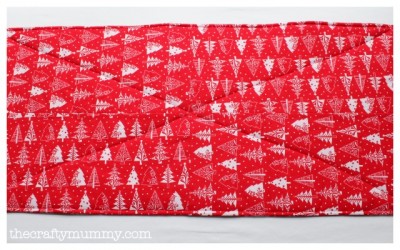
After sewing some bunting and table runners, I was asked to make a table centre for Mummy J. Although her table is a large square that seats 8 people, we decided on a wide rectangle that left room for the placemats around the edges. One side of the runner is owls and the other is Christmas trees, but both are fabrics with a strong direction in the print.
How could I make them look good no matter where the guests are seated?
Some careful cutting and piecing did the trick. I cut four rectangles then stitched them together to make my larger rectangle. You can see on the photo how I placed the rectangles so that everyone would have some trees looking “right”. I did the same thing on the owl side of the runner then joined them with some pellon in between and quilted the lot with a simple cross from corner to corner.
Tips for working with directional fabrics
- Assess whether your fabric is directional by laying it out and looking for any elements of the print that could be upside down
- Work out which way is the “right way up” for your piece of fabric
- Think about the project you want to make with it – does the “top” of the fabric need to be at the top of the project?
- Plan your cutting and how to orientate your pieces on the fabric
- Check twice and cut once
- Take care as you start sewing that you haven’t turned any pieces the wrong way
- Check as you join each piece that it looks right (Better to unpick one seam straight away than many!)
Have you done some sewing with directional prints? I’d love to see! Leave me a link to your pictures in the comments or over on my Facebook page.


oh hurrah! I can finally read your posts again! I have no idea what happened there but I’ve got my malware warning sorted now so perhaps that was the problem!!! Great how to post!
Yay! Nice to hear from you again!
Thank you, thank you, thank you. Now I can make the runner I want with the fabric I love.
Glad to help, Mimi! I’d love to see a picture when you’re done
Hi, I’m dealing with a floral print that is very busy. I sent away for this fabric… so didn’t see it being cut from the bolt. So I’m trying to determine “up” direction. I think I know? But, do you know if there is an industry standard as to which side of a properly configured print has the selvage with the info on it?
I think the correct direction of this pattern has it on the right side. Could that be the standard or can the info be on either side depending on the manufacturer? Any knowledge you can share will be greatly appreciated.
Thanks, Gary
I have a piece of fabric with coffee pots all over it going the same way, I want to make a kitchen boa but don’t know how to cut my fabric, can you help me !! Thank you!!