The Crafty Mummy

Crafts. Sewing. Quilting. Crochet. Tutorials.

  • Start Here
  • Welcome
    • Subscribe
    • About Me
      • Copyright
      • Disclosure
      • Privacy Policies
    • Advertise
    • Sharing
      • Recommendations
      • Shopping & Coupons
      • Books
  • Explore
    • Crafts
      • Beading
      • Kids
      • Paint
      • Storage
      • Christmas Crafts
    • Sewing
    • Quilting
    • Stitching
    • Crochet
      • Yarn
    • Life
      • Food
      • Organisation
    • Blogging
      • How To
      • Social Media
      • WordPress Plugins
      • Photography
  • Tutorials
    • Tips
  • Shop on Etsy
  • Shop on Redbubble

Clover Cutter Case

by Tonya Grant |Filed Under: Sewing, Tutorials Tagged With: Crochet Get a Weekly Update of all Articles

case for clover cutter
tutorial sewing clover cutter case

A few years ago when the items allowed on flights were heavily restricted I discovered the Clover cutter pendant. It is a small pendant with a blade enclosed completely in metal. You can cut threads with it, but not much else, so it is safe to take on board during a flight when you can’t take scissors.

So with a couple of flights coming up, I went searching for my cutter and had some trouble finding it again. I decided to make a little case for it so I’d find it easier next time and protect it when I’m travelling.

Here’s the tutorial if you’d like to make one for yourself – or even as a gift for another crafter!

What you’ll need:

  • rectangle scrap of fabric, 15cm x 18cm, for the case (6″ x 7″)
  • strip scrap of fabric, 2.5cm x 24cm, for the strap (1″ x 9.5″)
  • scrap of iron-on interfacing slightly smaller than the strip scrap
  • slip ring, 1.5cm diameter
  • sewing supplies and iron

tutorial sewing clover cutter case

Step 1:

Create a hem on each short end of your rectangle by folding it over about 3mm twice, pressing and stitching down.
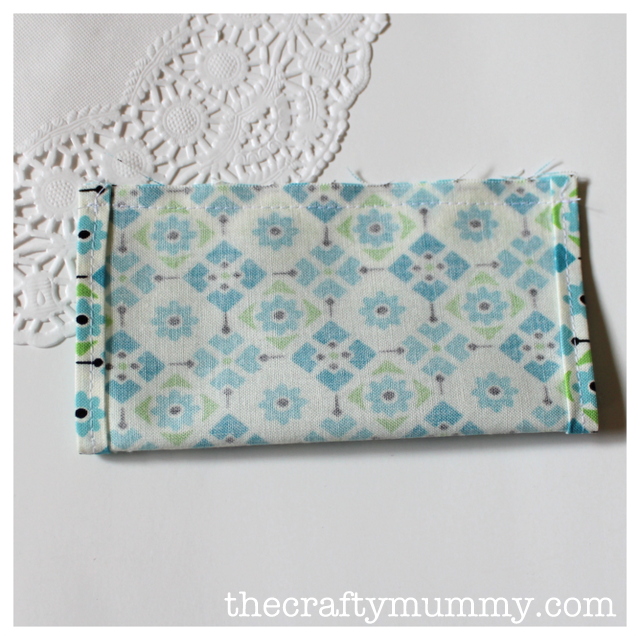
tutorial sewing clover cutter case

Step 2:

Fold the rectangle in half, right sides together and stitch down the side to form a tube.Turn through to the right side and press.
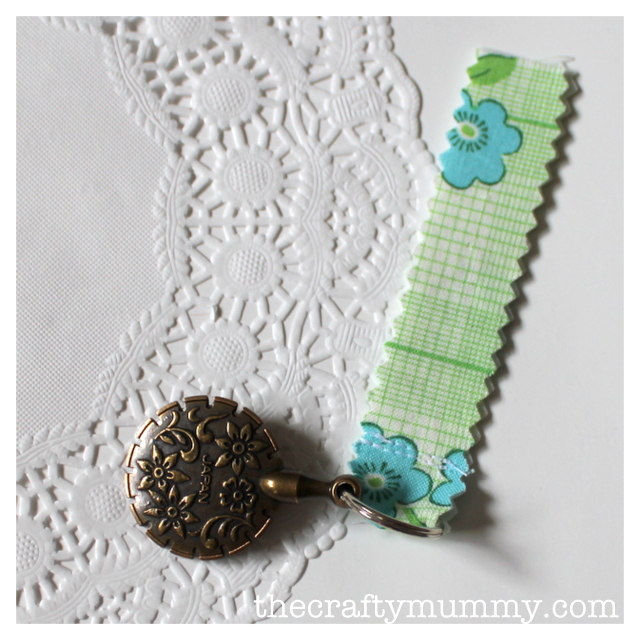
tutorial sewing clover cutter case

Step 3:

Thread the slip ring onto the Clover cutter. Iron the interfacing onto the wrong side of the strip of fabric and trim the edges with pinking shears to stop fraying.

Step 4:

Thread the strip of fabric through the slip ring and fold in half wrong sides together. Stitch across the strap about 1cm from the slip ring to hold it in place.

tutorial sewing clover cutter case

Step 5:

Slip the other end of the strap into one end of the rectangle tube and stitch the opening closed, catching the strap into the seam as you sew. Stitch the other end of the tube closed as well.
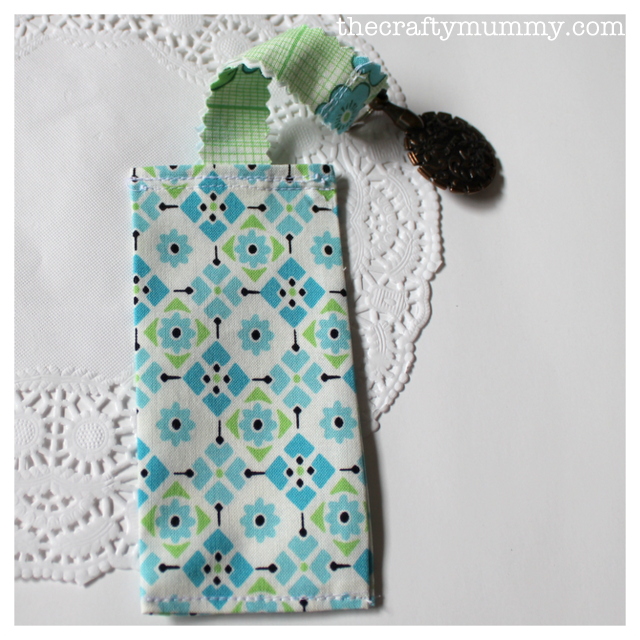
tutorial sewing clover cutter case

Step 6:

Fold the tube in half to make a square. Stitch up the two sides to form a little pocket for the cutter to slip into.

All done! Enjoy some crafting on your flight, but remember to check on what other crafting tools you are allowed on board. I recently took a domestic flight within Australia and I was allowed to take my cutter and my crochet hook on board, but rules may vary between airlines and destinations, so check before you fly.

Filed Under: Sewing, Tutorials Tagged With: Crochet

« Sharing Sunday
Busy at And Sew We Craft »
Disclosure: There are affiliate links in this post.  This just means that if you click through and choose to purchase something I may get a small commission - at no extra cost to you, of course.  This helps me keep the content here at The Crafty Mummy free for everyone.

I love to chat so please leave me a comment or ask a question.

Don't stress if your comment doesn't appear immediately - sometimes I have to moderate comments thanks to spam visitors, but the comments from real readers will always get published. Scroll down to add your thoughts or ask a question.

Comments

  1. Angie says

    May 23, 2012 at 5:01 PM

    This looks great! Exactly what I need for my sewing box and those sharp rotary cutters. Thanks for sharing!

    • CraftyMummy says

      May 25, 2012 at 2:28 PM

      Good idea, Angie! I hadn’t thought of making one for my rotary cutter.

  2. Amy @ MahliMoo says

    May 23, 2012 at 8:36 PM

    Great idea Tonya!

    • CraftyMummy says

      May 25, 2012 at 2:28 PM

      Thanks Amy

Hi! I’m the CraftyMummy

Tonya is the voice behind The Crafty Mummy. She dabbles in lots of different crafts – patchwork, quilting, cross-stitch, scrapbooking, knitting, crochet and sewing. This is the record of projects she has done, and the projects she dreams of getting to! Read More…

Search

  • Email
  • Facebook
  • Instagram
  • Pinterest
  • Twitter
  • YouTube
Shop my Affiliate Favourites

Fat Quarter Shop for Fabric and More

Grab the Sew Sampler Box Here

AccuQuilt for Cutting Machines and Dies

QuiltyBox for Monthly Treats in the Mail

CreativeBug for Craft Classes

Pretty Darn Cute for Blog Designs like mine

Creative Market for Fonts, Images, Themes and More

OzGameShop for All the Games

Adrift for Fashion you’ll Love

Kindle Unlimited Membership Plans

Kindle Book List

Click to shop my kindle book list
Shop my Amazon Influencer Shop
Join the CrochetU and learn to crochet
New to TheCraftyMummy.com? Click here to see more
Blog Tools I use for TheCraftyMummy.com

Grammarly

Aweber for email newsletter

CoSchedule to stay organised and share

Milotree for social media

Genesis for blog framework

FoodiePro is my theme

Hosting with WPEngine

Powered by

Recent Articles

Disclosure: There are affiliate links on this site. This means that I may get a commission if you choose to purchase after browsing via these links - at absolutely no extra cost to you, of course. I only recommend products which I use and love, or that I think will be quality products that will be useful to my readers. It is the affiliate links in this site that help me keep my tutorials free of charge. Thank you!

Looking for something? Search here:

Copyright 2015 The Crafty Mummy · Built using Genesis Framework & Foodie Pro Theme