When I wanted to start selling my handmade creations, I didn’t know where to start! I had already been blogging for ages so I had my blog on my own “dot.com”. I was also on Facebook and I had seen people selling over there but I wasn’t sure I wanted to rely on the rules not changing – as Facebook seems to do! I looked at Etsy but I didn’t want to deal with currency exchange rates and international shipping. So I settled on Madeit.com.au, an Australian site for selling all things handmade. I have written about how to set yourself up on Madeit before and I do LOVE Madeit. The owners over there do a fabulous job and it is easy to use.
But I have noticed that there are people who do not want to sign up over there and I’ve noticed other clever crafters having multiple shops on Madeit, Etsy and their blog. So I decided it was time to take the plunge and set something up. For me, Ecwid has been the perfect solution, so I thought I’d share with you how to add a shopping cart (or online Shop) Ecwid and then sell on your Blog or Facebook page.

You could use Ecwid to sell handmade products like I do, but there are lots of other options. Perhaps you have things around the house to sell. This could be your online Garage Sale. Perhaps you want to get rid of the kids old clothes. This could be a way to sell them. You can even use Ecwid to sell digital items like ebooks or downloadable PDFs.
Sign Up
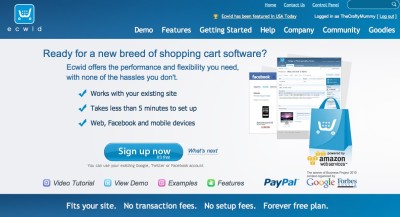
The sign up process is much like any other online sign up. You go to the Ecwid home page and find the sign up button. They will ask you for your basic details or you can use your details from Facebook, Google or Twitter. Sign up is free for the basic level. There are higher levels with more options that are priced on a sliding scale.
Control Panel
Once you have signed up, you have access to your Control Panel. This is where you will control the look of your shop, add products to sell, see customers and sales, and find the codes to display your store on your Blog.
Under the Catalog tab, you can create Categories and add Products. Now I’m sure there is heaps more functionality here than what I am using, but I have created categories and sub-categories in my Shop to make things easier for customers to find. For example, I have “Pencil Cases” with “Medium”, “Large” and “Long” sub-categories. When you create the categories, you can add a picture and description of what will be in there, so you could have broad categories like “Kids” and “Adults”, then sub-categories like “Clothes” and “Accessories”.
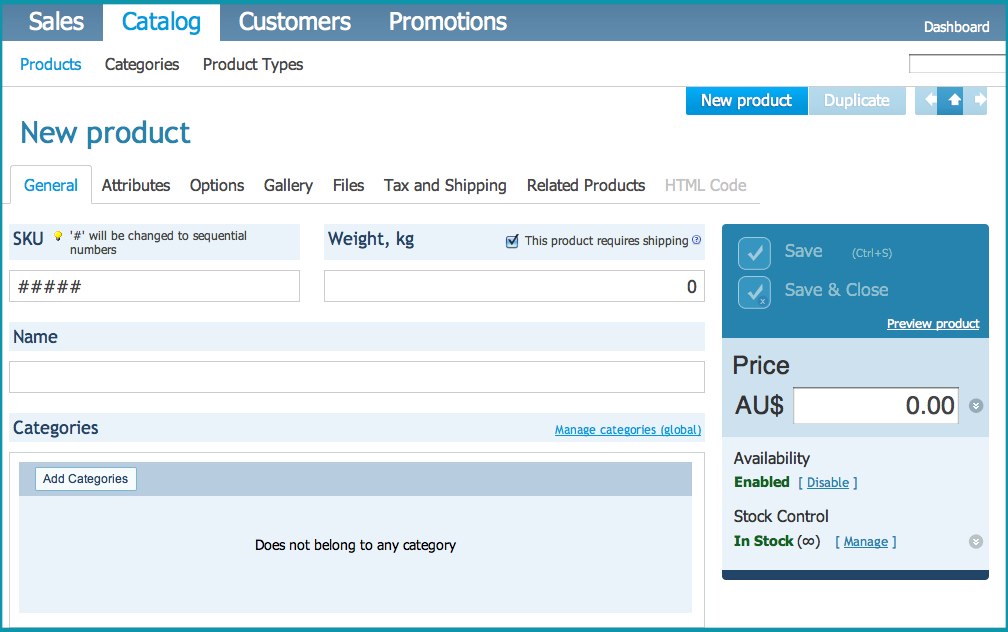
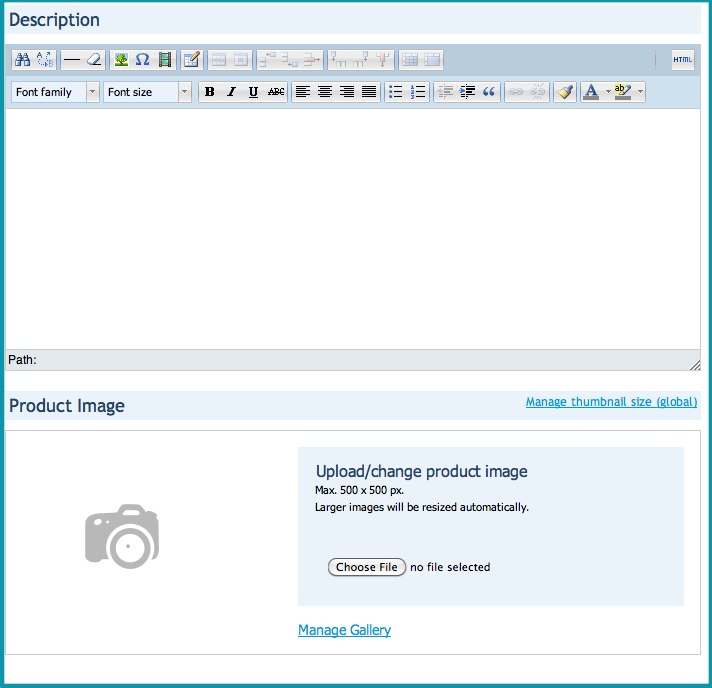
Then in Products I have added each of my pencil cases, coin purses, quilts and so on. Under the General tab, I have added a name, weight (I used my kitchen scales to weigh things!), category, price, description and a picture. Ecwid automatically generates an SKU number for each product that you add so that they all have a number. (SKU stands for StockKeeping Unit and is just a number to help track your products.)
To add extra pictures, click on “Manage Gallery” and add extra photos of that item.
If you have more than one of that item, find “Stock Control” on the right under the price and click manage to set a number for how many of them you have on offer.
Make sure you click “Save” when you’re done – although I have found it will prompt me if I forget.
If you want to add another similar product (for me it is often another pencil case but in a different fabric), then click “Duplicate” in the upper right and you will get a new product with a new SKU number but all the details copied from the previous item. You can then just make the changes you need to (maybe change the picture) and save it.
Back at the top of the New Product screen, you can also add Related Products, set Taxes and Shipping info and more options. If you are selling a digital product, you can upload it under the Files tab.
Shipping
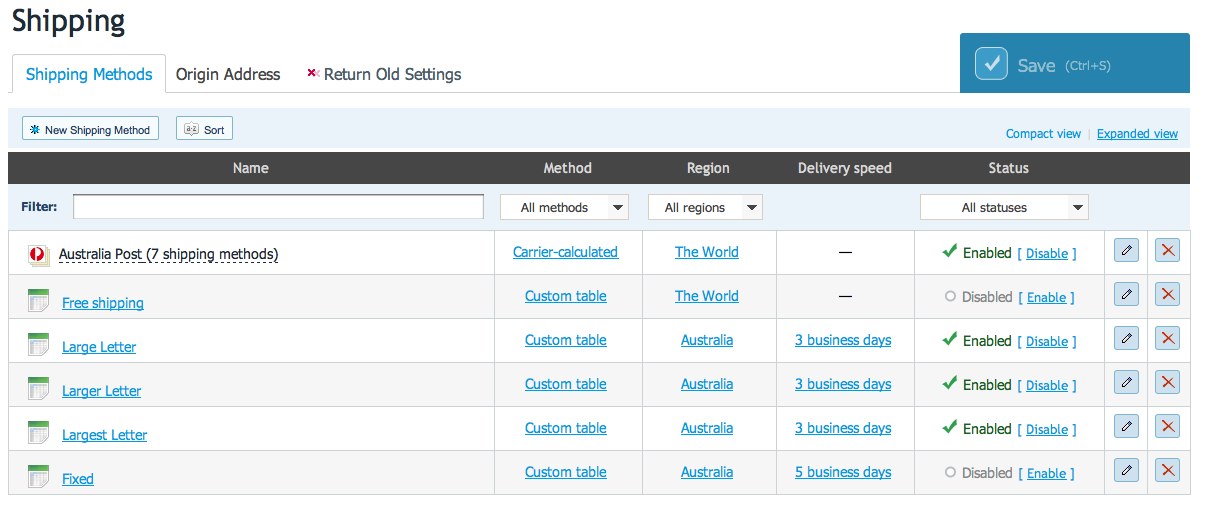
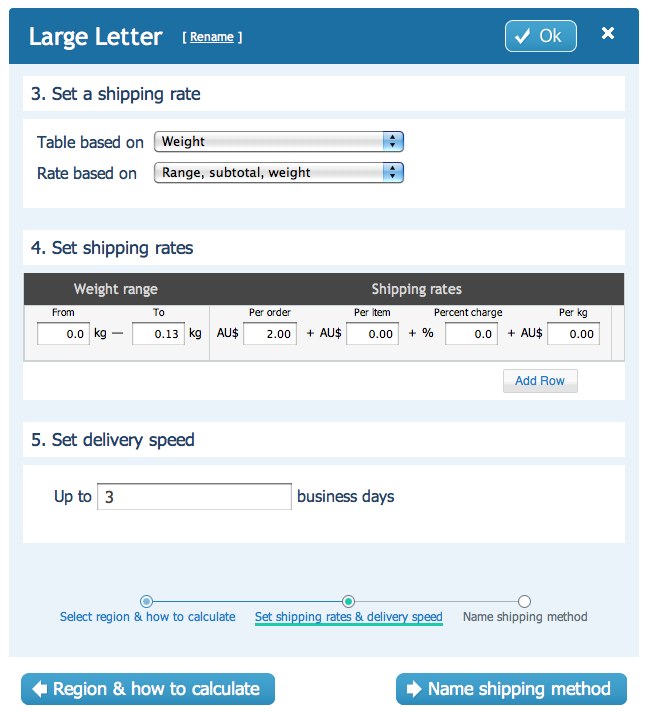
Rather than setting individual shipping for each item, I use the Global Settings. You can set these under the System Settings at the top right of the Control Panel, just under the “Visit Store Front” button. You can set where you are mailing from, then choose to turn off the default shipping choices if you want to and create new ones. Most of my items are small enough to be sent in standard envelopes so I looked at the Australia Post rates on their website and created some custom shipping amounts that were slightly more than the postage rate to cover the cost of envelopes and travel to the post office.
If customers order multiple items, the system adds up the weights and calculates postage accordingly. For me, working out the shipping was the hardest part of the whole set up process but once set, it is done.
Here’s what one of my custom shipping rates looks like:
Payment
Also under the System Settings, you can set up payment options. I accept PayPal and all I had to do was select that option and tell it my account details. Easy!
One day I will sit down and work out how to have Direct Deposit as an option but for now this is working just fine.
Social Tools
The other area I set up in the System Settings, was the Social Tools. By enabling the Facebook and other sharing buttons in that section, your customers can share your Shop items on social media. I figure this is free advertising if they choose to share – bonus! It also makes it easy for me to share my own items to social media, for example, to announce a new item in the Shop on my Facebook page or Twitter.
How to put your Shop on Facebook
So you’ve set up your Shop and loaded and item or two. But you want people to see it so they can shop with you! Let’s start with putting your Shop on your Facebook page. You can only add it to a Facebook, not your personal profile. If you don’t have a page, check out the post I wrote for Mum’s Business to find out how to set one up.
Simple Steps to set up your Shop:
- Make sure you’re logged in to Facebook
- Go to the Ecwid App: apps.facebook.com/ecwid-shop/ – click “Go To App” and
“Allow” - Choose “Add Store to my Page” then choose your page from the drop down menu
- Click “Add Ecwid”
- You should see a list with your Page and “Connected” next to it. Click on “Settings” next to that.
- Back in your Ecwid Control Panel you will find your “Store ID” under the Dashboard tab (on the right side half way down the page) – copy it and paste it into the box on the Facebook settings page.
- Then choose the option to show the Catalog and Store Home Page and Save it all.
- There should now be a Tab on your Facebook page with SHOP that shows your Ecwid store.
If you have any trouble or want to read more, check out this page in the Ecwid Help guide about Facebook.
How to put your Shop on your Blog
If Facebook is not your thing, you can also put your Shop on your Blog or any website. On my Blog, I created a new Page to put my Shop into just as you would create any page in WordPress or Blogger.
Then it is a case of copying and pasting some HTML code into the new page. You find the code in your Ecwid Control Panel under the Dashboard tab. They call them “Widgets Code” and they are all in a little box that scrolls.
Step by Step:
- Copy the “Product Browser Widget Code” by clicking on the blue words “the following code block” to highlight it then using your right mouse button to copy it.
- Go to your Blog and open the Page as if you were about to edit it – just like if you were going to write blog post there. In WordPress choose the “Text” tab (rather than the “Visual” tab). In Blogger choose the “HTML” tab (rather than the “Compose” tab).
- Paste the code into the page.
- Go back and copy the other codes from Ecwid and paste them in as well if you want to.
- Save the page.
That’s it!
On my Shop page, I have these codes in this order: Horizontal Categories; Shopping Bag; Product Browser; Search Box.
Tip: The Shopping Bag automatically attaches itself to your categories. If you don’t want it there, remove this section of code: “layout=attachToCategories”.
Since I set up my Shop, there is now a widget available for WordPress so that you don’t have to copy and paste the codes. I haven’t used it but you will find it here: Ecwid Shopping Cart Widget for WordPress
Apparently there is a gadget for Blogger as well – again I haven’t used it – but you can find it here: Blogger Gadget instructions for Ecwid
If you want to do the code thing like I did, there is also a video to help you here: Ecwid Tutorial Video
Need more help? Check out the Ecwid Help pages and the Community forum over there as well – you’ll see the links when you are logged into your account.
Disclosure: There are Affiliate links in this post.



This is great Tonya thank you so much for this post. I didn’t even know about Ecwid existed. I’ve been looking at all my options for a store and I’m having major dramas with Etsy with my store name and now I’m just wanting to walk away from it. So frustrating. I’m definitely going to have more of a look at Ecwid now.
Hope it helps, Trudie. You were one of a few people who had either asked me directly or had been talking about setting up shops but weren’t sure how.
Thanks for this! I’ve been thinking about setting up a small one so perfect timing. Will bookmark your page 😉
Awesome timing Tanya, I want to set one up on my blog soon, so I will have to check this out.
Wow, this is exactly what I have been looking for!!! THANK YOU so much. I am actually quite excited to set up my little shop for me CandyBowsAustralia on facebook. YAY!! you are a star!! (visiting from FYBF)
Perfect timing!! thanks so much for putting this up. Now all I have to do is try to find out how to make it so I can put up my logo and stuff. So when you see the page for the first time it doesn’t look blah!!
Thanks again!!
Just wondering if they charge a fee per sale?
Oh, I think I might have figured the answer out 🙂 Does the money from the sales you make go straight into your paypal account?
That’s right Emma. There is no listing fee or sales fee. The money goes straight to your Paypal account. The only cost is if you choose to upgrade to a level higher than the free level.
That’s all good but wouldn’t it be easier if you added an eCommerce plugin to your WordPress blog? You could have created something like shop.thecraftymummy.com and that would be better in my opinion.
Okay, just saw that your shop is located in a sub folder rather than a sub domain. But why use Ecwid when the same can be achieved with wordpress plugins?
Like lots of things online, there is more than one way to add a shop. A WordPress plugin would be another way to do it.
For me, I wanted to be able to have my shop on my blog and on my Facebook page, so Ecwid lets me have the same shop in both places without any extra work. When something sells from one site, it also disappears from the other site.
I just love the idea of using it to have your own online garage sale! What a great idea and fantastic post. Thanks for sharing
What a great and helpful post. I have a few friends that want to set up shop but weren’t sure where to start. I’ll be sharing this link with them. Rachel xx
Hi, spending almost 2 days finding cart widget that’s simple to manage; finally I found this ! ^_^ Thank you so much, this post of yours helps me a lot 😉 Now seeing cart in my blogshop really boost my spirit.. Thanks Crafty Mummy 😉