Step by step tutorial on how to cover a chair cushion by sewing a new cover – with a little baby vomit story thrown in!
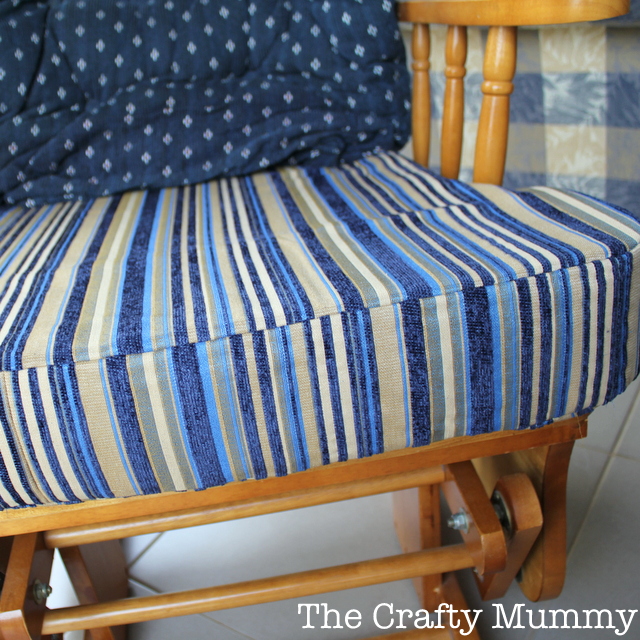
Click here to pin now and save for later
When I was pregnant with my first baby, I was sure I needed a rocking chair. I had lovely pictures in my head of rocking them to sleep, and reading them stories as they grew. So CraftyDaddy dutifully bought me a glider rocker and I loved it. Later it sat in Baby #2’s room and was used to rock him to sleep. But my most vivid memory of Baby #1 and the rocker is not at all the pretty picture I had imagined. Why don’t I just share this little tutorial then I’ll tell you the funny story at the end?
Years have passed and the seat cushion of the rocker was in sore need of a makeover. I had removed it because it looked so tatty! Under the cushion was a layer of fabric with a thin foam backing then wire springs under that.
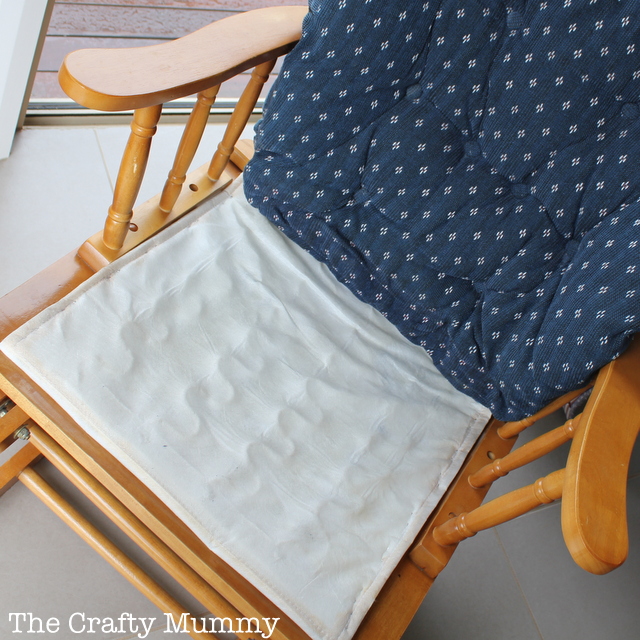
The first step was to remove the thin foam – which was slowly disintegrating anyway – from the fabric and replace it with a new piece. I found this foam in a small roll at Clark Rubber. After cutting it to size, I simply stapled it in place. The original had been stitched into the seam of the fabric piece, but to do that would have involved removing the fabric, sewing the foam in and them stapling the fabric back into place. My way was much quicker and it will always be covered by the cushion so I figure it doesn’t have to look flash. You can’t see my staples, can you?
How to Cover a Chair Cushion
What You Need
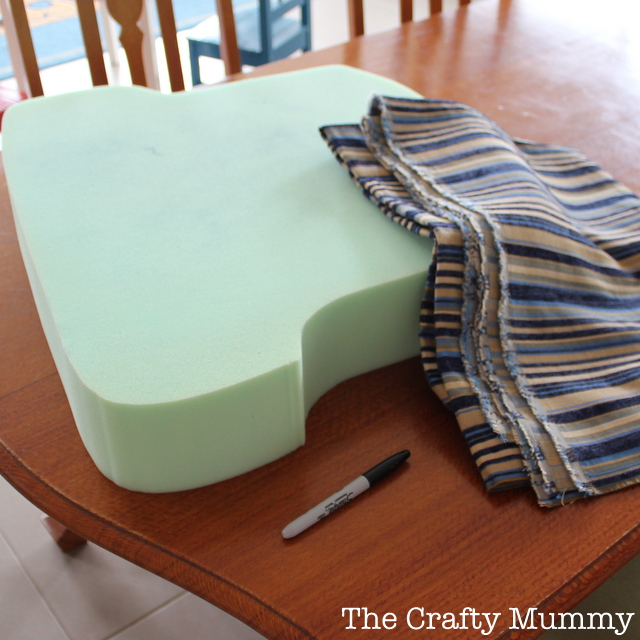
- Thick foam – mine is about 4″ or 10cm thick
- Fabric – enough to cover the cushion in question
- Marker
- Scissors
- Sewing supplies
Let’s talk about the foam: I took the old cushion into Clark Rubber and chose the replacement foam thickness. The staff then used the original cushion as a template to cut the new foam piece. They have a special saw like a jigsaw with a straight blade which they use. Easy!
What To Do
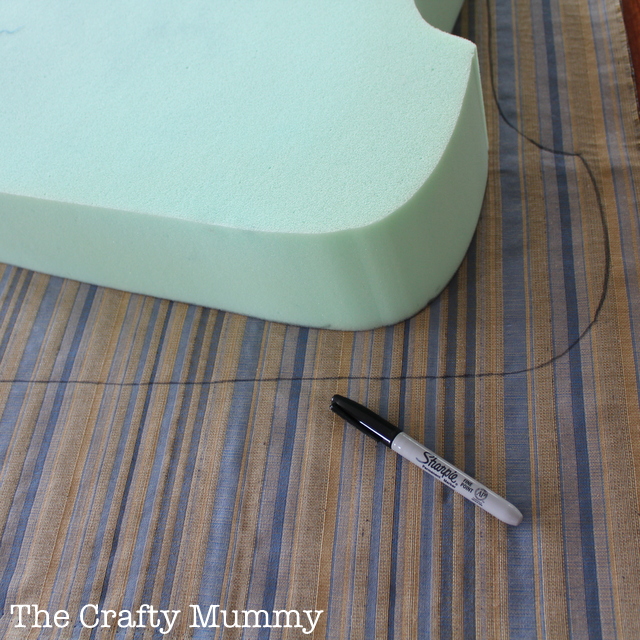
1. Fold your fabric in half with right sides together. This will let you cut the top and bottom pieces for the cover at the same time.
2. Position the foam on top and draw around the shape. My foam was about 4″ tall so I positioned it so that the back of the seat was parallel to the fold in the fabric and about 2″ in. Once cut that 2″ unfolds to become 4″ and the back of my cushion. I drew my shape from the back where it started to curve, up the side and around the front, and back to the curve at the back on the other side. (You can get an idea of the shape I ended up with in the photo below. It is sort of like a large number 8.)
If you have fabric with a directional design, like my stripes, make sure you think about how the design is going to line up on the cushion. Do you want the stripes across or down or diagonal?
3. Cut about 1cm outside the shape you’ve drawn – the extra 1cm will be the seam allowance when you sew.
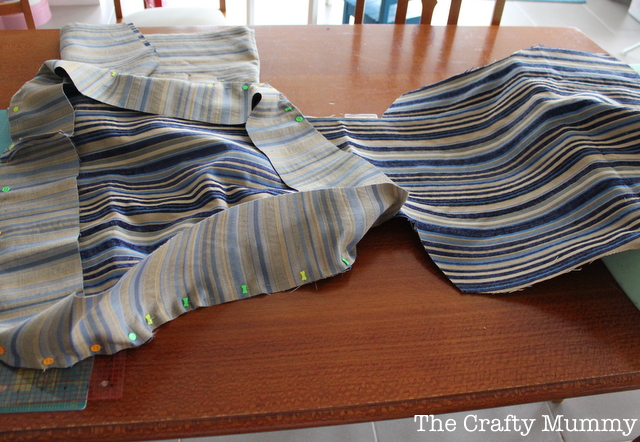
4. Also cut a strip 2cm wider than the depth of your foam and long enough to go all around the side. I had to join two strips together for mine to make it long enough.
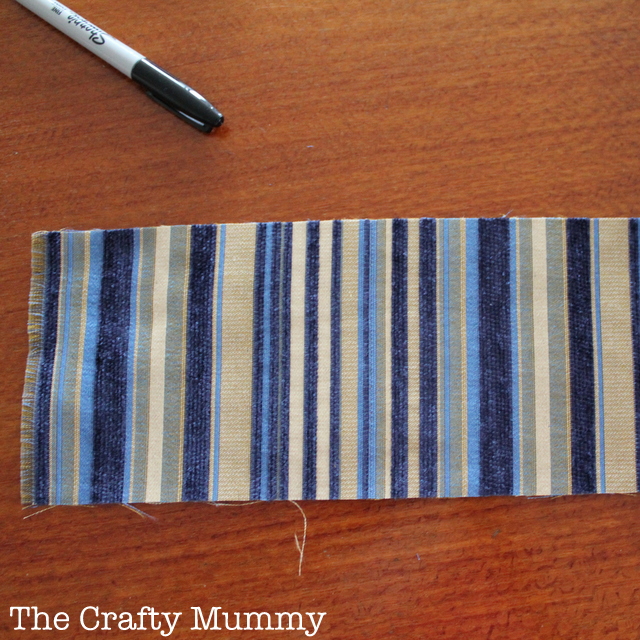
5. Open out your fabric shape. The long strip is going to be the wall of the cushion cover.
If you have two separate shapes, then you can measure the exact length you need for your strip, cut it and join it to create a loop. Then pin the strip to one of your shapes with right side together all the way around and stitch into place.
If, like me, you have a “back wall” created by the fold of the fabric, then start pinning one end your strip to the side of the back wall with right sides together. Pin the strip all the way around to the other side of the shape but not onto the second “back wall”. Stitch it in place. You can trim off any excess from your strip if you want to but I waited to trim after I had the cushion inside the cover.
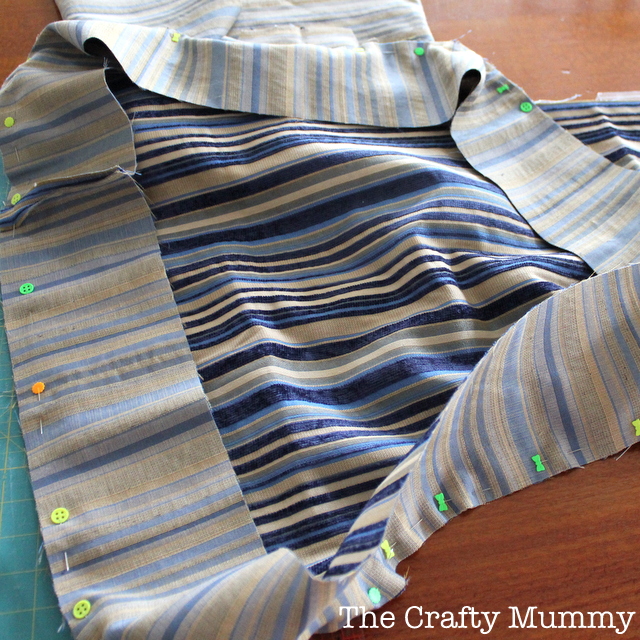
6. Now we’re going to join the strip to the second cushion shape, but instead of pinning and sewing all the way around the shape, we need to leave a hole for turning and then putting the cushion into the cover. I left one whole side of my cushion cover open and it was a tight fit to get the cushion in, so make sure you leave quite a big gap.
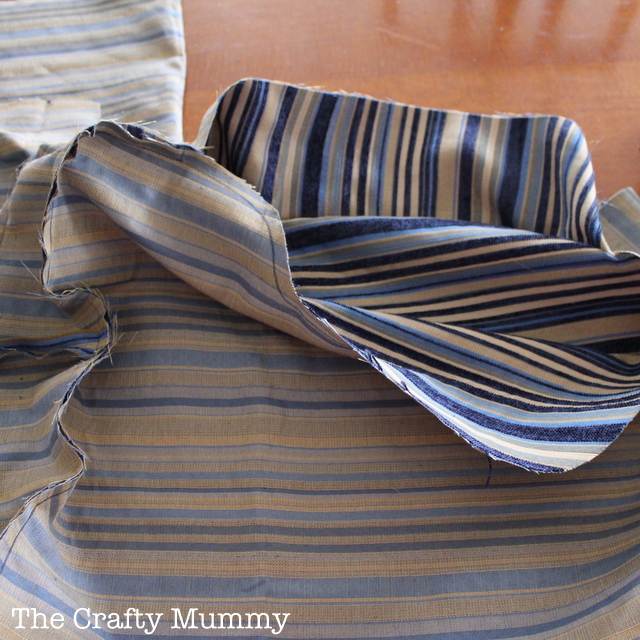
7. Clip the seam allowance. This means making little cuts into the extra seam fabric every couple of centimetres all the way around the cushion cover before you turn it through. On a really curvy cushion like this one, it is very important so that the seams sit nicely when you turn them through. On straight seams, it is not as important but even then make sure your clip the corners. Whatever you do, don’t cut through the stitching or you will create a hole!
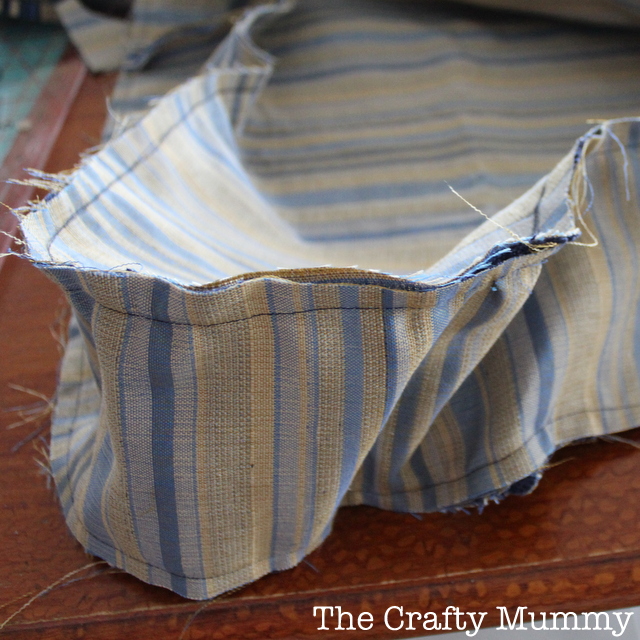
8. Turn through the cover. I love how the stripes are vertical on the sides of my cushion!
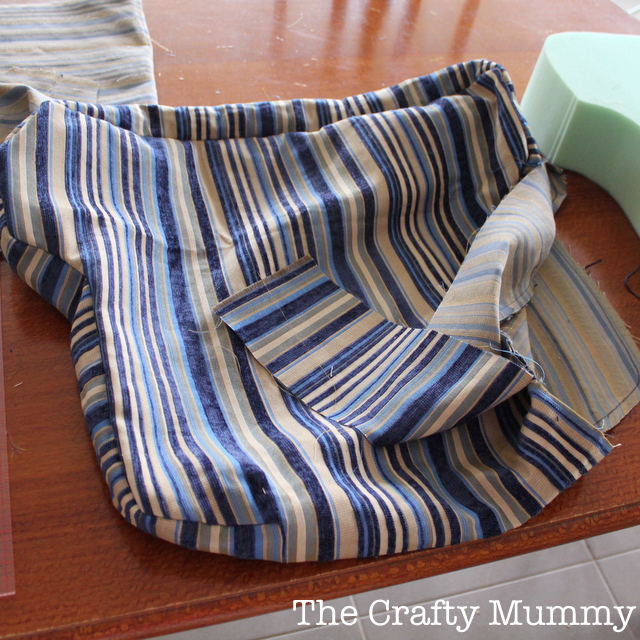
9. Nearly done! Insert your foam into the cushion cover. That sounds easy but if it is a nice tight fit, it will be kind of tricky. Just take it gently so you don’t rip any stitching. If you do, don’t panic. You can just hand stitch it again once you have the cushion in place.
10. Pin the opening closed, carefully tucking the seam allowance inside as you go along.
11. Hand stitch the gap closed.
Done! Back to my story…
Little Miss, my Baby #1, was tiny and had just had a feed. So I’m sitting in the rocking chair with her in my lap facing me having a little chat. She’s starting to look a little drowsy and I’m thinking “Oh good! Sleep time!’. Her eyes are drooping and she’s nearly asleep, when suddenly she opens the eyes, looks up at me and vomits warm milk back all over my shirt!! Arghh! Then she happily closes her eyes again.
I just burst out laughing! This sweet little baby had just caught me! I had to clean myself and the chair arms from memory. Needless to say, I learnt my lesson and was a little more careful about how I held after feeds from then on. Ahhh… the lessons a new mummy learns!
Anyway, I hope you enjoyed the story as well as the cushion cover tutorial.
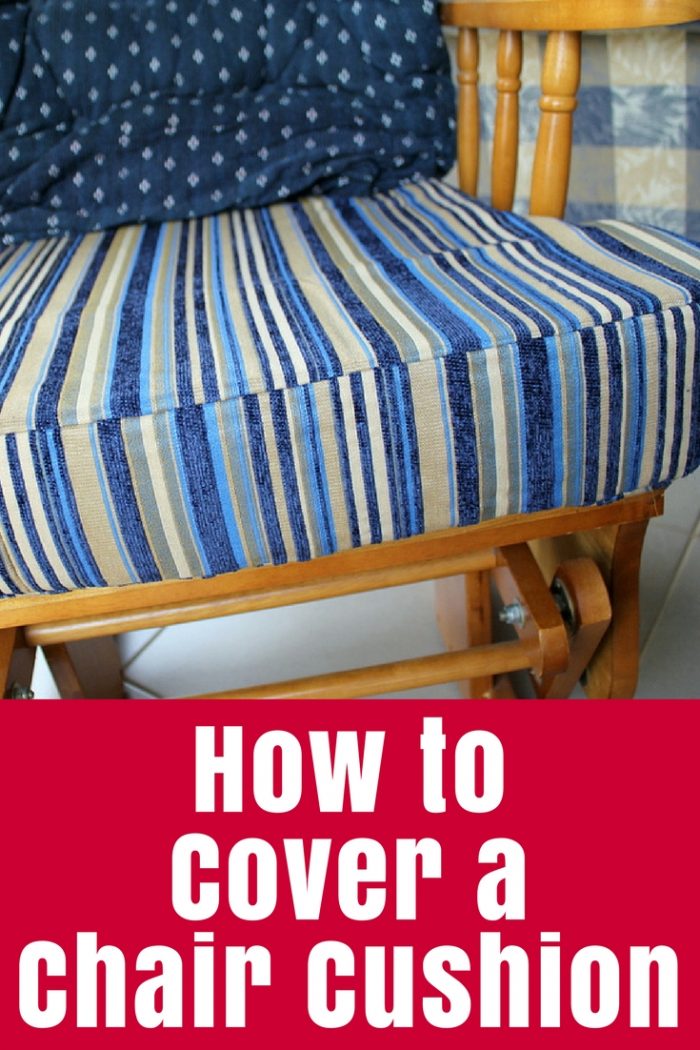



Amazingly great fit! Mine’s not as fitted as I didn’t want to fight with it each time I had to wash it =p
I figured I never took off the old cover and washed it so I would sew this one on. I may regret it!
I had to giggle! I think we all have a story similar to that one… oh the joys of motherhood! lol.
Great tutorial Tonya, now all I need is to get myself a rocker before bub #3 arrives!
It’s never too late, Cass!
That looks great!
Thanks for linking up to Aussie Blogs to Love. We now have a facebook group if you would like to join. I’m hoping to create a really active blogging network (something I feel is missing here in Australia).
https://www.facebook.com/groups/AussieBlogstoLove/
Thanks, Bettina! I just popped over and joined
Love the tutorial but had to laugh at the end of your story!
Great tip. Thanks!
How did you do the pillow for your back, with the pleads in it?
Hi Antoinet, I didn’t actually sew the back cushion for that chair – it is the original that came with the chair. It seems to have lasted well but the base cushion needed replacing so I did that. Looking at it though, the pleats are created by the buttons that sew the layers together – kind of like this tutorial: http://www.fabhousewife.com/diy-rush-dining-chairs-get-a-comfy-update-with-tufted-cushions/
Your pattern in the fabric doesn’t match in front of cushion. I have many years in upholstery business and always match pattern, especially in stripes.
Great tip, David. I sew as a hobby and rarely achieve perfection but I was still pretty happy with my amateur cushion cover. If I was paying a professional like yourself I would definitely expect the stripes to match!
I would never have been able to match the strips…so probably used a plain material that would match one of the colors in the striped material to create the band around the cushion…bingo…gives it a little accent and no matchy-matchy! Easier is better…not professional but works for me!
Hi, I’m in the process of sewing replacement cushion covers for my patio set but keep encountering the following problem: When I sew, the bottom stitch is always loose and loopy. The top stitch is fine. No matter how I adjust the tension on the bobbin, it never sews correctly. I am using outdoor polyester fabric and thread. Do I need a special foot? Can someone please tell me how to fix this? Thank you.
If your bottom thread is loopy it’s the tension on the top you need to adjust. If the top is loopy you adjust the bobbin tension.
Also be sure you are using the correct needle for the fabric!
Hello, I have never done any upholstery before and I’m very hesitant to start now. I have a glider that has been given to me and needs to redone pretty bad. Do you think this is a job for a beginner?
I’m no expert either, Erika, but I found the flat cushion pretty easy. I had never done anything like that before so I was a beginner too.
I need to tackle the back cushion now and I’m putting it off but even that doesn’t look that hard to do.
Would love love love to see a video of your process. Newer to the sewing world. Please and thank you
I am recovering the glider rocker I used with my two, for my newest grandson. One tip I have learned is to put the foam into a garbage bag. Stick the vacuum hose into it and gather the ends of the bag around the nozzle. Suck all of the air out of your foam and it will shrink up to nothing. Place in the cushion cover and let the air back in. Then rip the bag out and you are done. Easy Peasie.
Also, I cut the foam myself using an electric knife. The kind you use to carve a turkey.
Great tips, Nicky. Thanks!
I’m looking to get some covers for my chair. I could probably make them myself. Now I don’t know how well that would turn out so I might see about buying one.
As Nicky said, place your foam inside a plastic bag to insert it into the newly sewn upholstery, after you’ve turned it right side out. If you do not it will be very difficult and will get stuck on the fabric. I use thin dry cleaning bags. I will try the vacuum trick though with this one I’m doing. Not sure how Nicky got an air tight seal. If you use a thin dry cleaning bag you can easily remove it by ripping it off of the foam once it’s inside the fabric. Or just leave it. You won’t even know it’s there. It’s thin and not crinkly. Plus it makes the seat waterproof if you spill it won’t seep into the foam, just the fabric. Don’t use cheap fabric made for apparel, it will look cheap and not wear well. Buy actual upholstery in a similar weight to the original fabric on the chair. Make sure it something you can wipe clean with a wet cloth. Wouldn’t go for anything with a real light color as that will quickly soil.
I love your instructions! Do you have any recommendations to make this type of cushion cover removable for an outdoor patio set?
Hi Tonya. Your foam turned out perfect. I tried cutting mine with a bread knife. The edges were a bit ragged. What did you use to get such a clean cut. Your cushion looks great!!!
Hi Sheila, I got mine cut at store where I bought it. I just took a paper template with me for them to get the shape right.
Hi Tonya, thanks so much for taking the time to share your tutorial. Would you be able to tell me the best way to create a similar cushion cover but with a zipper in the back? I’m wondering if I would need to allow extra width for this but can’t quite work it out!
Many thanks,
Nelly