The Crafty Mummy

Crafts. Sewing. Quilting. Crochet. Tutorials.

  • Start Here
  • Welcome
    • Subscribe
    • About Me
      • Copyright
      • Disclosure
      • Privacy Policies
    • Advertise
    • Sharing
      • Recommendations
      • Shopping & Coupons
      • Books
  • Explore
    • Crafts
      • Beading
      • Kids
      • Paint
      • Storage
      • Christmas Crafts
    • Sewing
    • Quilting
    • Stitching
    • Crochet
      • Yarn
    • Life
      • Food
      • Organisation
    • Blogging
      • How To
      • Social Media
      • WordPress Plugins
      • Photography
  • Tutorials
    • Tips
  • Shop on Etsy
  • Shop on Redbubble

How to Blanket Stitch an Applique

by Tonya Grant |Filed Under: Stitching, Tutorials Tagged With: Applique, Blanket stitch, Felt, Tops of 2015 Get a Weekly Update of all Articles

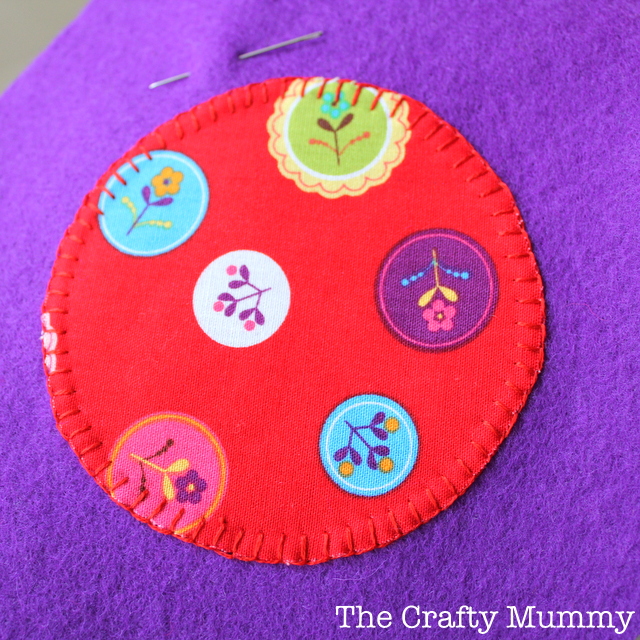
Learn how to blanket stitch an applique with this tutorial – instructions and photos to help you.

Learn how to blanket stitch an applique with this tutorial - instructions and photos to help you.

Tomorrow I have a very cute project to share on the blog as part of the Make a Plushka Toy Blog Tour. As I was making my toy I decided to create a tutorial that I’ve been planning to write for a while now. I wanted to show you how to blanket stitch an applique. You could use this to add applique to anything – a quilt, T-shirt, bag, anything! So although Plushka’s instructions said to use running stitch for the applique on the toy, I did some of it in blanket stitch just to show you how.

Preparation

Place your applique pieces onto the other fabric and pin them in place. If you want them to hold even more firmly in place, you could use Vilene Vliesofix or Bondaweb to iron them on, or spray adhesive. Vliesofix is a double-sided adhesive product that you iron on to fabric. You will also need needle and thread ready to stitch.

blanket stitch applique tutorial

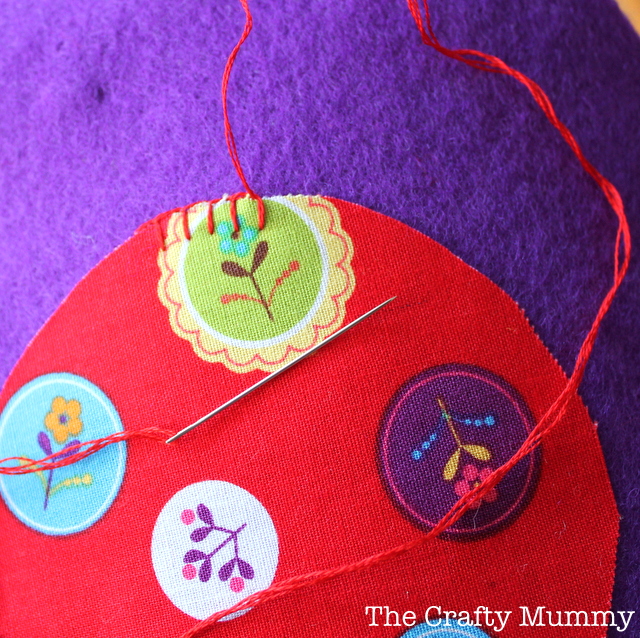
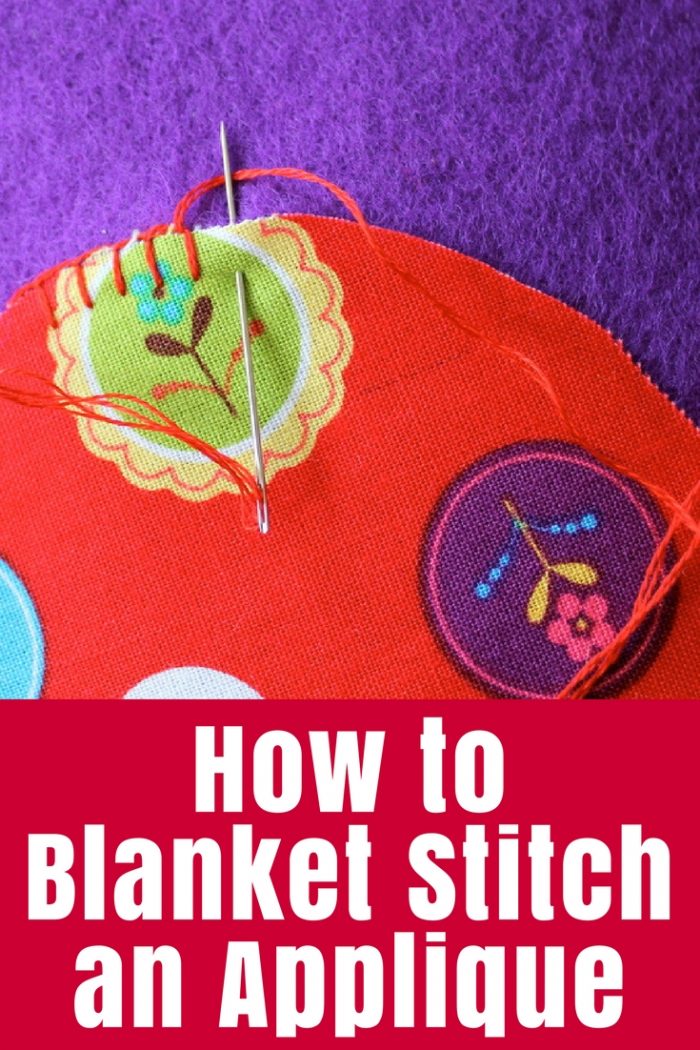
Step 1: Bring your needle and thread up from underneath your fabric in the spot you want to start stitching – in this case, I just picked a spot on my circle to start. You need to be right next to your applique piece but don’t stitch through the applique piece.

blanket stitch applique tutorial

Step 2: Stitch into your applique piece about 2mm from the edge of the applique and a similar distance to the right of your starting point.

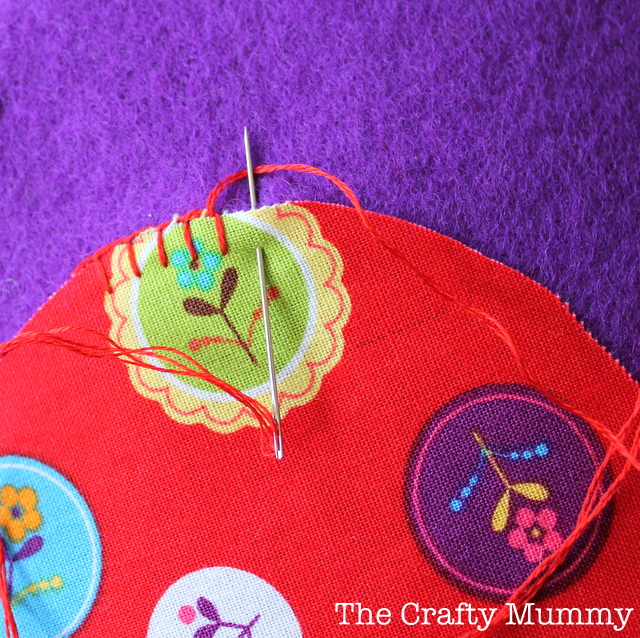
Step 3: Bring the needle back up near the edge of the applique but to the right of your starting point. Make sure that the thread is looped behind the needle as in the picture.

blanket stitch applique tutorial

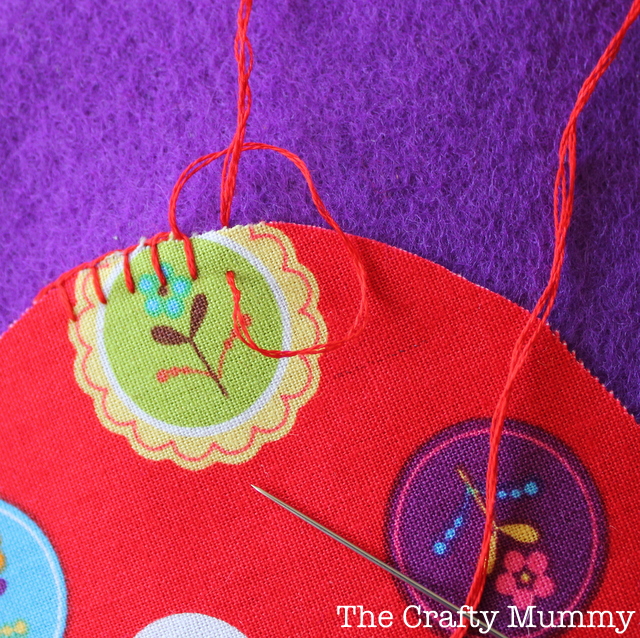
Step 4: Pull the needle through carefully ensuring that the loop is falling behind the stitch.

blanket stitch applique tutorial

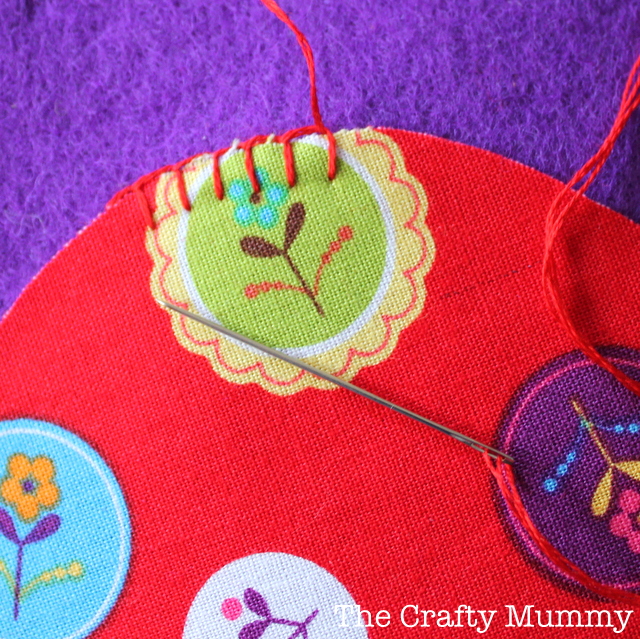
Step 5: Pull the thread so that the stitch sits flat but not so tight that it puckers. The “top” of the stitch should run along the edge of your applique piece.

blanket stitch applique tutorial

Tips

  • Try to keep the distance between stitches and the length in from the edge of the applique the same for an even look.
  • As you go around a curve like this circle, the points where your needle goes down on the applique piece need to be slightly closer together than the points where your needle comes up at the edge of the applique. This allows for the curved shape.
  • A curve going the other way would have the outer points closer together than the inner stitches.
  • At a sharp corner, you can stitch three stitches into the same inner point to turn the corner.
  • If you want your stitching to be a feature, use a contrasting thread instead of a matching thread.
Disclosure: This post includes an Affiliate link to Amazon.


Learn how to blanket stitch an applique with this tutorial - instructions and photos to help you.

Summary
Blanket Stitch Applique Tutorial
Article Title
Blanket Stitch Applique Tutorial
Description
Learn how to blanket stitch an applique with this tutorial - instructions and photos to help you.
Author
Tonya Grant
Published on
TheCraftyMummy.com

Filed Under: Stitching, Tutorials Tagged With: Applique, Blanket stitch, Felt, Tops of 2015

« Google Reader is Closing
Violette, the Felt Doll »
Disclosure: There are affiliate links in this post.  This just means that if you click through and choose to purchase something I may get a small commission - at no extra cost to you, of course.  This helps me keep the content here at The Crafty Mummy free for everyone.

I love to chat so please leave me a comment or ask a question.

Don't stress if your comment doesn't appear immediately - sometimes I have to moderate comments thanks to spam visitors, but the comments from real readers will always get published. Scroll down to add your thoughts or ask a question.

Comments

  1. Sue says

    March 22, 2013 at 2:19 AM

    Thank you so much for your tutorial I am off to have a go 🙂

    • CraftyMummy says

      March 22, 2013 at 7:32 AM

      I’d love to see a picture of your project when you’re done, Sue

  2. Rachael says

    May 15, 2014 at 8:46 AM

    My year 4 students very much appreciated your photos to help us applique tea-towels for mother’s day last week 🙂 10 year old blanket stitch is nowhere near as neat as yours, but they did an awesome job!

    • Tonya Grant says

      May 15, 2014 at 11:22 AM

      Oh I’m so glad it was helpful to your class, Rachael! I bet there were some very excited mums getting handmade gifts!!

  3. Lori says

    February 13, 2015 at 8:08 AM

    i am just learning how to sew. I have done a few small projects. I am fixing to start a table runner that has a lot of applique on it. I saw a website with an applique needle. I do not know what the difference is between that and a regular needle. I want to do the blanket stitch. Thanks.

  4. Cindy clark says

    December 28, 2018 at 1:20 PM

    Does the edge raw edge of your material that is xposed need to be stitched or turned under to,prevent fraying?

  5. Rachel says

    April 24, 2019 at 6:09 AM

    Thanks for taking the time to post a really clear explanation of this technique – I’ve seen photos of people using blanket stitch to appliqué on crocheted fabric and wanted to have a go.

Hi! I’m the CraftyMummy

Tonya is the voice behind The Crafty Mummy. She dabbles in lots of different crafts – patchwork, quilting, cross-stitch, scrapbooking, knitting, crochet and sewing. This is the record of projects she has done, and the projects she dreams of getting to! Read More…

Search

  • Email
  • Facebook
  • Instagram
  • Pinterest
  • Twitter
  • YouTube
Shop my Affiliate Favourites

Fat Quarter Shop for Fabric and More

Grab the Sew Sampler Box Here

AccuQuilt for Cutting Machines and Dies

QuiltyBox for Monthly Treats in the Mail

CreativeBug for Craft Classes

Pretty Darn Cute for Blog Designs like mine

Creative Market for Fonts, Images, Themes and More

OzGameShop for All the Games

Adrift for Fashion you’ll Love

Kindle Unlimited Membership Plans

Kindle Book List

Click to shop my kindle book list
Shop my Amazon Influencer Shop
Join the CrochetU and learn to crochet
New to TheCraftyMummy.com? Click here to see more
Blog Tools I use for TheCraftyMummy.com

Grammarly

Aweber for email newsletter

CoSchedule to stay organised and share

Milotree for social media

Genesis for blog framework

FoodiePro is my theme

Hosting with WPEngine

Powered by

Recent Articles

Disclosure: There are affiliate links on this site. This means that I may get a commission if you choose to purchase after browsing via these links - at absolutely no extra cost to you, of course. I only recommend products which I use and love, or that I think will be quality products that will be useful to my readers. It is the affiliate links in this site that help me keep my tutorials free of charge. Thank you!

Looking for something? Search here:

Copyright 2015 The Crafty Mummy · Built using Genesis Framework & Foodie Pro Theme