One of the things that Madeit introduced recently in their makeover was the ability to schedule a new listing. Previously if you had made a bunch of new items and wanted to put them into your store over a few days, you had to go back and list them individually on those various days. Now you can load them all at once and schedule each one to appear on made it whenever you want it to.

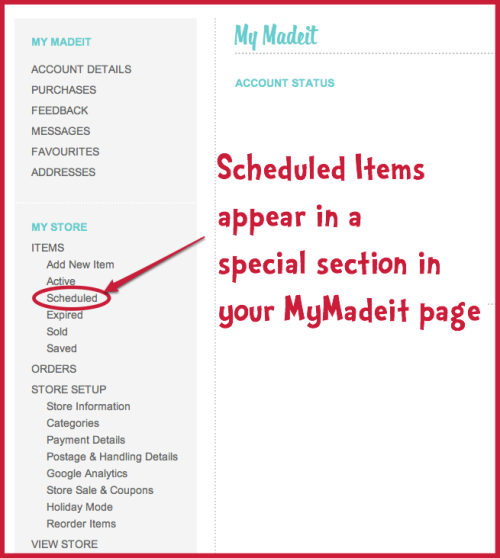
When you go into your “MyMadeit” dashboard, you can see a special tab for the Scheduled items over in the left hand column under Items. When you click on that you can see the items you have scheduled already. If you have none scheduled, there will be nothing there, of course.

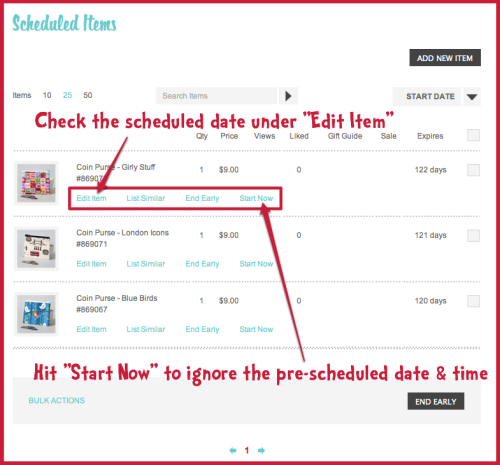
Here’s my Scheduled items currently so you can see there are three of them. Under each item there are some options. You can still edit the item just as you can an Active item by clicking Edit Item. This will also show you when the item is scheduled to publish and you can adjust that time or date. If you decide you want a Scheduled item to start immediately, just click the “Start Now” option to make it live.

How to Schedule Items on Madeit
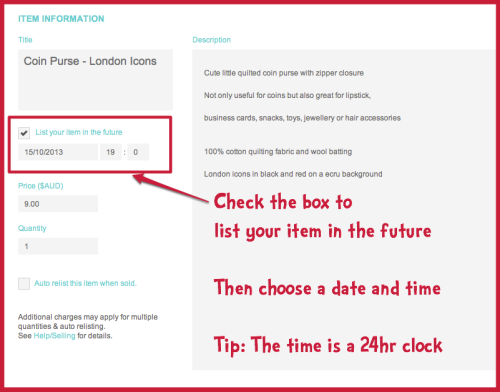
When you are in the Edit Screen for your listing, you can schedule it by checking the box on the left next to “List your item in the future”. Once you click this box, extra boxes will appear below it to choose a date and time for your listing to go live. The time is in 24 hour clock time so 1pm is 1300 and 7pm is 1900. When you have completed all the other details of your item and uploaded the pictures, you just click on the Add Item button at the bottom as usual. The item will appear in your list of Scheduled items until it goes live when it will appear in the Active items list.
Do you have a shop on Madeit.com.au? You can find mine here: Madeit.com.au/CraftyMummy


