Ever since I started selling my handmade lovelies online, I have had savvy friends telling me that I need to label them. And they are right! Of course.
But how? Which way would be the perfect way to add a label to my pencil cases and coin purses?
In my head, I could picture a ribbon label with my name on it that could be stitched into the seam of sewn items. But it would have to be fairly small and discreet. I never want a label to draw too much attention away from the quality handmade product.
At different times I have looked into getting fabric labels printed for me but I was never quite happy with the options. Either the price was too much or I would have to orders thousands at once. Sometimes I would have to create the lettering myself and email it to the supplier, or I recall one site where there were just so many options in the ordering process that I gave up!
So I put it aside. Again.
Until somewhere in a Facebook forum one day someone mentioned a UK company that makes stamps to label kids clothing. Instead of labelling clothes and school stuff with a pen that fades or stickers that come off eventually, this company made stamps that came with a special ink pad that would last. What is more the stamps could also be used on paper, wood, plastic and metal to name all kinds of other items that children might take to school.
Fantastic! Actually “Stamptastic“!
I immediately knew this was a possible answer to my product labelling. I could stamp directly onto products or onto ribbon or fabric tape to add to items. A little research on their website and I was convinced that it was worth giving them a go. The price was far less than a set of custom labels even with shipping from the UK to Australia.
So I contacted them and chatted about what I was thinking. Turns out they could also create bespoke custom stamps if I wanted to create an image. A little playing in Skitch – a free drawing program I use for blog images – and I had created a simple round logo. Unfortunately they couldn’t make it small enough for what I was thinking – I wanted it about 1cm square so pretty small – but could certainly create a larger version.
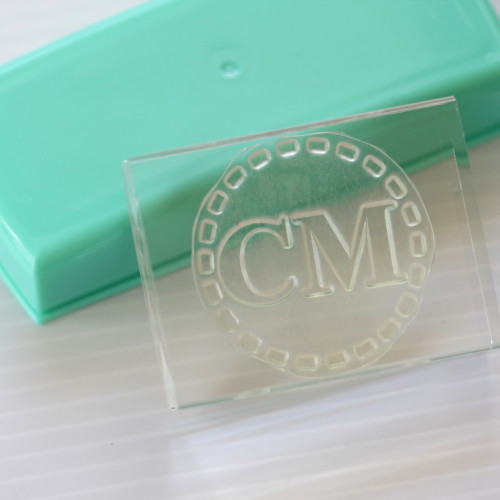
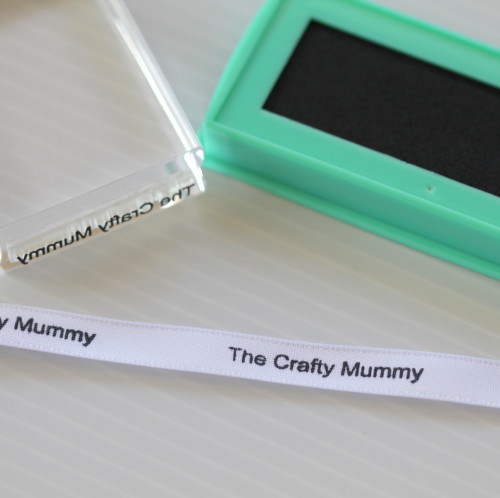
In the end I decided to go for a simple name stamp and a plan to stamp on ribbon. The lovely team at Stamptastic were quite happy to send a free sample to play with which turned out to be extremely generous of them when the first package got lost in the mail. But they happily sent another package and I was thrilled to find they had also created a 1″ version of my bespoke stamp and a couple of name stamps for my kids! Thank you!
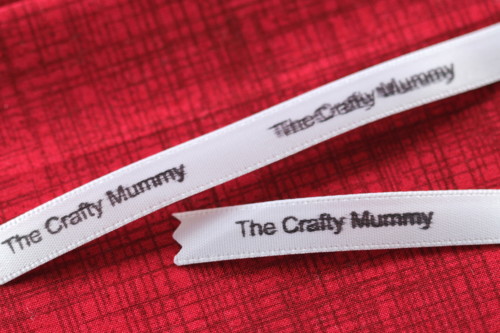
My first attempts with the name stamp were a little dodgy – too much ink and the shiny side of the satin ribbon tended to make the ink bleed. But I flipped the ribbon to the dull side and found the stamps were perfect. The clear mounting blocks make it very easy to see exactly where your stamp with end up so I can spread out my stamps on the ribbon with some room for stitching them into seams. The ink comes with the stamps with a super airtight lid, and although it will wash out eventually depending on the fabric and washing powder, for items like the ones that I make this is a great option. How often do you need to wash a pencil case or coin purse? Not all that often, and the stamps should be good for 40-50 washes so I think the stitching will wear out before the stamp washes out.
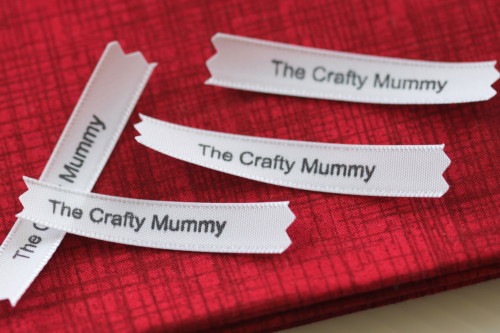
Naturally I immediately had to make something that I could add a new label to – a purple striped card case which will appear in my Shop shortly. The label placement isn’t quite perfect but I’m happy to finally have labels!
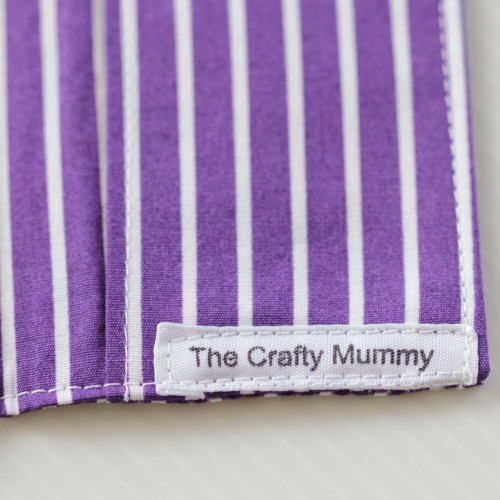
Here’s the first of my labels sewn into one of my card cases.
How to Stamp Fabric Labels
- Choose your fabric. Ribbon works well because the long sides are finished and won’t fray. Other options would be twill tape, felt or vinyl, depending on the look and durability you are looking for.
- Work on a flat hard surface and protect it from ink with a layer of paper underneath your fabric.
- Lay fabric or ribbon flat – iron it if needed and allow to cool.
- Ink up your stamp. Tape it gently on the stamp pad to gradually add ink to the raised stamp section without getting extra round the edges.
- Line up the stamp by looking through the clear perspex to see exactly where your stamp with be.
- Stamp straight downwards with a firm even touch. Try not to roll or tilt the stamp as you lift it back up.
- Allow to dry completely before adding to your project.
- You may find it useful to practise your technique on some paper to get it perfect.
Your Turn
Have you made fabric labels for naming kids gear or for your products? How did you make them?


Interesting! We have stamped my husband’s lino designs onto fabric with screen printing ink, heat treated and then used them as labels inside the children’s clothing that I’ve made. It’s worked well.You can only get so fine with linocutting though.
I made mine at SPOONFLOWER, they print your logo by the yard.
Hope it’s useful
The labels are such a great idea.