I quite enjoy adding the binding to a quilt. I think it is because at this point I know the quilt is almost finished and I’m going to get to enjoy the end results very soon!
But a tricky part of adding quilt binding is turning corners and creating neat corners. I know some people avoid the corners by making them into curves but you don’t have to. You can create neat corners simply by adding a couple of folds in the fabric.
Binding Basics
First of all let’s talk about that binding you’re going to attach to you quilt.
- I cut binding into 2″ or 2.5″ strips across the width of the fabric. (Some people use binding cut on the bias.)
- Sometimes I join scraps to create a long strip.
- I straight join my binding – it’s quick and easy! (Some people join strips at an angle.)
- Once I have a long enough strip to go around the outside edge of my quilt, I iron the whole strip in half lengthways with the right side out.
- Now it’s time to join it to the quilt edge on the front of the quilt top: Line up the raw edge of the binding strip with the edge of the quilt where you’re going to start sewing. Leave a tail of about 10″ for joining later on. I start in the middle of a side of the quilt usually.
- Start sewing your binding onto the quilt about 1/4″ in from the edge.
How to Turn Corners with Binding
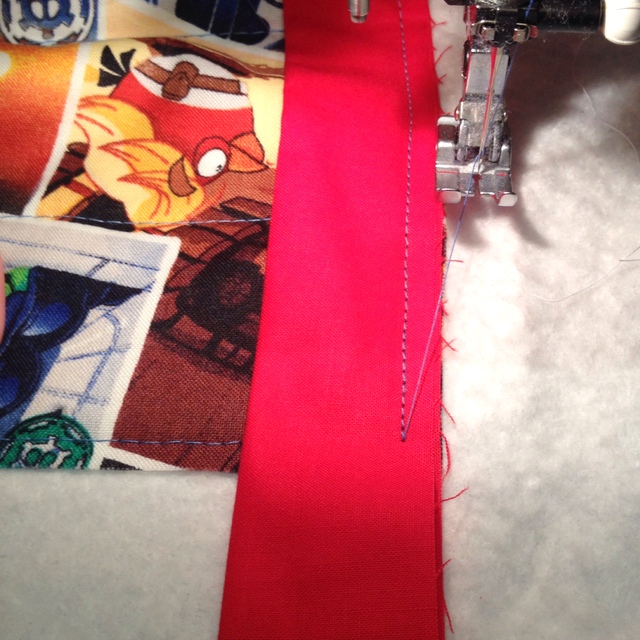
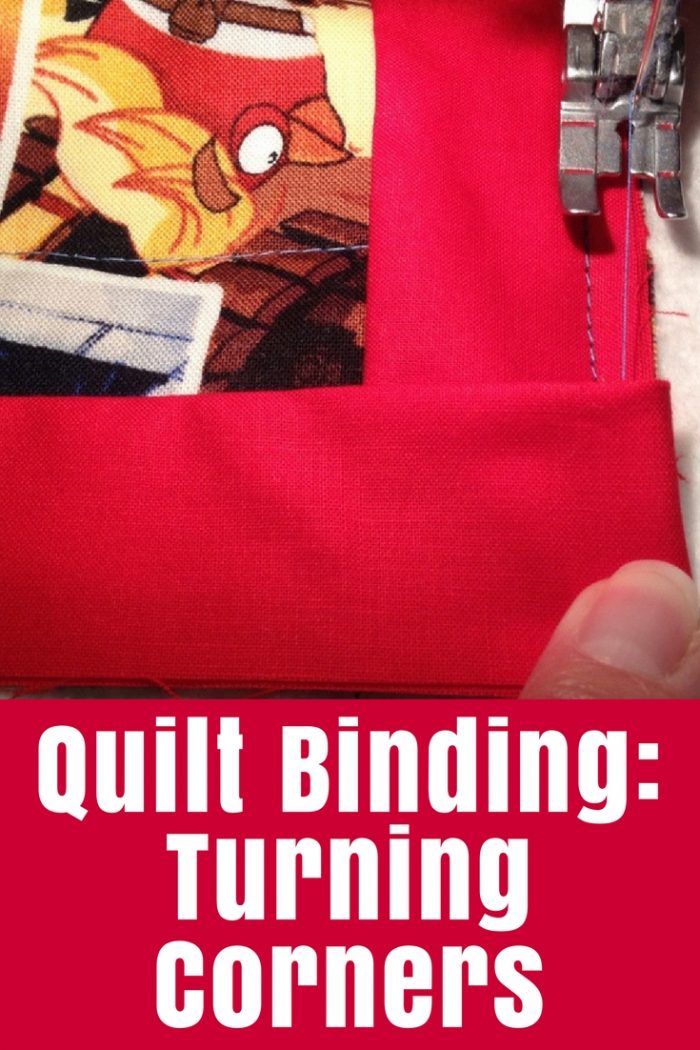
- When you get close to a corner, sew until you are about 1/4″ from the end of the side. (You can even do a little back and forth stitch if you want to.)
- Lift the presser foot but don’t cut the thread.
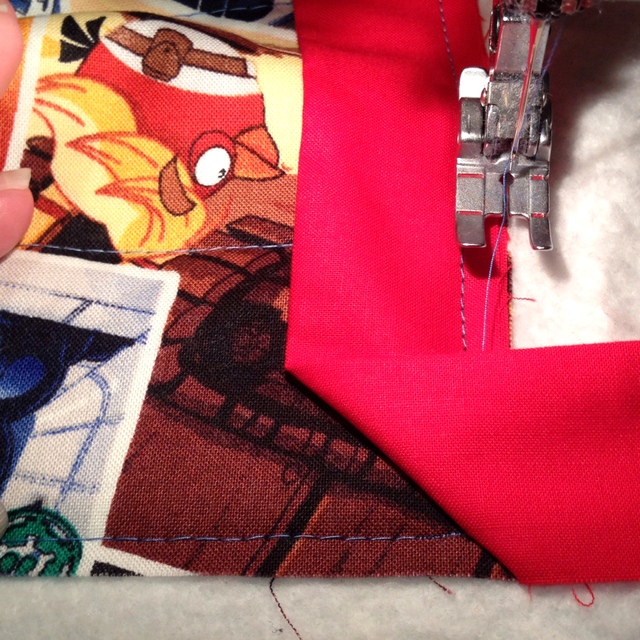
- Slide the quilt out from under the foot slightly so you can fold the binding strip.
- Fold the strip over to the right creating a fold with a 45″ angle. The bottom of the binding strip will now run parallel to the next side of the quilt.
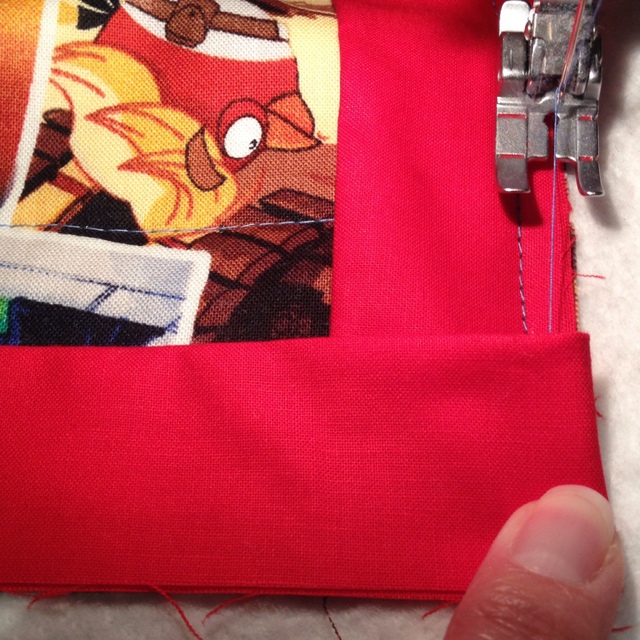
- Then fold the strip back along the next side of the quilt leaving a little triangle of fabric folded in the corner. Hold it in the place with your finger or pop a pin into it.
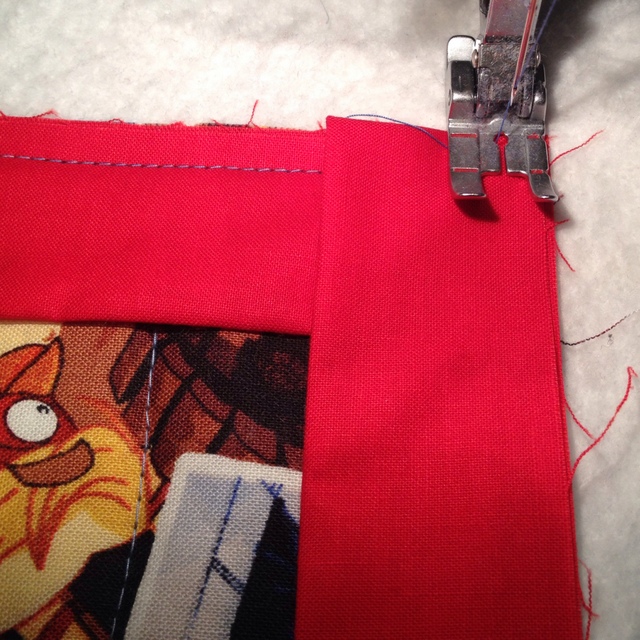
- Turn the whole quilt and slide it back under the presser foot ready to sew down the new side.
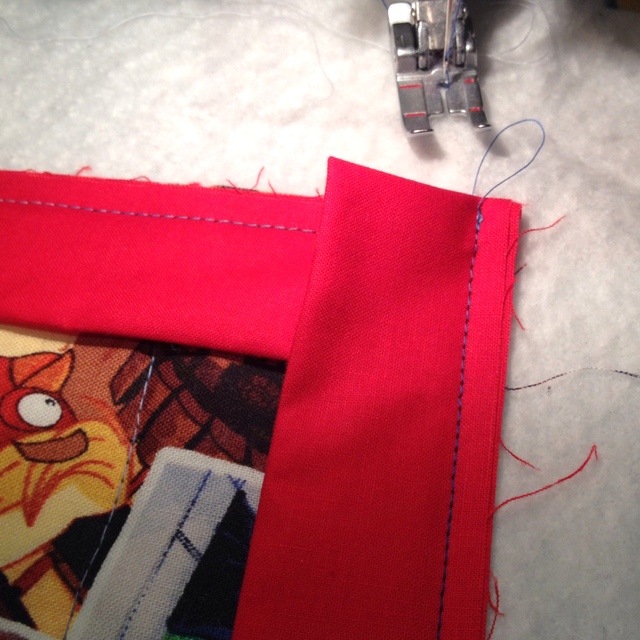
- Start sewing from the edge so you will catch the corner of that folded triangle with the next couple of stitches.
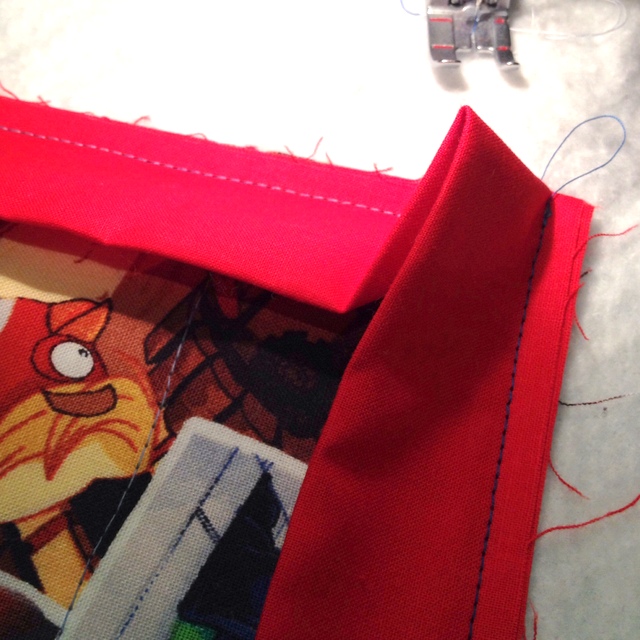
- Continue sewing down the side and round the next corners!
Joining the Binding
- When you get back to the start of your binding leave a gap of about 6″ and a tail of about 10″.
- Then use this tutorial to help you join the ends together neatly (I could explain it all again but she’s done such a great job!!)
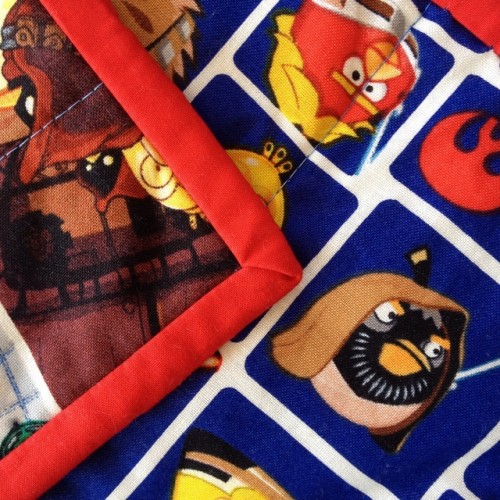
Finally you will hand stitch the other side of the binding to the back of your quilt
– a great job for in front of the TV! When you come to the corners, you will a little extra fabric to fold like you did on the back to create a neat finish.
Another tip: Use pegs to hold your binding in place like this.
Like my Angry Birds Star Wars quilt? Find more info here.


best easiest instruction for binding i have seen.
Thanks Dana. Hope it has been helpful!
I defiantly going to try this!! Thanks!!
That was excellent. Considering I am coming up to that point now, it was worth the watch as I hate joining my ends. I have been doing my corners slightly differently too and they were not sitting as flat as I would have liked. Will try your way!
Happy to help, Paige! I’d love to see your quilt when it is finished.
I have a big problem with any instructions re corners as when I try I just fumble and the corners look messy also the binding around the quilt edge are usually uneven and a mess…. I’ve practised heAps but no luck I’m just about at the stage of throwing my machine out the window (and yes I have a walking foot on my brother machine) do you have any hints for me I’m determined to succeed 🙂