The Crafty Mummy

Crafts. Sewing. Quilting. Crochet. Tutorials.

  • Start Here
  • Welcome
    • Subscribe
    • About Me
      • Copyright
      • Disclosure
      • Privacy Policies
    • Advertise
    • Sharing
      • Recommendations
      • Shopping & Coupons
      • Books
  • Explore
    • Crafts
      • Beading
      • Kids
      • Paint
      • Storage
      • Christmas Crafts
    • Sewing
    • Quilting
    • Stitching
    • Crochet
      • Yarn
    • Life
      • Food
      • Organisation
    • Blogging
      • How To
      • Social Media
      • WordPress Plugins
      • Photography
  • Tutorials
    • Tips
  • Shop on Etsy
  • Shop on Redbubble

How to Make a Flying Geese Block

by Tonya Grant |Filed Under: Quilting, Tutorials Tagged With: Patchwork, Tops of 2015 Get a Weekly Update of all Articles

How to Make Flying Geese Blocks

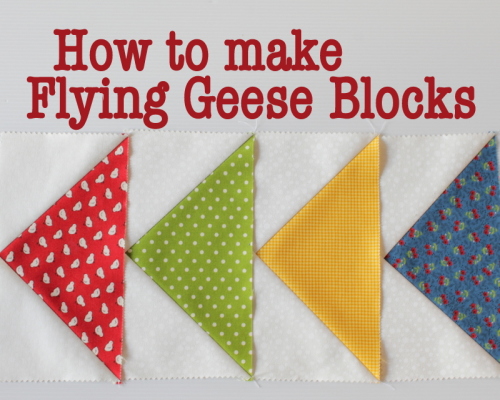
Last week a lovely reader named Linda asked me about the Flying Geese patchwork. She was looking for a tutorial and having trouble finding one. So I thought I’d help her out with a little step-by-step, a sizing chart and some ideas on how to join the basic Flying Geese unit into blocks for your quilt.

My Flying Geese units have been made using some cream charm squares (5″ x 5″) and layer cake squares divided in half then trimmed slightly to 5″ x 9.5″.
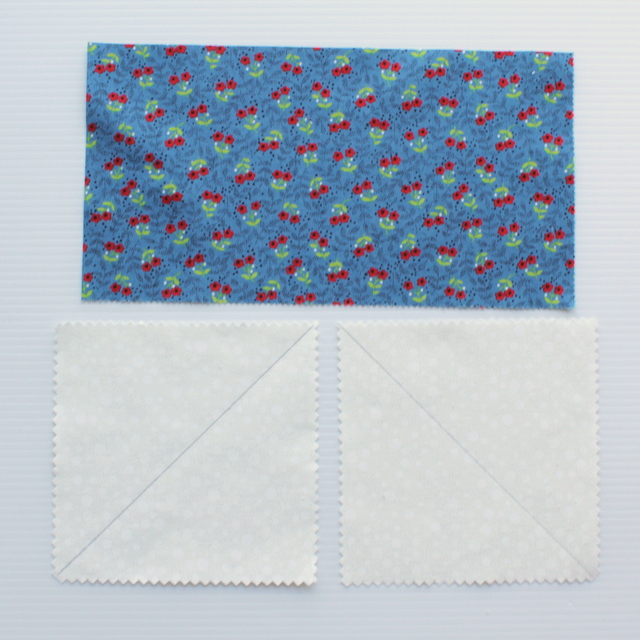
flying geese pieces

What You Need

  • one rectangle piece of fabric
  • two squares of fabric

Dimensions for pieces:

Flying Geese Sizing Chart

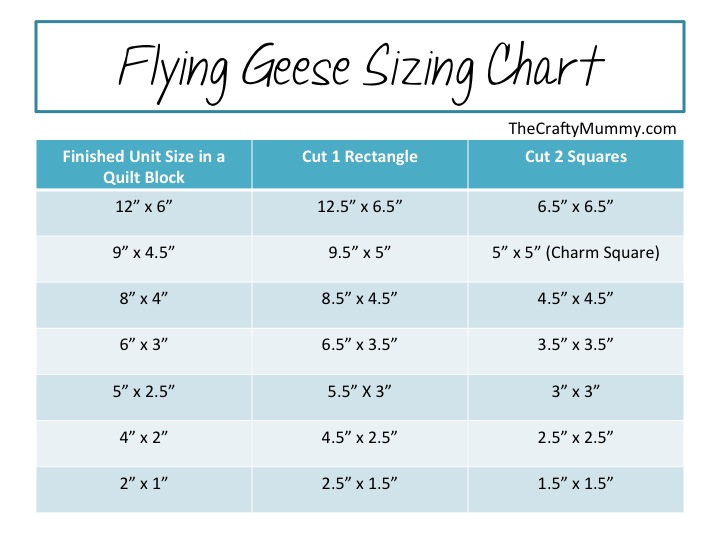
Flying Geese Sizing Chart – downloadable PDF

Note: The rectangle piece is cut the same height as the square. The width is twice the square size minus half an inch.

What To Do

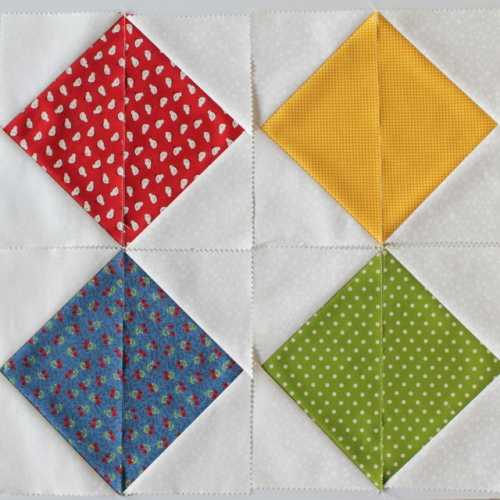
1. On the back (wrong side) of the two squares, draw a line from corner to corner. I just use a biro but you could use any type of marker. The line will end up under the stitching so you won’t see it when you’re finished.

flying geese join one

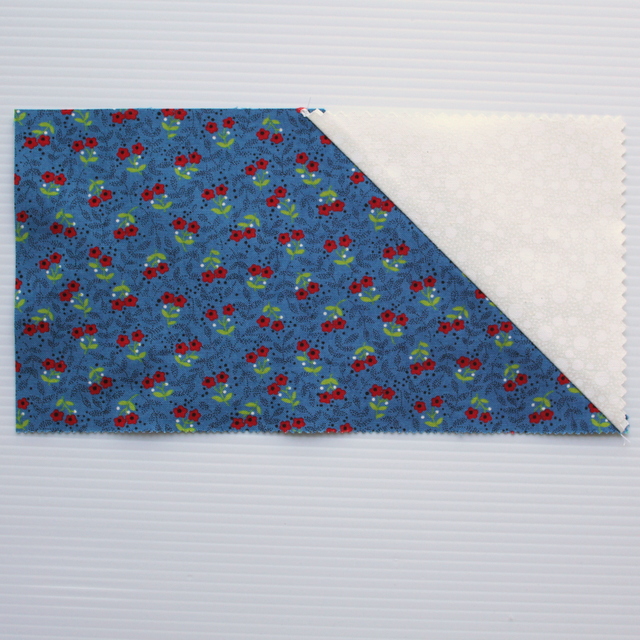
2. Place one square right sides together on the rectangle piece as pictured. Check that you have the line going from the bottom corner to the middle top.

3. Sew along the line you drew earlier.

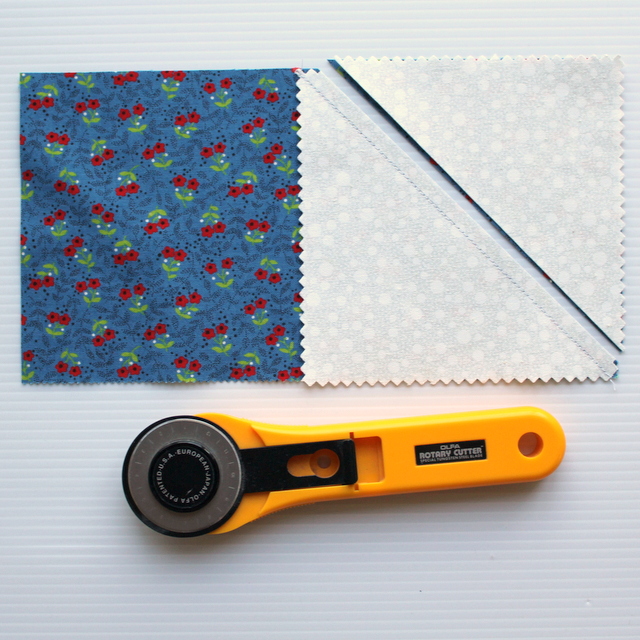
4. Trim the excess fabric from the corner leaving a quarter-inch seam.

flying geese press one

5. Press the triangle open.

Shop for quilting mugs in my Etsy Shop

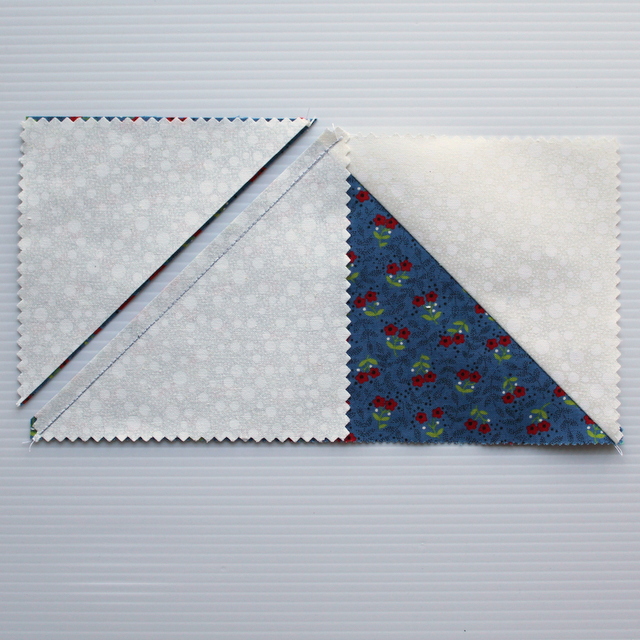
6. Place the second square right sides together on the other end of the rectangle (as pictured). Again the line starts at the bottom corner and goes to the centre top. It will slightly overlap the first triangle.

flying geese second square-001

7. Sew along the line.

8. Trim the excess fabric and press open.

flying geese unit finished

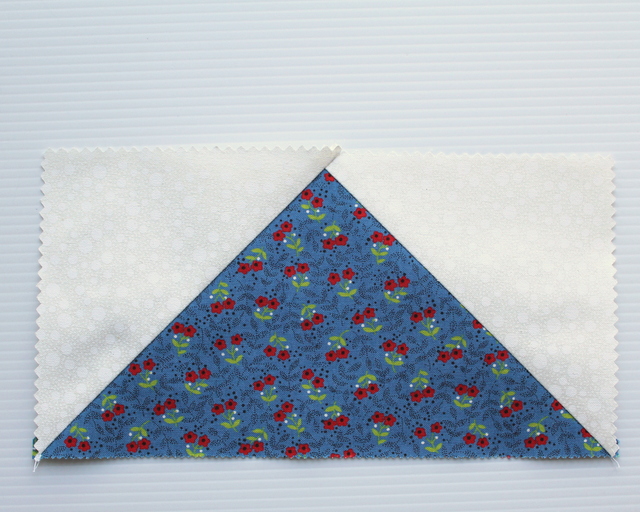
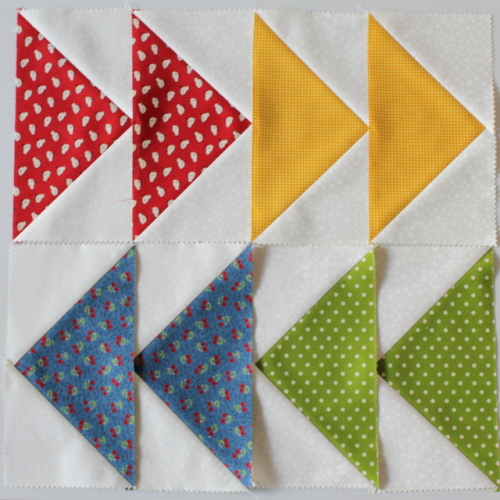
This is the Flying Geese block all done.

Where the triangles overlap at the top will become lost in your quarter-inch seam when you join this unit to others creating a perfect point.

Creating Blocks

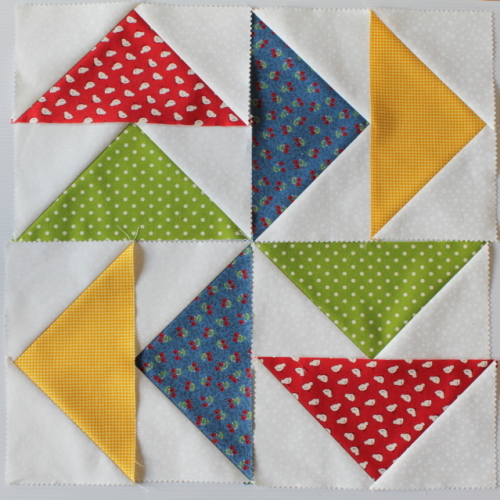
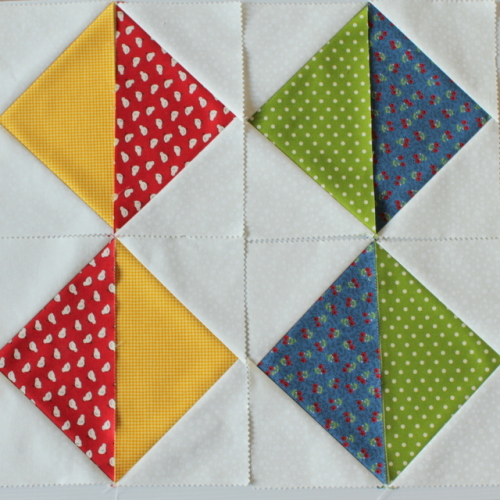
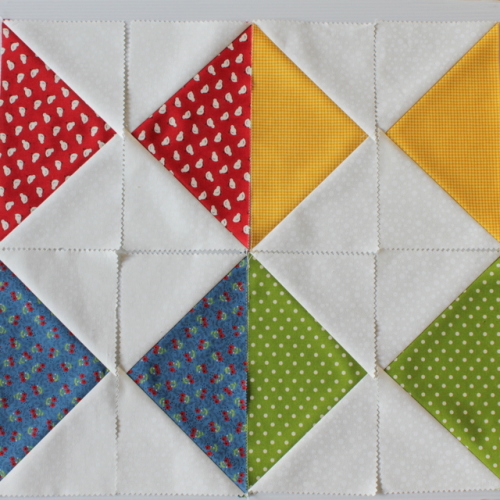
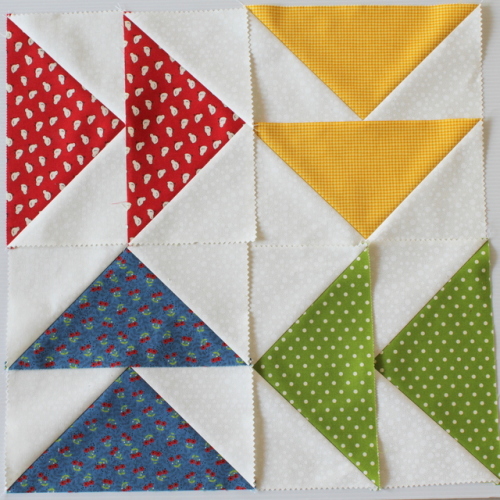
Once you have made some Flying Geese, you can join them in any combination you wish to create blocks. In my first picture above, you can see them joined in a row. Here are some more options – keeping in mind that I have just laid these out to take photos and not actually joined them. once they are joined the points will be perfect and the size slightly smaller.

Shop for quilting mugs in my Etsy Shop

You can also combine these units with plain rectangle blocks or square blocks to create other blocks.

flying geese block 1
 
flying geese block 2
flying geese block 3
 
flying geese block 4
flying geese block 6
 
flying geese block 5
 

Filed Under: Quilting, Tutorials Tagged With: Patchwork, Tops of 2015

« Washi Tape Mail Holders
Sets of 7: Sewing »
Disclosure: There are affiliate links in this post.  This just means that if you click through and choose to purchase something I may get a small commission - at no extra cost to you, of course.  This helps me keep the content here at The Crafty Mummy free for everyone.

I love to chat so please leave me a comment or ask a question.

Don't stress if your comment doesn't appear immediately - sometimes I have to moderate comments thanks to spam visitors, but the comments from real readers will always get published. Scroll down to add your thoughts or ask a question.

Comments

  1. Irena says

    September 22, 2014 at 2:32 PM

    You are a gem thank you for that size chart. That makes things much easier .

  2. Linda King says

    October 20, 2014 at 10:56 PM

    A HUGE big Thank You to you!!! I really appreciate what you have shown, I copied & pasted this tutorial & printed it out. You have done a great job, so easily explained. I appreciate all that you do for your readers & me. You will never really know how much I do appreciate this tute, I know that taking the pictues & explaining how to do this, took a lot of time & work. God Bless You!!!
    Linda

  3. Joyce says

    January 26, 2015 at 7:53 AM

    Thank you for the info on the different sizes on the flying geese blocks. Going to use as border on a baby quilt.

    • Tonya Grant says

      January 26, 2015 at 8:04 AM

      You’re welcome, Joyce. I have some rectangles cut to make some more of these but I just need to find some sewing time…

      • Nancy sneller says

        May 31, 2015 at 6:43 AM

        Just saw how to make flying geese block. Looks so easy. Thanks. Nancy

  4. donna says

    January 27, 2017 at 2:56 AM

    thank you for the info I have been looking forward to doing flying geese but wanted them a little bigger while I am here do you have some ideas for color variations on a desperado block? thank you

    • Tonya Grant says

      January 31, 2017 at 11:02 AM

      Hi Donna, I haven’t made a desperado block but I’m off to Google it right now. Tonya

  5. Jen says

    June 16, 2018 at 12:22 PM

    Thank you for the helpful tutuorial. What do you do with the extra pieces? Do you have any project ideas for the scraps?

  6. Nani says

    June 16, 2019 at 10:18 AM

    Acabo de leer a una compañera el término “bloque desesperado”, y no sé qué significa. Me podrías ayudar?
    Muy bueno el tutorial de gansos voladores. Muchas gracias 😘

    • Tonya Grant says

      June 16, 2019 at 2:40 PM

      Translation: I just read a colleague the term “hopeless block”, and I do not know what it means. Might you help me? Very good the flight geese tutorial. Thank you very much 😘

      I’m sorry, Nani, but I haven’t heard of that as the name of a quilt block. Perhaps they found it very hard and gave it up as hopeless.

Hi! I’m the CraftyMummy

Tonya is the voice behind The Crafty Mummy. She dabbles in lots of different crafts – patchwork, quilting, cross-stitch, scrapbooking, knitting, crochet and sewing. This is the record of projects she has done, and the projects she dreams of getting to! Read More…

Search

  • Email
  • Facebook
  • Instagram
  • Pinterest
  • Twitter
  • YouTube
Shop my Affiliate Favourites

Fat Quarter Shop for Fabric and More

Grab the Sew Sampler Box Here

AccuQuilt for Cutting Machines and Dies

QuiltyBox for Monthly Treats in the Mail

CreativeBug for Craft Classes

Pretty Darn Cute for Blog Designs like mine

Creative Market for Fonts, Images, Themes and More

OzGameShop for All the Games

Adrift for Fashion you’ll Love

Kindle Unlimited Membership Plans

Kindle Book List

Click to shop my kindle book list
Shop my Amazon Influencer Shop
Join the CrochetU and learn to crochet
New to TheCraftyMummy.com? Click here to see more
Blog Tools I use for TheCraftyMummy.com

Grammarly

Aweber for email newsletter

CoSchedule to stay organised and share

Milotree for social media

Genesis for blog framework

FoodiePro is my theme

Hosting with WPEngine

Powered by

Recent Articles

Disclosure: There are affiliate links on this site. This means that I may get a commission if you choose to purchase after browsing via these links - at absolutely no extra cost to you, of course. I only recommend products which I use and love, or that I think will be quality products that will be useful to my readers. It is the affiliate links in this site that help me keep my tutorials free of charge. Thank you!

Looking for something? Search here:

Copyright 2015 The Crafty Mummy · Built using Genesis Framework & Foodie Pro Theme