When you upload an image into a blog post on your WordPress blog, you get a choice of three set sizes – thumbnail, medium and large – or full size. These allow you to resize images to a particular width as you upload them so they fit into your post better and match all your other images.
For a long time my images have been 500 pixels wide but with my recent blog makeover and some online advice I have started using wider images instead.
Did you know you can customise these sizes?
If you prefer to have your images fill the width of your blog content, you can adjust the large size to fill the content width by setting it to match your blog theme. If you often want a particular size image for a particular type of post, you could set one size to that width. It is easy to adjust.
How to Change the Set Image Sizes

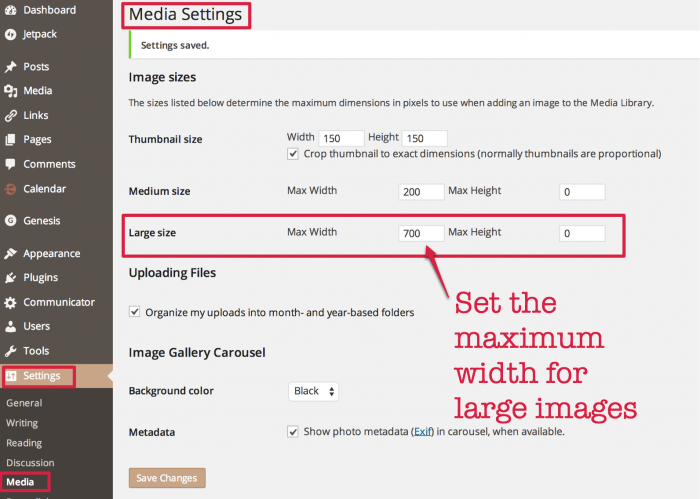
In your Dashboard, go into the Settings section in the left hand sidebar.
Next look in the Media Settings.
You can see the dimensions for each image set size listed. You can set the maximum width, maximum height or both for the medium and large images. If you just set the width, the images will stay in the same proportions as the original. The thumbnail setting allows you to set exactly the thumbnail size and tick a box to crop images to that size as well.
For my posts, I have set the large image size to 700 pixels wide.
Don’t forget to save the changes.


