Over the weekend I started a new quilt design – just a small one but I love starting! I was sewing a bunch of flying geese blocks which meant heaps of sewing across squares from one corner to the other diagonally.
When I wrote up the tutorial for the flying geese block I said you needed to draw a line across the back of your squares then stitching along the line. But as I sat down to do that for my own blocks, I decided it was going to take ages and I just wanted to get started.
So I tried a trick I saw somewhere around the net – probably on Pinterest!
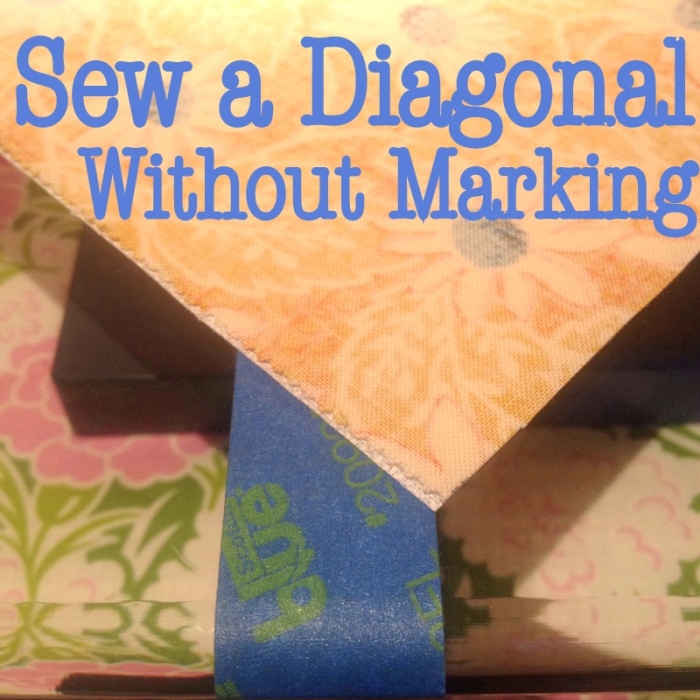
How to Sew a Diagonal Line without Marking
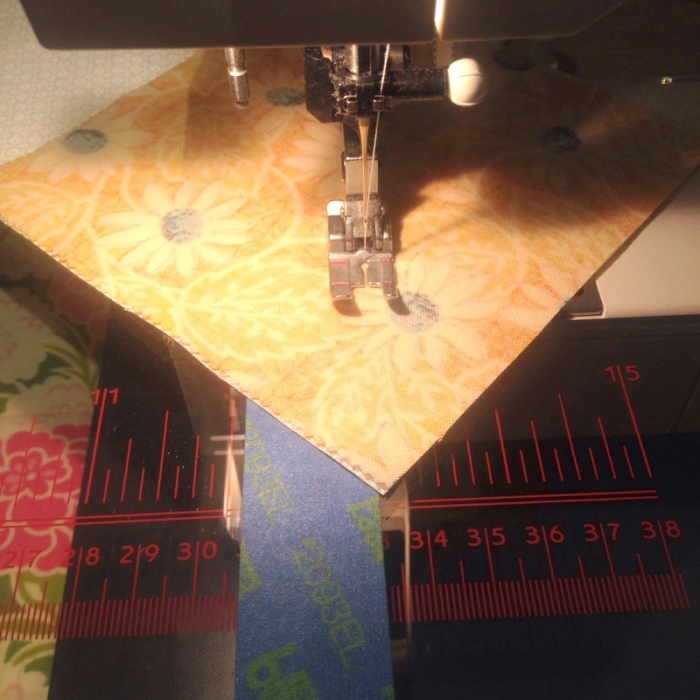
The idea is that you’re going to create a line on your sewing machine so that you don’t need one on your fabric. I used painters tape for this as I know it will come off without leaving sticky residue. Washi tape would also work – and maybe be prettier!
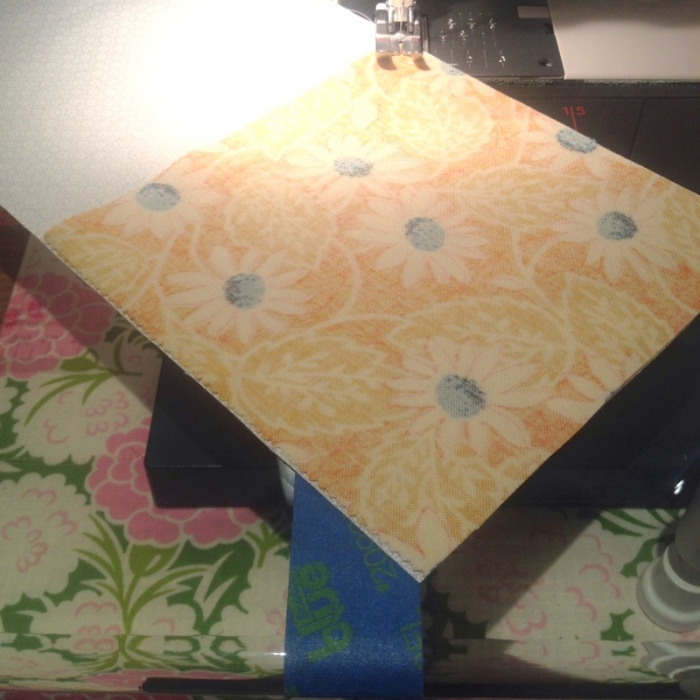
In order for my line to extend far enough for me to see it beyond the edge of my fabric, I put my quilting extension table onto my machine. My table is clear and just sits into place creating a larger flat space around my sewing machine. It is designed to help support your fabric during quilting. If your machine lowers partly into your table, you could do that. If you’re only sewing smaller squares, you may find your tape is long enough just taped onto your machine front.
Next I grabbed my tape and taped a piece in a straight line from the needle position.
To test that it is straight and in the right place, I grabbed a scrap square of fabric and sewed a test run.
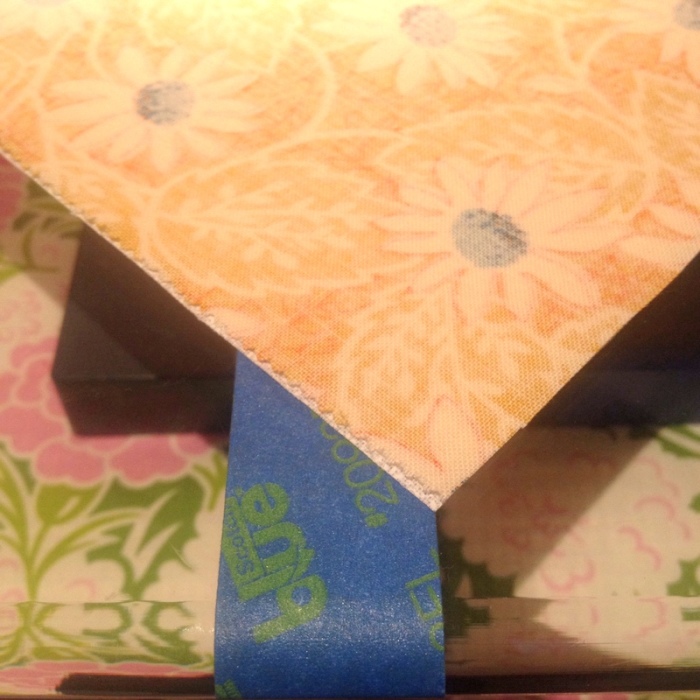
Line up one corner at the needle, ready to start sewing.
Line up the other corner to sit on the edge of the taped line.
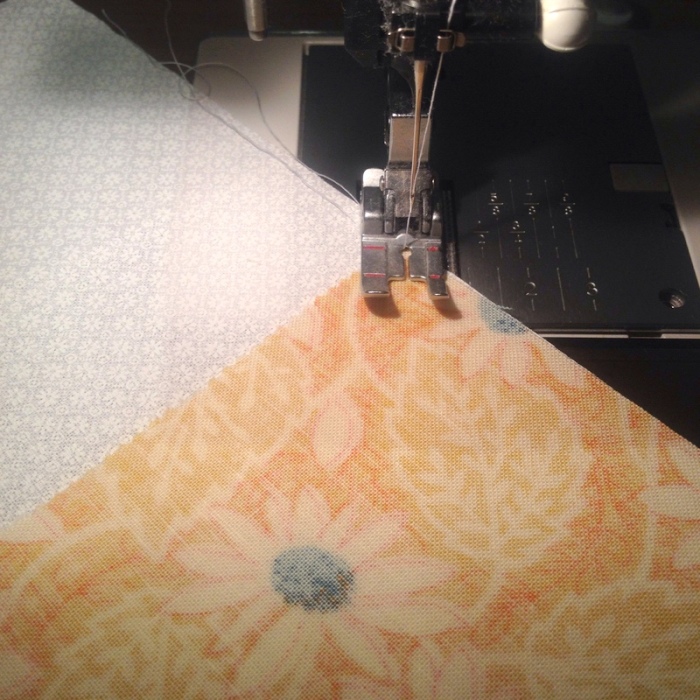
As you sew, keep the front corner running back along the tape line.
I found I needed to stitch a little slower than usual to keep it lined up. When I tried to hurry, I ended up with a slightly crooked line, so my advice is to take it carefully. I’m sure it will get more accurate as I practice more. (My squares were probably made harder by the pinked edge of the charm squares too. I always find these harder to sew with than when I have a straight cut edge on my fabric.)
You should end up at the bottom corner of your square with a nice straight line.
I chain pieced a bunch of these so look out for my quilt tutorial in the next couple of weeks.
Have you tried this trick? Did it work well for you?


The only problem with that, is when you’re making two half square triangles out of one square – you need that centre line going down your fabric, because you sew a 1/4″ away from that marked line – and then cut down the line. Using this method, wouldn’t allow you to end up with two half square triangles of the same size.
Ahhh sorry, I see what you’re doing now. Ignore me. No half square triangle – flying geese.. My bad.
Absolutely right, Tina. I have also seen this method used to mark for half square triangles too – using two pieces of tape, one for the centre and one for the quarter inch. I think it would a little more tricky to set up though.
what I’d like to see is how you accurately lined up the tape. A visual step-by-step for that process would be helpful. Did you just eyeball it or did you use a ruler or rulers?
Hi Doris,
I have to confess I just eyeballed it. If you want to be more accurate, I suggest using a ruler to measure in to the needle from the left-hand edge of your machine then mark that distance in a couple of places where you want the tape to go. If you mark two or three spots in from the left edge, then you should be able to line your tape up with the marks as you lay it on. Remember too that painters tape is removable so you can pull it off and try again if you need to.
I hope that helps,
Tonya
I used a ruler and lined the quarter inch mark up with the needle in the down position. Used a horizontal mark on the bottom of the ruler with the bottom if the machine. I then put painter’s tape along the edge of the ruler. This is magic-i wish I had known years ago! Way more accurate thank marking the lines.
I did half square triangles using this method but I made a line with the tape at the 1/4 mark. Then I lined the corners up as you show and sewed down both sides. Cut in half. Worked perfectly and so fast!