The Crafty Mummy

Crafts. Sewing. Quilting. Crochet. Tutorials.

  • Start Here
  • Welcome
    • Subscribe
    • About Me
      • Copyright
      • Disclosure
      • Privacy Policies
    • Advertise
    • Sharing
      • Recommendations
      • Shopping & Coupons
      • Books
  • Explore
    • Crafts
      • Beading
      • Kids
      • Paint
      • Storage
      • Christmas Crafts
    • Sewing
    • Quilting
    • Stitching
    • Crochet
      • Yarn
    • Life
      • Food
      • Organisation
    • Blogging
      • How To
      • Social Media
      • WordPress Plugins
      • Photography
  • Tutorials
    • Tips
  • Shop on Etsy
  • Shop on Redbubble

Crochet: How to Change Colours

by Tonya Grant |Filed Under: Crafts Get a Weekly Update of all Articles

Learn how to change colours or join a new ball of yarn to your crochet project using three different methods.

One of the trickiest things for a new crocheter is working out how to change colours in a project. There are a number of different ways to do this, including simply tying a knot between the new yarn and the current yarn, but there are other ways that will be more hidden in your finished project.

You can use these same methods, of course, to add your next ball of yarn if you’re continuing in the same colour. One of my current projects is my Shades of Green Blanket and the yarn changes colours gradually by itself. I don;t need to add a different colour fo yarn but I do need to join the next ball.

How to Change Yarn in a Crochet Project

Method 1: The Easiest

Just tie your new yarn to the end of the current yarn. I would leave tails of about 6″ or 20cm on both pieces so that you can weave them in later or crochet over them to hide them in your work. So work your crochet until you have about 6″ left then tie your new piece of yarn onto that piece and keep crocheting.

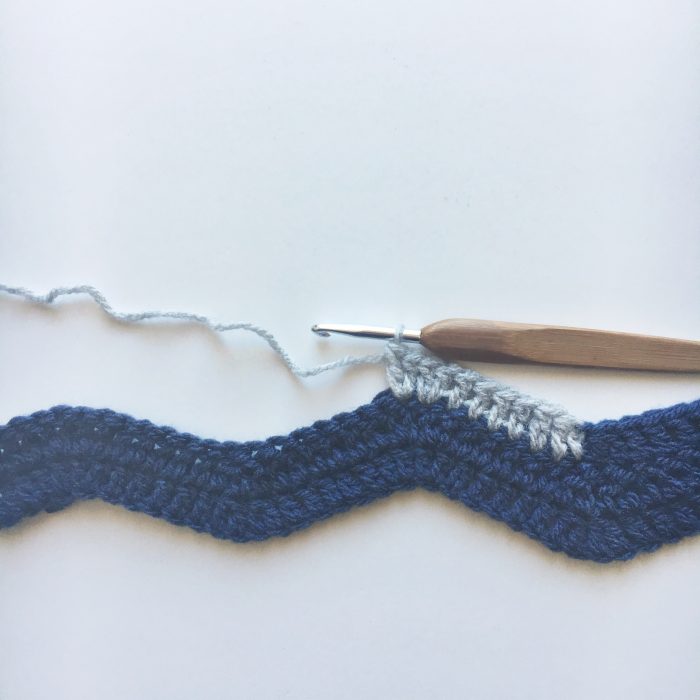
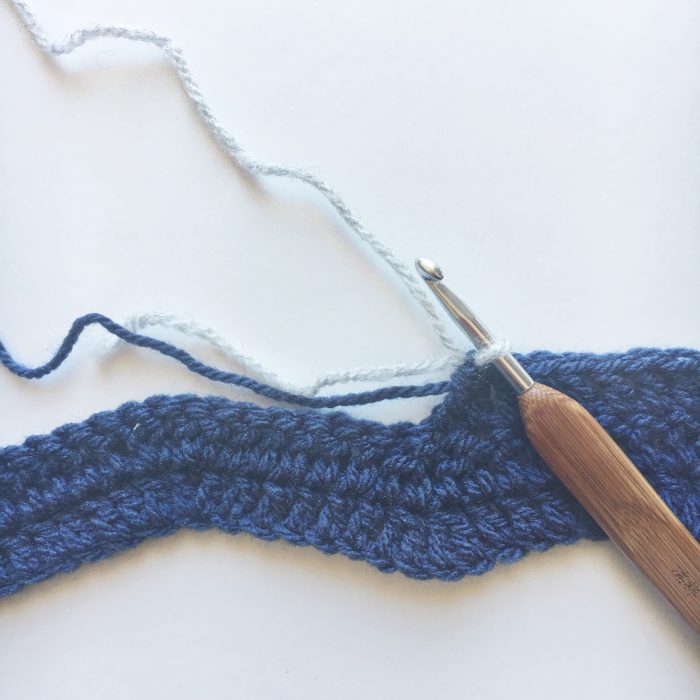
Method 2: The Hidden Knot

Sometimes you want the colour change to be a very specific spot, for example, the end of a row so that the next row starts the new colour. In this case, you can carefully tie your joining knot at the base of a stitch so that it is hidden.

Step 1:  Cut off your current yarn about 6″ or 20cm from your last stitch. Leave the crochet hook in your last stitch.
Step 2:  Take your new yarn and knot it with the first as close as you can to the crochet hook. Leave a similar 6″ tail of the second yarn too.
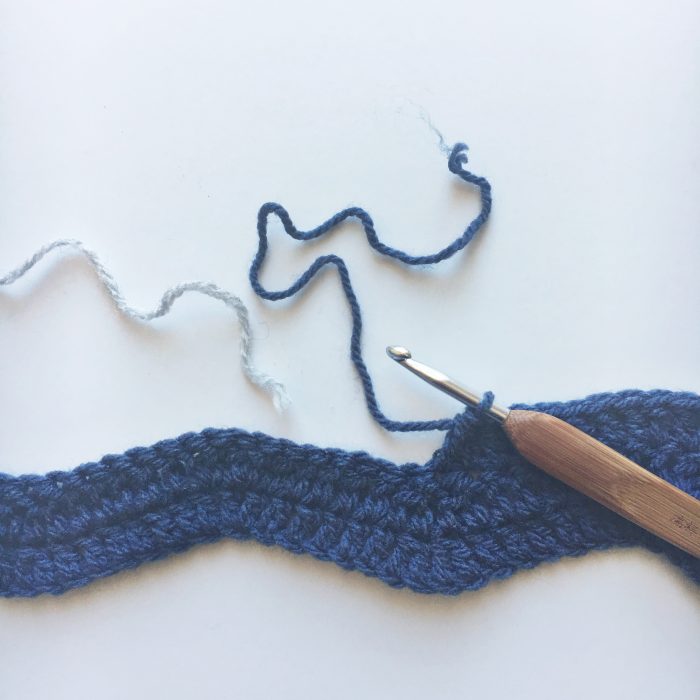
Step 3:  If it is the start of a new row, work your chain stitches with the new yarn. Leave out this step if you are changing yarn in the middle of a row.
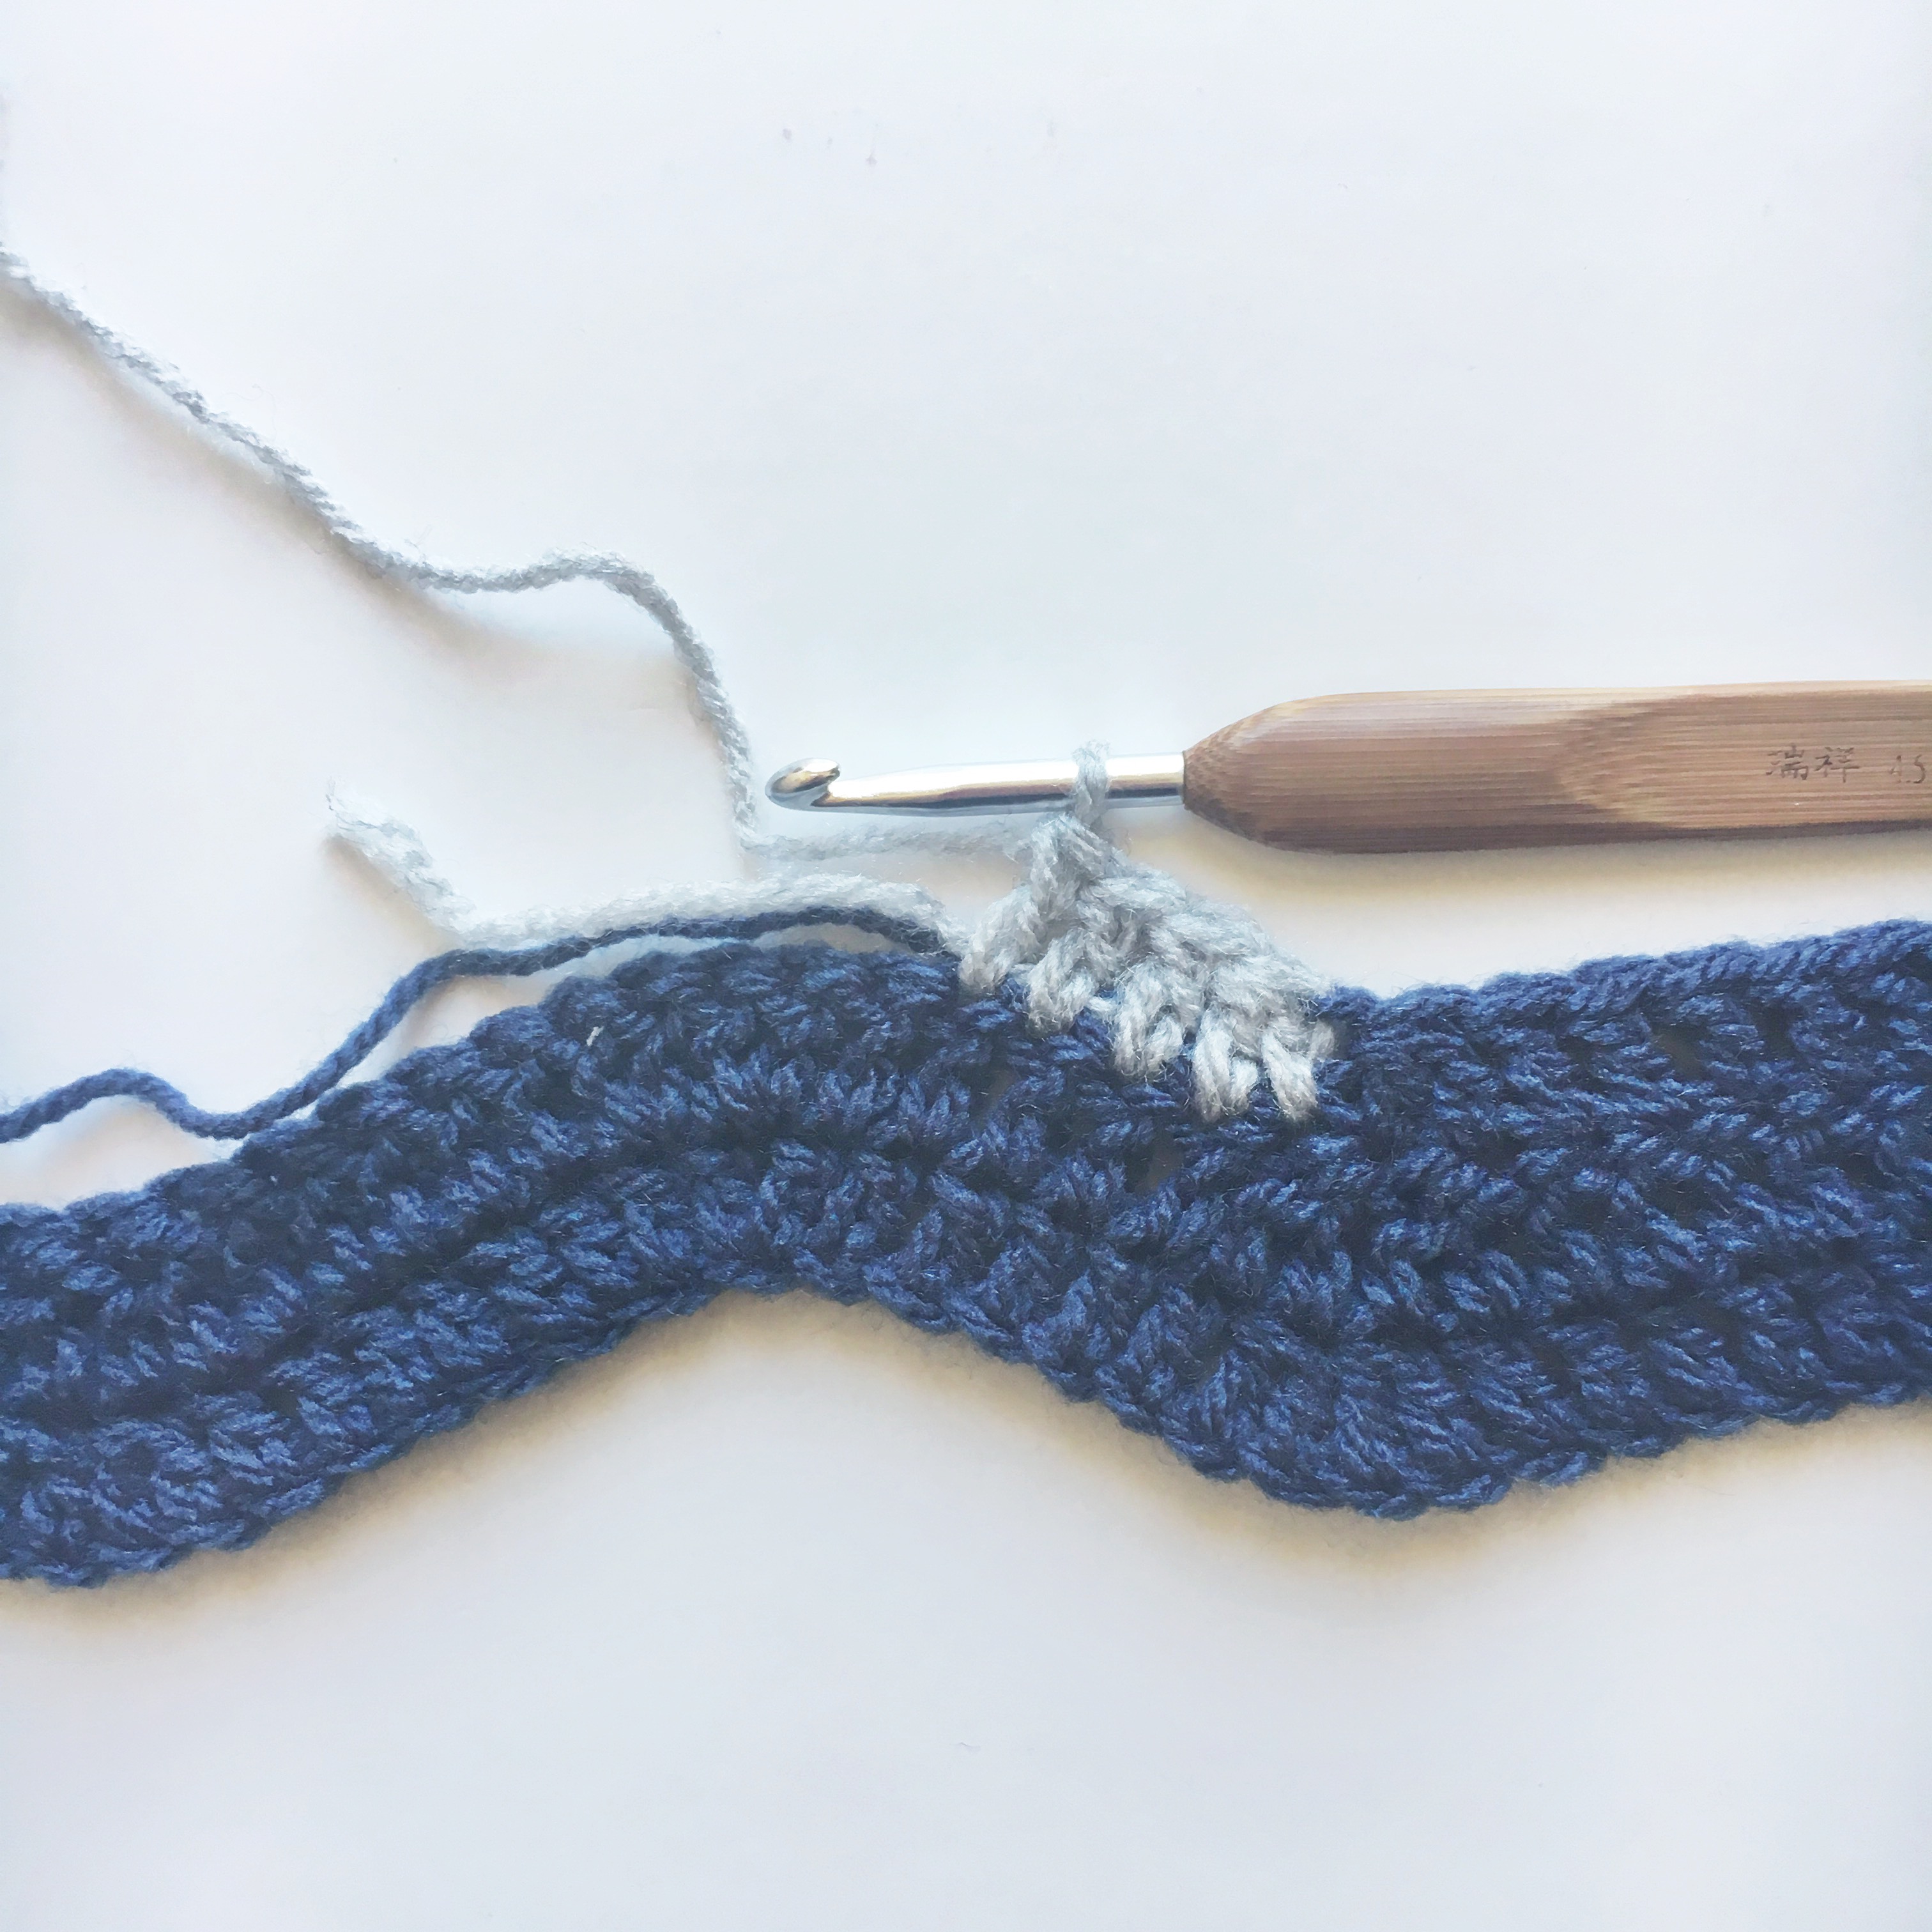
Step 4:  Lay the two tails of yarn along the top of the previous row. We are going to cover these with the next row of stitches so that we don’t have to weave them in later.
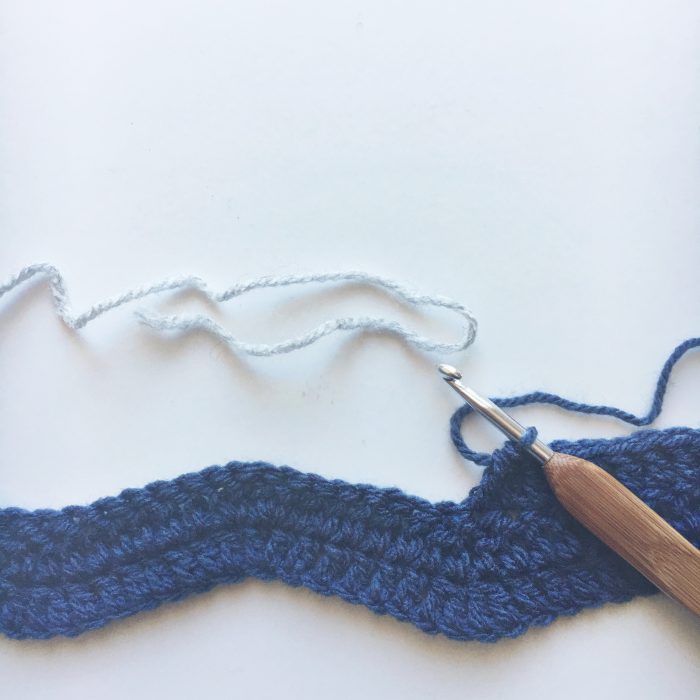
Step 5:  Start working your double crochet along the next row of the blanket. By holding the ends along the top of the previous row, they will naturally be caught within the stitches. I usually work over the top of them until I get to the end of them. Sometimes you need to just give them a gentle tug so the initial knot is hidden under the first stitch.

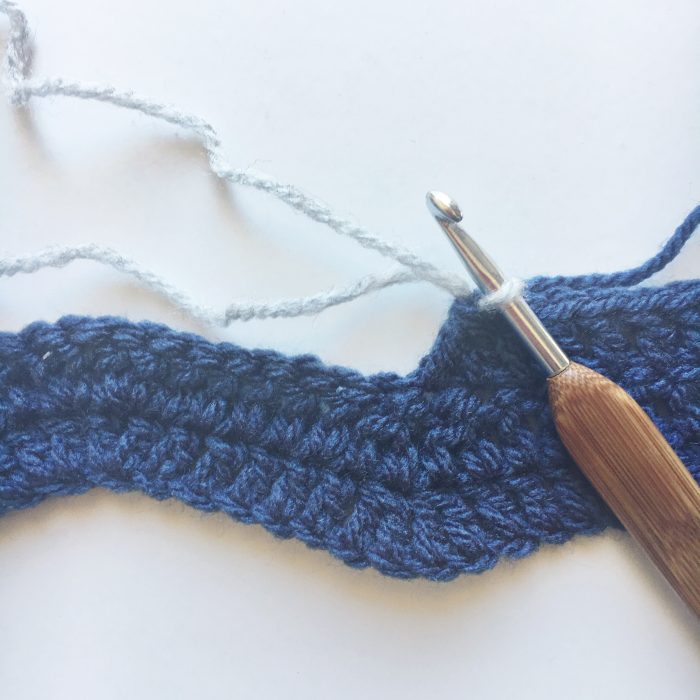
Method 3: No Know Required

This is my current favourite method of joining crochet yarn. It doesn’t require a knot and you can still crochet over the ends as described in Method 2.

Step 1: Cut off the current yarn leaving a 6″ or 20cm tail. Leave the crochet hook in place.

Note: You can also use this method when you want to use the yarn again in your design. Rather than cutting off the yarn, just leave it hang and keep the hook in place as you go to step 2. Later you can pick up the first yarn again when needed.

Step 2: Take your new yarn and fold the tail over to create a loop with about a 6″ or 20cm tail.

Step 3: Hook the new yarn and pull through the loop of yarn already on the hook.

Step 4: Pull both the yarn tails firm and hold as you continue your next crochet stitch or two with the new yarn.

You can lay your ends along your work and crochet over them just as you did in the previous method.

Now you’re all set to change colours in all your crochet projects.

Here are some projects to try it on – click to see more info on each one:


Learn how to change colours or join a new ball of yarn to your crochet project using three different methods.

Summary
Crochet: How to Change Colours
Article Title
Crochet: How to Change Colours
Description
Learn how to change colours or join a new ball of yarn to your crochet project using three different methods.
Author
Tonya Grant
Published on
TheCraftyMummy.com

Filed Under: Crafts

« Halloween Jokes for Kids
Things I Know 161-170 »
Disclosure: There are affiliate links in this post.  This just means that if you click through and choose to purchase something I may get a small commission - at no extra cost to you, of course.  This helps me keep the content here at The Crafty Mummy free for everyone.

I love to chat so please leave me a comment or ask a question.

Don't stress if your comment doesn't appear immediately - sometimes I have to moderate comments thanks to spam visitors, but the comments from real readers will always get published. Scroll down to add your thoughts or ask a question.

Comments

  1. Miriama says

    October 8, 2017 at 1:58 PM

    Thank you for that it’s a great help as I’m just learning

  2. cardiogod says

    April 6, 2018 at 5:30 PM

    I love crocheting, especially when my works are full of different colors. I also use this technique of changing the yarn.

Hi! I’m the CraftyMummy

Tonya is the voice behind The Crafty Mummy. She dabbles in lots of different crafts – patchwork, quilting, cross-stitch, scrapbooking, knitting, crochet and sewing. This is the record of projects she has done, and the projects she dreams of getting to! Read More…

Search

  • Email
  • Facebook
  • Instagram
  • Pinterest
  • Twitter
  • YouTube
Shop my Affiliate Favourites

Fat Quarter Shop for Fabric and More

Grab the Sew Sampler Box Here

AccuQuilt for Cutting Machines and Dies

QuiltyBox for Monthly Treats in the Mail

CreativeBug for Craft Classes

Pretty Darn Cute for Blog Designs like mine

Creative Market for Fonts, Images, Themes and More

OzGameShop for All the Games

Adrift for Fashion you’ll Love

Kindle Unlimited Membership Plans

Kindle Book List

Click to shop my kindle book list
Shop my Amazon Influencer Shop
Join the CrochetU and learn to crochet
New to TheCraftyMummy.com? Click here to see more
Blog Tools I use for TheCraftyMummy.com

Grammarly

Aweber for email newsletter

CoSchedule to stay organised and share

Milotree for social media

Genesis for blog framework

FoodiePro is my theme

Hosting with WPEngine

Powered by

Recent Articles

Disclosure: There are affiliate links on this site. This means that I may get a commission if you choose to purchase after browsing via these links - at absolutely no extra cost to you, of course. I only recommend products which I use and love, or that I think will be quality products that will be useful to my readers. It is the affiliate links in this site that help me keep my tutorials free of charge. Thank you!

Looking for something? Search here:

Copyright 2015 The Crafty Mummy · Built using Genesis Framework & Foodie Pro Theme