The Crafty Mummy

Crafts. Sewing. Quilting. Crochet. Tutorials.

  • Start Here
  • Welcome
    • Subscribe
    • About Me
      • Copyright
      • Disclosure
      • Privacy Policies
    • Advertise
    • Sharing
      • Recommendations
      • Shopping & Coupons
      • Books
  • Explore
    • Crafts
      • Beading
      • Kids
      • Paint
      • Storage
      • Christmas Crafts
    • Sewing
    • Quilting
    • Stitching
    • Crochet
      • Yarn
    • Life
      • Food
      • Organisation
    • Blogging
      • How To
      • Social Media
      • WordPress Plugins
      • Photography
  • Tutorials
    • Tips
  • Shop on Etsy
  • Shop on Redbubble

Tutorial: Recorder Bag

by Tonya Grant |Filed Under: Sewing, Tutorials Tagged With: Bags, Felt, Kids, School Get a Weekly Update of all Articles

sew a bag for a recorder

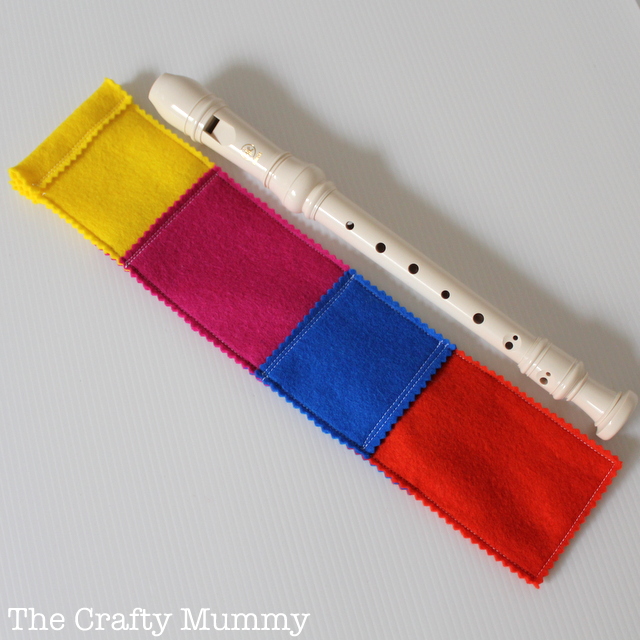
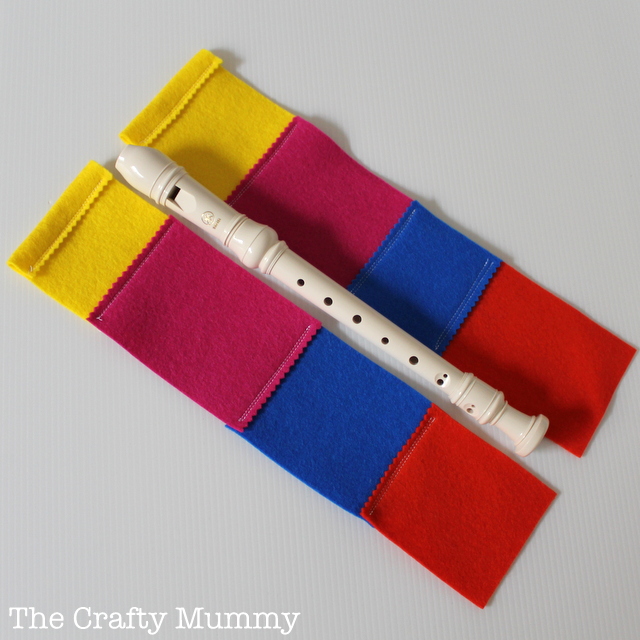
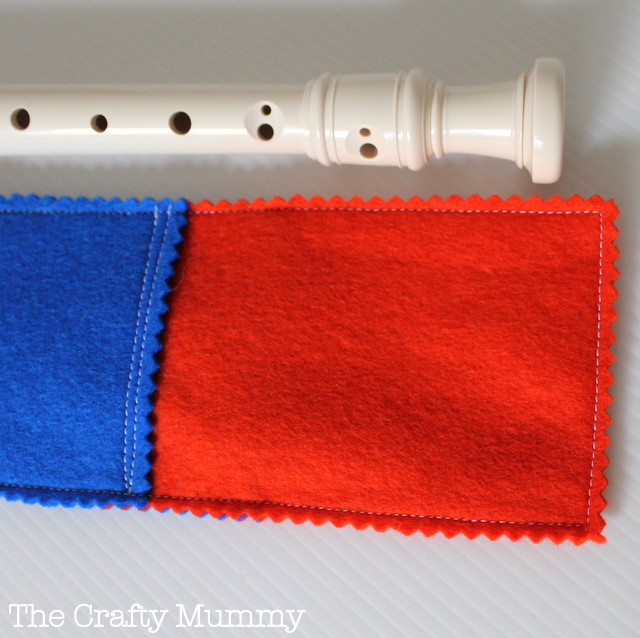
Did you play the descant recorder when you were at school? I did. This year my Little Miss will start learning as well. So we have bought the recorder and she has produced all the usual squeaky noises around the house for a few days. Being keen to protect this musical instrument and prevent the need to purchase another one this year, I decided to make a cute and colourful bag to store it in. I used some leftover felt from Plushka’s Craft but you could just as easily make one in fabric instead. The beauty of felt is that you don’t need to finish the edges as they won’t fray.

sew recorder bag tutorial

What You Need

  • felt – enough to create two pieces, 3.5″ x 16″ (9cm x 41cm)
  • elastic about 4″ (11cm) (Read the notes before you cut this for a tip)
  • usual sewing supplies and sewing machine

recorder bag tutorial felt

What To Do

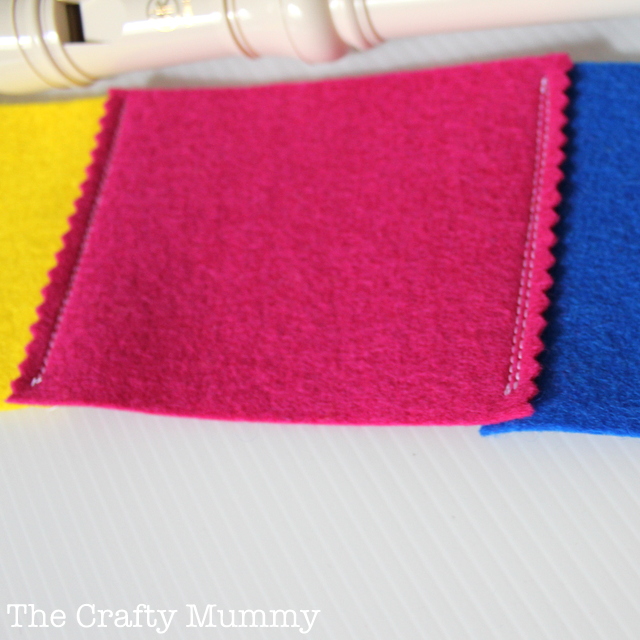
Create your two panels of felt first. You could use two pieces if you have them but in my case I used scraps. Cut each scrap 3.5″ wide then lay then together and stitch them in place. Because the felt won’t fray, you can simply lay one edge on top of the next edge and stitch across. I did a double row of stitching on each one to give a little extra strength. I pinked the edges of my pieces just to make them look pretty. join pieces until you have two pieces that are approximately 3.5″ by 16″ (or 9cm x 41cm)

If you are using fabric instead of felt, join your pieces right sides together and press flat so that the seams are hidden on the inside of your finished bag. You might want to add a layer of fusible pellon to the back of your fabric to give extra protection to the recorder.

recorder bag casing

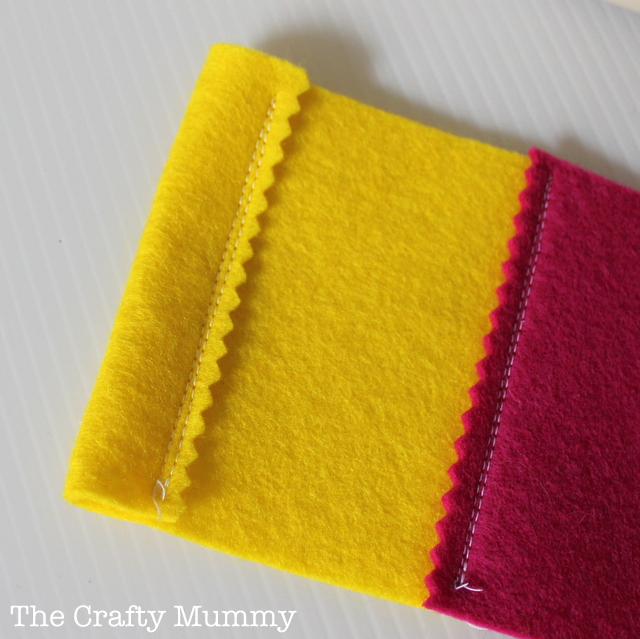
Next, create a casing at one end of each piece of felt by folding over the edge about 3/4″ or 2cm. I pinked the edge of this before I stitched it into place – just to look pretty!

recorder bag felt tutorial


Lay the two rectangles on top of each other with the casings on the outside and pin. Stitch from below the casing down one side, across the bottom of the bag and up the other side to the casing. Don’t stitch the casing closed! Pink the edges to finish.

 recorder bag tutorial

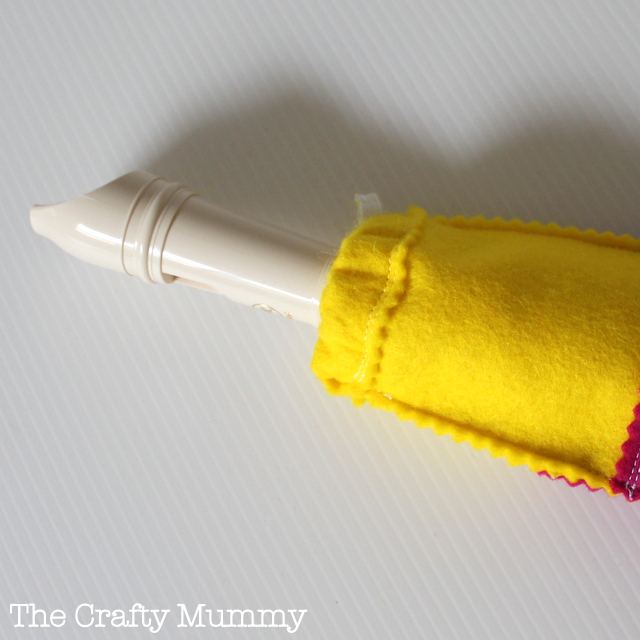
I used elastic to create the closure. (You could use ribbon if you prefer and just tie the ends to close it.) The idea is that the elastic is tight enough to pull the top closed enough so that the recorder won’t fall out. This means pretty tight elastic. In hindsight, here’s my tip: don’t cut the piece of elastic from the roll until after you have threaded it through the casing – along one casing then back through the other. Then pull the elastic tight enough the close and stitch the two ends together. Then  trim the excess off. Much easier than trying to stretch a tiny piece of elastic and hold it while you stitch!

recorder bag tutorial-001

Filed Under: Sewing, Tutorials Tagged With: Bags, Felt, Kids, School

« Butterfly Mobile
New Chair Bags »
Disclosure: There are affiliate links in this post.  This just means that if you click through and choose to purchase something I may get a small commission - at no extra cost to you, of course.  This helps me keep the content here at The Crafty Mummy free for everyone.

I love to chat so please leave me a comment or ask a question.

Don't stress if your comment doesn't appear immediately - sometimes I have to moderate comments thanks to spam visitors, but the comments from real readers will always get published. Scroll down to add your thoughts or ask a question.

Hi! I’m the CraftyMummy

Tonya is the voice behind The Crafty Mummy. She dabbles in lots of different crafts – patchwork, quilting, cross-stitch, scrapbooking, knitting, crochet and sewing. This is the record of projects she has done, and the projects she dreams of getting to! Read More…

Search

  • Email
  • Facebook
  • Instagram
  • Pinterest
  • Twitter
  • YouTube
Shop my Affiliate Favourites

Fat Quarter Shop for Fabric and More

Grab the Sew Sampler Box Here

AccuQuilt for Cutting Machines and Dies

QuiltyBox for Monthly Treats in the Mail

CreativeBug for Craft Classes

Pretty Darn Cute for Blog Designs like mine

Creative Market for Fonts, Images, Themes and More

OzGameShop for All the Games

Adrift for Fashion you’ll Love

Kindle Unlimited Membership Plans

Kindle Book List

Click to shop my kindle book list
Shop my Amazon Influencer Shop
Join the CrochetU and learn to crochet
New to TheCraftyMummy.com? Click here to see more
Blog Tools I use for TheCraftyMummy.com

Grammarly

Aweber for email newsletter

CoSchedule to stay organised and share

Milotree for social media

Genesis for blog framework

FoodiePro is my theme

Hosting with WPEngine

Powered by

Recent Articles

Disclosure: There are affiliate links on this site. This means that I may get a commission if you choose to purchase after browsing via these links - at absolutely no extra cost to you, of course. I only recommend products which I use and love, or that I think will be quality products that will be useful to my readers. It is the affiliate links in this site that help me keep my tutorials free of charge. Thank you!

Looking for something? Search here:

Copyright 2015 The Crafty Mummy · Built using Genesis Framework & Foodie Pro Theme