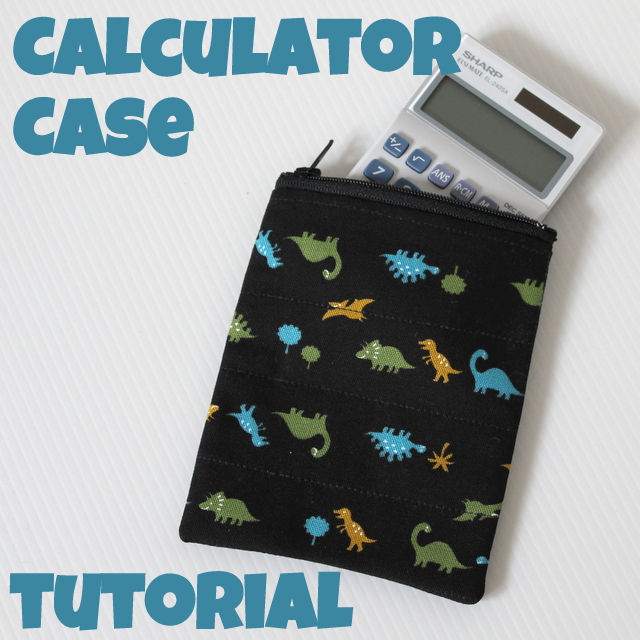
Do your kids need a calculator for school? My kids do and it is not a cheap item to purchase. So I want to make sure that it stays clean and working for at least this year, if not a couple of years.
My answer? A zippered padded calculator case to store it in. They can find it easily in their bag or desk and it is a little protected from loss and damage.
Would you like to make one for your kids? Here’s the step-by-step tutorial. This is basically how I make any zippered pouch. I just varied the size to fit the calculator in this one.
What You Need
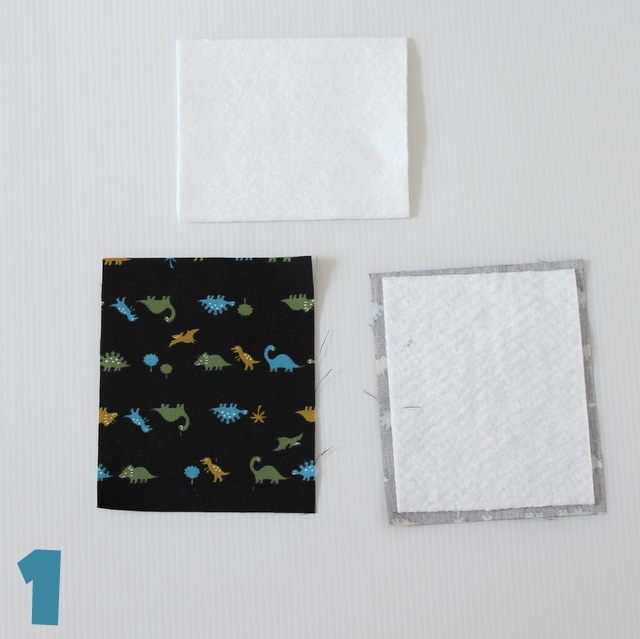
- 2 x fabric rectangles 6″ x 5″ (15cm x 12.5cm)
- 2 x batting rectangles 5.5″ x 4.5″ (14cm x 11.5cm) (I used quilt batting scraps but you could use pellon, even iron-on pellon)
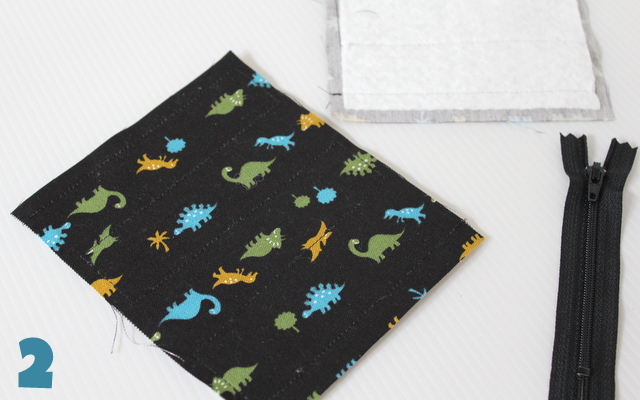
- 4″ zipper
- Usual sewing supplies, sewing machine and pinking shears
- Finished size: approximately 5.5″ x 4.5″ (if you use quarter inch seams) If you need a slightly bigger size just adjust the fabric sizes accordingly.
What To Do
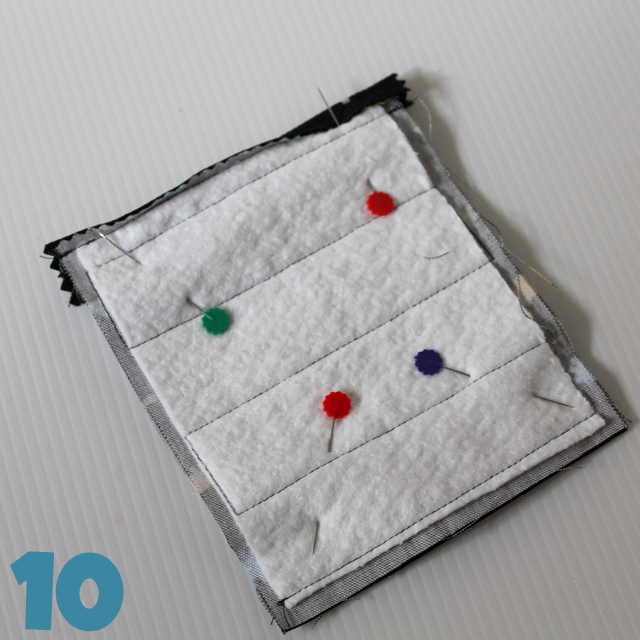
1. Cut your fabric and place your batting rectangles on the back of your fabric rectangles. I press the batting into place so it stays without pinning. Pin if you’re concerned about shifting.
2. Stitch your batting onto the fabric – this is just like quilting the layers together. I stitched straight lines back and forth about 1″ (2.5cm) apart. Here’s what my stitching looks like:

At each corner I just put my needle down, lifted the presser foot and pivoted the fabric. Do this on both of your pieces of fabric.
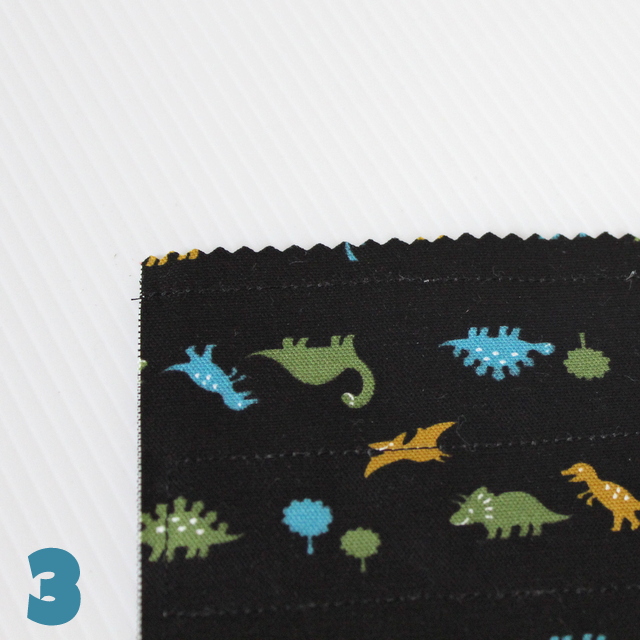
3. Decide which short end of your fabric pieces will be the top of your pouch. Trim that end with your pinking shears. This is especially important for directional fabrics – you don’t want cute cars driving upside down on your finished pouch!

4. Pin the zipper to the top edge that you just trimmed. Put the zipper on the right side of the fabric, but have the zipper right side down i.e. with the zipper pull against the fabric. Pin it in place.

5. With the zipper foot on your sewing machine, sew the zipper on. Start at the end away from the zipper pull and stitch to the middle. Stop with the needle down into the fabric and lift the zipper foot. Carefully slide the upper pull to the other end of the zipper past your presser foot and out of the way. This means you won’t have to sew close to the zipper pull which makes sewing easier.
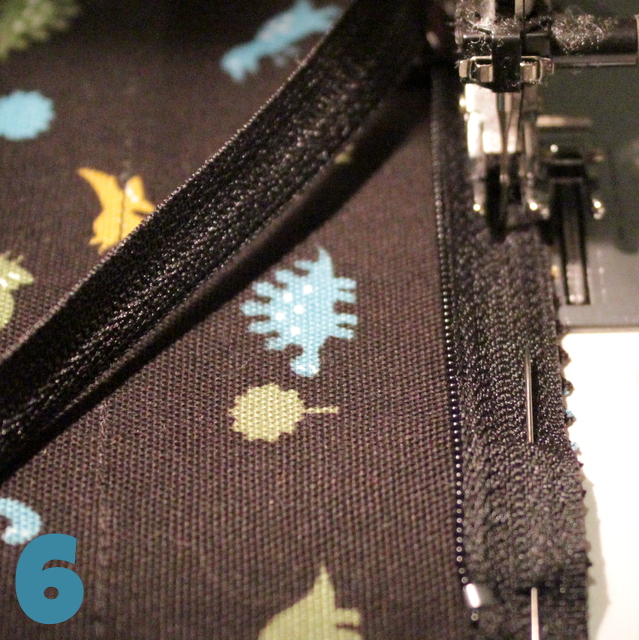
6. Sew the rest of the zipper into place.
7. Put this piece with zipper now attached right side together with your other fabric piece. Line up the side edges of the two fabric pieces (the bottom edge won’t match at this stage) then pin the other side of the zipper onto the top of the second piece of fabric. Again the zipper pull should be against the right side of the fabric.
8. Sew this side of the zipper into place, using the same trick of putting the needle down to move the zipper pull out of the way when you need to.
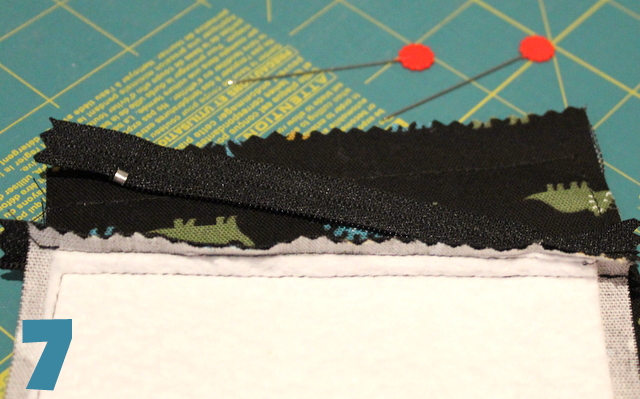
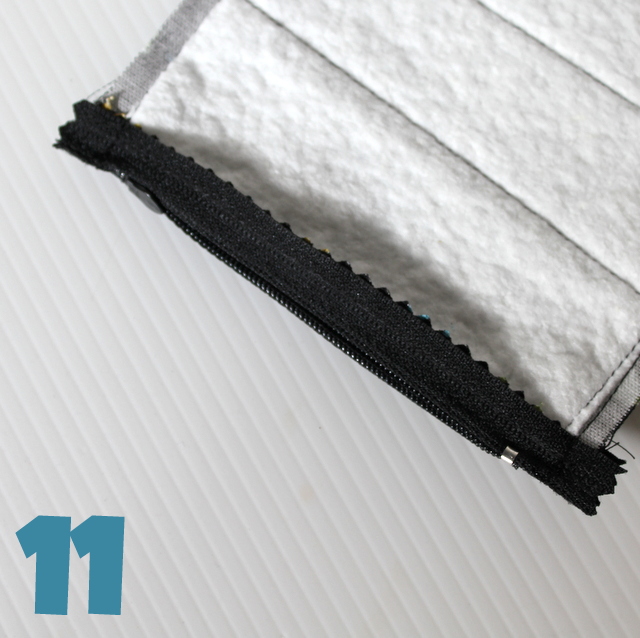
9. Now your pieces should look like this – two rectangles joined with the zipper. Press the fabric neatly away from the zipper.
10. Open the zipper – REALLY IMPORTANT STEP!
Then pin the two pieces right sides together matching the edges and the zipper ends carefully. Note in Picture 11 below how the zipper should look when pinned.
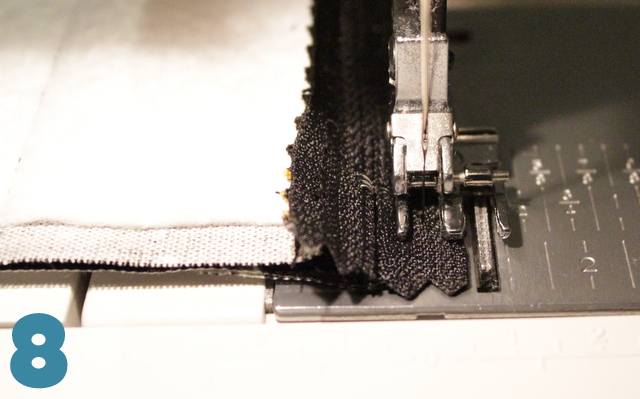
11. Sew from the top edge, down one side, across the bottom of the pouch and up the other side, pivoting at each corner. I aim for my stitching to be about a quarter of an inch from the edge of the fabric. Watch out for any metal parts of the zipper when you are stitching close to the zipper. If you hit those with your needle, the needle might break!

12. Trim the edges with your pinking shears and clip the corners, then turn the pouch through and press.
Tip: If you get to here and realise that you have forgotten to open the zipper, use a knitting needle to open it – click here for the how to.
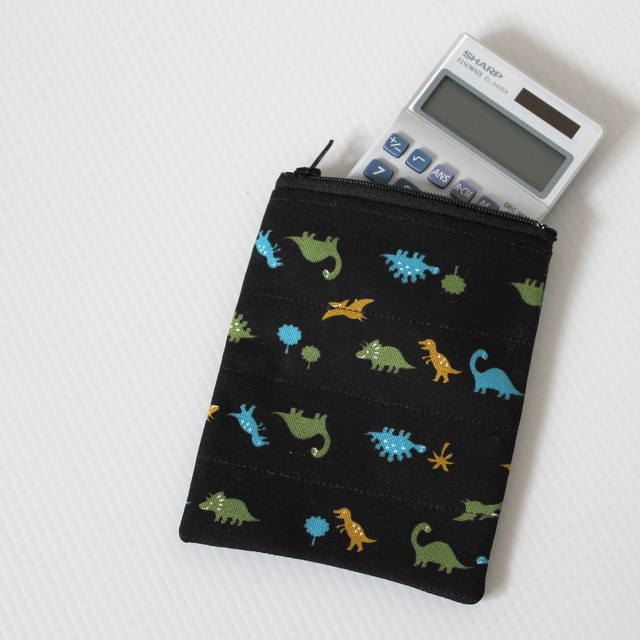
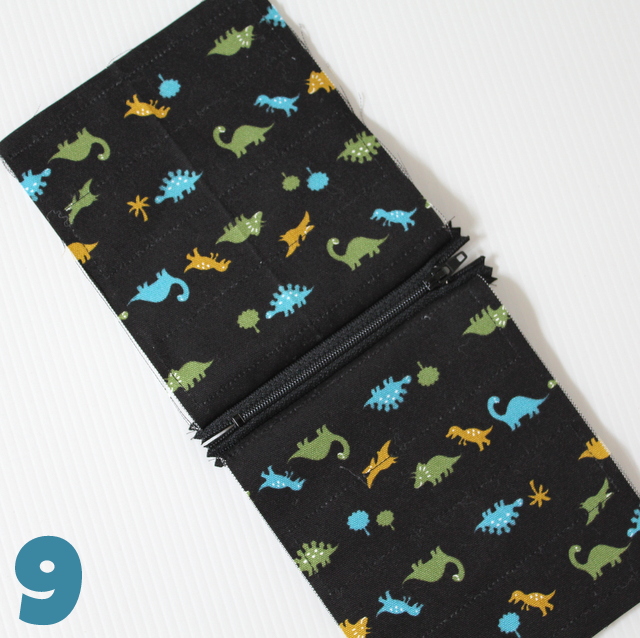
All done! Keep in mind that you can adjust these dimensions for your device. This would also be great for a phone or iPod.
More Things You Can Sew for School


I’m new to sewing and have never done a zip. I’ve looked at numerous tutorials and these are the best step by step instructions yet. Gonna give it a try, will keep you posted. Thanks.xx
Hi Anna,
Have fun! They are really not that hard so I’m sure you can do it!