The Crafty Mummy

Crafts. Sewing. Quilting. Crochet. Tutorials.

  • Start Here
  • Welcome
    • Subscribe
    • About Me
      • Copyright
      • Disclosure
      • Privacy Policies
    • Advertise
    • Sharing
      • Recommendations
      • Shopping & Coupons
      • Books
  • Explore
    • Crafts
      • Beading
      • Kids
      • Paint
      • Storage
      • Christmas Crafts
    • Sewing
    • Quilting
    • Stitching
    • Crochet
      • Yarn
    • Life
      • Food
      • Organisation
    • Blogging
      • How To
      • Social Media
      • WordPress Plugins
      • Photography
  • Tutorials
    • Tips
  • Shop on Etsy
  • Shop on Redbubble

Quilt Binding: Turning Corners

by Tonya Grant |Filed Under: Quilting, Tutorials Tagged With: Binding, Tips, Tops of 2015, Tutorials Get a Weekly Update of all Articles

How to Turn Corners on Quilt Binding

I quite enjoy adding the binding to a quilt. I think it is because at this point I know the quilt is almost finished and I’m going to get to enjoy the end results very soon!

But a tricky part of adding quilt binding is turning corners and creating neat corners. I know some people avoid the corners by making them into curves but you don’t have to. You can create neat corners simply by adding a couple of folds in the fabric.

Binding Basics

First of all let’s talk about that binding you’re going to attach to you quilt.

  • I cut binding into 2″ or 2.5″ strips across the width of the fabric. (Some people use binding cut on the bias.)
  • Sometimes I join scraps to create a long strip.
  • I straight join my binding – it’s quick and easy! (Some people join strips at an angle.)
  • Once I have a long enough strip to go around the outside edge of my quilt, I iron the whole strip in half lengthways with the right side out.
  • Now it’s time to join it to the quilt edge on the front of the quilt top: Line up the raw edge of the binding strip with the edge of the quilt where you’re going to start sewing. Leave a tail of about 10″ for joining later on. I start in the middle of a side of the quilt usually.
  • Start sewing your binding onto the quilt about 1/4″ in from the edge.

quilt binding turn corner 1

How to Turn Corners with Binding

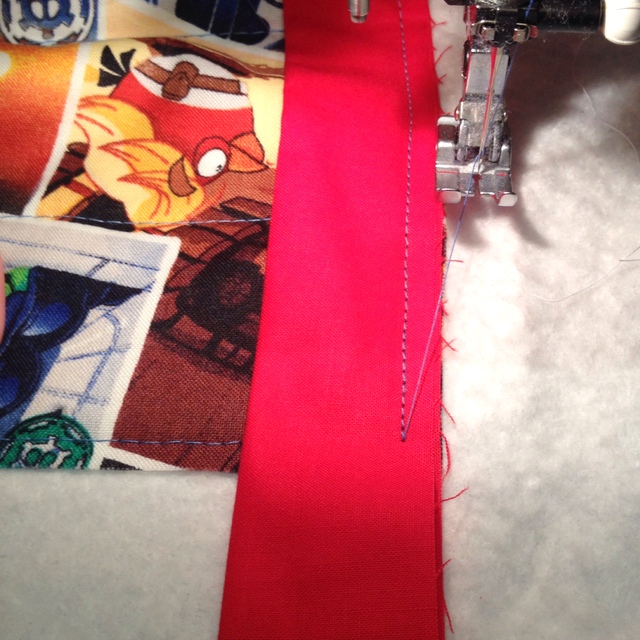
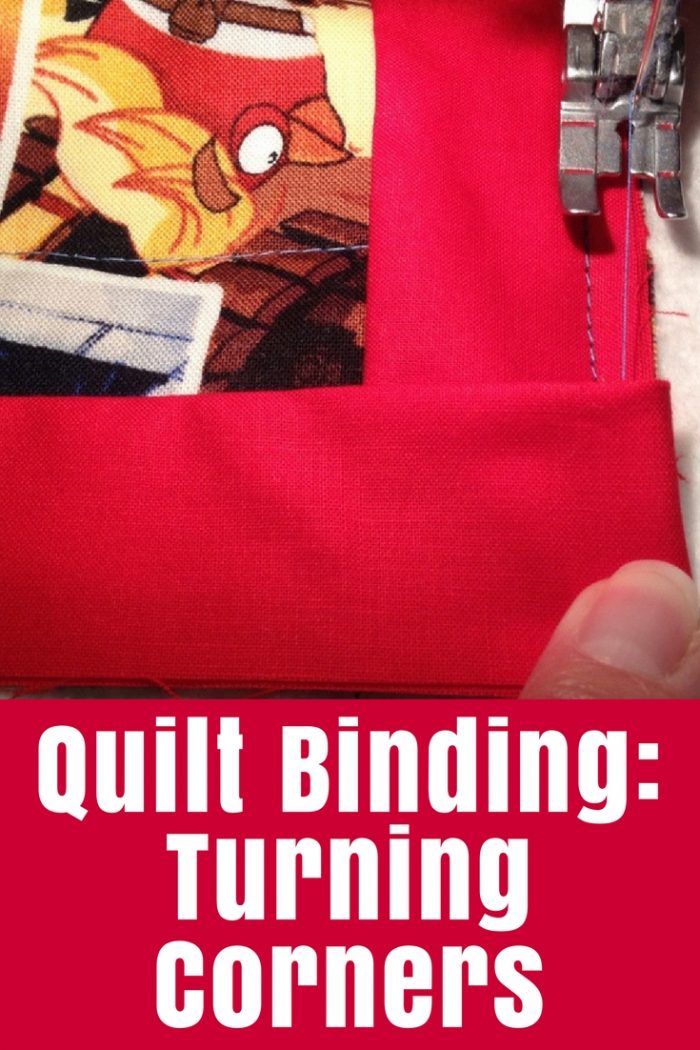
  • When you get close to a corner, sew until you are about 1/4″ from the end of the side. (You can even do a little back and forth stitch if you want to.)
  • Lift the presser foot but don’t cut the thread.

quilt binding turn corner 2

  • Slide the quilt out from under the foot slightly so you can fold the binding strip.
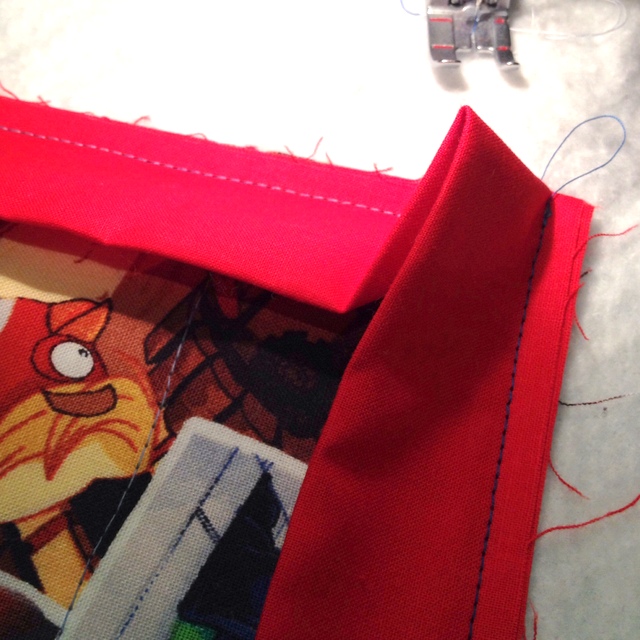
  • Fold the strip over to the right creating a fold with a 45″ angle. The bottom of the binding strip will now run parallel to the next side of the quilt.

quilt binding turn corner 3

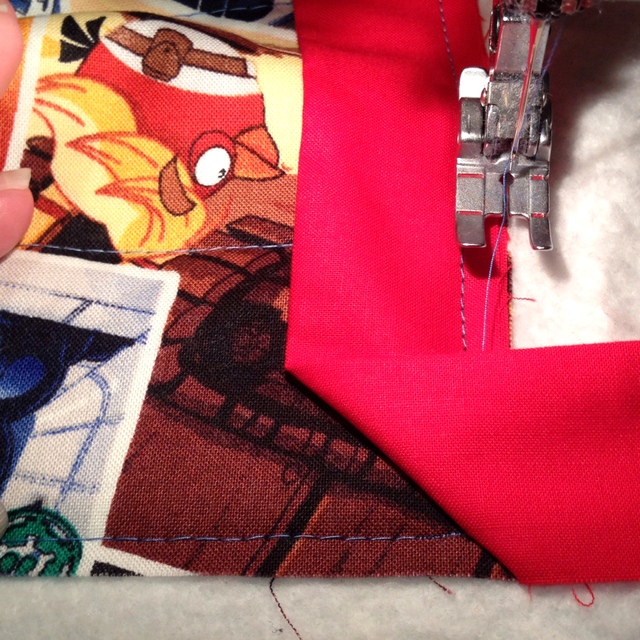
  • Then fold the strip back along the next side of the quilt leaving a little triangle of fabric folded in the corner. Hold it in the place with your finger or pop a pin into it.

quilt binding turn corner 4

  • Turn the whole quilt and slide it back under the presser foot ready to sew down the new side.

quilt binding turn corner 5

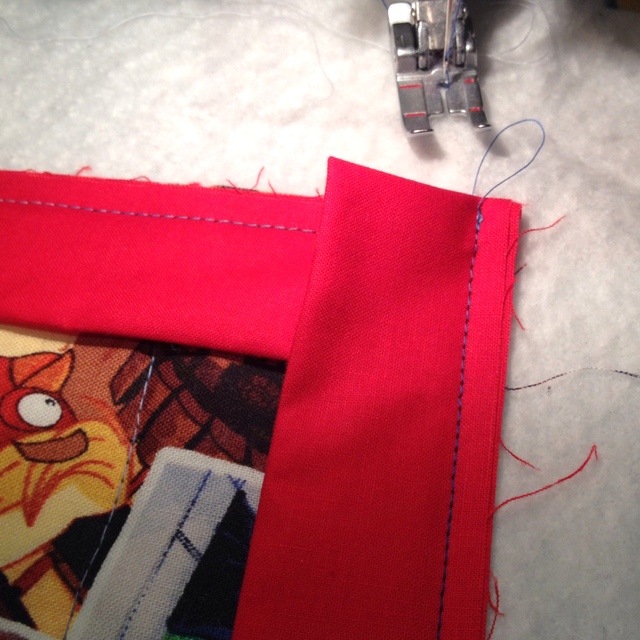
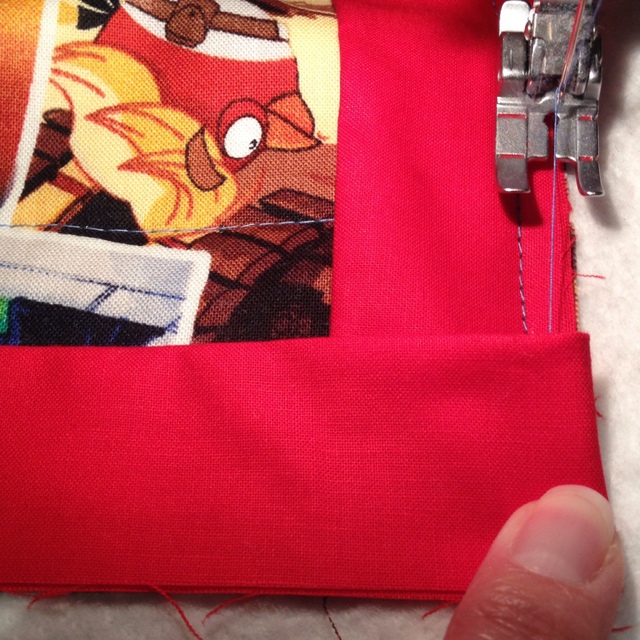
  • Start sewing from the edge so you will catch the corner of that folded triangle with the next couple of stitches.

quilt binding turn corner 6

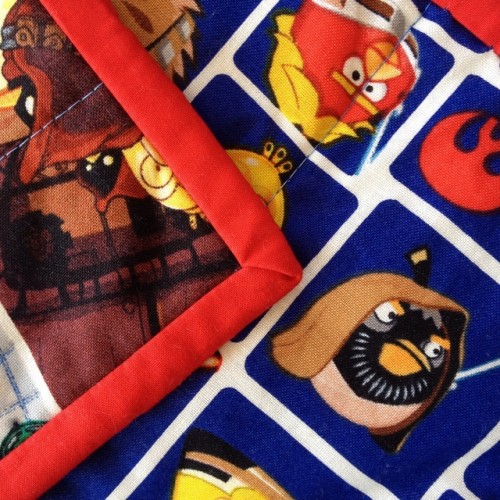
  • Continue sewing down the side and round the next corners!

Joining the Binding

  • When you get back to the start of your binding leave a gap of about 6″ and a tail of about 10″.
  • Then use this tutorial to help you join the ends together neatly (I could explain it all again but she’s done such a great job!!)

quilt binding corner front

Finally you will hand stitch the other side of the binding to the back of your quilt

– a great job for in front of the TV! When you come to the corners, you will a little extra fabric to fold like you did on the back to create a neat finish.

Another tip: Use pegs to hold your binding in place like this.

 Like my Angry Birds Star Wars quilt? Find more info here.

One of the trickiest bits of attaching quilt binding: turning corners - explained with pictures


Filed Under: Quilting, Tutorials Tagged With: Binding, Tips, Tops of 2015, Tutorials

« Top 5 Resources I Use & Love
Four for Friday: Angel Crafts »
Disclosure: There are affiliate links in this post.  This just means that if you click through and choose to purchase something I may get a small commission - at no extra cost to you, of course.  This helps me keep the content here at The Crafty Mummy free for everyone.

I love to chat so please leave me a comment or ask a question.

Don't stress if your comment doesn't appear immediately - sometimes I have to moderate comments thanks to spam visitors, but the comments from real readers will always get published. Scroll down to add your thoughts or ask a question.

Comments

  1. dana says

    August 16, 2014 at 10:46 AM

    best easiest instruction for binding i have seen.

    • Tonya Grant says

      August 16, 2014 at 10:53 AM

      Thanks Dana. Hope it has been helpful!

  2. Lori says

    August 28, 2014 at 12:24 AM

    I defiantly going to try this!! Thanks!!

  3. Paige says

    February 3, 2015 at 6:00 PM

    That was excellent. Considering I am coming up to that point now, it was worth the watch as I hate joining my ends. I have been doing my corners slightly differently too and they were not sitting as flat as I would have liked. Will try your way!

    • Tonya Grant says

      February 3, 2015 at 6:56 PM

      Happy to help, Paige! I’d love to see your quilt when it is finished.

  4. Heidianne says

    February 25, 2018 at 9:09 AM

    I have a big problem with any instructions re corners as when I try I just fumble and the corners look messy also the binding around the quilt edge are usually uneven and a mess…. I’ve practised heAps but no luck I’m just about at the stage of throwing my machine out the window (and yes I have a walking foot on my brother machine) do you have any hints for me I’m determined to succeed 🙂

Hi! I’m the CraftyMummy

Tonya is the voice behind The Crafty Mummy. She dabbles in lots of different crafts – patchwork, quilting, cross-stitch, scrapbooking, knitting, crochet and sewing. This is the record of projects she has done, and the projects she dreams of getting to! Read More…

Search

  • Email
  • Facebook
  • Instagram
  • Pinterest
  • Twitter
  • YouTube
Shop my Affiliate Favourites

Fat Quarter Shop for Fabric and More

Grab the Sew Sampler Box Here

AccuQuilt for Cutting Machines and Dies

QuiltyBox for Monthly Treats in the Mail

CreativeBug for Craft Classes

Pretty Darn Cute for Blog Designs like mine

Creative Market for Fonts, Images, Themes and More

OzGameShop for All the Games

Adrift for Fashion you’ll Love

Kindle Unlimited Membership Plans

Kindle Book List

Click to shop my kindle book list
Shop my Amazon Influencer Shop
Join the CrochetU and learn to crochet
New to TheCraftyMummy.com? Click here to see more
Blog Tools I use for TheCraftyMummy.com

Grammarly

Aweber for email newsletter

CoSchedule to stay organised and share

Milotree for social media

Genesis for blog framework

FoodiePro is my theme

Hosting with WPEngine

Powered by

Recent Articles

Disclosure: There are affiliate links on this site. This means that I may get a commission if you choose to purchase after browsing via these links - at absolutely no extra cost to you, of course. I only recommend products which I use and love, or that I think will be quality products that will be useful to my readers. It is the affiliate links in this site that help me keep my tutorials free of charge. Thank you!

Looking for something? Search here:

Copyright 2015 The Crafty Mummy · Built using Genesis Framework & Foodie Pro Theme