The Crafty Mummy

Crafts. Sewing. Quilting. Crochet. Tutorials.

  • Start Here
  • Welcome
    • Subscribe
    • About Me
      • Copyright
      • Disclosure
      • Privacy Policies
    • Advertise
    • Sharing
      • Recommendations
      • Shopping & Coupons
      • Books
  • Explore
    • Crafts
      • Beading
      • Kids
      • Paint
      • Storage
      • Christmas Crafts
    • Sewing
    • Quilting
    • Stitching
    • Crochet
      • Yarn
    • Life
      • Food
      • Organisation
    • Blogging
      • How To
      • Social Media
      • WordPress Plugins
      • Photography
  • Tutorials
    • Tips
  • Shop on Etsy
  • Shop on Redbubble

Tutorial: Sewing Machine Pincushion

by Tonya Grant |Filed Under: Sewing, Tutorials Tagged With: Sewing machine, Tops of 2015 Get a Weekly Update of all Articles

Pincushion for Sewing Machine

Sometimes when you’re sewing at your sewing machine, you just need a spot to put a pin or two for a minute. Either you’re taking out pins as you sew two pieces together, or you’re moving pins as you’re quilting. I often find myself sticking a couple of pins into my sewing machine mat when my pincushion has disappeared! Do you find that too?

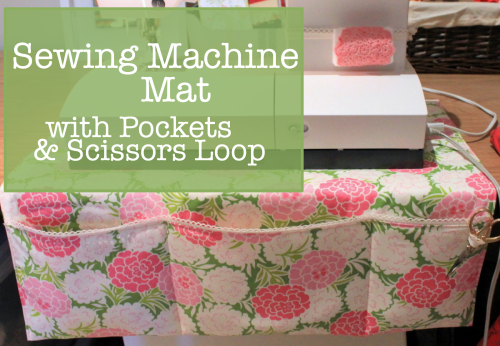
As I was making my new sewing machine mat last week, I decided to also make a matching pin cushion that would stay with my machine, tied to the body of the machine but out the way of the sewing space. I know some machines have buttons and dials in this area, but my Pfaff has a blank space there so it is perfect for adding a pincushion.

This is not my own original idea, of course. I have seen various similar things on Pinterest, and possibly even other blogs, over the years. But when it came to making one I just made it up as I went along and snapped a few pictures so I could share the very simple tutorial with you.

pincushion supplies

How to Make a Sewing Machine Pincushion

What You Need

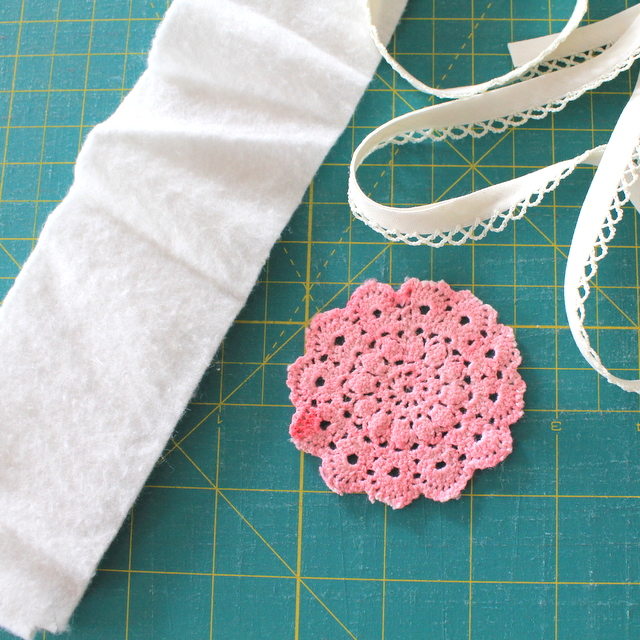
  • Doily – about 3″ round – this came in my box from Sew Box Subscriptions
  • Strip of wadding – about 3″ x 12″ – a scrap from this quilt
  • Ribbon – about 27″ – enough to tie in a nice bow
  • Needle, thread, scissors

What To Do

roll wadding

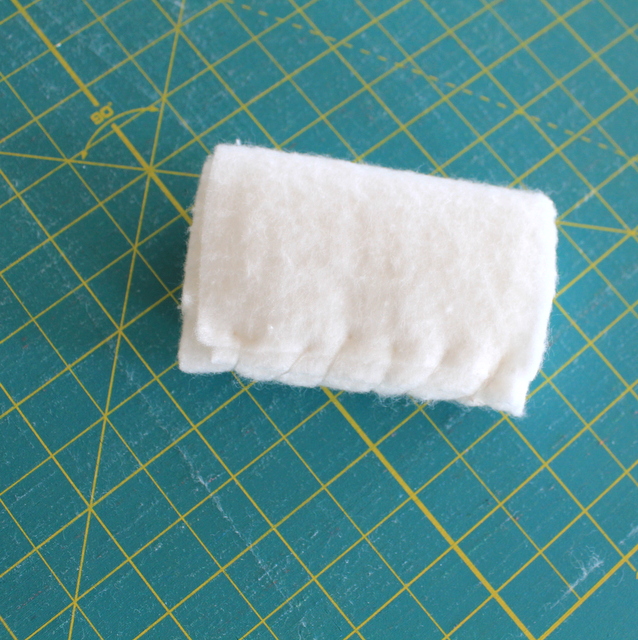
1. Roll the wadding strip into an oblong shape. It needs to small enough to partly wrap the doily around so play it until you are happy with the size and shape.

2. Stitch the wadding across the end to keep it in place. You want this seam to be at the back of your pincushion so it will against the sewing machine and unseen in the end.

wrap doily

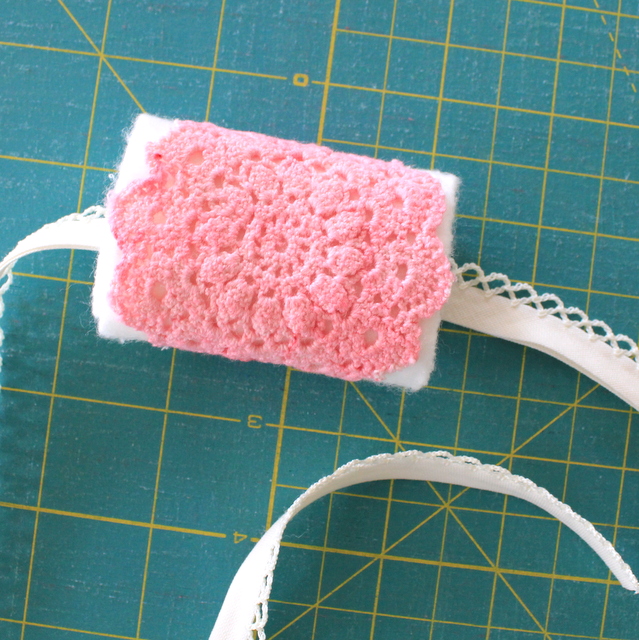
3. Wrap the doily around the front of the cushion and stitch into place. Using the same colour thread as your doily will hide the stitches.

doily pincushion

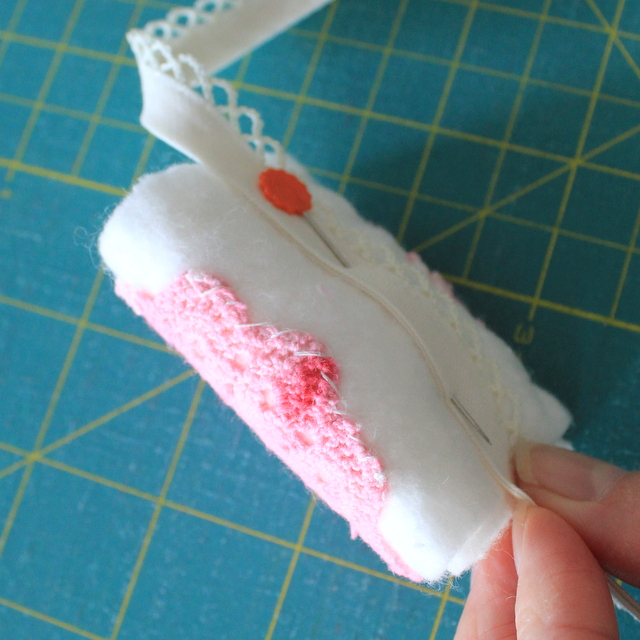
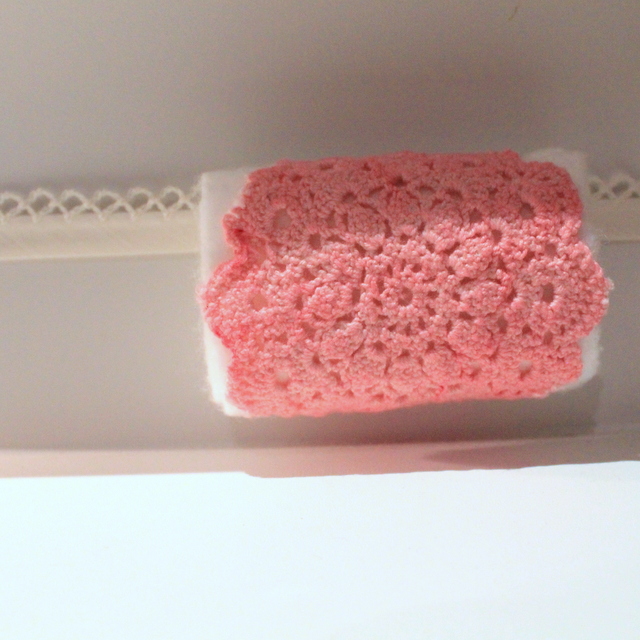
4. Pin the ribbon into place on the back of the pincushion then take it to your machine and check that you’re happy with the placement. I lined mine up to tie at the side of the machine so my pincushion is not in the middle of the ribbon but slightly to one end. When you’re happy with the placement, stitch the ribbon onto the back of the cushion.
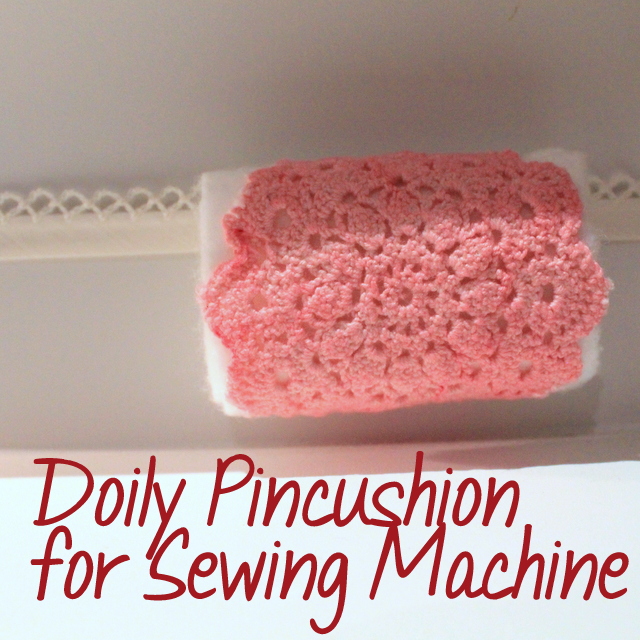
Doily Pincushion for Sewing Machine

All done!

This pincushion coordinates with my new Sewing Machine Mat – find that tutorial here.

sewing machine mat with pocket tutorial

more sewing

Filed Under: Sewing, Tutorials Tagged With: Sewing machine, Tops of 2015

« Creative Craft Retreat 2014
Four for Friday: Rainbow Loom »
Disclosure: There are affiliate links in this post.  This just means that if you click through and choose to purchase something I may get a small commission - at no extra cost to you, of course.  This helps me keep the content here at The Crafty Mummy free for everyone.

I love to chat so please leave me a comment or ask a question.

Don't stress if your comment doesn't appear immediately - sometimes I have to moderate comments thanks to spam visitors, but the comments from real readers will always get published. Scroll down to add your thoughts or ask a question.

Comments

  1. Cindie Brandt says

    September 16, 2015 at 11:30 PM

    I just printed the instructions for your sewing machine mat. Currently, my machine lives on the end of the dining room table (in the hopes that my husband will get so sick of it he will let me convert one of our bedrooms into a sewing room!), It’s a great pattern, and so easy, it will help protect the finish of the table. Thanks!!!

  2. Betty Hagewood says

    April 2, 2018 at 2:35 PM

    Thanks for sharing. I like the clear directions to, I love sewing and quilting but I just choose the free stuff because I am on a budgut and that is why.ok thanks.Happy Easter.

  3. Teresa Sinor says

    November 25, 2021 at 2:53 AM

    I love the simplicity of your sewing machine matt and pin cushion, instructions also. Thank you for sharing your appreciated.
    My name is Teresa, Hi , I am on disability but love to sew. I don’t get to spend much money on my sewing as I would like to. Lol but I think everyone’s in the same boat.

Hi! I’m the CraftyMummy

Tonya is the voice behind The Crafty Mummy. She dabbles in lots of different crafts – patchwork, quilting, cross-stitch, scrapbooking, knitting, crochet and sewing. This is the record of projects she has done, and the projects she dreams of getting to! Read More…

Search

  • Email
  • Facebook
  • Instagram
  • Pinterest
  • Twitter
  • YouTube
Shop my Affiliate Favourites

Fat Quarter Shop for Fabric and More

Grab the Sew Sampler Box Here

AccuQuilt for Cutting Machines and Dies

QuiltyBox for Monthly Treats in the Mail

CreativeBug for Craft Classes

Pretty Darn Cute for Blog Designs like mine

Creative Market for Fonts, Images, Themes and More

OzGameShop for All the Games

Adrift for Fashion you’ll Love

Kindle Unlimited Membership Plans

Kindle Book List

Click to shop my kindle book list
Shop my Amazon Influencer Shop
Join the CrochetU and learn to crochet
New to TheCraftyMummy.com? Click here to see more
Blog Tools I use for TheCraftyMummy.com

Grammarly

Aweber for email newsletter

CoSchedule to stay organised and share

Milotree for social media

Genesis for blog framework

FoodiePro is my theme

Hosting with WPEngine

Powered by

Recent Articles

Disclosure: There are affiliate links on this site. This means that I may get a commission if you choose to purchase after browsing via these links - at absolutely no extra cost to you, of course. I only recommend products which I use and love, or that I think will be quality products that will be useful to my readers. It is the affiliate links in this site that help me keep my tutorials free of charge. Thank you!

Looking for something? Search here:

Copyright 2015 The Crafty Mummy · Built using Genesis Framework & Foodie Pro Theme