The Crafty Mummy

Crafts. Sewing. Quilting. Crochet. Tutorials.

  • Start Here
  • Welcome
    • Subscribe
    • About Me
      • Copyright
      • Disclosure
      • Privacy Policies
    • Advertise
    • Sharing
      • Recommendations
      • Shopping & Coupons
      • Books
  • Explore
    • Crafts
      • Beading
      • Kids
      • Paint
      • Storage
      • Christmas Crafts
    • Sewing
    • Quilting
    • Stitching
    • Crochet
      • Yarn
    • Life
      • Food
      • Organisation
    • Blogging
      • How To
      • Social Media
      • WordPress Plugins
      • Photography
  • Tutorials
    • Tips
  • Shop on Etsy
  • Shop on Redbubble

How to Fold an Envelope

by Tonya Grant |Filed Under: Crafts, Tutorials Tagged With: 31 Days of Crafty Tutorials, Tops of 2015 Get a Weekly Update of all Articles

Fold a Rectangle Letter into an Envelope-001

Did you write notes in school? I mean, notes to your friends?

I can remember writing a lot of notes to friends in high school. (Which I find really interesting in hindsight as an ex-teacher! How did my teachers not notice us writing all those notes?!) Anyway I remember writing lots of notes – mostly to boys from memory.

Not “boyfriends” but friends who were boys. Not even boys in other classes necessarily – sometimes we would write notes and pass them back and forth, having whole conversations between maths problems or science experiments. And, of course, there were notes to girlfriends about the boys!

I found a stash of those notes when we moved house a few years back and threw them out but I wish now that I had kept them. They would paint an interesting picture I’m sure of how we thought as teenagers.

I don’t remember what all these notes were about now. I think we wrote about random stuff – what we thought of the latest movies or songs, maybe things that had happened with friends, plans for the weekend, the stuff of a teen’s life!

What I do remember is that we had a cool way of folding them up so they stayed closed even when passed along. Our pages were usually torn from our notebooks so they were lined rectangle papers.

printable letter writing paper

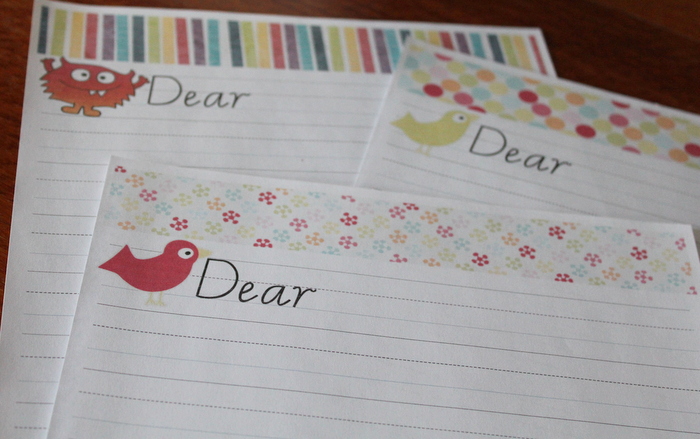
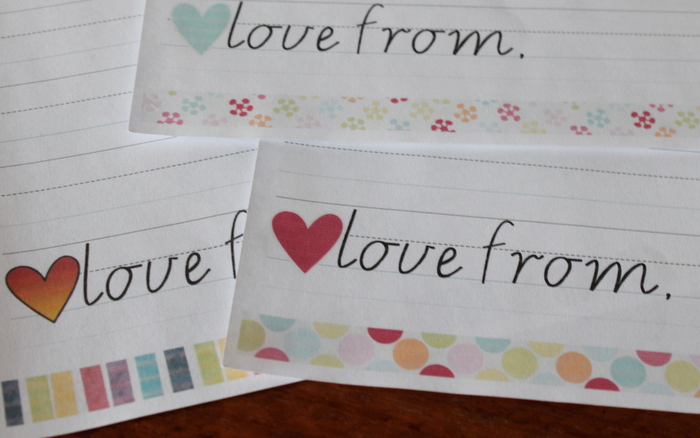
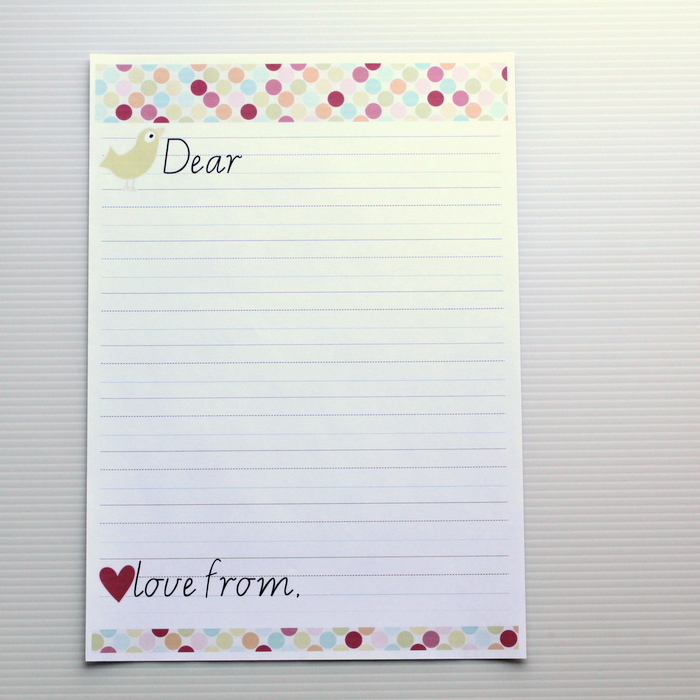
I’m sure they were not anywhere near as cute as these writing papers I found over at Picklebums. These are very cute! They are a free download so find them here. I printed mine on A4 paper.

love from

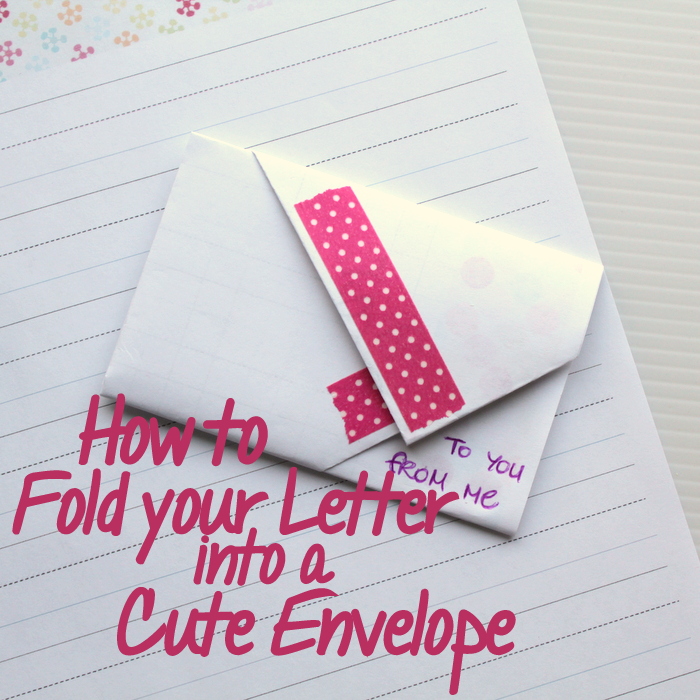
How to Fold an Envelope (that stays closed without glue)

letter fold 1

1. Start with your rectangle sheet of paper with the writing side up – that way the writing will end up hidden inside.

letter fold 2

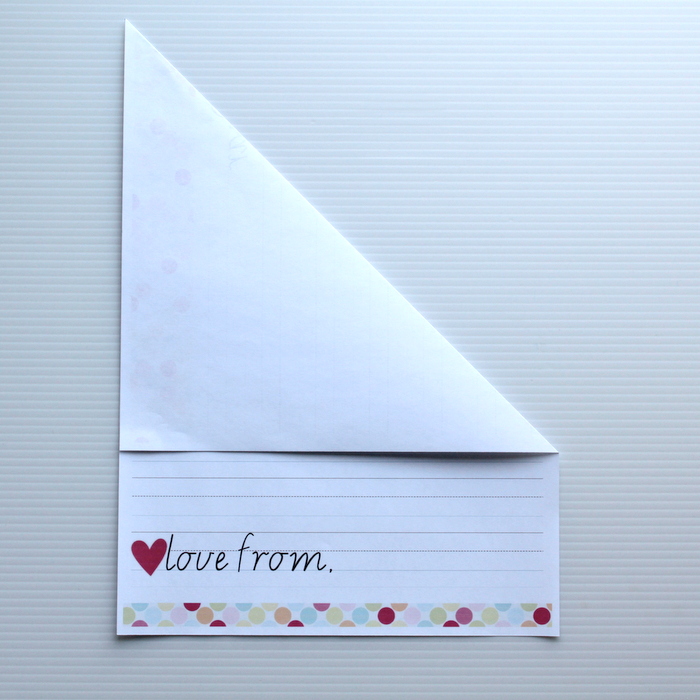
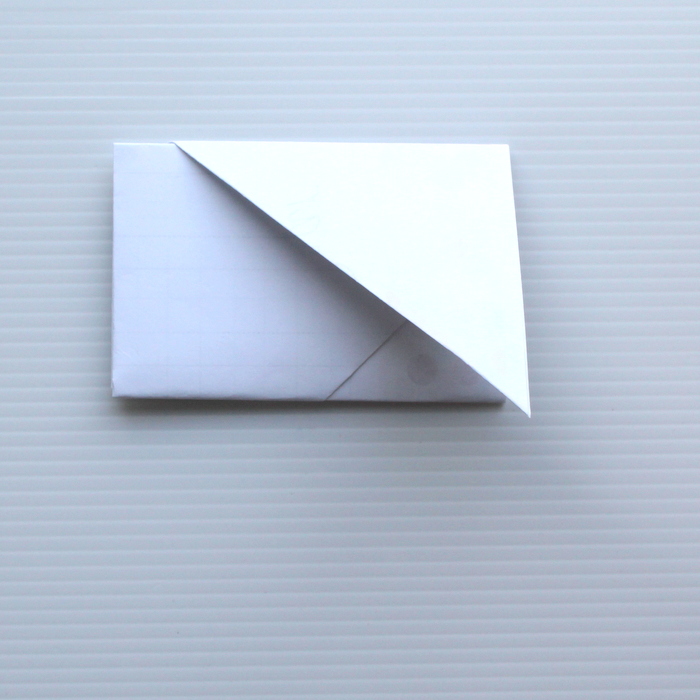
2. Fold the top right corner down to the left hand edge to create a triangle.

letter fold 3

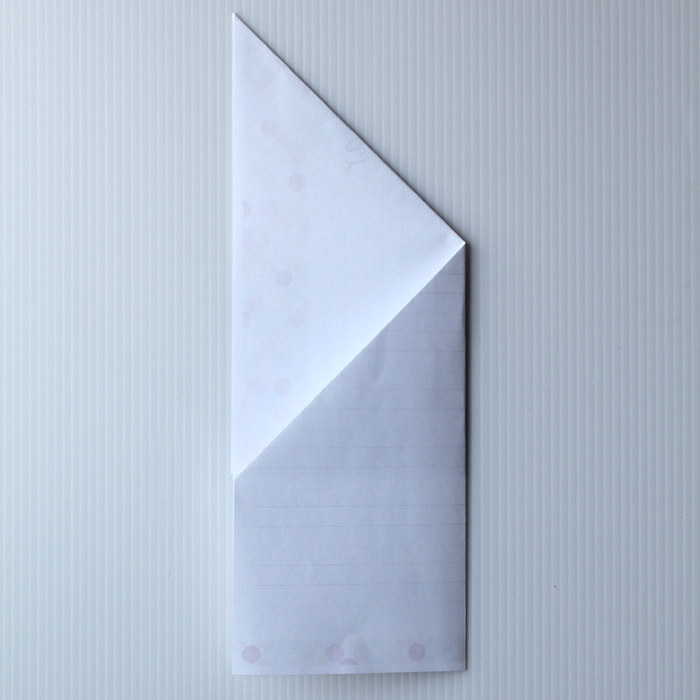
3. Fold the left hand edge across to meet the right hand edge.

letter fold 4

4. Turn the whole piece over.

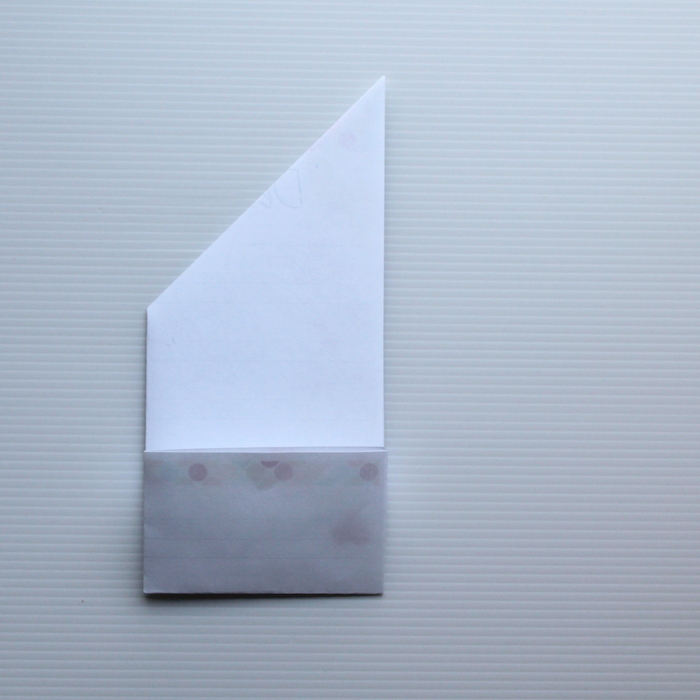
5. Fold the bottom edge up about a third of the way.

letter fold 5

6. The fold it up again, using the first edge as a guide.

letter fold 6

7. Fold the top edge down to create a neat rectangle.

letter fold 7

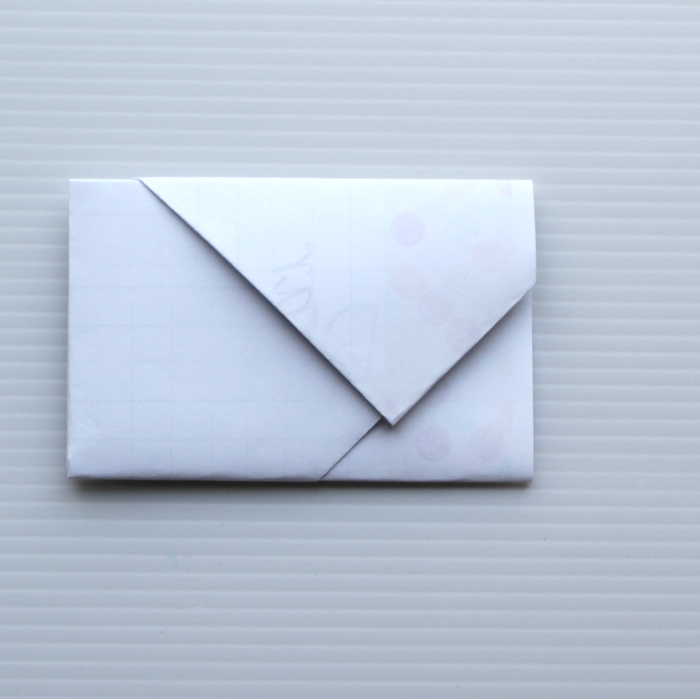
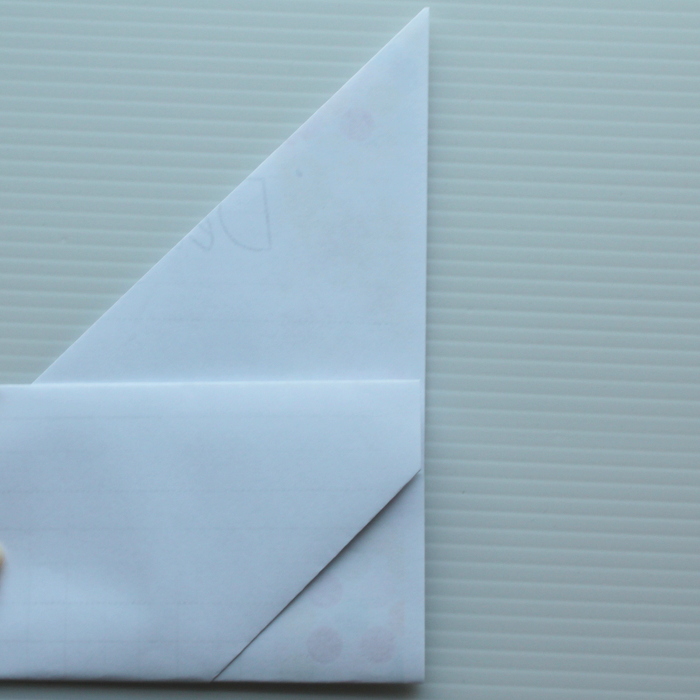
8. Tuck the point into the fold to keep the envelope closed.

Fold a Rectangle Letter into an Envelope

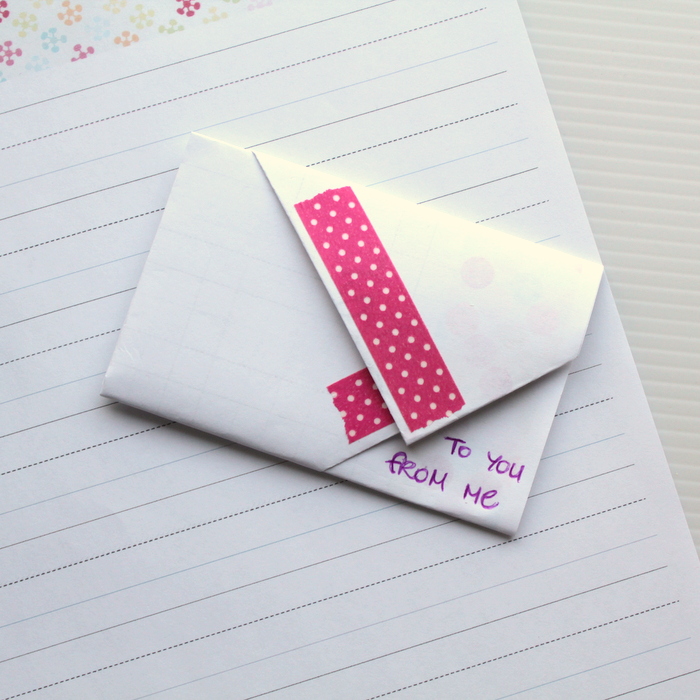
9. I decorated my envelope with some cute washi tape (leftover from this project).

Who will you write notes to?

31 days of crafty tutorials

Filed Under: Crafts, Tutorials Tagged With: 31 Days of Crafty Tutorials, Tops of 2015

« How to Cross Stitch
Sets of 7: Christmas Tutorials »
Disclosure: There are affiliate links in this post.  This just means that if you click through and choose to purchase something I may get a small commission - at no extra cost to you, of course.  This helps me keep the content here at The Crafty Mummy free for everyone.

I love to chat so please leave me a comment or ask a question.

Don't stress if your comment doesn't appear immediately - sometimes I have to moderate comments thanks to spam visitors, but the comments from real readers will always get published. Scroll down to add your thoughts or ask a question.

Comments

  1. Sarah@Tomfo says

    October 17, 2014 at 11:10 PM

    What a cute way to fold a piece of paper into an envelope, I’ve bookmarked this one, so I can do it from now on. Thanks for sharing. x

Hi! I’m the CraftyMummy

Tonya is the voice behind The Crafty Mummy. She dabbles in lots of different crafts – patchwork, quilting, cross-stitch, scrapbooking, knitting, crochet and sewing. This is the record of projects she has done, and the projects she dreams of getting to! Read More…

Search

  • Email
  • Facebook
  • Instagram
  • Pinterest
  • Twitter
  • YouTube
Shop my Affiliate Favourites

Fat Quarter Shop for Fabric and More

Grab the Sew Sampler Box Here

AccuQuilt for Cutting Machines and Dies

QuiltyBox for Monthly Treats in the Mail

CreativeBug for Craft Classes

Pretty Darn Cute for Blog Designs like mine

Creative Market for Fonts, Images, Themes and More

OzGameShop for All the Games

Adrift for Fashion you’ll Love

Kindle Unlimited Membership Plans

Kindle Book List

Click to shop my kindle book list
Shop my Amazon Influencer Shop
Join the CrochetU and learn to crochet
New to TheCraftyMummy.com? Click here to see more
Blog Tools I use for TheCraftyMummy.com

Grammarly

Aweber for email newsletter

CoSchedule to stay organised and share

Milotree for social media

Genesis for blog framework

FoodiePro is my theme

Hosting with WPEngine

Powered by

Recent Articles

Disclosure: There are affiliate links on this site. This means that I may get a commission if you choose to purchase after browsing via these links - at absolutely no extra cost to you, of course. I only recommend products which I use and love, or that I think will be quality products that will be useful to my readers. It is the affiliate links in this site that help me keep my tutorials free of charge. Thank you!

Looking for something? Search here:

Copyright 2015 The Crafty Mummy · Built using Genesis Framework & Foodie Pro Theme