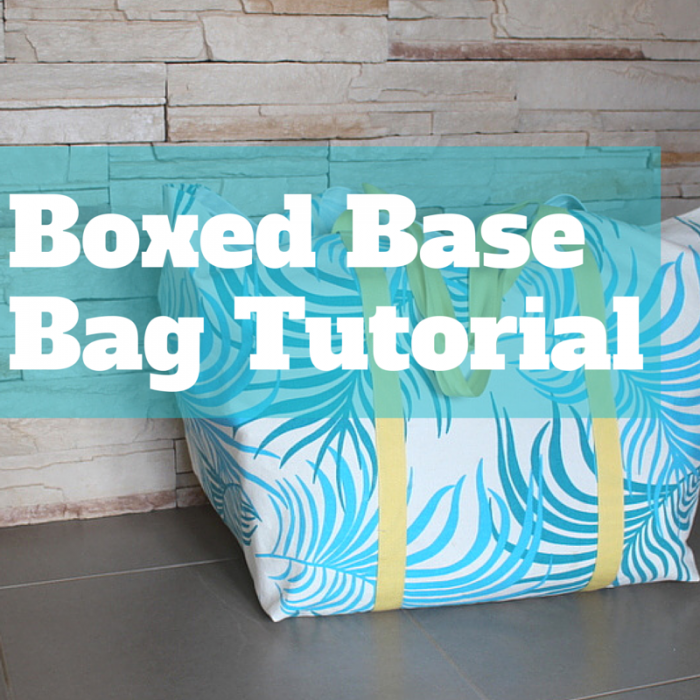
Your Crafty Question
A couple of weeks ago I asked if readers had any questions that I might be able to help with. This was the very first one from Pat.
“I am sewing a bag to put a sewing box into and need to know how many inches to add to the height to accommodate the gusset. I was only wanting to have 2 side seams and the gusset would form the square base. The box’s dimensions are 9″ x 10″ square and 9″ in height.”
A Crafty Answer
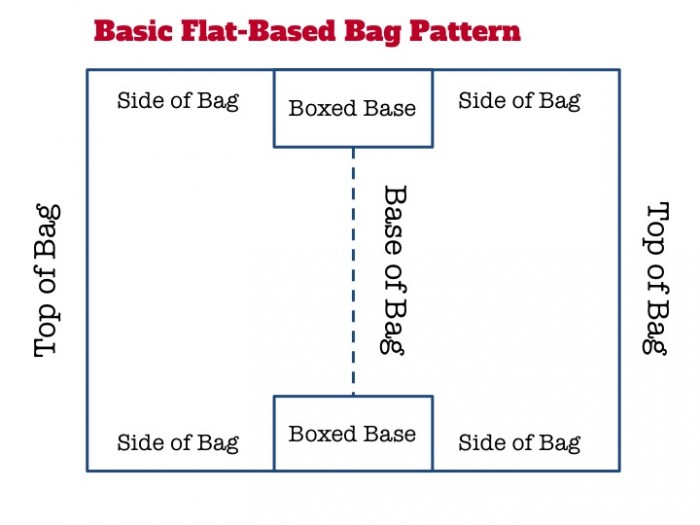
I used to be a little scared of creating a bag with a flat base or gusset but they are really not that tricky once you’ve done a couple. You can work with a large rectangle then box the bottom corners but I find if I want to be sure that the finished bag is a particular size, I use this template:
Working out your Measurements
Let’s look at the calculations you would make using Pat’s box as an example.
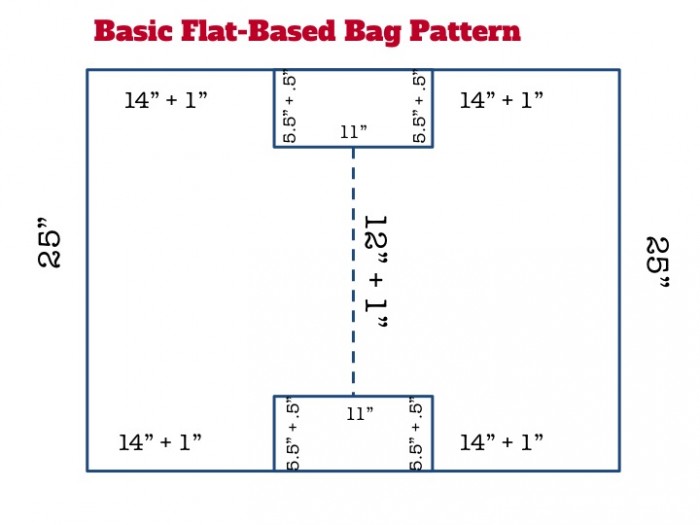
Sides: The box is 9″ tall so the side need to be at least 9″ too. If you want enough extra fabric to cover the top – perhaps so that the top of your bag pulls together above the box, then you need to add some extra here too. An extra 5″ will cover your box in this case, so that’s 14″ for each side.
Base: The base of the bag can be the trickiest to work out but this pattern helps. The dotted line up the centre is the middle of the base. Let’s think of that as the 10″ length of the box. So add an inch to each end of that line for wriggle room and make that 12″. The two smaller rectangles marked “Boxed Base” are going to be cut out to create the boxed base. The longer side of the small rectangle will be twice the length of the short sides. So the longer side would be to accommodate the 9″ side of the box. Add two inches for wriggle room and that measurement becomes 11″. If the longer side is 11″ then to two shorter sides will be half that – 5.5″ each.
Top: The top of the box is 9″ x 10″ so the top of the bag needs to be 9 + 10 + 9 + 10 = 38″ at least. If we made it exactly that much then it would be a tight fit so we need to add some “wriggle” room. We’re going to work out our top measurement from the measurements of the base.
Lost yet?
Here’s a list of the measurements so far:
- Sides: 14″
- Base: 12″ across the middle base and 11″ x 5.5″ for the “Boxed Base” rectangles.
- Top: we’ll get that from our base in a minute
Seams: There’s one more thing we need to add to each of our measurements – the seam allowance. This is the strip of fabric that ends up in the seams when we stitch our pieces of fabric together. I use either half-inch seams or quarter-inch seams on most of my projects. Let’s imagine we’re going to use half-inch seams this time. Each of your edges will have a seam at both ends so you need to add half an inch onto each end of the measurement which means adding 1″ to the base measurement and the side measurements. We’re also going to add 0.5″ to each of the short sides of the boxed base small rectangle.
Top: Now that we have the base measurements all worked out we can add them to find the top measurement on our pattern:
5.5″ + 0.5″ + 12″ + 1″ + 5.5″ + 0.5″ = 25″
Remember this is 25″ on each end of our pattern so together that makes the top of the bag 50″ minus the seams. That’s well beyond the minimum 38″ that we calculated earlier so it’ll be fine.
So here’s what your pattern will look like with the measurements added:
Now you’re ready to cut and sew your bag:
- Measure and cut your fabric using the pattern measurements as your guide.
- Cut out the small rectangle marked “boxed base” on the template so your fabric is a kind of “H” shape.
- Fold in half along the base line with right sides together – and iron a crease to help see the middle base line.
- Pin and sew the side seams.
- Still with right sides together, pull one of the boxed base rectangle “holes” flat so that the middle base line crease you created with your iron lines up with the side seam you just sewed.
- Pin and sew along this seam.
- Repeat on the other end of the base. Now your bag is nearly done!
- Fold down the top of the bag twice to hide the raw edge and top stitch into place.
- Add handles and overlock or pink the raw edges on your seams, turn it through and you’re finished!
This is a great video for another way to create a gusset when you don’t need it to be an exact size:


Wow. Thank you for the instructions and pattern. I have made a bag/carrier already but it isn’t exactly what I wanted so i will definitely be using your pattern to make the bag that I originally imagined. Thank you for the breakdown of how to get the measurements, I will definitely be using these directions to make other bags.
You’re very welcome, Pat. I hope they help