The Crafty Mummy

Crafts. Sewing. Quilting. Crochet. Tutorials.

  • Start Here
  • Welcome
    • Subscribe
    • About Me
      • Copyright
      • Disclosure
      • Privacy Policies
    • Advertise
    • Sharing
      • Recommendations
      • Shopping & Coupons
      • Books
  • Explore
    • Crafts
      • Beading
      • Kids
      • Paint
      • Storage
      • Christmas Crafts
    • Sewing
    • Quilting
    • Stitching
    • Crochet
      • Yarn
    • Life
      • Food
      • Organisation
    • Blogging
      • How To
      • Social Media
      • WordPress Plugins
      • Photography
  • Tutorials
    • Tips
  • Shop on Etsy
  • Shop on Redbubble

How to Make Paper Roses

by Tonya Grant |Filed Under: Crafts, Tutorials Tagged With: Papercrafts Get a Weekly Update of all Articles

How to make Paper Roses: Learn how to make the easiest paper rose ever! All you will need is red paper, scissors and a drop of glue.

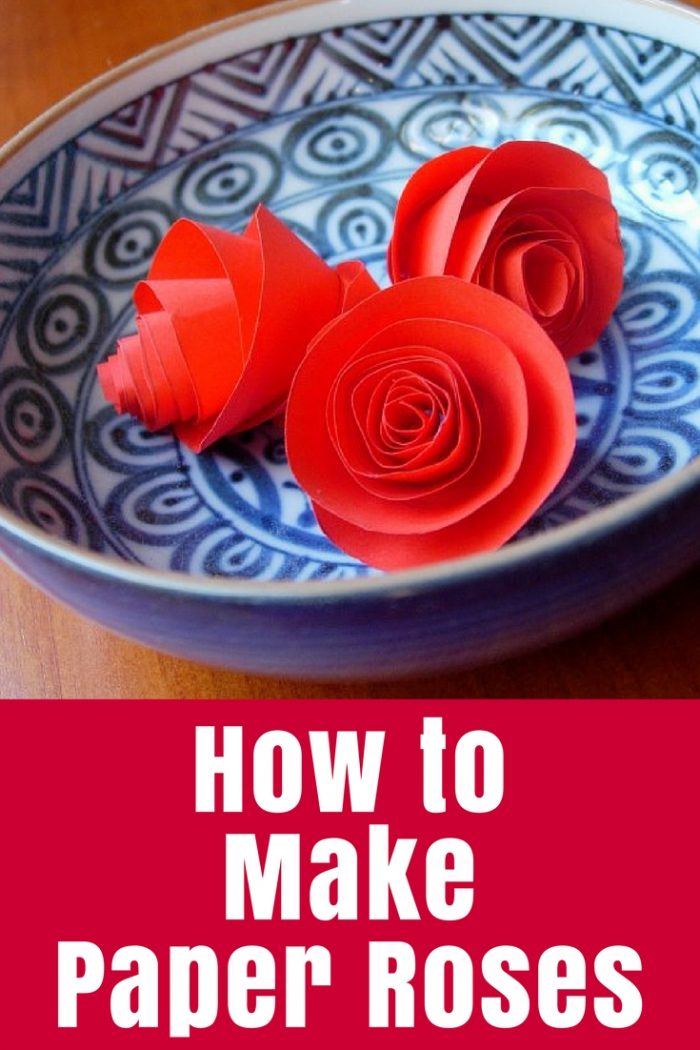
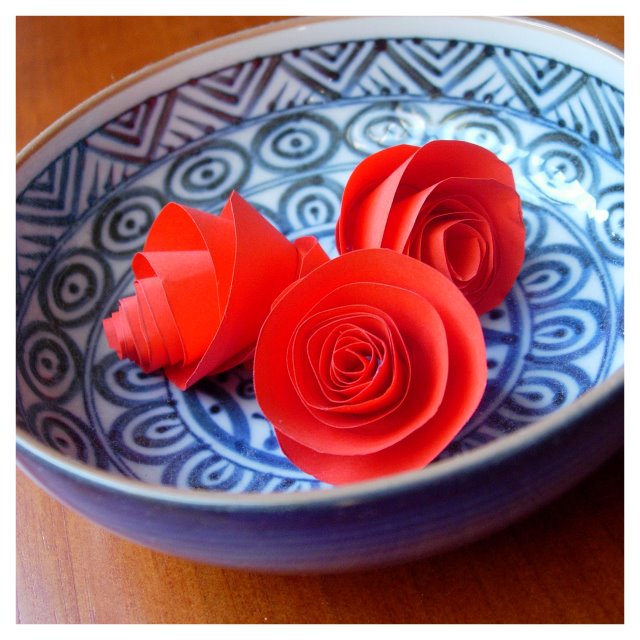
These paper roses may be one of the easiest crafts I have ever made! They take less than five minutes and all you need is red paper and a pair of scissors.

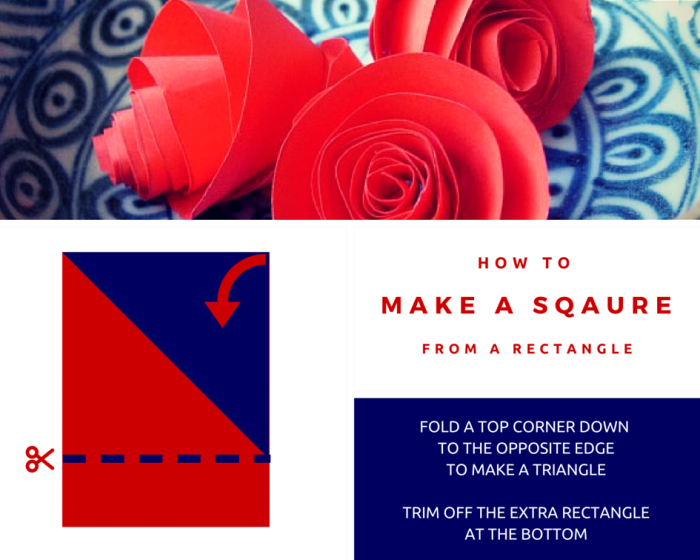
Grab your paper and make sure it is a square.

If it is a rectangle, just fold one top corner down to the opposite edge and line up the edges to create a triangle. Then trim off whatever paper is outside the triangle – usually another rectangle shape. When you unfold your triangle you will have a square!

how to make a square from a rectangle

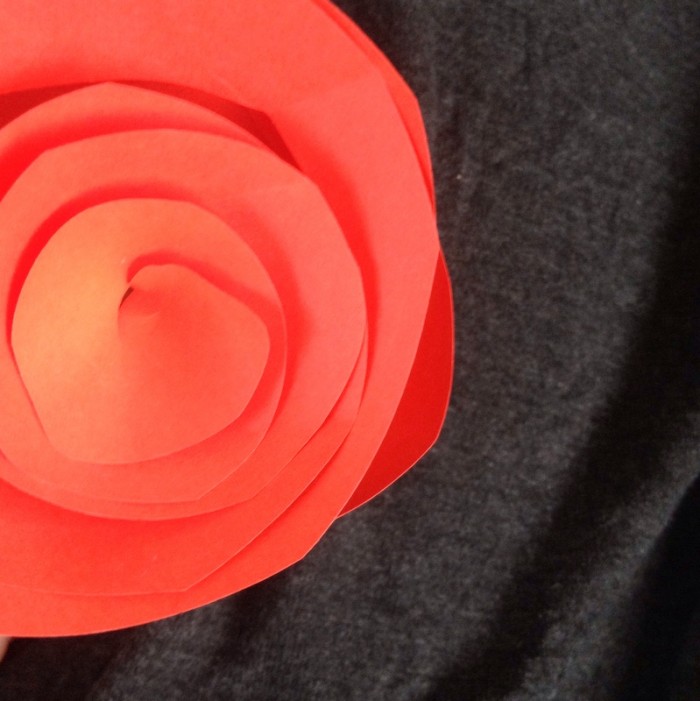
Now start cutting from the edge of your square and cut in a spiral, round and round until you get to the centre. Trim of the odd shaped edge strip when you finish.

paper roses spiral

Next, starting from the centre of the spiral gradually wrap the paper around itself to create a rose shape. Wrap it super tight, like a roll of paper tube. The tighter you wrap it, the better the rose will sit once you release it.

paper roses spiral curling

Once you have the whole spiral wrapped into a tight tube, sit it on a table and let it loosen. It should loosen enough to look like a rose. You can add a little tape or glue to stop it loosening any further, or just let it go.

paper rose

What To Do with Your Paper Roses

  • Fill a little bowl and display
  • Add a wire or pipe cleaner stem
  • Fill a jar
  • Attach to a gift
  • Add a ribbon and tie
  • Attach a handful to a string for a garland
  • Start with a large piece of card and make them jumbo size
  • For a more sturdy version, use felt

How to make Paper Roses: Learn how to make the easiest paper rose ever! All you will need is red paper, scissors and a drop of glue.

Filed Under: Crafts, Tutorials Tagged With: Papercrafts

« Sashiko Project
Beading: Bobbin Necklace »
Disclosure: There are affiliate links in this post.  This just means that if you click through and choose to purchase something I may get a small commission - at no extra cost to you, of course.  This helps me keep the content here at The Crafty Mummy free for everyone.

I love to chat so please leave me a comment or ask a question.

Don't stress if your comment doesn't appear immediately - sometimes I have to moderate comments thanks to spam visitors, but the comments from real readers will always get published. Scroll down to add your thoughts or ask a question.

Hi! I’m the CraftyMummy

Tonya is the voice behind The Crafty Mummy. She dabbles in lots of different crafts – patchwork, quilting, cross-stitch, scrapbooking, knitting, crochet and sewing. This is the record of projects she has done, and the projects she dreams of getting to! Read More…

Search

  • Email
  • Facebook
  • Instagram
  • Pinterest
  • Twitter
  • YouTube
Shop my Affiliate Favourites

Fat Quarter Shop for Fabric and More

Grab the Sew Sampler Box Here

AccuQuilt for Cutting Machines and Dies

QuiltyBox for Monthly Treats in the Mail

CreativeBug for Craft Classes

Pretty Darn Cute for Blog Designs like mine

Creative Market for Fonts, Images, Themes and More

OzGameShop for All the Games

Adrift for Fashion you’ll Love

Kindle Unlimited Membership Plans

Kindle Book List

Click to shop my kindle book list
Shop my Amazon Influencer Shop
Join the CrochetU and learn to crochet
New to TheCraftyMummy.com? Click here to see more
Blog Tools I use for TheCraftyMummy.com

Grammarly

Aweber for email newsletter

CoSchedule to stay organised and share

Milotree for social media

Genesis for blog framework

FoodiePro is my theme

Hosting with WPEngine

Powered by

Recent Articles

Disclosure: There are affiliate links on this site. This means that I may get a commission if you choose to purchase after browsing via these links - at absolutely no extra cost to you, of course. I only recommend products which I use and love, or that I think will be quality products that will be useful to my readers. It is the affiliate links in this site that help me keep my tutorials free of charge. Thank you!

Looking for something? Search here:

Copyright 2015 The Crafty Mummy · Built using Genesis Framework & Foodie Pro Theme