The Crafty Mummy

Crafts. Sewing. Quilting. Crochet. Tutorials.

  • Start Here
  • Welcome
    • Subscribe
    • About Me
      • Copyright
      • Disclosure
      • Privacy Policies
    • Advertise
    • Sharing
      • Recommendations
      • Shopping & Coupons
      • Books
  • Explore
    • Crafts
      • Beading
      • Kids
      • Paint
      • Storage
      • Christmas Crafts
    • Sewing
    • Quilting
    • Stitching
    • Crochet
      • Yarn
    • Life
      • Food
      • Organisation
    • Blogging
      • How To
      • Social Media
      • WordPress Plugins
      • Photography
  • Tutorials
    • Tips
  • Shop on Etsy
  • Shop on Redbubble

Mini Weaving Project

by Tonya Grant |Filed Under: Crafts Get a Weekly Update of all Articles

Mini Weaving Key Fob

If you follow me on Instagram, you would have seen a little tiny weaving project come together a little while ago. I’ve been wanting to try some weaving after seeing lots around the Net recently, and I also needed to replace the fob on my keys so I created a tiny woven piece that will hang off my keys and help me keep track of them.
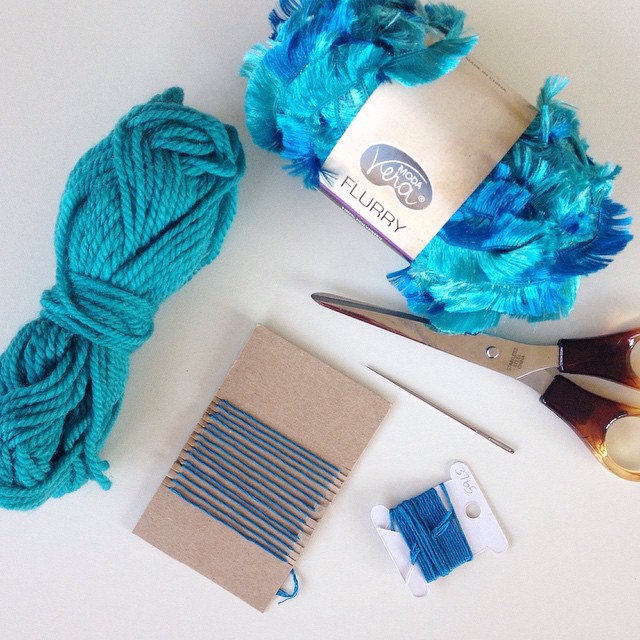
weaving stuff

What I Used:

  • Piece of cardboard
  • Scissors
  • Stranded embroidery thread (DMC 3765)
  • Yarn from my stash: Flurry from Moda Vera and matching 8 ply yarn
  • Large yarn needle

weaving start

What I Did:

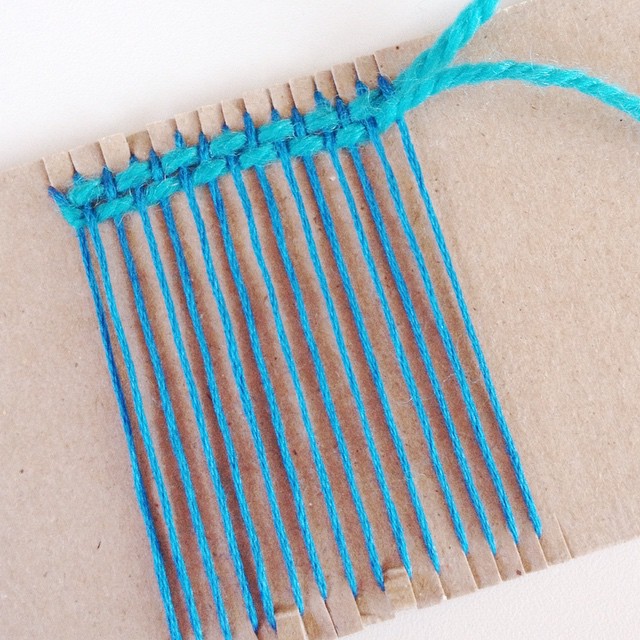
I started by cutting little slots in my cardboard about 1mm apart. I cut 15 slots on each side.

Then I wrapped my embroidery thread around the card into each slot to create the base threads for my weaving.

weaving progress

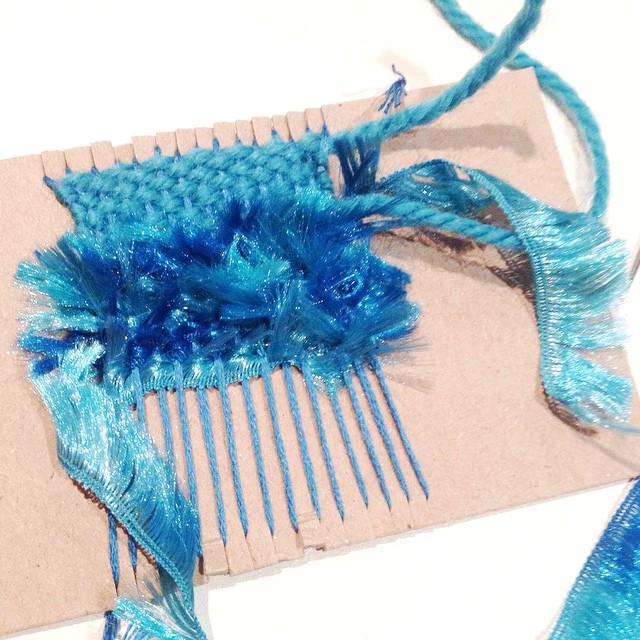
I started weaving with my plain yarn leaving a tail of an inch or so and using my yarn needle to help me go under every second thread in my base. At the end of each row I gently pushed the yarn towards the top so there were no gaps between rows.

weaving almost done

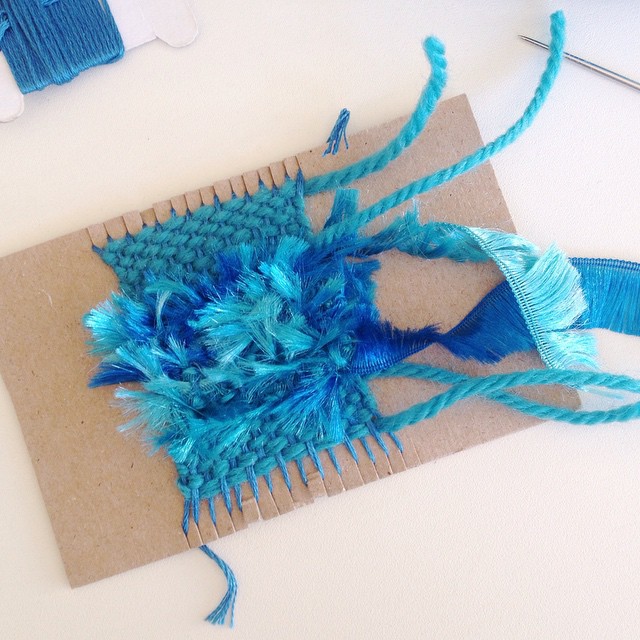
After a block of plain yarn I left the tail hanging and started weaving the flurry “fluffy” yarn, again leaving a short tail. This yarn was a little trickier to weave with because the fluffy ends made it harder to see what I was doing but it looks so cute done.

Finally I switched back to the plain yarn to finished the block.

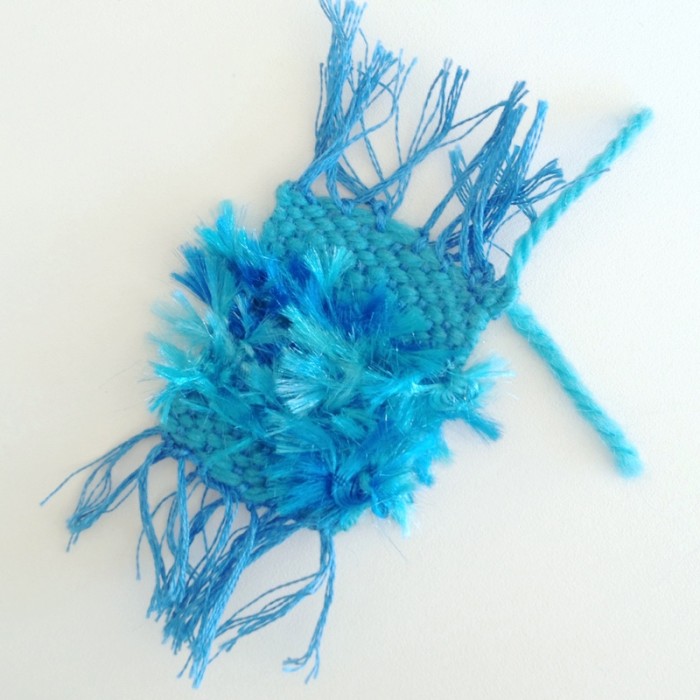
With the weaving finished I just had to work out what to do with the ends and how to remove it from my cardboard “loom”.

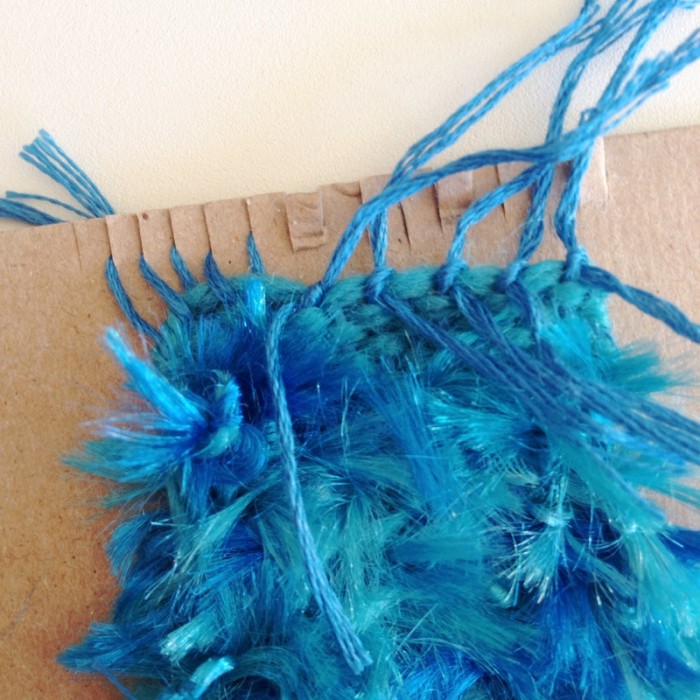
Where I switched yarns I had tails hanging. these I simply tied together and trimmed. The knots are hidden by the fluffy yarn. The finishing and ending tails I carefully wove down the side of the block of weaving so they were hidden and wouldn’t unravel.

weaving back

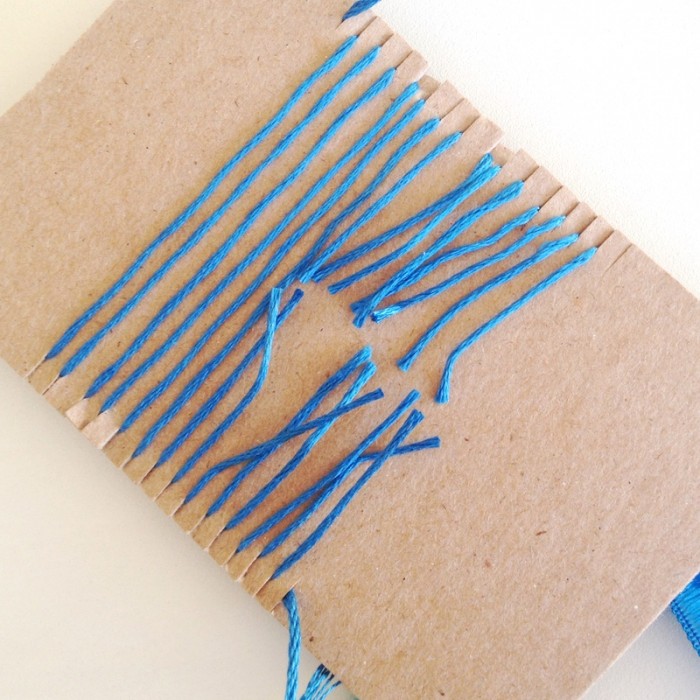
Here’s what the back of my weaving looked like. I cut all the thread in about the middle. Then I took two threads at a time beside each other, slipped them out of the slots in the cardboard and tied them together in a simple knot. (See picture below)

After I had done this to all the threads on each end, it went back and tied alternating pairs of threads together. My goal was really to stop it all unravelling. This seemed to be enough.

I had originally imagined that the ends would be like fringing, but I realise that they weren’t quite long enough to give that effect. Next time I would make my cardboard loom larger so that the ends would create fringing when I got to this stage.

weaving tie off

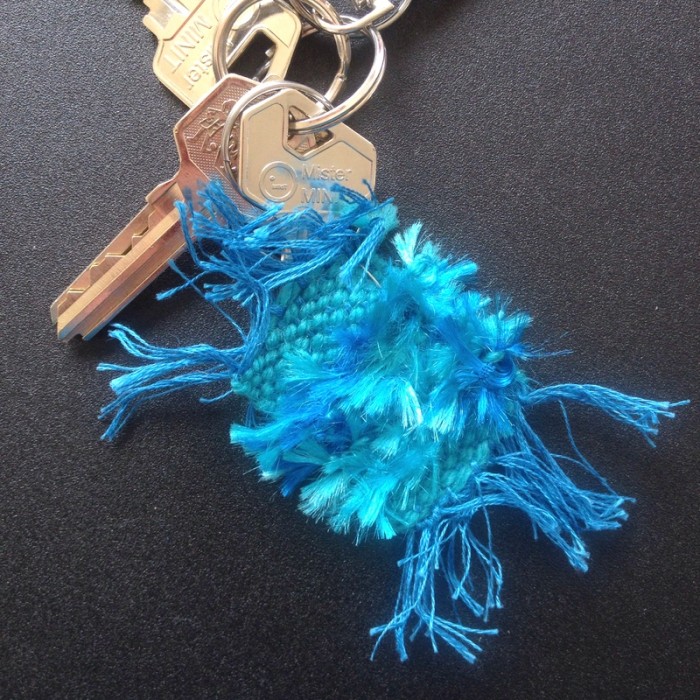
With my mini weaving fairly secure and unlikely to unravel, I attached a tiny safety pin and a slip ring so that I could hang it on my keys. It is a pretty little thing but it is making me smile when I grab the keys each morning.

Now I’m itching to try a bigger piece of weaving! Any tips or tricks for me?

weaving done


Filed Under: Crafts

« Life: We Are All Homemakers
Help with a Ripple Crochet Blanket »
Disclosure: There are affiliate links in this post.  This just means that if you click through and choose to purchase something I may get a small commission - at no extra cost to you, of course.  This helps me keep the content here at The Crafty Mummy free for everyone.

I love to chat so please leave me a comment or ask a question.

Don't stress if your comment doesn't appear immediately - sometimes I have to moderate comments thanks to spam visitors, but the comments from real readers will always get published. Scroll down to add your thoughts or ask a question.

Hi! I’m the CraftyMummy

Tonya is the voice behind The Crafty Mummy. She dabbles in lots of different crafts – patchwork, quilting, cross-stitch, scrapbooking, knitting, crochet and sewing. This is the record of projects she has done, and the projects she dreams of getting to! Read More…

Search

  • Email
  • Facebook
  • Instagram
  • Pinterest
  • Twitter
  • YouTube
Shop my Affiliate Favourites

Fat Quarter Shop for Fabric and More

Grab the Sew Sampler Box Here

AccuQuilt for Cutting Machines and Dies

QuiltyBox for Monthly Treats in the Mail

CreativeBug for Craft Classes

Pretty Darn Cute for Blog Designs like mine

Creative Market for Fonts, Images, Themes and More

OzGameShop for All the Games

Adrift for Fashion you’ll Love

Kindle Unlimited Membership Plans

Kindle Book List

Click to shop my kindle book list
Shop my Amazon Influencer Shop
Join the CrochetU and learn to crochet
New to TheCraftyMummy.com? Click here to see more
Blog Tools I use for TheCraftyMummy.com

Grammarly

Aweber for email newsletter

CoSchedule to stay organised and share

Milotree for social media

Genesis for blog framework

FoodiePro is my theme

Hosting with WPEngine

Powered by

Recent Articles

Disclosure: There are affiliate links on this site. This means that I may get a commission if you choose to purchase after browsing via these links - at absolutely no extra cost to you, of course. I only recommend products which I use and love, or that I think will be quality products that will be useful to my readers. It is the affiliate links in this site that help me keep my tutorials free of charge. Thank you!

Looking for something? Search here:

Copyright 2015 The Crafty Mummy · Built using Genesis Framework & Foodie Pro Theme