The Crafty Mummy

Crafts. Sewing. Quilting. Crochet. Tutorials.

  • Start Here
  • Welcome
    • Subscribe
    • About Me
      • Copyright
      • Disclosure
      • Privacy Policies
    • Advertise
    • Sharing
      • Recommendations
      • Shopping & Coupons
      • Books
  • Explore
    • Crafts
      • Beading
      • Kids
      • Paint
      • Storage
      • Christmas Crafts
    • Sewing
    • Quilting
    • Stitching
    • Crochet
      • Yarn
    • Life
      • Food
      • Organisation
    • Blogging
      • How To
      • Social Media
      • WordPress Plugins
      • Photography
  • Tutorials
    • Tips
  • Shop on Etsy
  • Shop on Redbubble

Easiest Kid’s Scarf Ever Tutorial

by Tonya Grant |Filed Under: Crafts, Tutorials Tagged With: Clothes, Kids Get a Weekly Update of all Articles

As I sat outside Little Miss’ classroom on Friday afternoon,
I was looking at the scarf of one of her classmates.
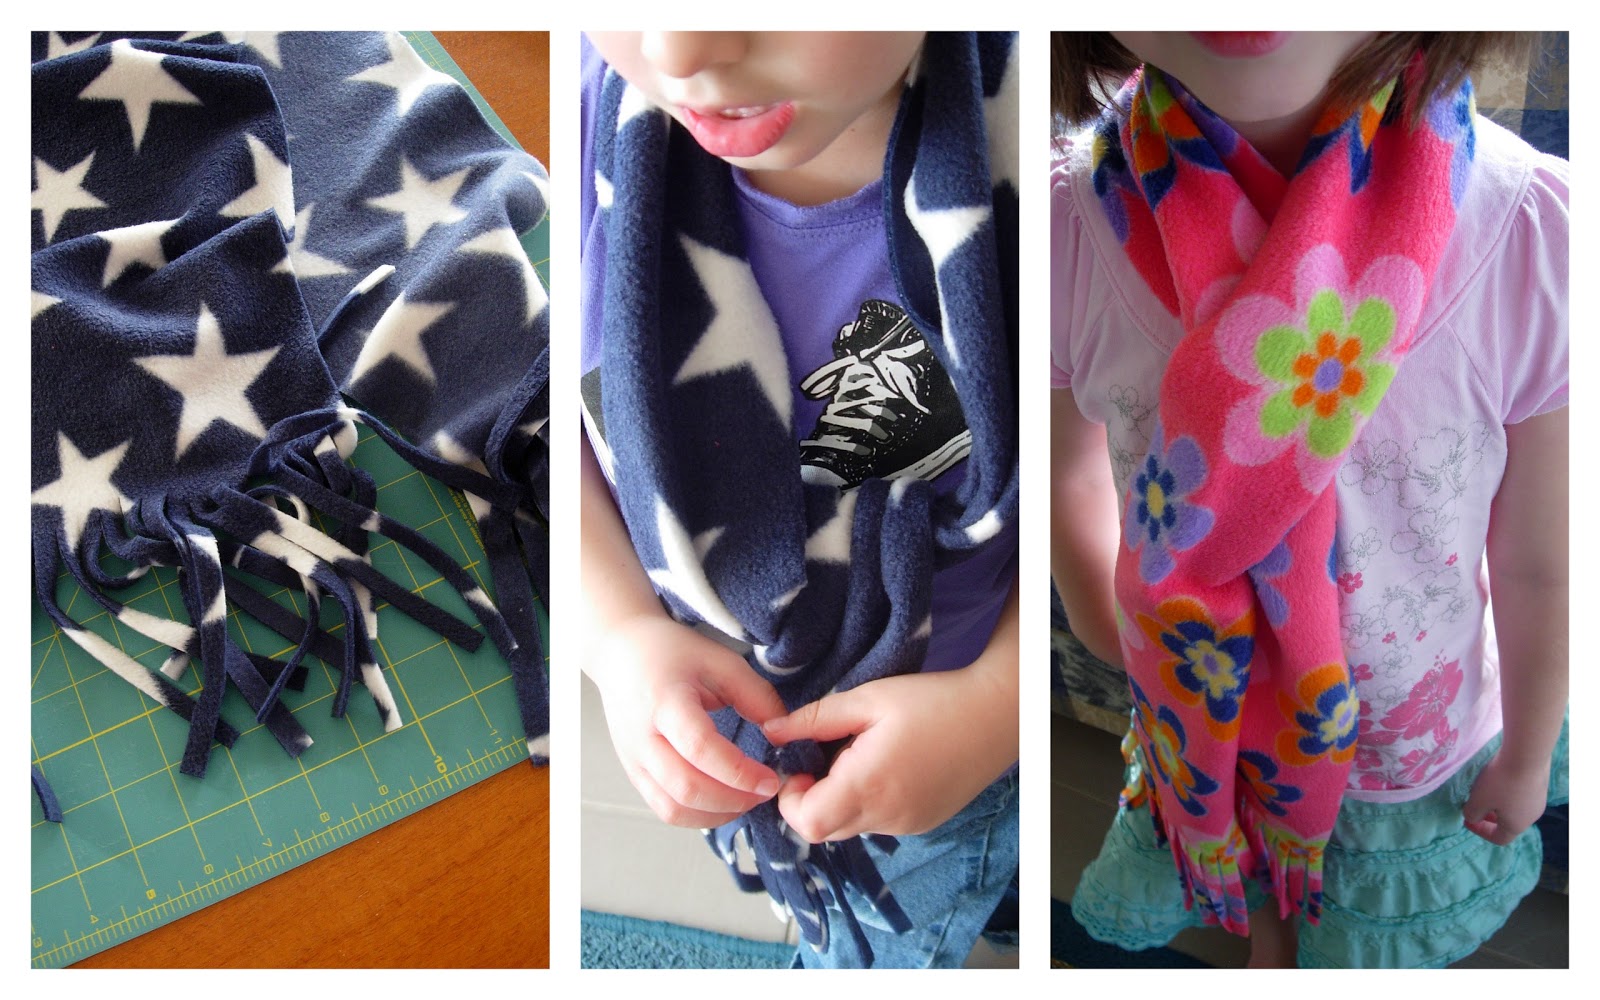
Soft, snuggly polar fleece…
Fringed edge…
I can make one like that!
So here’s the
Tutorial
 I started with approximately 30cm (12″) of each of my polar fleece fabrics
I ended up with 4 scarves
(So if you just want one scarf, you’ll need 15cm or 6″)
 I used my rotary cutter and cutting mat,
so this whole project took about 10 minutes.
But you could just as easily use scissors.
First fold your fabric in half and match the selvedge edges.
Then trim the long edges so that they are straight.
I trimmed off the selvedges at this point too.
The beauty of polar fleece is that it won’t fray so no sewing!
 Next trim your scarf to the width you want.
I went for about 15cm or 6″ wide so that I got two scarves from each piece of fabric.
Now you could leave them just like that and be done,
but I wanted fringing.
So I just cut the edges in about 15cm or 6″
about half a centimetre (quarter inch) apart.
If you leave it folded, you’ll do both ends of the scarf at once.
Kids are loving them and I’ll just be able to toss them in with the washing when they need it.

Filed Under: Crafts, Tutorials Tagged With: Clothes, Kids

« Making pictures like Eric Carle
Raggy Flower Quilt »
Disclosure: There are affiliate links in this post.  This just means that if you click through and choose to purchase something I may get a small commission - at no extra cost to you, of course.  This helps me keep the content here at The Crafty Mummy free for everyone.

I love to chat so please leave me a comment or ask a question.

Don't stress if your comment doesn't appear immediately - sometimes I have to moderate comments thanks to spam visitors, but the comments from real readers will always get published. Scroll down to add your thoughts or ask a question.

Comments

  1. Michelle says

    June 13, 2010 at 6:39 PM

    BRILLIANT!! shame it is never cold enough for a scarf here. I would love to make these for my boys.

  2. Jane says

    June 13, 2010 at 8:42 PM

    I've made these before but was never smart enough to think o fusing my rotary cutter. Now I'm saying to myself, "Duh!" Thanks for sharing!
    🙂

  3. Angie says

    June 14, 2010 at 2:56 AM

    Oh these are like the no sew blankets. I made a blankete like that for my two older boys. Which reminds me I gotta make one for the baby now

  4. Corrie says

    June 14, 2010 at 7:13 PM

    noooooooooooo way! that is so easy! I love it! oh my gosh I have some russian doll fleece at the top of my fabric wardrobe!

    love it , thanks for sharing

    Corrie:)

  5. C.R.A.F.T. says

    June 15, 2010 at 11:41 PM

    wow! you mkae it look so easy! thank you for linking up to MMM 🙂

  6. ★All Thingz Related★ says

    June 16, 2010 at 1:01 AM

    Thanks for helping us have a great Tuesday at Anything Related! ~Bridgette

  7. Stephanie Lynn says

    June 16, 2010 at 1:42 AM

    These are super cute! Love the star fleece! Great tutorial – they seem really easy! I'm adding these to my winter to-do! Thanks so much for joining the Sunday Showcase! I greatly appreciate it! Hope you have a wonderful week! ~ Stephanie Lynn

  8. Jenn @ Delicious Ambiguity says

    June 16, 2010 at 10:25 PM

    This is fabulous! It's freezing in Sydney at the moment and I'd love to make one for my son. I love this idea

  9. Diana says

    June 17, 2010 at 3:31 AM

    I saw double sided versions of these for sale in a touristy craft shop in Porvoo- 1 hour from helsinki – today. 33 Euro's each!! About $48 AUD.

    All I could think was that Crafty Mummy's version would be so much cheaper…..

  10. Laura Ingalls Gunn says

    June 17, 2010 at 7:36 AM

    This project made me heart go pitter pat. Well done.

  11. Leslie says

    June 17, 2010 at 4:38 PM

    What a great tutorial! I love your cute scarfs! Thanks for linking up to Hoo's got talent!

  12. Cori Benson says

    June 18, 2010 at 1:27 PM

    Cute, Cute scarves!! How easy are those?? Love it!

  13. Cheryl says

    June 18, 2010 at 2:07 PM

    I love the easiness of fleece! Thanks for linking to Craftastic Monday:)

  14. Jenn @ Delicious Ambiguity says

    June 18, 2010 at 10:46 PM

    Thanks for linking up to Tot Tuesdays! I really appreciate it! ☺

  15. Lanie Ree says

    June 18, 2010 at 11:31 PM

    Man, I need a rotary cutter so bad! This is such a fun and easy tutorial.

    Thank you for participating in the Creative Therapy Session at Life in the Pitts

  16. Kami @ Sweet Charli... says

    June 19, 2010 at 3:59 AM

    What a great, super-easy tutorial! Even the kids could help with this! Thanks for sharing! 🙂

  17. Miri says

    June 19, 2010 at 6:07 AM

    Brilliant! Cute and quick!

  18. Tonia says

    June 19, 2010 at 7:07 AM

    So cute!I will have to try these for the kids this winter for sure! Thanks for linking up to What the Cr@ft!?

  19. Michelle says

    June 19, 2010 at 8:32 AM

    What a terrific idea!

  20. Coloradolady says

    June 19, 2010 at 9:49 AM

    That star scarf is great for the fourth coming up! Great job…so cute! Have a great weekend.

  21. Threeundertwo says

    June 19, 2010 at 10:56 AM

    Great idea for cozy scarves, and a great way to use the remnants I sometimes find in the fabric store. Thanks so much for linking up to
    Finished for Friday.

  22. [email protected] says

    June 19, 2010 at 1:23 PM

    Thanks so much for linking up to Pajama Party at Life In My Pjs!!

    ~Ela

  23. Annemarie's Breiblog says

    June 19, 2010 at 5:12 PM

    Oh this is really nice! If you like you can add a link to your blog and a picture of something you've made yourself on my blog. Just check my latest blog post, it's really simple. Hope to see you there!
    Bye!
    Annemarie

  24. TheCraftInMe says

    June 20, 2010 at 12:10 AM

    Such a great way to personalize, thanks for the tutorial!

  25. Annemarie's Breiblog says

    June 21, 2010 at 6:59 AM

    Hi! Thank you so much for posting the lovely picture on my blog. If you like you can add something every Saturday. You're very welcome to add something again!
    Bye!
    Annemarie

  26. Craft Envy says

    June 21, 2010 at 10:12 AM

    Well, I'm thinking Christmas gifts to my nieces and nephews… 🙂 Thanks so much for linking up!

  27. Its A Blog Party says

    June 22, 2010 at 6:25 AM

    Very cute!
    Thanks for linking up!
    ~Liz

  28. elizabeth @ twelvecrafts says

    July 1, 2010 at 9:52 AM

    I did one of these a few years ago for a niece. I had forgotten about it and it's the perfect stocking stuffer! Thanks so much!

  29. Megan says

    July 7, 2010 at 4:26 AM

    What a perfect idea! I'm planning on doing a "homemade" Christmas this year, I'm definitely adding this project to my list! Thanks for sharing!

  30. Kat @ Black Kats Design says

    August 5, 2010 at 3:06 AM

    Cute and so easy! I love working with fleece – no sew!!

    Thanks for linking up to the “Cheap Thrills Thursday” party at Black Kats Design. I hope you had fun and will join in again next Thursday!
    Kat

  31. Renegades says

    November 24, 2010 at 6:05 AM

    What a cute and easy gift idea.

  32. Clara says

    January 21, 2011 at 3:19 AM

    I was recently looking in a clearance bin at a major dept. store and saw some pretty fleece scarves that had been reduced multiple times. I look very closely and could actually see where the edges had been cut and thought, "I can do that too"….just like you. So easy and they are so warm too and you can make them for a song.

Hi! I’m the CraftyMummy

Tonya is the voice behind The Crafty Mummy. She dabbles in lots of different crafts – patchwork, quilting, cross-stitch, scrapbooking, knitting, crochet and sewing. This is the record of projects she has done, and the projects she dreams of getting to! Read More…

Search

  • Email
  • Facebook
  • Instagram
  • Pinterest
  • Twitter
  • YouTube
Shop my Affiliate Favourites

Fat Quarter Shop for Fabric and More

Grab the Sew Sampler Box Here

AccuQuilt for Cutting Machines and Dies

QuiltyBox for Monthly Treats in the Mail

CreativeBug for Craft Classes

Pretty Darn Cute for Blog Designs like mine

Creative Market for Fonts, Images, Themes and More

OzGameShop for All the Games

Adrift for Fashion you’ll Love

Kindle Unlimited Membership Plans

Kindle Book List

Click to shop my kindle book list
Shop my Amazon Influencer Shop
Join the CrochetU and learn to crochet
New to TheCraftyMummy.com? Click here to see more
Blog Tools I use for TheCraftyMummy.com

Grammarly

Aweber for email newsletter

CoSchedule to stay organised and share

Milotree for social media

Genesis for blog framework

FoodiePro is my theme

Hosting with WPEngine

Powered by

Recent Articles

Disclosure: There are affiliate links on this site. This means that I may get a commission if you choose to purchase after browsing via these links - at absolutely no extra cost to you, of course. I only recommend products which I use and love, or that I think will be quality products that will be useful to my readers. It is the affiliate links in this site that help me keep my tutorials free of charge. Thank you!

Looking for something? Search here:

Copyright 2015 The Crafty Mummy · Built using Genesis Framework & Foodie Pro Theme