A few weeks back I wrote an introductory post about using Pinterest and then somehow life got in the way. Sigh.
That post gave you the introduction to All About Pinterest – check it out here.
But I’m back today with the next in the series: How I use Pinterest as a Pin Board.
Now if you’ve been using Pinterest for a while now, you will understand that it is like a digital pinboard where you can pin things you find on the internet.
Back in the day, when I found something online that I wanted to be able to find again later to read it properly (or often to try to make the item!), I would “Bookmark” it in my browser. (Common browsers include Internet Explorer, Safari or Chrome and each has a function to Bookmark or Save web pages.) Bookmarking would add the link to a list and I’d be able to click the item in the list to go back to that page another time.
But after a while my lists became huge, and although I could set up Folders to organise them, I rarely got around to that so finding things later on was often difficult.
Pinterest solves this problem for me, and improves on that system by saving images so I can quickly scan and find the item I saved.
How to “Bookmark” to Pinterest
So how do you save your bookmarks or “Pins” to Pinterest? First you need to sign up for a free account. It is easy and you just need your name and an email address. Go here to sign up.
If you want to, you can go into the Settings and add a picture of yourself, fill in your Profile information, and add links to your website and social media profiles. But you don’t have to.
Next I would add the Pinterest button to your browser so that you can pin any time from any page. You will find that many web pages have a pin button somewhere on them to help you pin their articles, but when they don’t, it can be very frustrating so this little gadget in your browser will help you there. Go to this page in the Pinterest help guide to learn how to add a Pin button to your browser.
Now you’re ready to pin something. Say you want to pin this article, just click the Pin button up the top of your browser and a pop-up window will appear. If you’re not logged into Pinterest, it will ask you to, then you can select which board you want to pin the article onto.
Oh yes, boards…
What Boards should you create?
Your pins get organised into Boards as you pin them. You will always have to option to pick which board to pin to, or to create a new board as you pin. It might be helpful to create a few boards up front if you know you will want them.
Just go to your Pinterest profile page – the URL will be something like this http://pinterest.com/craftymummy/ but instead of “craftymummy” you would have your user name. You should be able to see any boards that you have but the very first board will be grey with a cross in the middle and say “Create a board”. Click this one to create a new board, giving it a name, description and if you like a category.
You can also make the board “secret” if you don’t want anyone to see it yet. Plus you could invite a friend to pin to your board as well if you wish – we’ll talk about that more later in this series so stay tuned.
Make sure you click Save to finish up.
You can go back and create as many boards as you like – or you can create them in the pop-up when you want to pin something.
Naming your Boards
You can name your boards anything you like, and there are some cute and clever names out there. You might go with a theme in your names or a particular wording in all of them. You might want to create sub-categories or sets of boards by having similar names, e.g. “Crafts: Kids”, “Crafts: Lego” and “Crafts: Paper”. You just want to be able to find the boards again easily when you want to pin more things to them.
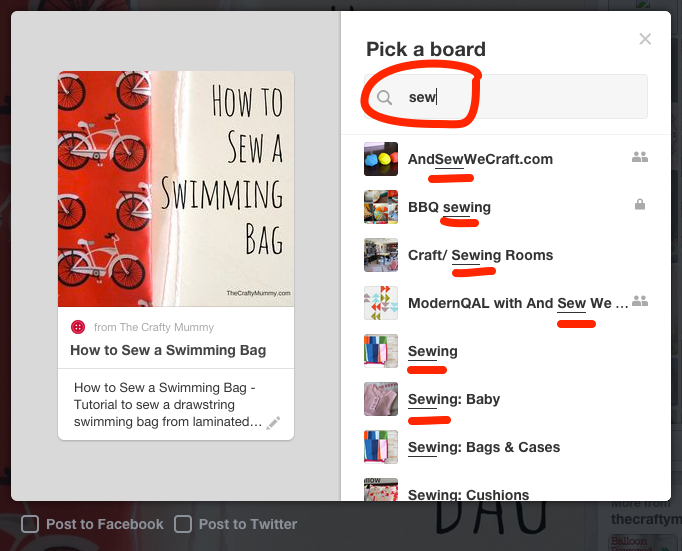
When you go to pin something, the board list will come up alphabetically, but will also show you “most recently pinned to” board at the top of the list. If you type the first letter of the board name into the box, it will show just boards that start with that letter making it easier to find the board you’re looking for.
Blogger Tip: If you are setting up Pinterest for professional use, either with a business or as a blogger, then you might want to think a little more strategically about naming your boards. It will help you be found on Pinterest and thus be more likely to help grow your business or blog following. Pinterest suggests boards to other people in the search function and in a couple of other ways on the site. They pick which boards to share by their names, just as things get found in search by their names and descriptions. So if you have a board full of beautiful quilts and you want it to be found and shared, keep it simple and call it “Quilts” or “Quilting”. If you call it “Pretty Fabrics” or “Designs I Love” then Pinterest may not understand that it is a board of quilts, and therefore will not share it for you.
Organising your Boards
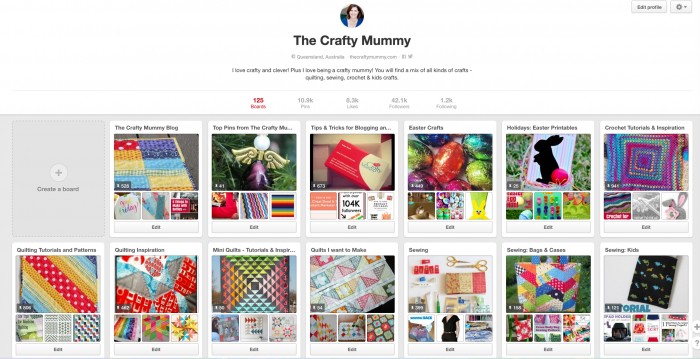
I have lots of boards now that I’ve been pinning for a few years, so I’ve had a think about how to organise them.
This is very personal and you may not care or you may have a particular idea of which order you want your boards to appear.
For me, the first two boards on my profile are those with pins from here, TheCraftyMummy.com, because I really want people to find those if they find me. Then I try to have a couple of boards featured next, usually related to crafts for upcoming holidays like Easter or Christmas. Next I list my most popular boards, about 4 or 5 of them, and then the rest of my boards are in groups related to themes. I have a number of sewing boards, quilting boards, crafts of various kinds, holiday crafts and so on. Finally, at the bottom of my collection are the few group boards that I’m a part of. These are boards that I don’t own but can pin to.
Pinning so you can find things again
Back to pinning your new pin…
You’re reading an article online and you want to save it so you click the Pin button and a pop-up box appears.
- choose which board you want the article to go to – or create a new board if you need to
- write a description of what it is – it can be as long or as short as you like, but respect the writer and don’t copy all the details they have written – just a bit rude!
- Save it!
Super easy!
One more thing to think about when you’re pinning:
You want to find the article again, right? So just be aware of where you are when you pin it. Some blogs and websites have a front page with a collection of articles on it. You can usually click on the titles of the articles to read the full article. That page with the full article is the page you want to pin. The front page of the website will change over time and that article won’t be on there anymore so if you pin the front page then you won’t see the article when you go back. Take the extra time to go to the full article then click the pin button there.

More Pinterest Tips and Tutorials:
More in this Series – coming soon


