The Crafty Mummy

Crafts. Sewing. Quilting. Crochet. Tutorials.

  • Start Here
  • Welcome
    • Subscribe
    • About Me
      • Copyright
      • Disclosure
      • Privacy Policies
    • Advertise
    • Sharing
      • Recommendations
      • Shopping & Coupons
      • Books
  • Explore
    • Crafts
      • Beading
      • Kids
      • Paint
      • Storage
      • Christmas Crafts
    • Sewing
    • Quilting
    • Stitching
    • Crochet
      • Yarn
    • Life
      • Food
      • Organisation
    • Blogging
      • How To
      • Social Media
      • WordPress Plugins
      • Photography
  • Tutorials
    • Tips
  • Shop on Etsy
  • Shop on Redbubble

How to make Scrappy Quilt Binding

by Tonya Grant |Filed Under: Quilting, Tutorials Get a Weekly Update of all Articles

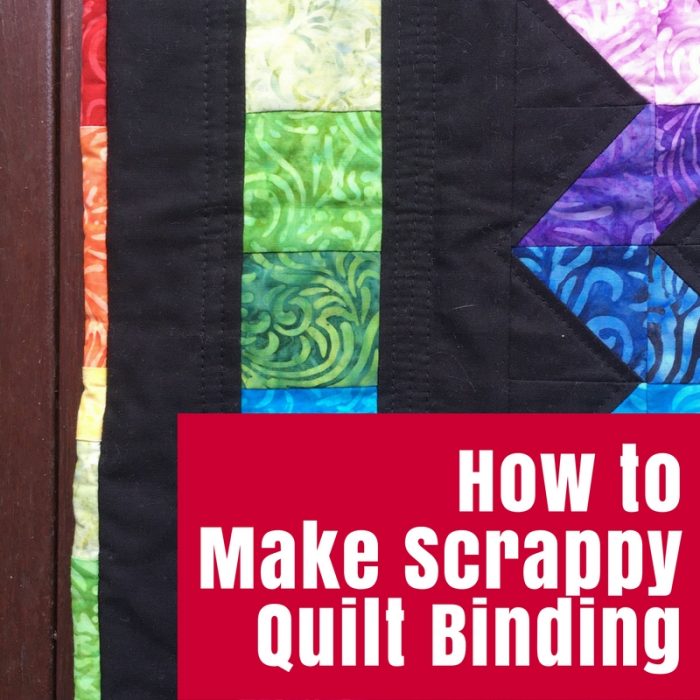
Learn how to create scrappy quilt binding like I did for my rainbow star mini quilt – a great way to use up the scraps from your quilt piecing.

Learn how to create scrappy quilt binding like I did for my rainbow star mini quilt - a great way to use up the scraps from your quilt piecing.

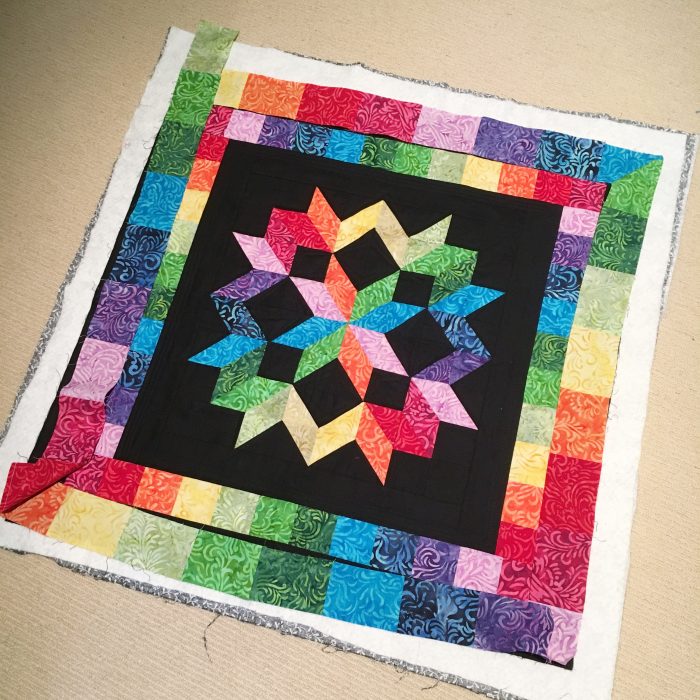
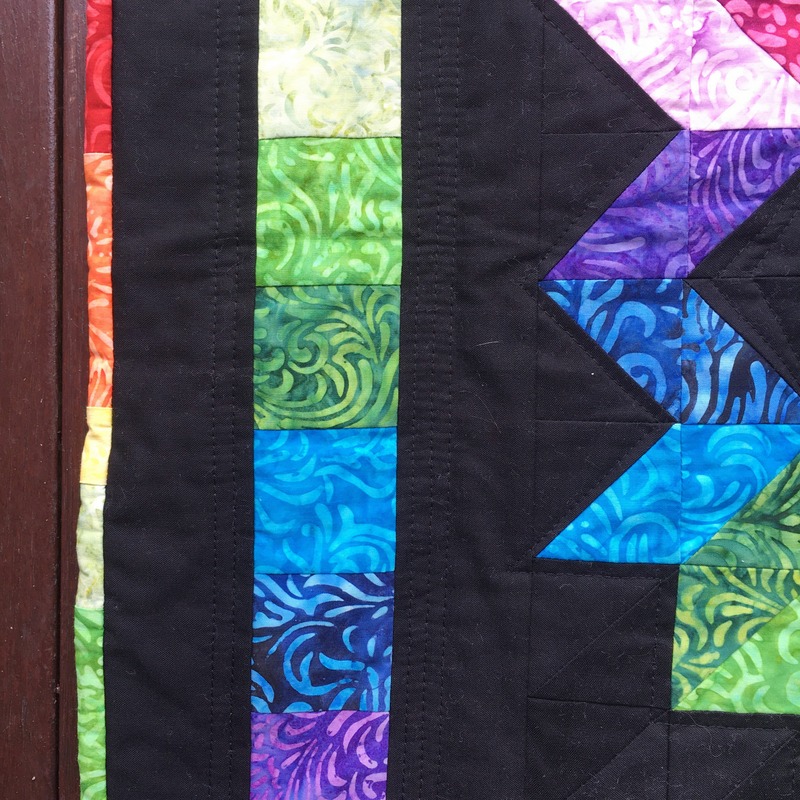
Remember this Rainbow Star Mini Quilt I made last year? It is one of my favourite finishes from 2016 and is destined to hang in my entrance hall – as soon as I add the hanging loops! (Note to Self: You should do that later today.)

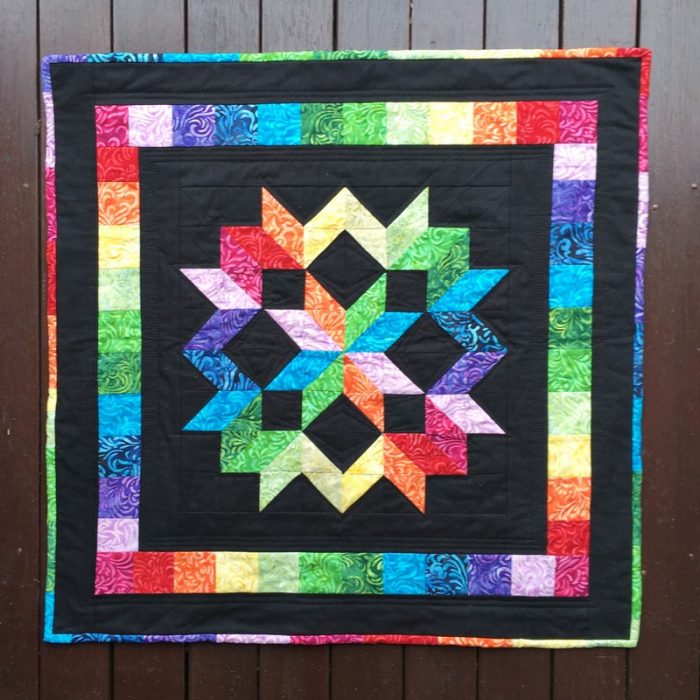
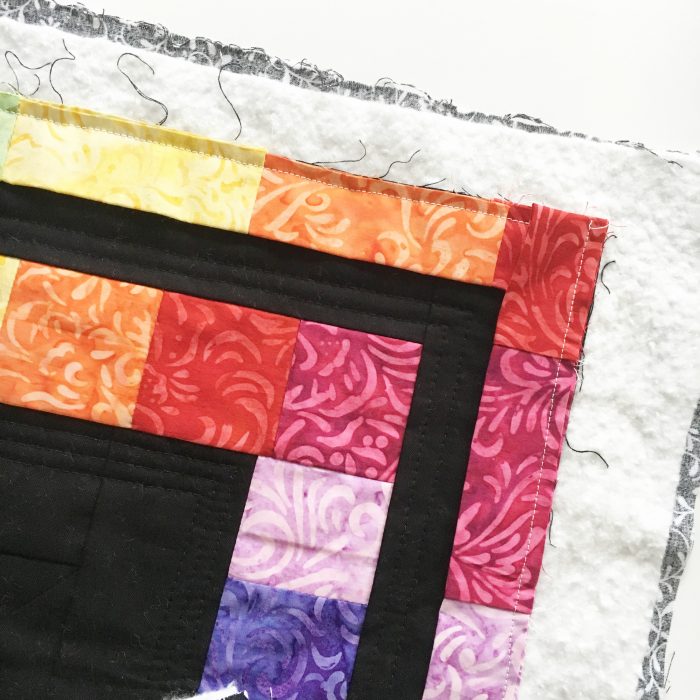
With all those gorgeous rainbow colours and lots of scraps, it was crying out for a scrappy rainbow binding. I love creating scrappy quilt binding. I often use up the extra fabric from the quilt itself in the backing or binding rather than adding those extra bits to my stash of fabric.

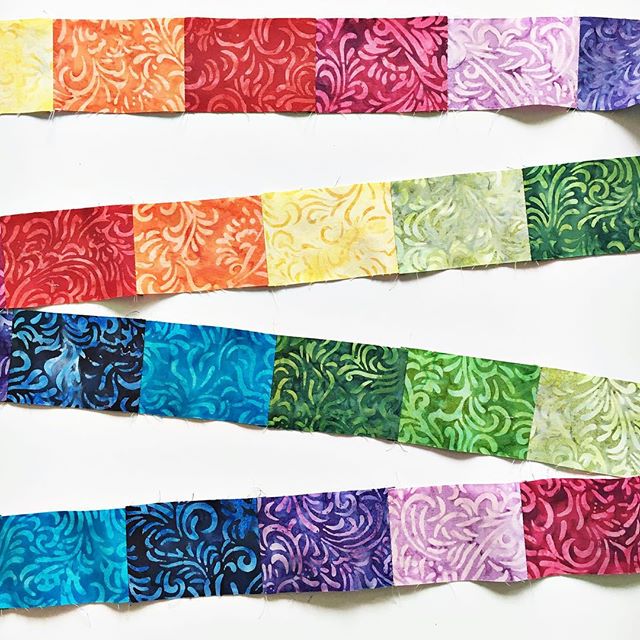
In this case, I used a rainbow batik jelly roll to create the quilt. The extra pieces of fabric were already 2.5″ wide – perfect for binding.

cutting scrappy binding

How to make Scrappy Binding
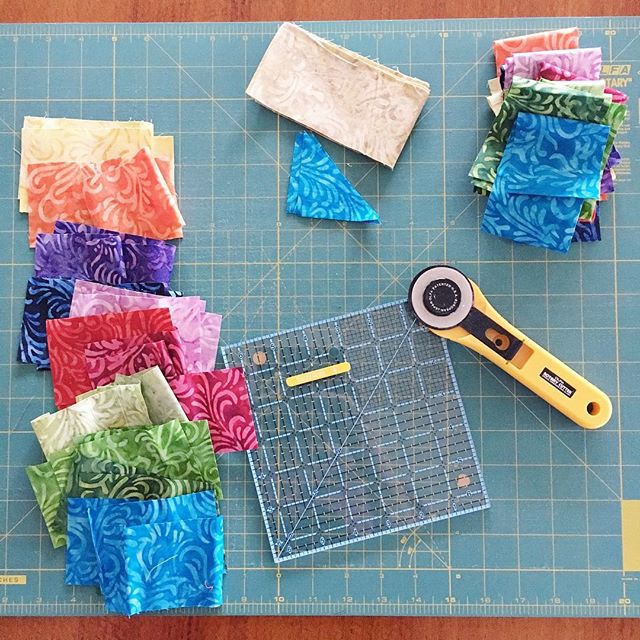
  • Gather your scraps.
  • Decide on the width of your binding. I usually use either 2″ or 2.5″ wide binding.
  • Cut your scraps to the width you need.
  • Decide whether you want all your scraps to be the same length or a variety of lengths. I cut mine all to the same length so that I would have a good mixture of colours from my quilt, but I have sometimes just used various lengths of each fabric. It just creates a different look.
  • Trim scraps to length – if you decide to go that way – and make sure all the ends are straight across.
scrappy binding measure
  • Sew your scraps together into a long strip. Place two scraps right sides together and sew along the short side using a quarter-inch seam. Press the seam open. Add each scrap to the strip, being careful to always add them with right sides together as you sew.
  • Lay your strip around your quilt to measure that you have it long enough. (Or use a measuring tape to measure your quilt if it is larger.) You need to have an overlap of at least a few inches for joining the binding.
scrappy binding strip
  • Fold the strip in half lengthways and press with the right side out.
  • Join the binding to your quilt and finish.

Find my quilt binding tutorial here

Check out how I turn corners here

scrappy binding attach

My rainbow jelly roll came in a QuiltyBox, a lovely box of goodies each month, and I highly recommend Craftsy online quilting classes if you want to learn more about quilting from your home. Click below to find out more.

    
Learn how to create scrappy quilt binding like I did for my rainbow star mini quilt - a great way to use up the scraps from your quilt piecing.
Summary
How to Make Scrappy Quilt Binding
Article Title
How to Make Scrappy Quilt Binding
Description
Learn how to create scrappy quilt binding like I did for my rainbow star mini quilt - a great way to use up the scraps from your quilt piecing.
Author
Tonya Grant
Published on
TheCraftyMummy.com

Filed Under: Quilting, Tutorials

« Is there a Right or Wrong Way to Cross Stitch?
Cool Origami for Kids »
Disclosure: There are affiliate links in this post.  This just means that if you click through and choose to purchase something I may get a small commission - at no extra cost to you, of course.  This helps me keep the content here at The Crafty Mummy free for everyone.

I love to chat so please leave me a comment or ask a question.

Don't stress if your comment doesn't appear immediately - sometimes I have to moderate comments thanks to spam visitors, but the comments from real readers will always get published. Scroll down to add your thoughts or ask a question.

Comments

  1. Rhonda Cratty says

    January 9, 2017 at 3:51 PM

    Fun and easy idea! Thanks, I will pin and give a try.
    Best,
    Rhonda

    • ruci napolioni says

      January 25, 2018 at 11:22 AM

      i’m very interst to learn

  2. Cecelia says

    January 9, 2017 at 4:45 PM

    Is the fabric for the scrappy binding cut on the cross.????

    • Tonya Grant says

      January 9, 2017 at 5:38 PM

      Yes. I know some quilters like to cut their binding on the bias, but I never have. It is just a personal preference.

  3. Ann says

    August 22, 2021 at 9:36 AM

    Can binding strips be cut along the length of a fabric?

    • Tonya Grant says

      August 26, 2021 at 9:51 AM

      Yes you can

Hi! I’m the CraftyMummy

Tonya is the voice behind The Crafty Mummy. She dabbles in lots of different crafts – patchwork, quilting, cross-stitch, scrapbooking, knitting, crochet and sewing. This is the record of projects she has done, and the projects she dreams of getting to! Read More…

Search

  • Email
  • Facebook
  • Instagram
  • Pinterest
  • Twitter
  • YouTube
Shop my Affiliate Favourites

Fat Quarter Shop for Fabric and More

Grab the Sew Sampler Box Here

AccuQuilt for Cutting Machines and Dies

QuiltyBox for Monthly Treats in the Mail

CreativeBug for Craft Classes

Pretty Darn Cute for Blog Designs like mine

Creative Market for Fonts, Images, Themes and More

OzGameShop for All the Games

Adrift for Fashion you’ll Love

Kindle Unlimited Membership Plans

Kindle Book List

Click to shop my kindle book list
Shop my Amazon Influencer Shop
Join the CrochetU and learn to crochet
New to TheCraftyMummy.com? Click here to see more
Blog Tools I use for TheCraftyMummy.com

Grammarly

Aweber for email newsletter

CoSchedule to stay organised and share

Milotree for social media

Genesis for blog framework

FoodiePro is my theme

Hosting with WPEngine

Powered by

Recent Articles

Disclosure: There are affiliate links on this site. This means that I may get a commission if you choose to purchase after browsing via these links - at absolutely no extra cost to you, of course. I only recommend products which I use and love, or that I think will be quality products that will be useful to my readers. It is the affiliate links in this site that help me keep my tutorials free of charge. Thank you!

Looking for something? Search here:

Copyright 2015 The Crafty Mummy · Built using Genesis Framework & Foodie Pro Theme