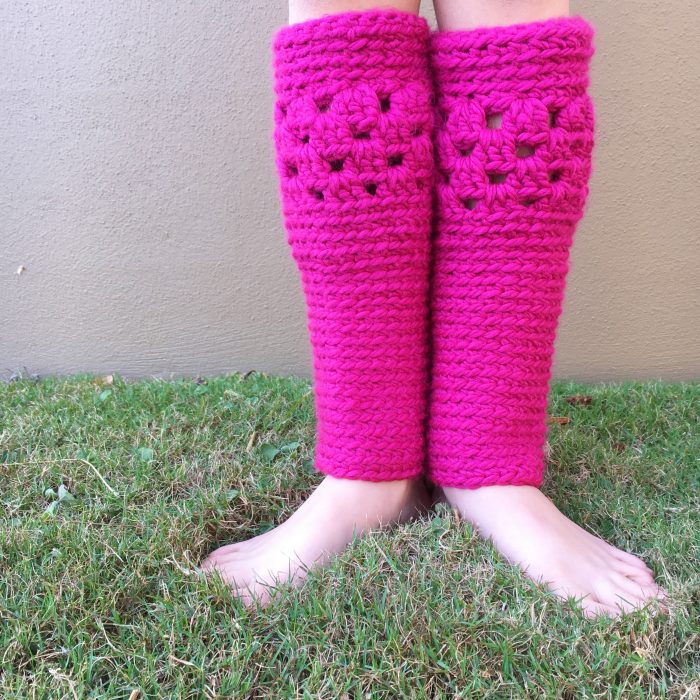
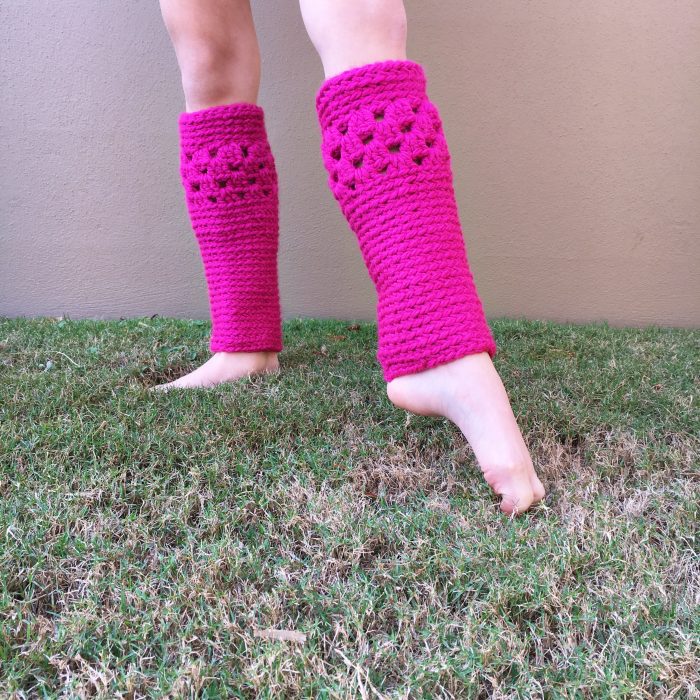
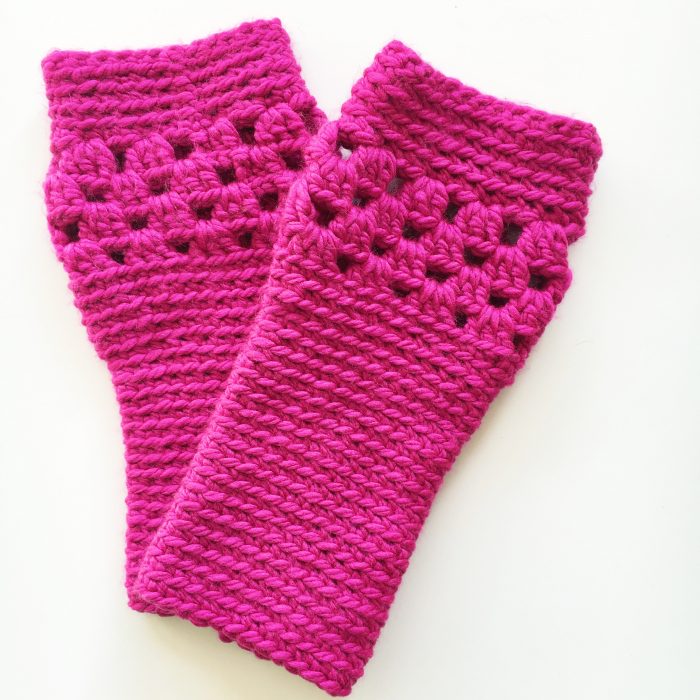
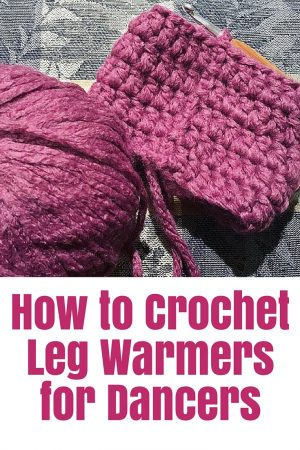
My Physie girl desperately wanted another pair of leg warmers to match her club uniform so I’ve created a fancier crochet leg warmers pattern to share.
My dancer girl desperately wanted leg warmers this year as we got into the cooler temperatures so I created a super easy pair from the pretty pink yarn I had in my stash – you can see them here.
But what she really wanted was a pair that would match her Physie club uniform colours – black and hot pink. Later in the year there will be competitions to go to and they will great for keeping her legs warm while she waits backstage. So I popped into Spotlight looking for just the right shade of pink. Luckily they had it the Moda Vera Monkey range. Bonus! It was discounted! Yay!
So two balls of Monkey yarn it was – 100% acrylic, 100g balls, colour: Pink. It is another super Chunky yarn, like the Shiver I used for the other pair of leg warmers, although the weight is not marked on the packaging. Again it is super soft and squidgy – love it! I used a 6.0mm hook.
Find similar yarn at American Yarns:

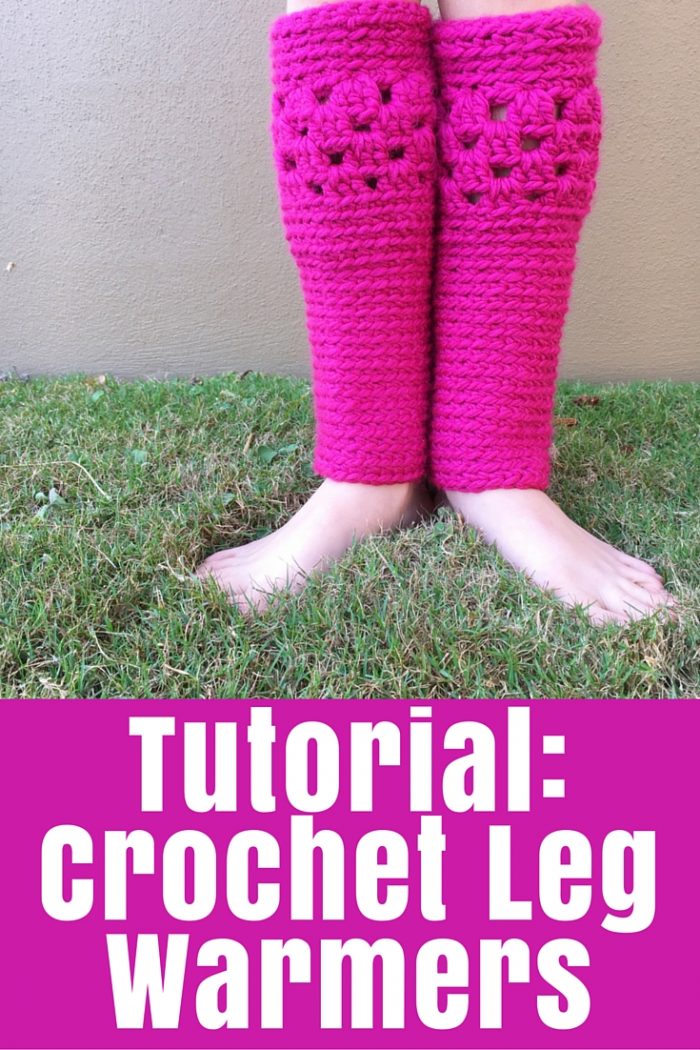
This time I wanted to create something a little fancier so I made up the pattern as I went along. It took a little playing around – and some frogging! – to get it right but I’m so happy that I persevered. They look great with the panel of granny trebles around her calves. Keep in mind that I worked from the top down so your starting chain needs to fit over the wearer’s foot and then sit relatively snuggly around their calf.
Pattern for Crochet Leg Warmers
Chain 27. This chain needs to fit around the wearer’s calf and needs to be a multiple of 3.
Slipstitch to join the loop – being careful that it is not twisted.
5 rows of single crochet with 2 chain at the start of each row and a slip stitch at the end of each row to join.
Note: I crocheted into only the back bar of each stitch to create a ribbed look.
3 chain, 2 treble into same stitch. 1 chain.
3 treble into every 3rd stitch with 1 chain between each treble group. Slip stitch to join row.
**Slip stitch into next 2 stitches and into to the gap between treble groups.
3 chain + 2 treble into space. 1 chain.
3 treble into next space + 1 chain. Continue with 3 treble + 1 chain all the way around the row and join with a slipstitch.
Repeat from ** to create two more rows of treble groups.
2 chain, single crochet around the next row, skipping three stitches in three different spots around the row. Slipstitch to join.
Continue rows of single crochet with 2 chain at the start and a slipstitch at the end of each row.
Note: The treble feature section is slightly larger than the original 27 stitches so we want to gradually decrease the rows back to 27 stitches. To decrease, just skip a stitch as you crochet, so I skipped 3 stitches in each row until I had decreased my round back to 27 stitches. You could even decrease further to fit the wearer’s lower leg tighter if you want to, but remember to check that they can get it over their foot to pull on.
Continue until you have enough rows to make them long enough for your wearer. Mine have 20 rows after the pattern section.
Done and my Physie girl is loving her mama!
P.S. If you are curious about Physie, check out Physie 101.

More Crochet Leg Warmers:
More Simple Crochet Projects:


Nice and easy pattern.
Thank u
You are very welcome, Nandhini
Great idea. Thank you.
So cute for skiing!
Thanks
Hi! I am now crocheting this and I am stumped! In the middle of the pattern at ** slip stitch into next 2 stitches and into the gap, you are only slip stitching into the gaps after the first 2 stitches, yes?
And what do you mean treble into next space? The next stitch or the space in between the treble groups? I’ve tried crocheting in between the treble groups and the rounds are getting smaller. Please help! What am I doing wrong? Thank you!
Hi Jane,
The slip stitch instructions after the ** are only at the start of the row to get you across the two stitches (slipstitch into the top of those two stitches) and into the space (ie slipstitch into the space between the treble groups). Then you are doing the groups of trebles in all the spaces around the row until you slipstitch to join the last group to the first group.
“Treble in the next space” is treble into the space between groups of trebles.
I hope this helps,
Tonya