The Crafty Mummy

Crafts. Sewing. Quilting. Crochet. Tutorials.

  • Start Here
  • Welcome
    • Subscribe
    • About Me
      • Copyright
      • Disclosure
      • Privacy Policies
    • Advertise
    • Sharing
      • Recommendations
      • Shopping & Coupons
      • Books
  • Explore
    • Crafts
      • Beading
      • Kids
      • Paint
      • Storage
      • Christmas Crafts
    • Sewing
    • Quilting
    • Stitching
    • Crochet
      • Yarn
    • Life
      • Food
      • Organisation
    • Blogging
      • How To
      • Social Media
      • WordPress Plugins
      • Photography
  • Tutorials
    • Tips
  • Shop on Etsy
  • Shop on Redbubble

Quick Tip: Cutting Fabric Strips

by Tonya Grant |Filed Under: Quilting, Tips Get a Weekly Update of all Articles

cutting tip

One of the most common way that quilters cut fabric pieces for patchwork designs is by cutting fabric first into strips across the width of the fabric and then cross-cutting the strips into squares, rectangles or other shapes. It can save a lot of time especially when you can stack the strips and cut them at the same time. But I also have another trick that I use for cutting fabric strips quickly and accurately.

What You Need

Make it easy for yourself and start with the best tools you can. I have a couple of different cutting mats but my absolute favourite is the biggest one because I can line up my fabric and then not have to move it until I finish cutting. Every time you have to stop and move fabric you are adding time to your cutting session. So big is better for the cutting mat! I’d go at least 24″ x 36″ but my favourite mat is 36″ x 48″ – it covers my half my table which is awesome.

Next, make sure you have a sharp blade in your rotary cutter. Blades do get blunt over time and can also get blunt spots on them if they accidentally hit pins or other things that they shouldn’t so if you are finding that you need to do multiple cuts to get through the layers of fabric, it is time to replace the blade.

Quick Tip for Cutting Fabric Strips

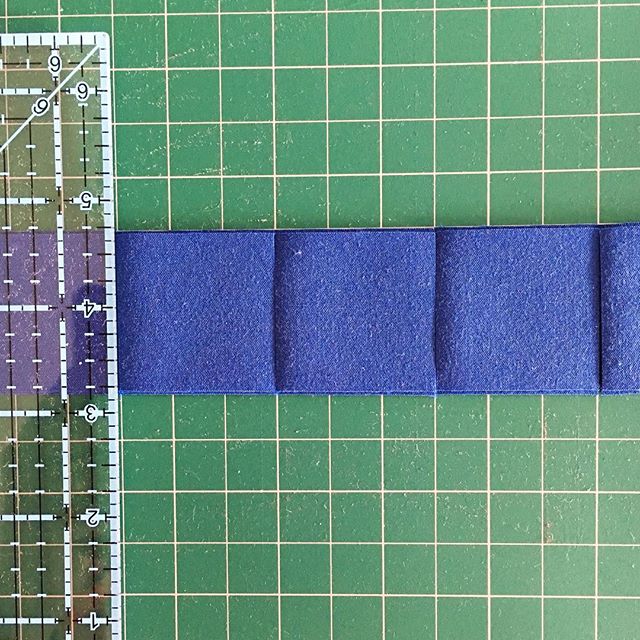
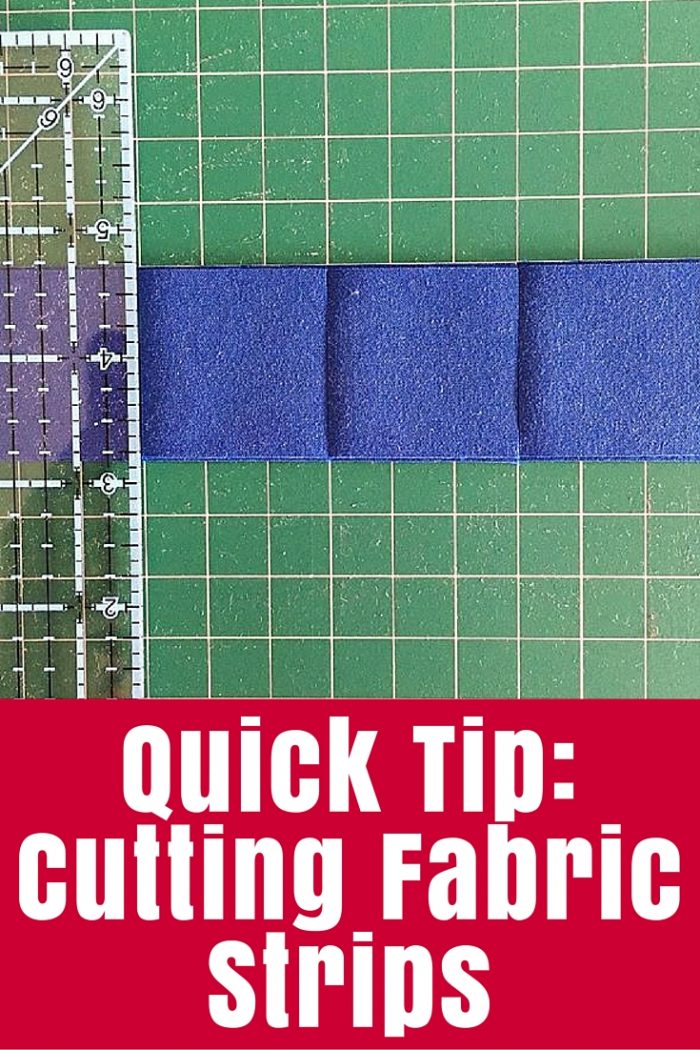
If you’re cross-cutting a fabric strip into smaller pieces, see if you can use your cutting mat lines.

Line up your strip, then start from the far right and cut each piece, gradually moving the ruler to the left and lining up the next cut with lines. I cut over 200 1.5″ squares this afternoon using this method in less than 20 minutes! It was much quicker than my usual method where I work from the left-hand side of the strip and remove the cut pieces as I go along.

I was cutting tiny blue squares for the background of a table runner – you can get a glimpse of the other fabric for this project in this post:

How to Personalize a Quilt Pattern (1)

More Quilting Tips:

Quilt Binding Tip
  
quilting start threads
Tutorials
  
How to cut Triangles with a Square Ruler (1)
Cross-cutting fabric strips is a basic way quilters cut fabric for patchwork and this tip will make it just a little quicker and easier for you.


Summary
Quick Tip: Cutting Fabric Strips
Article Title
Quick Tip: Cutting Fabric Strips
Description
Cross-cutting fabric strips is a basic way quilters cut fabric for patchwork and this tip will make it just a little quicker and easier for you.
Author
Tonya Grant
Published on
TheCraftyMummy.com

Filed Under: Quilting, Tips

« How to Personalise a Quilt Pattern
Crochet Rainbow Heart Blanket Finished »
Disclosure: There are affiliate links in this post.  This just means that if you click through and choose to purchase something I may get a small commission - at no extra cost to you, of course.  This helps me keep the content here at The Crafty Mummy free for everyone.

I love to chat so please leave me a comment or ask a question.

Don't stress if your comment doesn't appear immediately - sometimes I have to moderate comments thanks to spam visitors, but the comments from real readers will always get published. Scroll down to add your thoughts or ask a question.

Comments

  1. Sandi says

    January 23, 2017 at 2:16 PM

    I bought something called a “Quilt Stick”. It is made out of a lightweight board and you can get it in all different widths. Being a quilter, of course mine is 2 and 1/2 inches. It has kind of a rough finish on the back and when you put it down it stays where you put it. no slip, no slide. I love it and when I have several pieces to cut it really speeds things up when you don’t have to worry that the ruler is going to fly across the table.
    Oh, and don’t feel too guilty about feeling just a little bit like celebrating about the kiddos going back to school. I have GREAT grand kids, but I still remember that first day of excitement of what can I do??? I’m all by myself!!!

    • Tonya Grant says

      January 31, 2017 at 11:08 AM

      Thanks, Sandi – that sounds like a tool I need!

  2. Janet says

    April 16, 2018 at 9:38 PM

    Hi Tonya
    Love all of your hints and tips I am always very happy too receive your Amazing Newsletters
    Lots of Huggs
    Januk Keep them comming (e/mails) thank you

Hi! I’m the CraftyMummy

Tonya is the voice behind The Crafty Mummy. She dabbles in lots of different crafts – patchwork, quilting, cross-stitch, scrapbooking, knitting, crochet and sewing. This is the record of projects she has done, and the projects she dreams of getting to! Read More…

Search

  • Email
  • Facebook
  • Instagram
  • Pinterest
  • Twitter
  • YouTube
Shop my Affiliate Favourites

Fat Quarter Shop for Fabric and More

Grab the Sew Sampler Box Here

AccuQuilt for Cutting Machines and Dies

QuiltyBox for Monthly Treats in the Mail

CreativeBug for Craft Classes

Pretty Darn Cute for Blog Designs like mine

Creative Market for Fonts, Images, Themes and More

OzGameShop for All the Games

Adrift for Fashion you’ll Love

Kindle Unlimited Membership Plans

Kindle Book List

Click to shop my kindle book list
Shop my Amazon Influencer Shop
Join the CrochetU and learn to crochet
New to TheCraftyMummy.com? Click here to see more
Blog Tools I use for TheCraftyMummy.com

Grammarly

Aweber for email newsletter

CoSchedule to stay organised and share

Milotree for social media

Genesis for blog framework

FoodiePro is my theme

Hosting with WPEngine

Powered by

Recent Articles

Disclosure: There are affiliate links on this site. This means that I may get a commission if you choose to purchase after browsing via these links - at absolutely no extra cost to you, of course. I only recommend products which I use and love, or that I think will be quality products that will be useful to my readers. It is the affiliate links in this site that help me keep my tutorials free of charge. Thank you!

Looking for something? Search here:

Copyright 2015 The Crafty Mummy · Built using Genesis Framework & Foodie Pro Theme