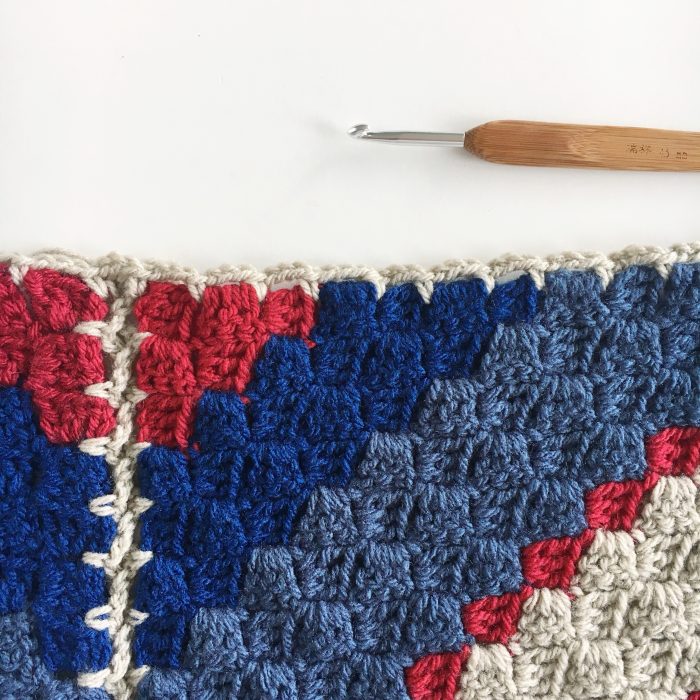
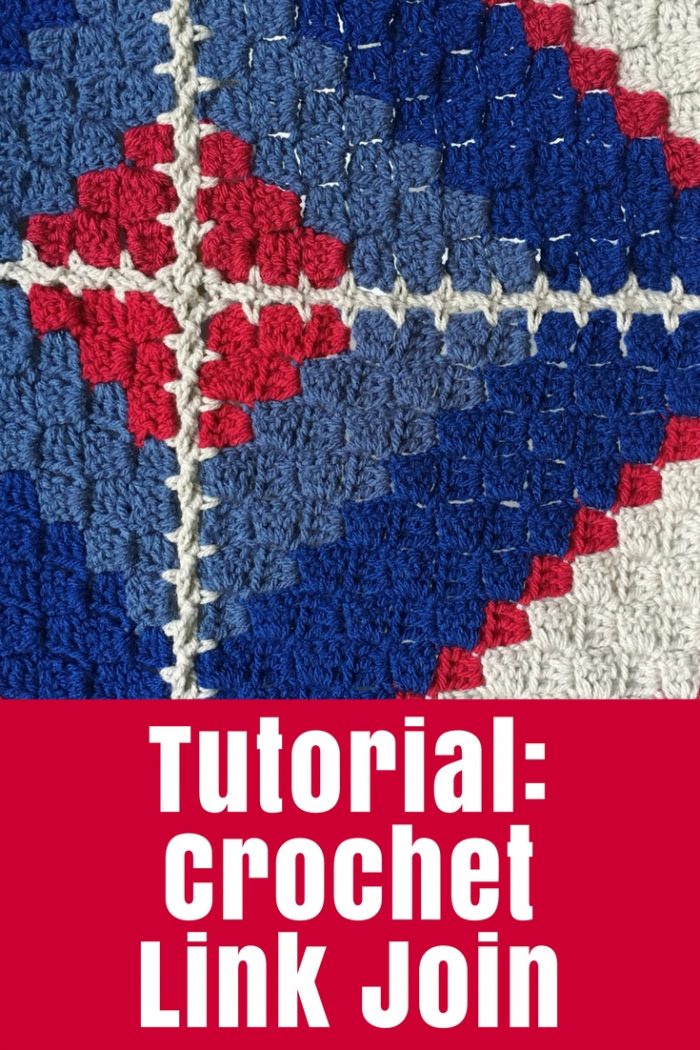
Learn how to crochet a Link Join for your C2C blocks or other crochet afghan motifs. Make your blanket special with this unusual way of joining C2C squares.
I’m so excited to share this tutorial with you!
I’ve been crocheting for a couple of years now but somehow I still consider myself a beginner. I tend to go for easier patterns and blankets that don’t require joining at the end. I’d much rather do a blanket with long rows worked back and forth across the width or length of the blanket than small squares or shapes that have to be joined at the end of the process.
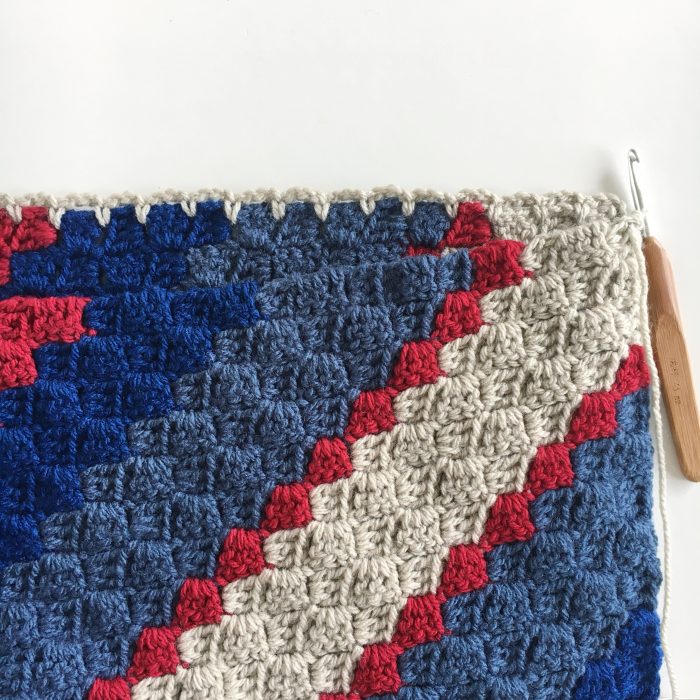
But I was keen to try a relatively new crochet I had seen on Pinterest called C2C crochet. C2C stands for ‘Corner to Corner’ and these designs are worked from one corner of the design in diagonal rows that get longer with each row. The stitches create small squares so it can be used to create pixellated pictures. Very fun!
Anyway, I joined in a 30-day crochet challenge to make a C2C blanket made up of large squares. The squares then were joined together to form the blanket.

It was the joining that I did NOT want to do.
So I finished my squares and then put them aside for a month or two while I moved on to other projects.

Finally, the pull of these lovely colours kept calling and the urge to finish this project hit me. I started joining the squares using the simple and quite common method of ladder stitching with a yarn needle and the stone yarn from my squares.
I started joining the squares using the simple and quite common method of ladder stitching with a yarn needle and the stone yarn from my squares. This is one of the methods I included in this collection about joining crochet a few years ago.
But I just wasn’t happy with how it looked. The stone yarn was really obvious against the other three colours and my sstitcheslooked uneven and messy.
I started looking for another way to join them and came across this tutorial from Crochet 365 Knit Too for a flat braid join. It looked great and a little different so I’ve adapted it to the C2C squares. I call mine a Link Join.
How to Crochet a Link Join
Let’s join two C2C blocks down one side so grab two of your finished blocks.
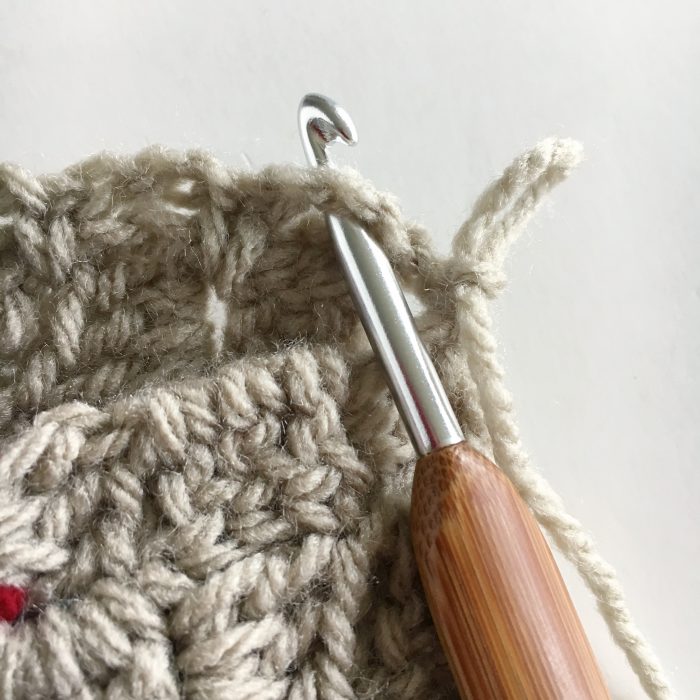
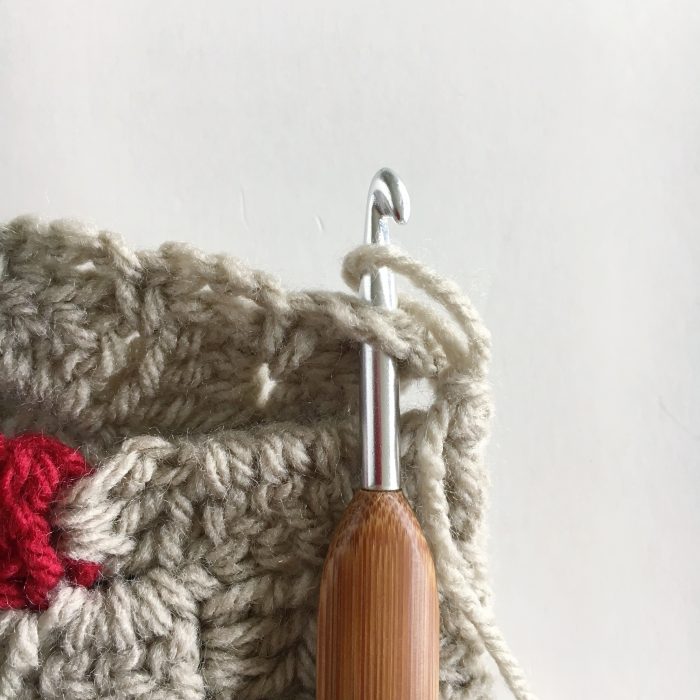
To start, join your yarn to the end of the C2C block you are going to start with. I created a slip knot loop, then pulled that loop through the top of the first stitch in the corner of my blanket.
Chain three stitches.
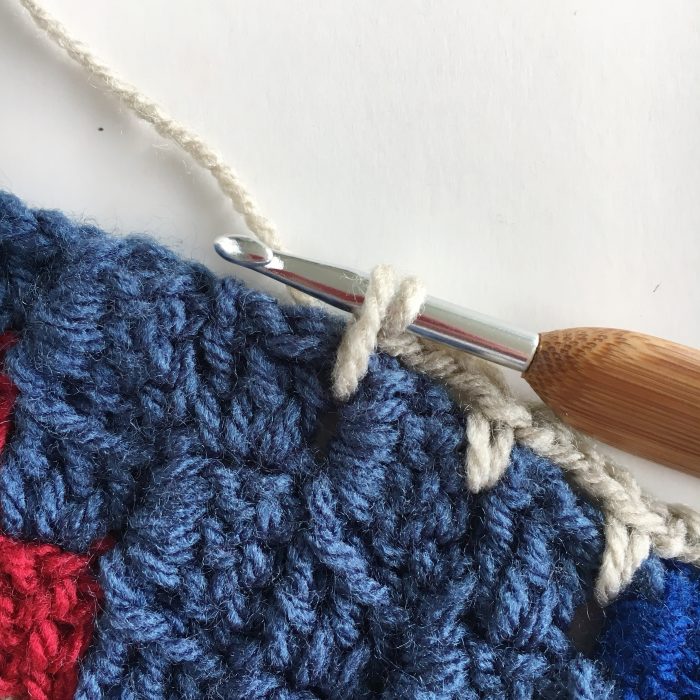
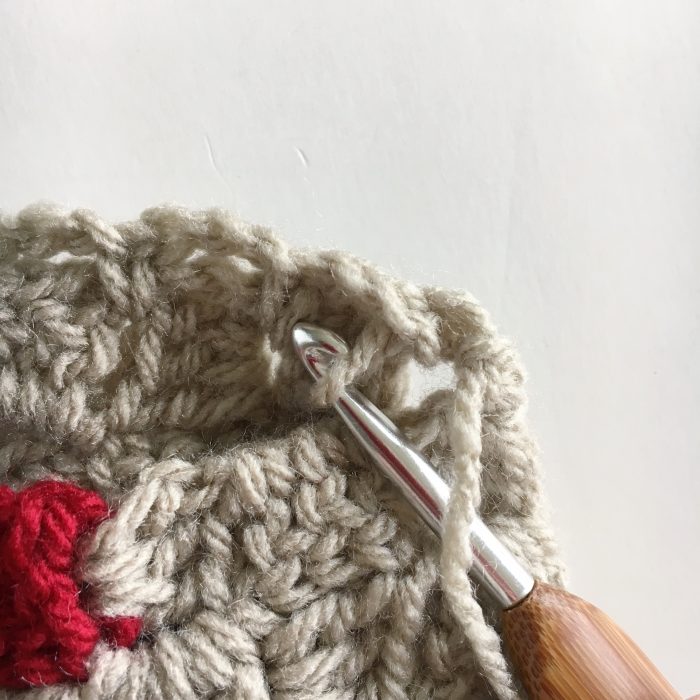
Next, find the gap between the C2C squares. These are groups of three or four tall stitches usually.
Work a US Single Crochet or UK Double Crochet into that gap. (That is, insert hook, yarn over and pull through, yarn over and pull through both loops)
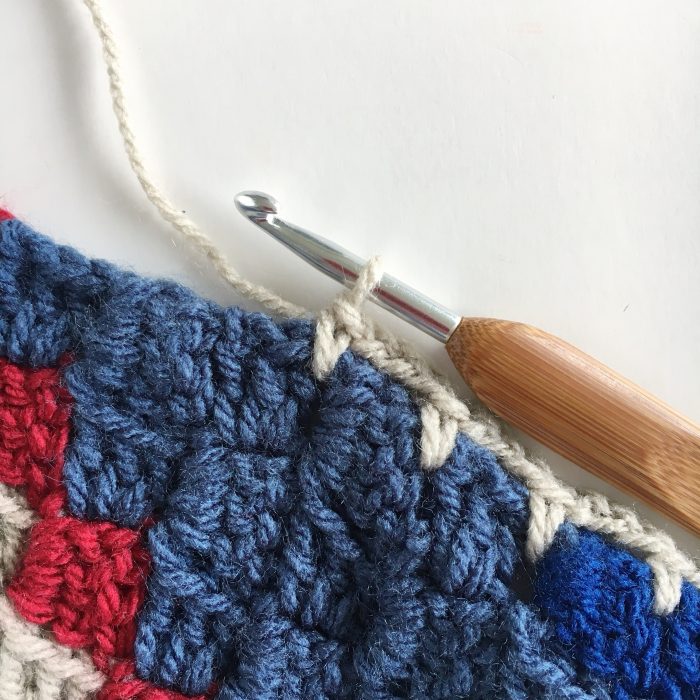
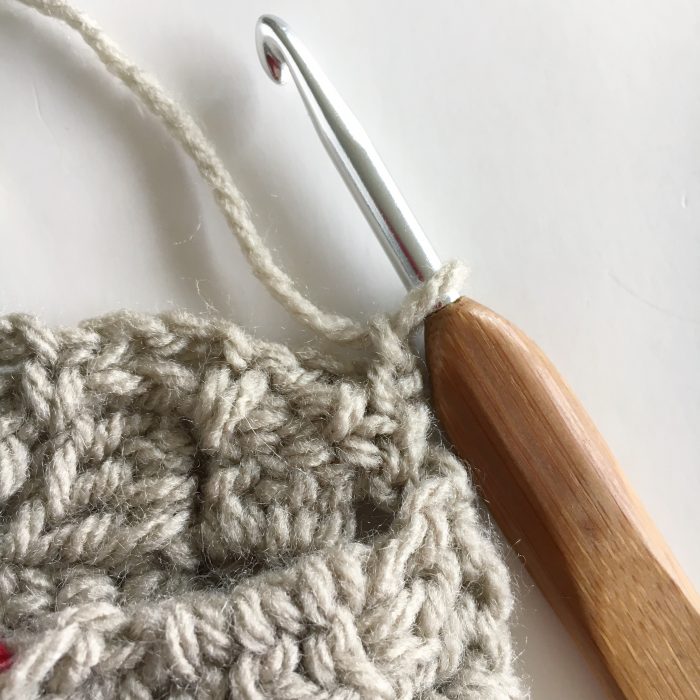
Continue to chain 3 and then Single Crochet into the gap all the way along the side of the first block you are joining.
Note: My yarn colour is quite a contrast to most of the block, but you can certainly choose something that blends more if you wish.
When you get the end of the side, Single Crochet into the top of the last stitch in the corner.
Grab the second block you are going to join this block to and line them up ready to work along the new block’s edge.
Chain one stitch.
Then insert your hook into the corner of the new square, yarn over and pull through both loops. (This is really a slip stitch to join the two blocks together.)
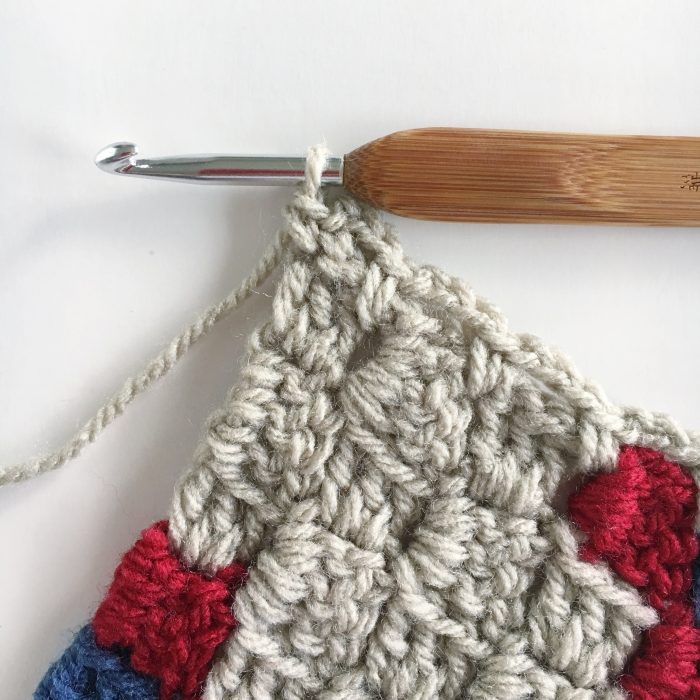
Lay your work flat with the square you’ve just finished working along the bottom and the new square on top with the edges lined up ready to join together. See picture below.
On this new block, we are still going to do three chain and a single crochet for each C2C squares, but we are going to weave the chains through the chains on the first block so they are linked.
Start with working one chain.
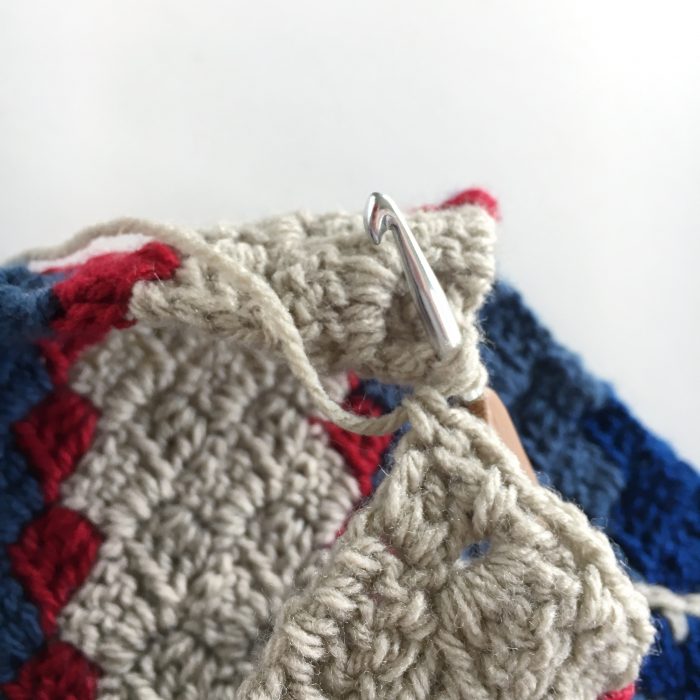
Then pull your hook out of the loop and insert the hook under the three chain link on the corresponding first square of the first block.
Insert the hook back into the loop and pull it under the three chain.
Work 2 more chain then Single Crochet into the C2C square gap – just as you did on the first block.
That’s your first Link Join done!
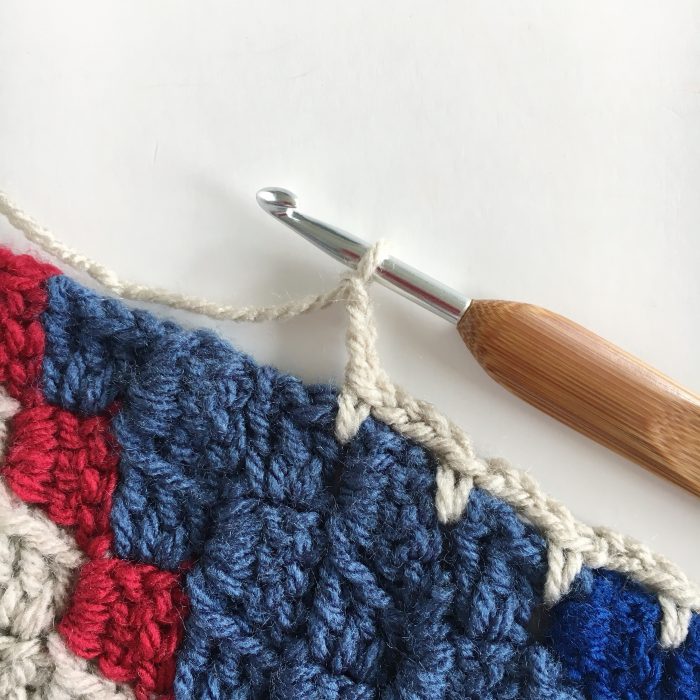
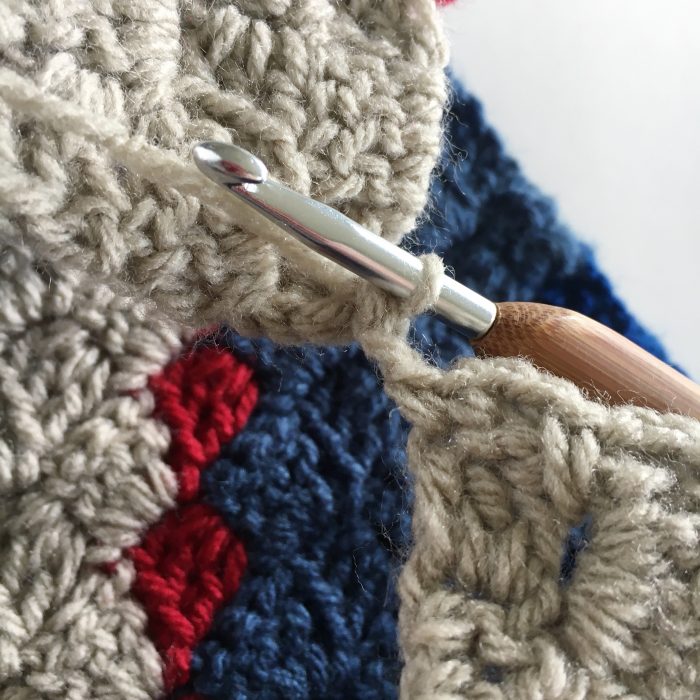
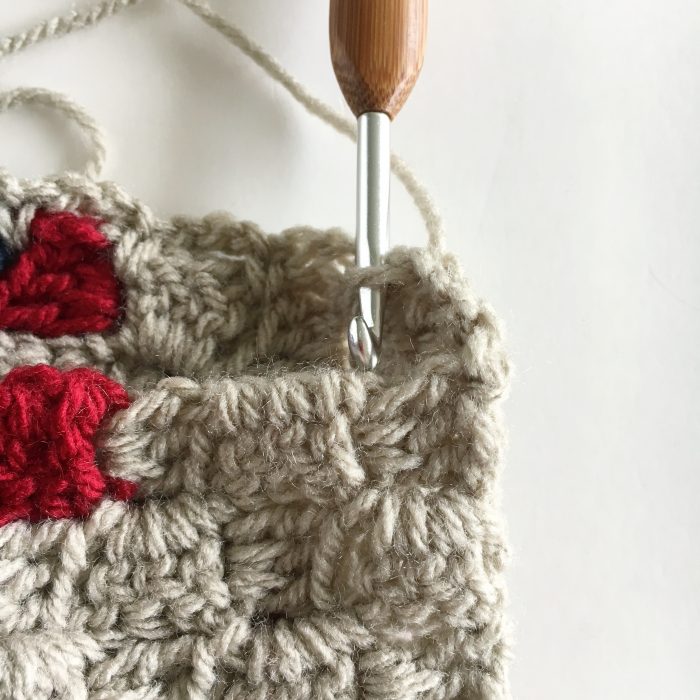
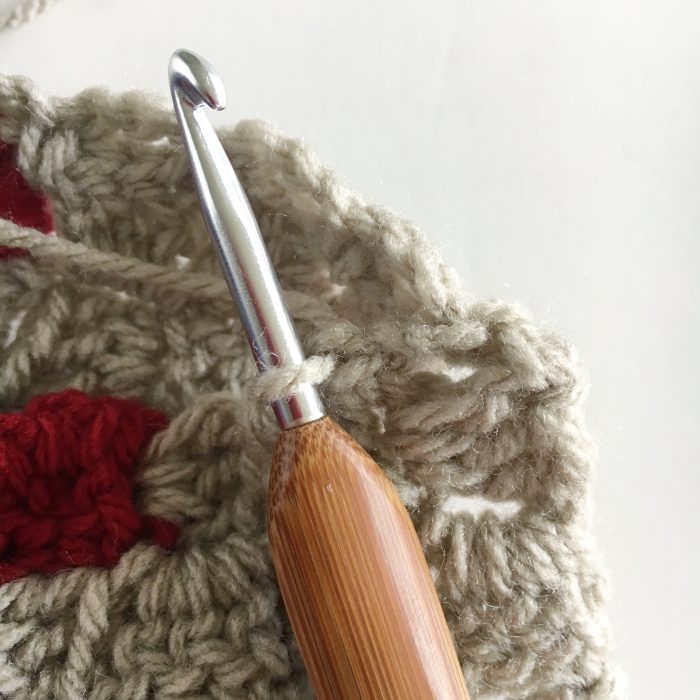
See below where my crochet hook is pointing down to? That’s the C2C square gap that you’re aiming for.
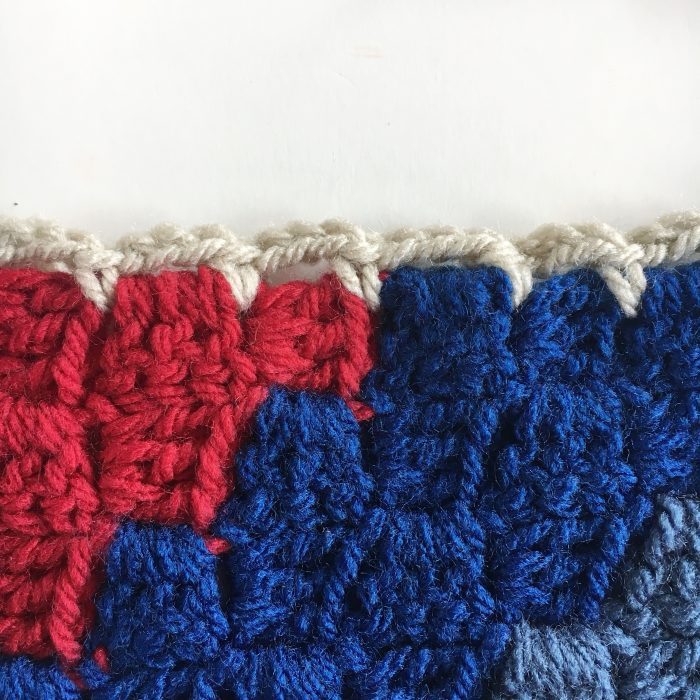
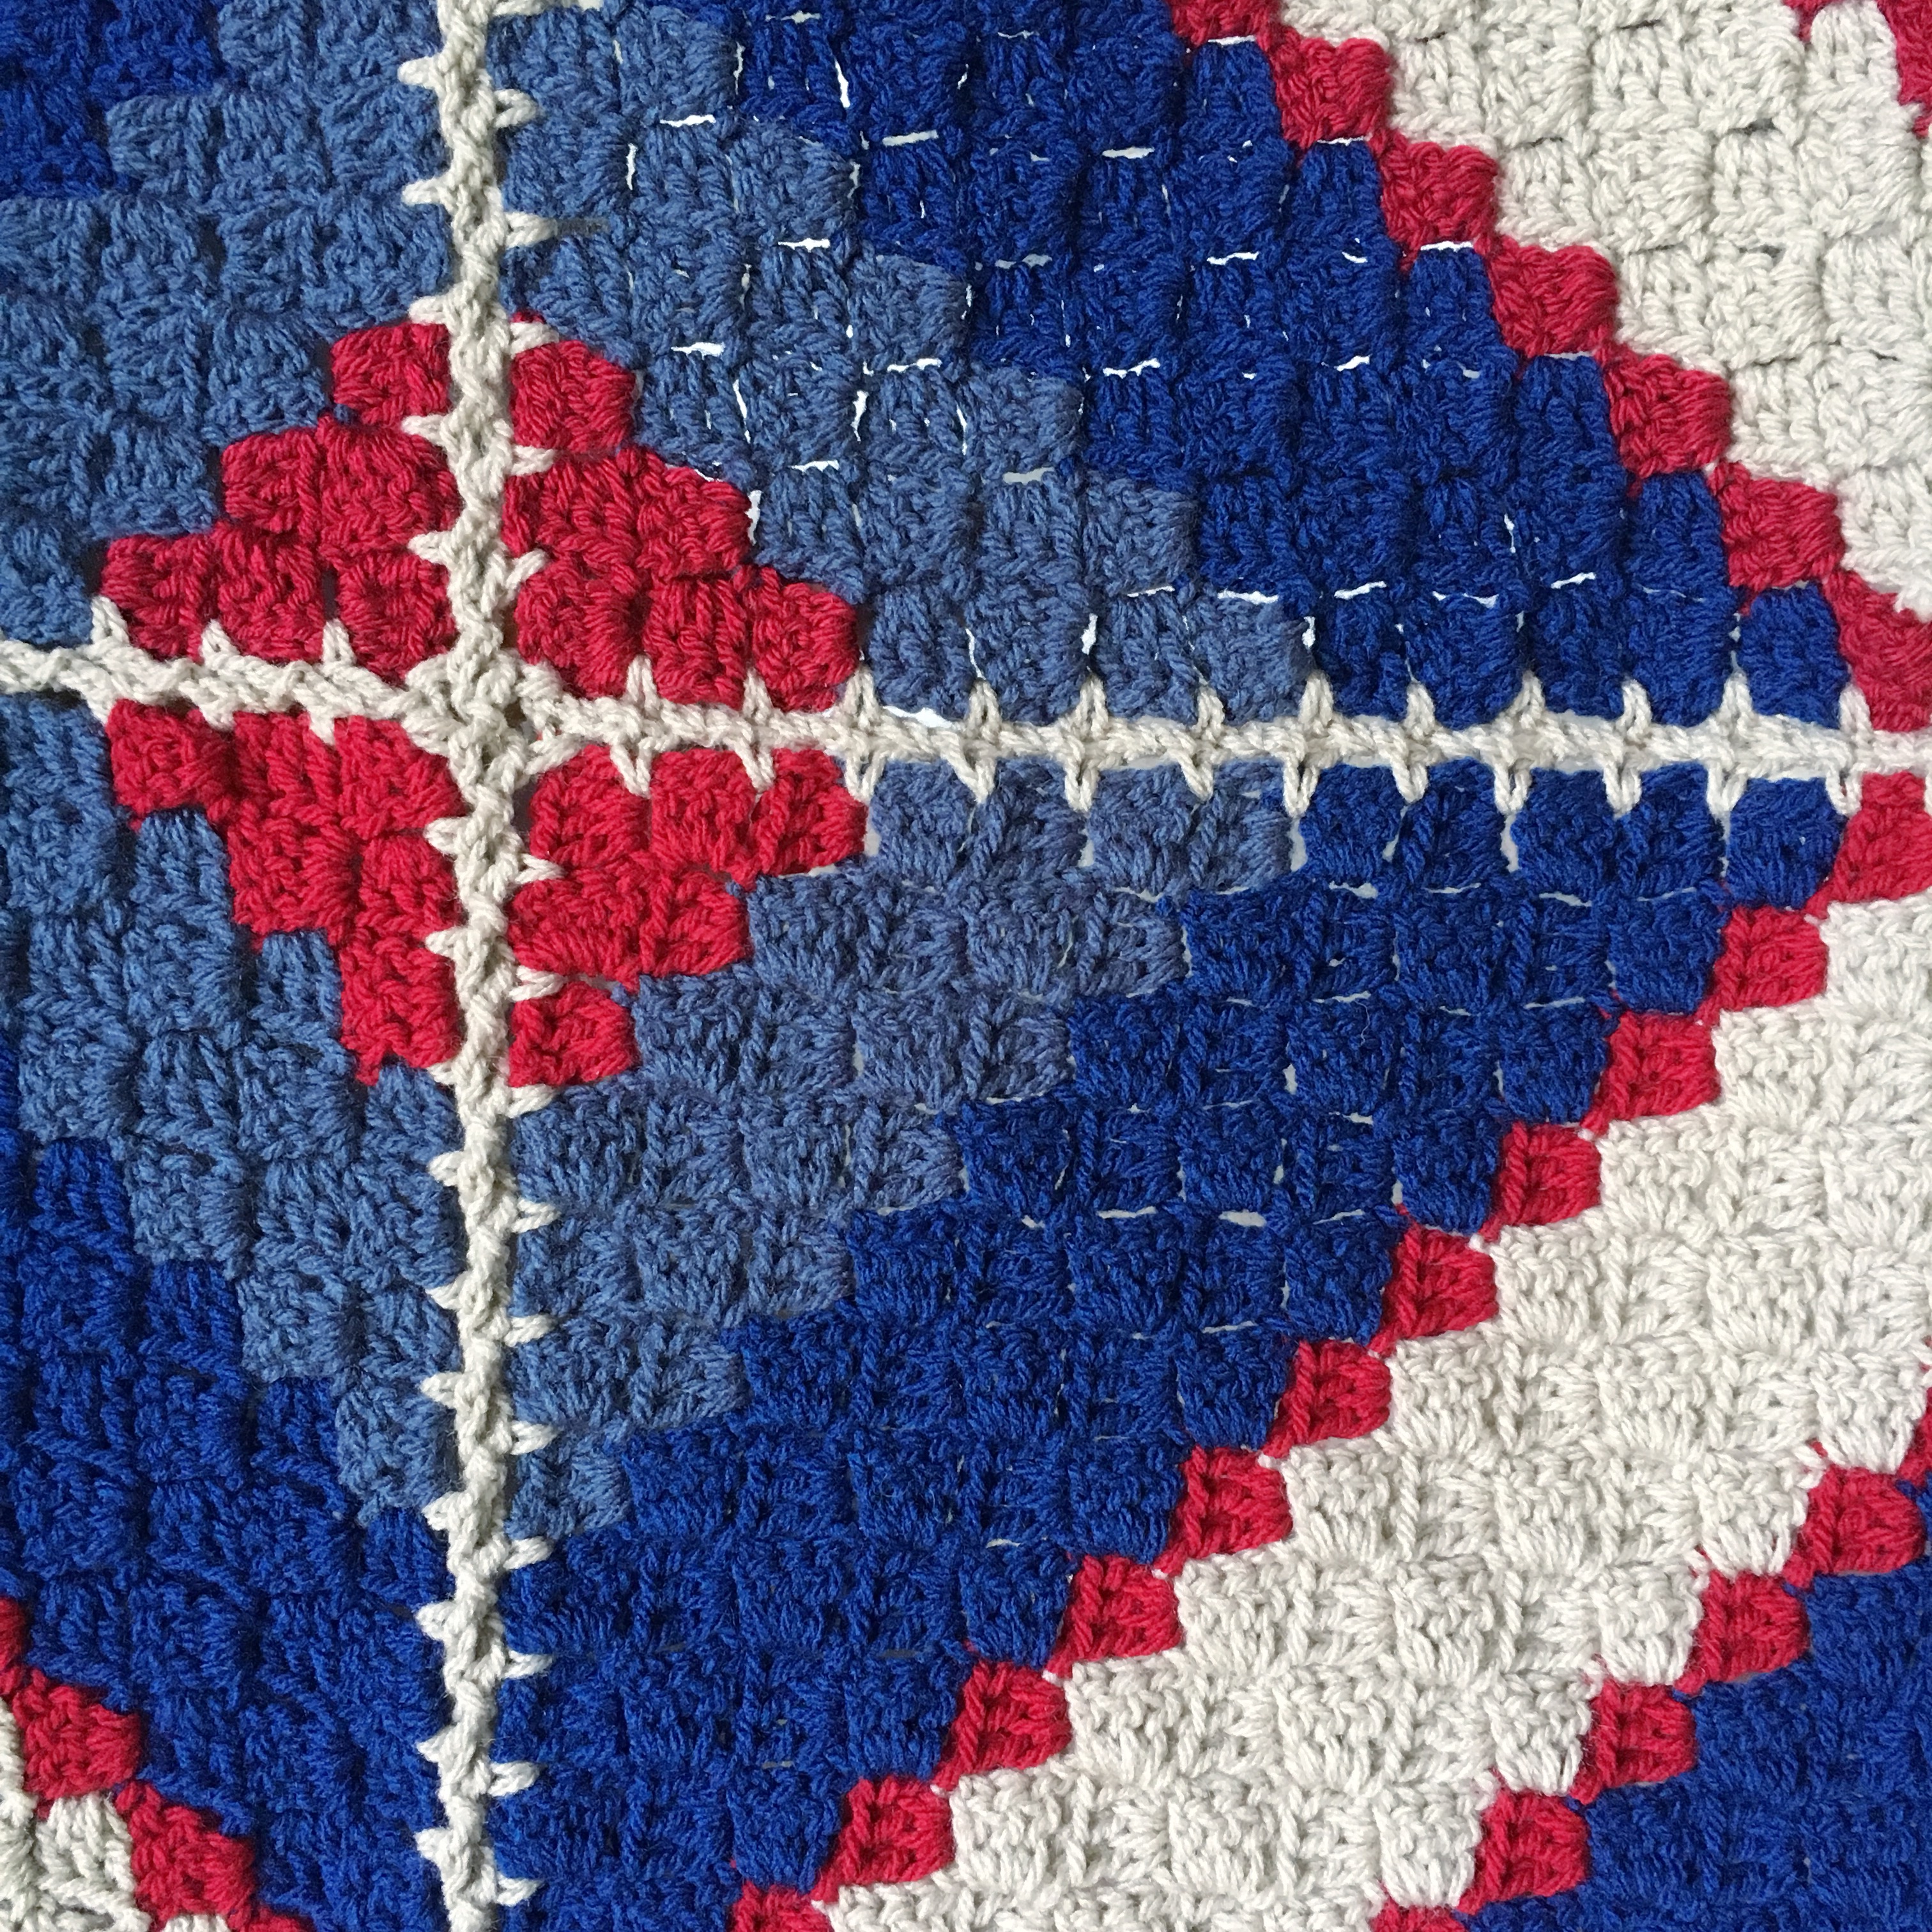
Below is what the Link Join will look like when it is done. It is hard to see with the stone yarn against itself so look back at the images at the top of this post to get a better idea of how the links will look.
Continue along the side of the block with:
- 1 chain
- remove hook and insert under the corresponding 3 chain link
- pull the stitch loop under the link
- 2 chain
- 1 single crochet into the c2c gap
At the end of the block, single crochet into the corner stitch. Chain 1 then slip stitch into the corner of the first block the create a final join between the two blocks.
Learn to make the blocks for this blanket with this class for only $19.
To Join a Whole Blanket
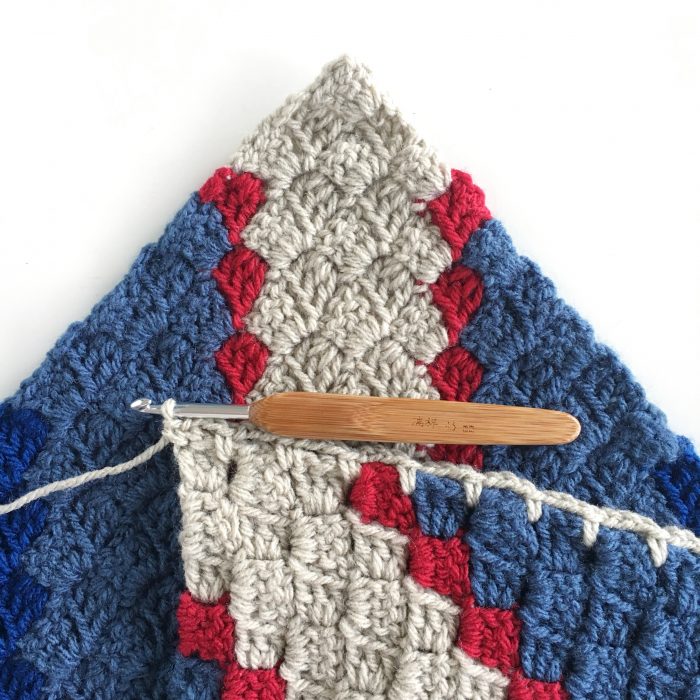
I joined my blocks into rows first. So join two blocks down one edge. Then join two more blocks to create a row of four.
I created 4 rows of four blocks each.
Then I used exactly the same method to join two rows together, working my chains links all the way along one long side of the four blocks, then back along joining them in links to the next row.
When I came to the joins between two blocks, I treated those like a C2C square and crocheted 3 chain and a Single Crochet over them. Then as I came back I just linked through that 3 chain as I had for all the other squares.
I’m so pleased with the result and LOVE this blanket!


I have been crocheting. For many years and am really old now. So I don’t think I can comprehend this enough to even try it. Yes, it is beautiful and I love it. Keep up the good work. By the way, I never liked to join squares either.
Thank you.
I absolutely love this, but I so wish there was a video tutorial!! I’m American and I think our terminology is a little different.
I wish there were a video tutorial.
I understand the instructions for going alongvthe first square but don’t understand the ‘linking’ of the second square.
Sorry, Jeannine, but I’m not good at creating videos!
Please do a video of just joining the squares of where to place the hook when joining the squares I really want to conquer this PLEASE HELP ME. I think you will be good at this as you are in your pictorials.
Thankss
Linda