This post is sponsored by We Crochet and there are affiliate links in this post.

It is Summer already here in Queensland – that really HOT Summer weather that we usually only get in January. I know my Northern Hemisphere readers might be thinking longingly of warm sunshiney days while they start to look for snow, but Christmas here in Australia is perfect BBQ weather. Such a contrast!

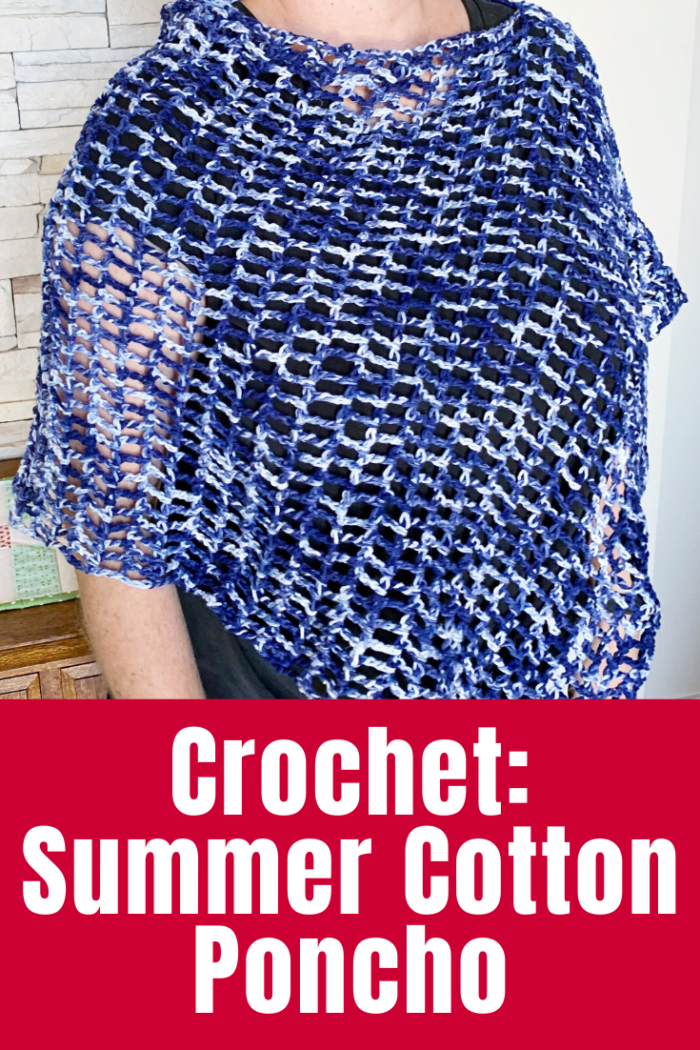
With the warm weather on hand, I was excited to think about a crochet project that might be useful for the slightly cooler evenings in a yarn that was not crazy to work in the heat. This Summer Cotton Poncho is super quick and easy and will just add a layer when the sun goes down.
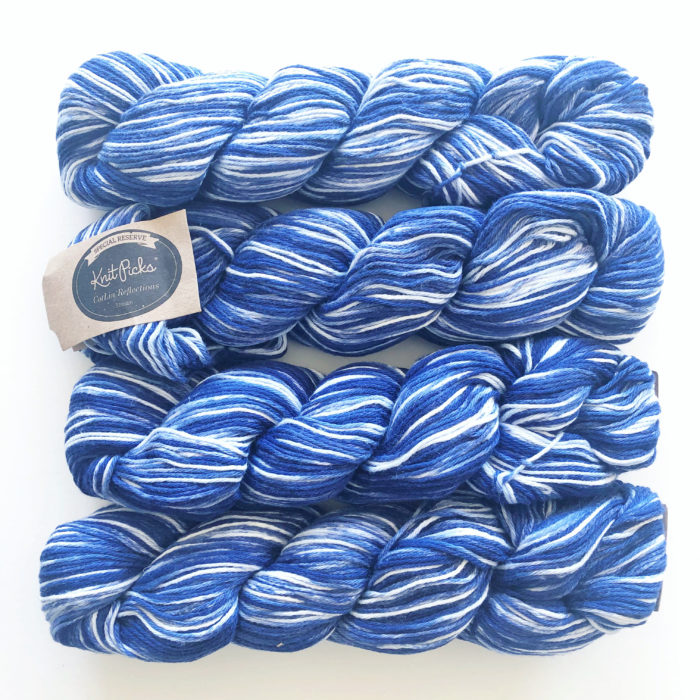
The gorgeous cotton yarn is a variegated denim blue called “Stream” from CotLin Reflections. It is 70% Tanguis Cotton and 30% Linen in 100g skeins. It is beautiful to work with. I estimated that I would need 4 skeins but in the end, I only used 2 so look for another project with the leftover yarn one day soon. (This yarn reminded me of another denim blue crochet project!)
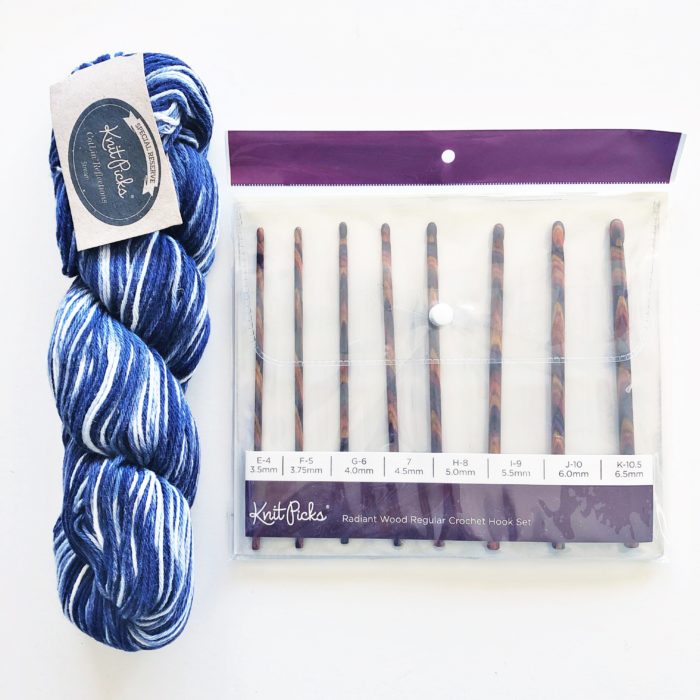
When they shipped the yarn, the lovely folks at We Crochet included a set of crochet hooks as a surprise gift – thank you! The hooks are the Radiant Wood Regular set in pretty earthy colours. I used the size 7 or 4.5mm hook for this project. Now, I am a little attached to my current crochet hook set and see no need to have multiple sets of hooks but I may have changed my mind after using this new hook. It had a pointier tip than my other hooks and a deeper hook length (if that makes sense!) so it seemed to go into the holes easier and hold the yarn better as I worked. I’ll certainly be using these again! (Quick tip for remembering which hook you’re using here.)
My Poncho is based on a store-bought one that I already have in my cupboard. It is a simple long rectangle of “fabric” which has been folded in half and part of the top joined to create a seam and space to go over the head. It is easy to throw on over any outfit and drapes well. I wear mine all the time through Winter but it is a little too warm for Summer.
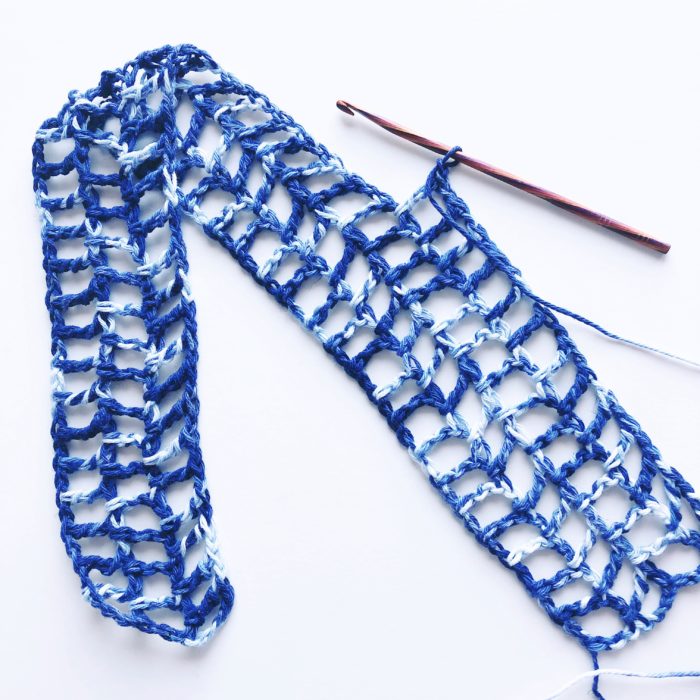
To create my “fabric” piece, I wanted a simple repetitive stitch that created quite an open weave so it wouldn’t be too hot for Summer nights. I was inspired by this blanket from Craft-Mart: https://craft-mart.com/knitting-crocheting/crochet/free-crochet-throw-pattern/ and the tall stitches post by Moogly: https://www.mooglyblog.com/tall-crochet-stitches/.
I chose to use the Treble Crochet stitch which starts with 2 yarn overs, but you could easily create this poncho with any of the tall stitches Tamara talks about in her post. Just keep in mind that if you use a taller stitch, you will need to add extra turning chains at the ends of each row to match your taller stitch.
NOTE: This is the U.S. Treble which is the equivalent of the U.K. Double Treble. Learn more here.
What To Do:
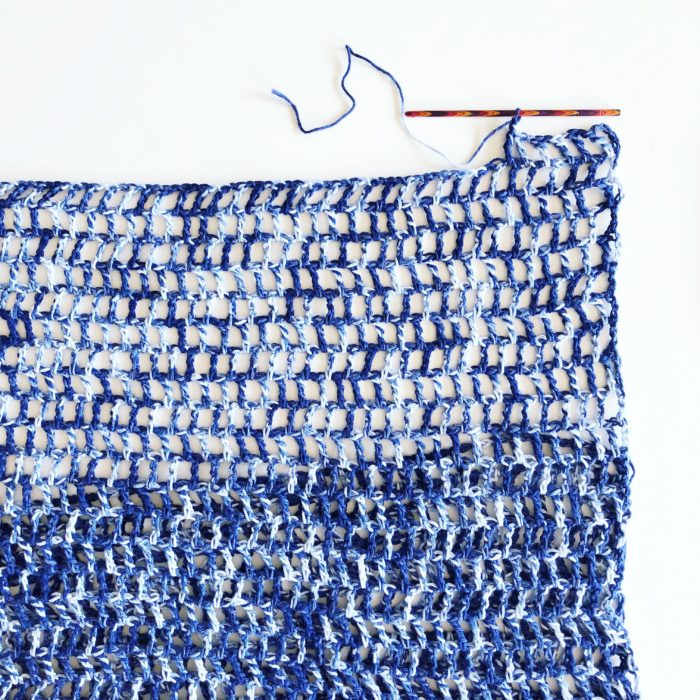
I started with a chain of 79 stitches plus 3 to turn. This gave me a finished width of about 60cm or 23.5″.
Row 2: To work the next row, crochet a tall “Treble Crochet” stitch (TC) into the 4th stitch from the hook then Chain 1 (C1). Skip the next stitch and TC into the stitch after then C1 again. Repeat this pattern all the way to the end of the row (stitching into every second chain), then Chain 3 and turn.
Row 3: TC into the chain space then C1. Repeat to the end of the row, finishing with a TC into the top of the original 3 Chains of the previous row. Chain 3 then turn.
Row 4 and beyond: Continue the same as Row 3 until you have a pice of crochet “fabric” that is about 128cm or 50″ long. This took me almost 2 skeins of yarn. I did 57 rows all up.

Finishing:
Weave in the ends and any joins in your yarn.
Fold the rectangle in half with the short ends on top of each other.
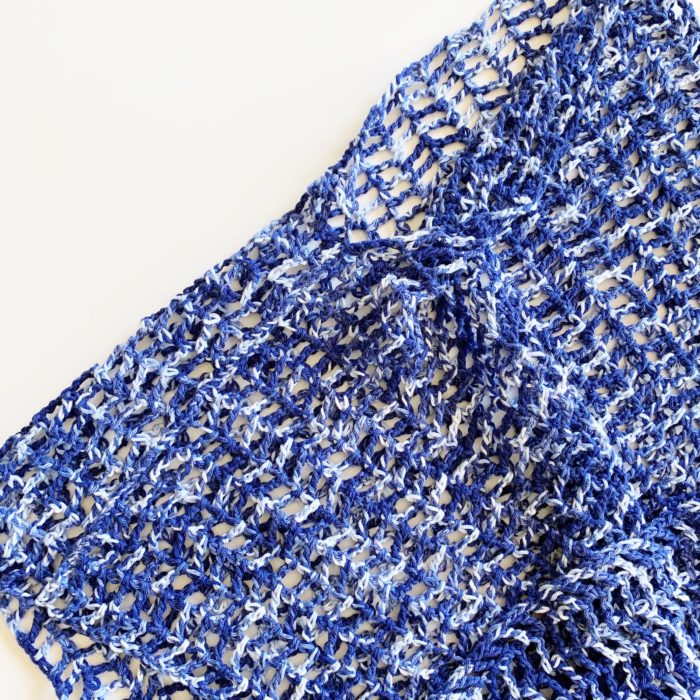
Join along the top of the rectangle from the outer edge for about 30cm or 12″, leaving an opening of about 13.5″ or 35cm. Just slip stitch the sides together with more of your matching yarn and a large needle so the stitching is almost invisible.
To Wear:
Slip the opening over your head and adjust the drape of the Poncho until you are happy with how it sits. This poncho is super easy to wear adding a little extra warmth but still leaving your arms free to get things done!
A super special thank you to the folks at We Crochet for sponsoring this post. They generously provided the yarn and hooks as well as a small fee. These type of posts and affiliate links are how I can keep running this website and giving you projects for free. Please support them by popping over to We Crochet and checking out their beautiful yarns, hooks, patterns, kits and more.