The Crafty Mummy

Crafts. Sewing. Quilting. Crochet. Tutorials.

  • Start Here
  • Welcome
    • Subscribe
    • About Me
      • Copyright
      • Disclosure
      • Privacy Policies
    • Advertise
    • Sharing
      • Recommendations
      • Shopping & Coupons
      • Books
  • Explore
    • Crafts
      • Beading
      • Kids
      • Paint
      • Storage
      • Christmas Crafts
    • Sewing
    • Quilting
    • Stitching
    • Crochet
      • Yarn
    • Life
      • Food
      • Organisation
    • Blogging
      • How To
      • Social Media
      • WordPress Plugins
      • Photography
  • Tutorials
    • Tips
  • Shop on Etsy
  • Shop on Redbubble

Special Guest… Jen from Perler Voodoo

by Tonya Grant |Filed Under: Crafts Tagged With: Guest Post, Perler beads Get a Weekly Update of all Articles

Today I’d like to welcome Jen from Perler Voodoo…
My name is Jen and I live in good old Canada :). 
I work in a day care so I needed something to help me relax after a tiring day.

Over at my blog I talk about a craft called Perler Beads. 
They go on a pegboard and you iron them. 
I have been asked to write a tutorial on how to make them, so I will do just that.

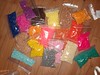
There are 3 brands of beads, which offer a good range of colours:Perler, Hama and Photopearls. 
You can find Perler Beads in craft stores and you live in the United States/Canada. 
Over in Europe, Hama beads are the easiest to find (I hear). 
You can find them in buckets in stores and they usually run around $10-20 
depending on how many beads you buy. 
If you buy them online in individual colours, they usually are around $2 a bag of 1000. 
Pegboards are around $8 for 2 from craft stores.
The best way to buy them from my experience is from a girl named Michelle Baker. 
She can be found on Ebay, but if you email her directly you get a better price. 
She has never failed me yet.

Items you need
     
Beads
Pegboards
Iron
Parchment Paper
Pattern

Step 1:
Pick a Pattern
You can search on Google, Flickr and Deviant for perler beads. 
Also, you can look at www.spritesresource.com for stuff from video games. 
Save the images and use either 
http://perlerpal.com/ or http://dolkow.se/perler/ 
to load the images into. 
They give you the colours of beads you will need.


Step 2:
Once you have your pattern you can begin following it 
and placing the right coloured beads on the pegboard


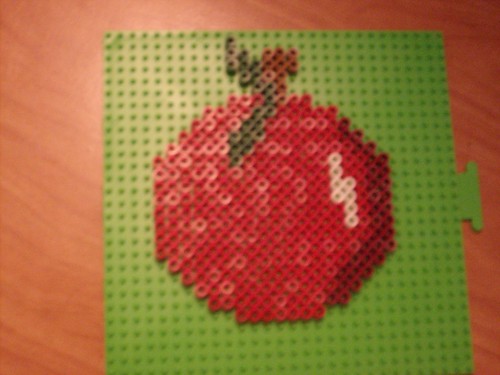
Step 3: Once done, cover the project with the parchment paper


Step 4: Iron it. Do it slowly and at an even moving pace to make sure it’s all ironed.
You can have holes in the beads or flat iron for a different look.
I usually use a medium setting on my iron, 
but it can become a trial and error based on the project you are doing 
and the type of beads you have. 
Each company’s beads melt at different rates and heat.
If you iron them for a while the holes will close up and give the beads a square shape. 
There are other bead artists that use this method for their work. 
As long as the iron is melting everything constantly, it works well either way.


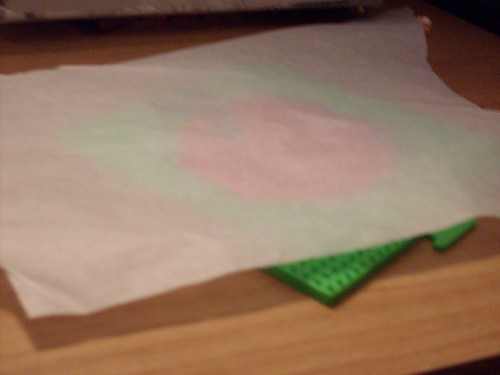
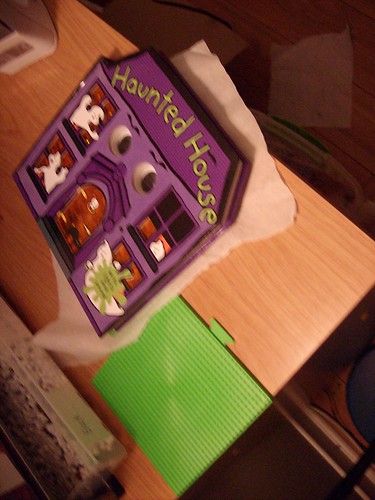
Step 5: Take the pattern off the pegboard while the paper is still attached and place books on it.
The reason for putting books on them is to keep them flat. 
When the beads begin to cool, they will warp and curl. 
The pressure from the books keeps them flat, making them easier to hang. 
I hope you guys all enjoyed the tutorial and check out the guest post on my blog.
perlervoodoo.blogspot.com

Filed Under: Crafts Tagged With: Guest Post, Perler beads

« Yoyo Christmas Tree Done
Blogging Tips: Comments to your Inbox »
Disclosure: There are affiliate links in this post.  This just means that if you click through and choose to purchase something I may get a small commission - at no extra cost to you, of course.  This helps me keep the content here at The Crafty Mummy free for everyone.

I love to chat so please leave me a comment or ask a question.

Don't stress if your comment doesn't appear immediately - sometimes I have to moderate comments thanks to spam visitors, but the comments from real readers will always get published. Scroll down to add your thoughts or ask a question.

Comments

  1. CK says

    October 25, 2010 at 2:10 PM

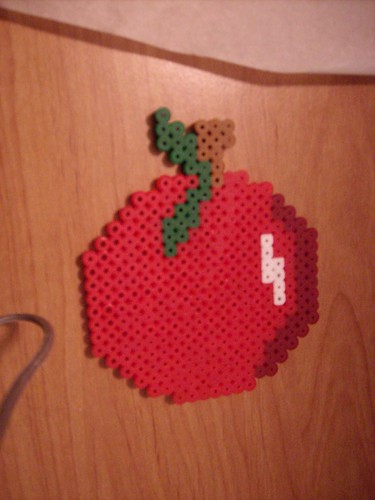
    Wow! What a great idea! Love the apple!

  2. Tammy@ Not Just Paper and Glue says

    October 25, 2010 at 11:37 PM

    What a really cool project! Looks very detailed 🙂

Hi! I’m the CraftyMummy

Tonya is the voice behind The Crafty Mummy. She dabbles in lots of different crafts – patchwork, quilting, cross-stitch, scrapbooking, knitting, crochet and sewing. This is the record of projects she has done, and the projects she dreams of getting to! Read More…

Search

  • Email
  • Facebook
  • Instagram
  • Pinterest
  • Twitter
  • YouTube
Shop my Affiliate Favourites

Fat Quarter Shop for Fabric and More

Grab the Sew Sampler Box Here

AccuQuilt for Cutting Machines and Dies

QuiltyBox for Monthly Treats in the Mail

CreativeBug for Craft Classes

Pretty Darn Cute for Blog Designs like mine

Creative Market for Fonts, Images, Themes and More

OzGameShop for All the Games

Adrift for Fashion you’ll Love

Kindle Unlimited Membership Plans

Kindle Book List

Click to shop my kindle book list
Shop my Amazon Influencer Shop
Join the CrochetU and learn to crochet
New to TheCraftyMummy.com? Click here to see more
Blog Tools I use for TheCraftyMummy.com

Grammarly

Aweber for email newsletter

CoSchedule to stay organised and share

Milotree for social media

Genesis for blog framework

FoodiePro is my theme

Hosting with WPEngine

Powered by

Recent Articles

Disclosure: There are affiliate links on this site. This means that I may get a commission if you choose to purchase after browsing via these links - at absolutely no extra cost to you, of course. I only recommend products which I use and love, or that I think will be quality products that will be useful to my readers. It is the affiliate links in this site that help me keep my tutorials free of charge. Thank you!

Looking for something? Search here:

Copyright 2015 The Crafty Mummy · Built using Genesis Framework & Foodie Pro Theme