The Crafty Mummy

Crafts. Sewing. Quilting. Crochet. Tutorials.

  • Start Here
  • Welcome
    • Subscribe
    • About Me
      • Copyright
      • Disclosure
      • Privacy Policies
    • Advertise
    • Sharing
      • Recommendations
      • Shopping & Coupons
      • Books
  • Explore
    • Crafts
      • Beading
      • Kids
      • Paint
      • Storage
      • Christmas Crafts
    • Sewing
    • Quilting
    • Stitching
    • Crochet
      • Yarn
    • Life
      • Food
      • Organisation
    • Blogging
      • How To
      • Social Media
      • WordPress Plugins
      • Photography
  • Tutorials
    • Tips
  • Shop on Etsy
  • Shop on Redbubble

Sew a Reversible Wrap Skirt

by Tonya Grant |Filed Under: Sewing Tagged With: Clothes, Skirt Get a Weekly Update of all Articles

wrap skirt reversible tutorial

Over at And Sew We Craft, we’ve been having a skirt sew along. We chose to make this reversible wrap skirt and planned to each share our skirts last week. You can find the Skirt Tutorial and Pattern at Craftzine.

I had good intentions of doing mine last week but somehow the week just got away from me!

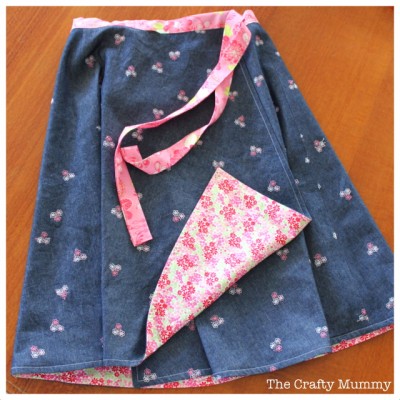
So I was deteremined to at least get started today. Once I started, I got on a roll and here’s my skirt, ready to wear.

I used an embroidered denim on one side and a cotton floral print on the other side. I didn’t have any ribbon and I had a sick little girl on the couch so I decided to make my own waist band.

Make your own Waist Band and Ties

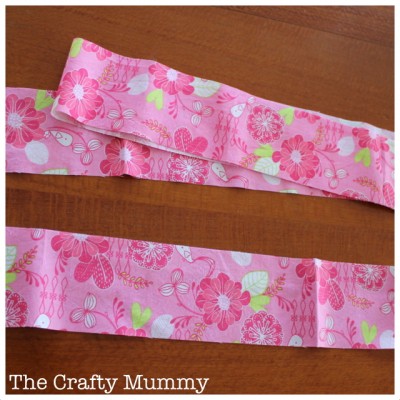
You will need 10.5″ of fabric. Cut it into 3.5″ strips across the width of the fabric.

Join two of the strips end to end and iron the join flat.

Now you should have one long strip and one short strip.

making skirt waist ribbon

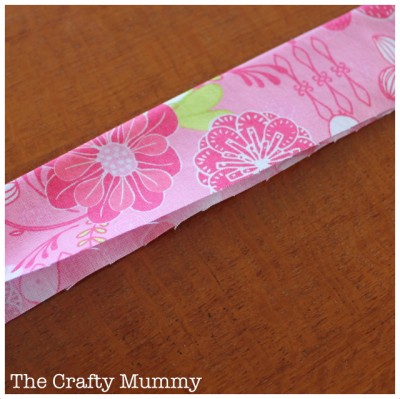
Iron the long strip in half lengthways with wrong sides together.

making skirt waist band

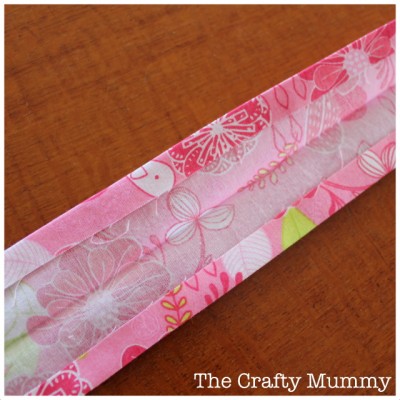
Open the strip up again. Iron each edge in towards the middle about 1cm or half an inch.

making ribbon for wrap skirt waist

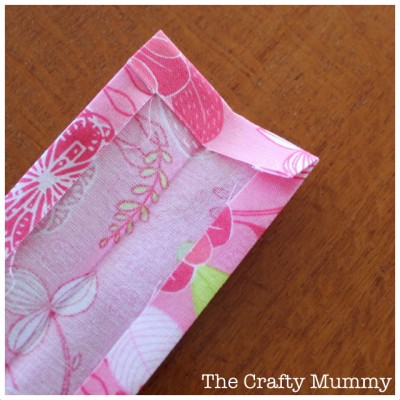
Fold each end in 1cm or half an inch as well.

making skirt waist band

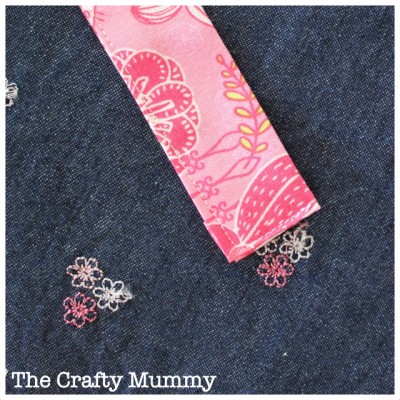
Fold the strip back in half and it is ready to attach to your skirt. Pin it in place. Start at one end and stitch the end closed. Then pivot at the corner and stitch along the rest of the strip, attaching it to the skirt as you go. At the other end, stitch the end closed.

finishing waist ties

Iron the shorter strip in the same way as above to create a folded strip with the edges folded in. Cut it in half and fold the ends in. Now you have two short ties.

Attaching the Two Short Ties

I found it a little confusing to work out where to attach these two ties so here’s what I did.

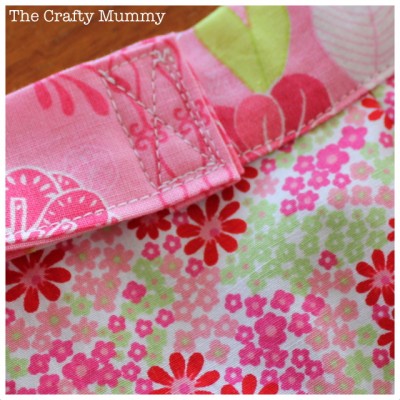
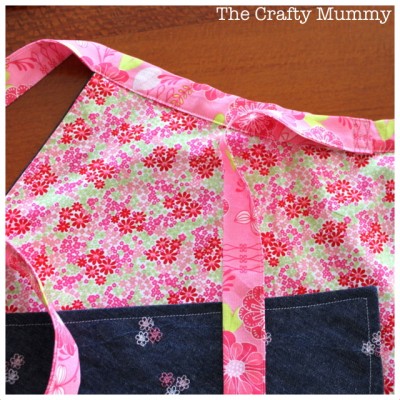
I wrapped the skirt around myself with the denim side out and pinned one short tie near the side seam so that it would tie nicely. Then I flipped the skirt and wrapped it with the floral side out and pinned the second short tie near the other side seam. I attached each tie on top of the waist band strip with a rectangle and a cross design for extra durability.


ties for wrap skirt

You can find some more pictures of my skirt over at And Sew We Craft.
Today's Creative Blog

Filed Under: Sewing Tagged With: Clothes, Skirt

« Baby Quilt Collection
Book Week: Dorothy Costume »
Disclosure: There are affiliate links in this post.  This just means that if you click through and choose to purchase something I may get a small commission - at no extra cost to you, of course.  This helps me keep the content here at The Crafty Mummy free for everyone.

I love to chat so please leave me a comment or ask a question.

Don't stress if your comment doesn't appear immediately - sometimes I have to moderate comments thanks to spam visitors, but the comments from real readers will always get published. Scroll down to add your thoughts or ask a question.

Comments

  1. Cate says

    August 20, 2012 at 9:32 PM

    Thanks for the tip about the waist band, I couldn’t figure it out!

    • CraftyMummy says

      August 20, 2012 at 9:34 PM

      You’re welcome, Cate. It took me a while… maybe if I sewn a skirt from a pattern before I would have been quicker!

  2. Deb @ Home life simplified says

    August 21, 2012 at 5:21 PM

    awesome! i know the year is getting away from me but i am determined to dust off my sewing machine asap and finally get comfortable with it – so much i want to make!

  3. Karen Schulz says

    August 23, 2012 at 2:09 PM

    visiting from domesticity link party

Hi! I’m the CraftyMummy

Tonya is the voice behind The Crafty Mummy. She dabbles in lots of different crafts – patchwork, quilting, cross-stitch, scrapbooking, knitting, crochet and sewing. This is the record of projects she has done, and the projects she dreams of getting to! Read More…

Search

  • Email
  • Facebook
  • Instagram
  • Pinterest
  • Twitter
  • YouTube
Shop my Affiliate Favourites

Fat Quarter Shop for Fabric and More

Grab the Sew Sampler Box Here

AccuQuilt for Cutting Machines and Dies

QuiltyBox for Monthly Treats in the Mail

CreativeBug for Craft Classes

Pretty Darn Cute for Blog Designs like mine

Creative Market for Fonts, Images, Themes and More

OzGameShop for All the Games

Adrift for Fashion you’ll Love

Kindle Unlimited Membership Plans

Kindle Book List

Click to shop my kindle book list
Shop my Amazon Influencer Shop
Join the CrochetU and learn to crochet
New to TheCraftyMummy.com? Click here to see more
Blog Tools I use for TheCraftyMummy.com

Grammarly

Aweber for email newsletter

CoSchedule to stay organised and share

Milotree for social media

Genesis for blog framework

FoodiePro is my theme

Hosting with WPEngine

Powered by

Recent Articles

Disclosure: There are affiliate links on this site. This means that I may get a commission if you choose to purchase after browsing via these links - at absolutely no extra cost to you, of course. I only recommend products which I use and love, or that I think will be quality products that will be useful to my readers. It is the affiliate links in this site that help me keep my tutorials free of charge. Thank you!

Looking for something? Search here:

Copyright 2015 The Crafty Mummy · Built using Genesis Framework & Foodie Pro Theme