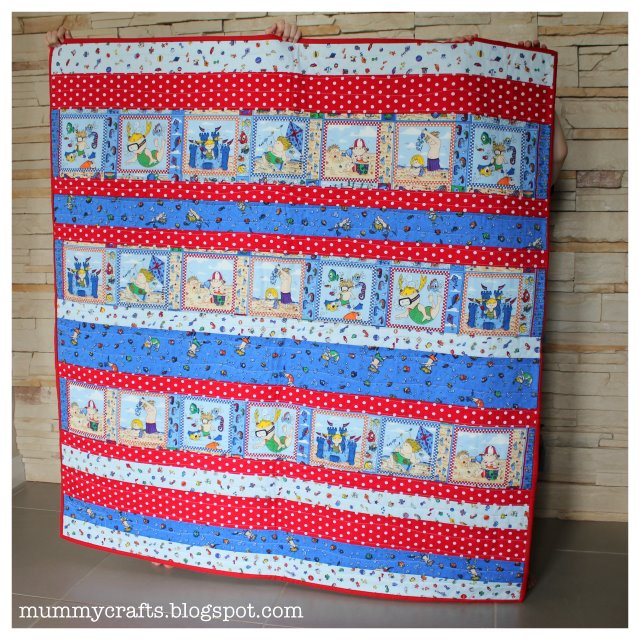
I posted about this easy strip quilt a couple of weeks back. It was a gift for a special friend of mine. I thought I’d share with you how easy it is – perfect for those of you who want to try quilting!
What you’ll need:
- 4 or more fabrics that look good together
- about 1.5m of fabric for the back
- about 50cm of fabric for the binding
- quilt batting: approx. 1.5m square
- scissors or rotary cutter and mat
- sewing machine and thread
Step 1 – Choosing Fabric:
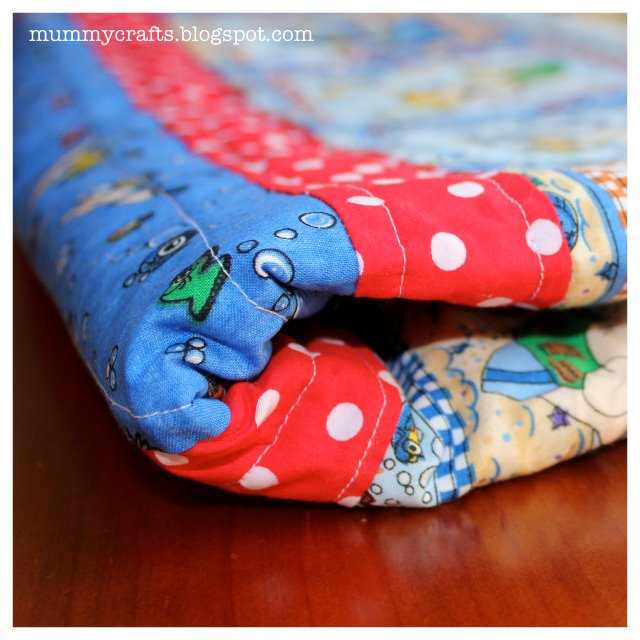
Part of what makes this quilt easy is that it is the width of your fabric. Most quilting fabrics are about 112cm or 44″ wide. You can see by the edges in my photo that there can be a slight difference in different fabrics but that’s fine.
I used 4 fabrics in this quilt but you can use as many or as few as you like. I started with the fabric with the little panels then chose my other fabrics to match that one. You want your finished quilt to be square so your fabrics need to create about 44″ or 112cm when they are pieced together. Each seam (or join) is quarter of an inch or 0.5cm. So 30-40cm of each fabric should be enough.
Step 2 – Cutting:
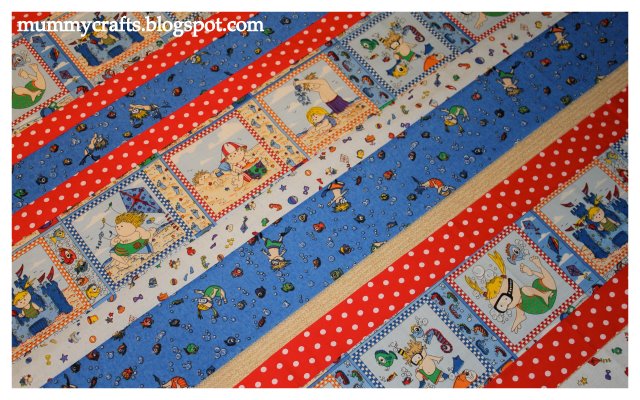
You are going to cut each fabric into strips. They can be as wide or as narrow as you like. It will look better if some are wider and some narrower.
My panel fabric strips are quite wide (about 6″) to accommodate the pictures. My red strips are quite narrow (about 2″) so they don’t overwhelm the other strips.
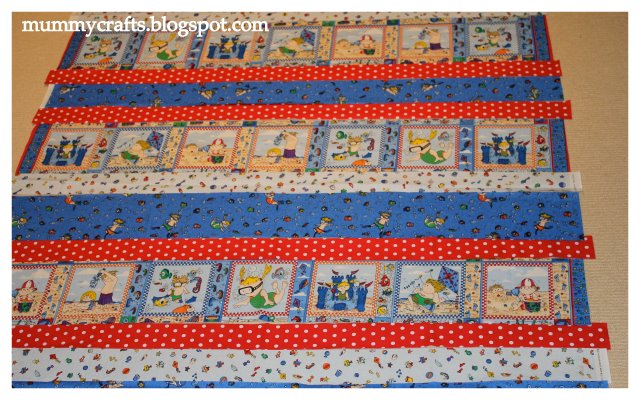
Step 3 – Sewing the strips
Once you have enough strips and you are happy with the layout, its time to sew them together. Quilters tend to sew seams of quarter of an inch, but in this quilt it won’t matter if your seams are slightly larger.
Lay your first two strips right sides together and stitch them together. Use the edge of your sewing machine foot as a guide to stay straight.
Then press the seam flat with your iron. Press each seam as you go along to get a nice finish. I tend to press my seams to the same side, but you can press them open if you prefer.
Keep joining strips until the length of your quilt is the same as the width. If your strips are slightly different lengths, try to keep one side straight. You can trim off the excess edge at the end. Go ahead and cut extra strips if you need them.
Step 4 – Squaring up
You may be able to skip this step, but you’ll probably want to even up your edges. You may also need to trim off the selvedges if they are white.
Lay out your quilt flat then fold it in half so that most uneven edge is to the right. Line up the strips so that they are parallel to each other. Then just as you squared up your fabric before you cut your strips, line up your ruler with the shortest strip and make sure its square with the fold. Trim that side straight in one smooth cut. Then spin your fabric to put the other side to the right and trim that one straight as well.
Step 5 – Getting ready to quilt
Cut your batting and backing fabric slightly larger than your finished quilt top – an extra couple of inches on each side is good.
Lay your backing fabric down wrong side up, then lay your batting on top, then finally your quilt top with right side up. The quilting will join the three layers together. But you need to keep them lined up.
Some quilters use pins to “baste” them together, others use big stitches. I use basting spray because it is quicker. This video gives a great explanation of how to do that.
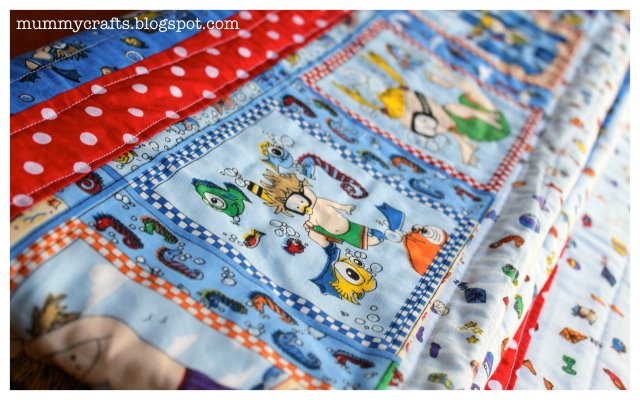
Step 6 – Quilting
The quilting is what holds the three layers together. I’ve kept the quilting super simple on this quilt.
You’ll need a walking foot to get the best result. Check out this video because she knows heaps more than me!
Start at one side of your quilt and stitch across the strip. You don’t have to go perfectly straight – in fact, I deliberately did slightly wavy lines on mine. When you get the other side, leave the needle down in the fabric and turn your quilt so you can go along the edge about a quarter-inch in. Sew along the edge to where you want to start your next line then turn again and go back across the quilt as before.
Keep going until you’ve covered the whole quilt. Your lines can be close together or further apart, but you don’t want gaps much more than about 4″ or 12cm or the batting might shift when it’s washed.
Once you’ve finished quilting, you can trim off the extra fabric around the edges. I tend to leave quarter of an inch of batting all around, but my friend Di trims hers to the edge of the quilt top, so either will work.
Step 7 – Binding
I was going to write instructions for this but this YouTube video gives such a clear explanation. It tells you how to cut the strips, how to iron them, how to attach them to your quilt, how to get the corners nice, then how to hand stitch the back of the binding.
You’re done!
Enjoy your new quilt.
Questions? Need help? Please ask in the comments below and I’ll try to help you.

Want to try quilting and patchwork? Check out this free Craftsy class to get you started (Affiliate link)


Thanks for the relatively simple instructions and links to videos. I've been seriously thinking of trying my hand at a small quilt and I love that there are simple instructions for someone who has never really quilted before.
It is something my Mom did and I would like to at least complete one quilt myself. I might just have to go back to the fabric store and pick up the fabric I looked at the other day and just do it.
Wow, that is an amazingly simple binding video. I always found some of the instructions in books confusing. Thank you.
So cute! I love it!
This is such a cute quilt. I will have to give this style a try.
I think I could actually do this! I am featuring this at somedaycrafts.blogspot.com. Grab my 'featured" button.
Love the pattern! I'm making a twin-sized quilt that will be gifted to an anonymous child in foster care this Christmas.
Thanks for the tutorial! I've never quilted before. It's a little intimidating. Maybe I'll give it a try. Maybe I could get one done before I have grandchildren.
So cute! Thanks for sharing over at Tuesday Tell All.
Thanks for the tutorial. Your quilt looks really cute and fun!
Wow! What a great tutorial… and I love all of the links you included. You covered everything, and I think I could maybe actually do this now! Thanks so much for sharing this.
This is adorable! I’ve added this link, as well as several other of yours to both of my websites. I’m an email subscriber and very much enjoy receiving your posts.
Thanks, Kelly. I appreciate you linking back to me.
You made it sound so easy that I’m going to have to give it a try!
Thanks for sharing.
You should, Linda. It really isn’t that hard at all. Let me know if you have any questions.
This is really great, simple pattern. I’ve been quilting for a while but ALL of my friends have just had or are expecting babies. I have 6 baby quilts to make! Thank you for providing a simple solution. 🙂
You are so welcome! I would love to see your 6 baby quilts when you have them done – perhaps a guest post?
can’t print the second page. the last page is superimposed over it. please help or send me page 2 with instruction steps 1 – 3. Thanks P
Sorry. I have never tried to format my posts for printing so I’m not sure why they wouldn’t print properly.
Just came across your cute baby quilt. I realize that you posted this several years ago. Probably no chance of finding the fabric that you used, but was wondering what the blocks were called or who the manufacturer was. I’m attending a conference this summer and it fits the theme being used. Thought I’d try making one for the silent auction that is a fundraiser for this non-profit organization. Thanks, so much!.
Hi Karla,
Glad you like it but I’m afraid I don’t have any of the fabric left to find the manufacturer for you. It would have been from Spotlight but they carry a lot of brands so I’m not sure that helps.
Hope you find something suitable,
Tonya
Where can I buy the beach baby strips for the beachy baby quilt. I’vd looked everywhere and just can’t find it.
Hi Judy,
I made that quilt in 2011 so I would have bought the fabric before that. I’m afraid you’d be very lucky to find it now. But you can make this quilt with any fabrics. Just start with a novelty print that you love and pick a couple of coordinating prints for the other strips.