It’s Father’s Day next weekend and there’s a stall at Little Miss’ school this week where the kids can buy something for Dad.
(You might remember when I made things for the Mother’s Day stall earlier in the year.)
So this time I’ve done a few bookmarks and keyrings – 8 of each because that’s all the split rings I had!
Here’s how:
I started with:
- 4 sheets of felt (approx A4 size)
- (2 sheets of felt will make 4 bookmarks & 4 keyrings)
- iron-on interfacing
- 8 split rings
- ribbon (you’ll need about 2.5″ per keyring)
- fabric paint (to decorate)
- pinking shears to zigzag the edges
- sewing machine and thread
Step 1
I decided to have red and yellow felt for one set, and blue and green felt for the other set.
Iron your interfacing onto one of your pair of felt sheets. I ironed onto the blue and the yellow.
Step 2
Cutting
I used my rotary cutter and mat but you can easily use scissors.
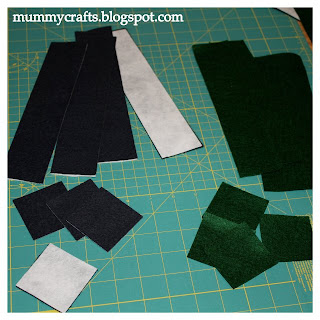
I cut 4 strips across the felt sheet, each about 2″ wide. These will be your bookmarks – 2″ x 8.5″ approx.
Then the last bit I cut into 4 squares about 2.5″ square.
Do that for both your sheets of felt.
You’ll end up with all the bits in the photo above – blue bits with interfacing, green without.
Step3
Keyring:
Match up a green and blue square with the interfacing in the middle and pin.
Slip a piece of ribbon through a split ring then tuck the ends into one edge of your sandwiched squares.
I placed my ribbon near but not on a corner.
Make sure that its tucked far enough in that the ends will get caught when you sew.
Bookmark:
Match a blue and a green rectangle with the interfacing in the middle and pin to hold.
Step 4
Sew the squares together about 5/8″ in from the edge.
I started just before the ribbon then finished just past it so it got stitched in twice to reinforce it a bit better.
Then trim the edges with pinking shears.
Be careful when trimming near the ribbon – do each fabric individually on that side of the square so you don’t cut through the ribbon!
Step 5
Repeat Step 4 on the rectangles to make your bookmarks.
Then I added “DAD” with fabric paint but you could decorate with a pattern or buttons or anything!
You could also add ribbon to the top of your bookmark if you like.
I’m thinking next year I’ll do “girly” ones with buttons or flat flowers for Mother’ Day.
They’d also be good to add to a book gift for a child’s birthday or Christmas.


Those are really cute and crafty! Would be great teacher gifts, too!
smiles!
These are nice! Have a wonderful week.
I love how you made those up! Great for kiddos to add a personal touch. I have to say that I am spoiled by me embroidery machine and ITH (In-The-Hoop) designs, LOL!
~Kimberlee
Cute! I have tons of felt I need to use up. book marks and key rings would be a great idea.
Thanks for sharing.
What a great idea, I love these!
Darling idea!!! Thanks for joining in on the first Thrilling Thursday linky party @ Paisley Passions. I hope you will join in again next week 🙂
~Lori
Very cute idea! Thanks for linking up with Making It Fantabulous Friday on mommaskindcrafty!
Joy
What a fun idea!
What a great idea – useful and cute and a great gift.
Sorry if this is a duplicate – the computer is acting up!
What a great idea. Anything that is useful and cute is tops in my book.
What fun bookmarks
These are so cute! I think they would be great to add to gifts for Christmas.