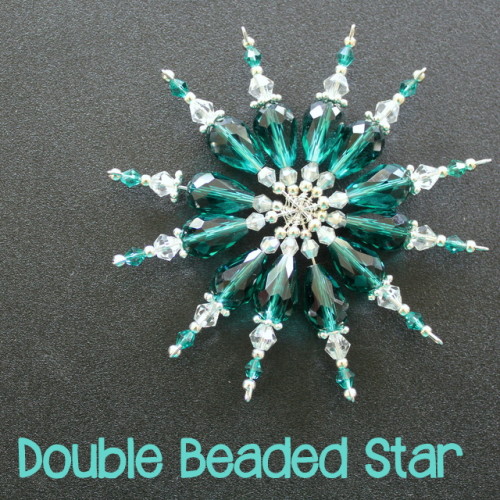
While I was on Craft Retreat I saw a very clever lady making beaded stars.
I just had to have a go!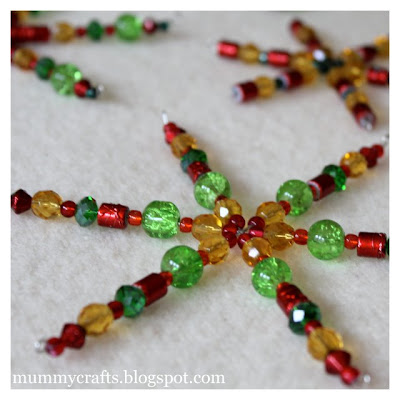
You start off with pre-made wire stars. The packaging calls them snow flakes but since we don’t get snow here I’m calling them stars for Christmas. They come in 3 different sizes in our local beading shop.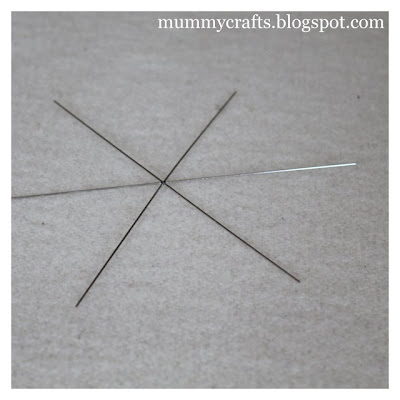
The kids and I had fun threading all the beads. I just bought a variety of shapes and sizes. It was good to have some smaller ones to start in the middle.
At the end of each “spike” we just curved the wire over to stop the beads coming off. (I’m sure there’s a technical beading term for this…?)
We discovered that you needed to complete each “spike” and finish the end before doing the next one or you risked tipping all the beads back off again!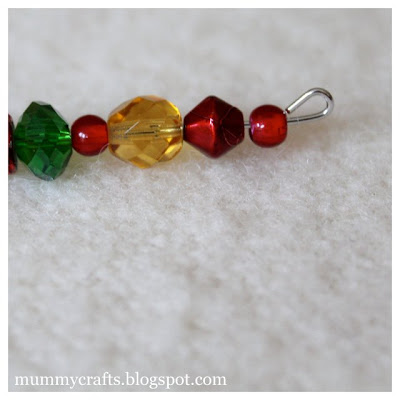
I intend to thread ribbon and hang our stars near our front door for Christmas. This was a fun craft to do with the kids and fits nicely with my idea of starting a new tradition – making a new ornament with the kids each year.
Note: These photos are watermarked for my old blog, MummyCrafts, before I moved over to TheCraftyMummy.com They are still photos taken by me.



These are just lovely!
How cool. We pick a color for our tree each year. This would be a good way to fill in the wholes in any color.
Beautiful! What a great handmade ornament!!!
Awesome! What a great handmade ornament!!!
-CK
Thanks for linking this up to the twelve days of traditions! Great idea to include them in the ornament making!
very nice! i want to make some too 🙂
I've made mine in white, clear and green but I love the multicoloured ones and think I'm going to have to make more now;-D
Thank you for sharing your lovely pictures and story.
These are lovely! We change up our tree every year, too and this would be an inexpensive way to do so with pony beads or wooden beads for the kids.
(Stopped by from BlogFrog.)
I hope I can find the wire snowflakes at my craft store — these are really cute! Joni
That is so cute! Thanks for sharing over at Tuesday Tell All!
Well — they're beautiful. Truly a beautiful little star and they look like they would be great fun to make — I would love to experiment with the colors and bead combinations, and imagine that some could get quite elaborate. Thank you so much for sharing, Crafty Mummy, this wonderful project on the Boardwalk Bragfest. I wish that you and yours have a blessed Thanksgiving!
These are sooooo pretty…my daughter made one a few years ago!
Blessings,
Linda
I’m having a CHRISTMAS OPEN HOUSE linky party on 12/9…would love for you to join in on the FUN!!!
Really colorful. Love them. Thank you for sharing them (and their tutorial) with us in our DIY Craft linky party!
Today a new party opens and you're invited to come add a few new ideas/projects/tutorials, particularly if they are as nice as these.
Really colorful. Love them. Thank you for sharing them (and their tutorial) with us in our DIY Craft linky party!
Today a new party opens and you're invited to come add a few new ideas/projects/tutorials, particularly if they are as nice as these.
Thanks for linking:) I featured these in tomorrow's post.
Hi, I use the tall earring backs for my star ornaments. Can be bought by the bag at craft locations. It is a good finish for the project, and you can put your string, wire, whatever on then put earring back on to hold in place. I have also alternated them narrow end and wide endaround so three of them are narrow end up & three down.
Dar
Great idea, Darlene!