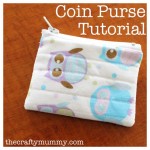
 I’ve gone visiting today to my friend Jill’s online home, Creating my Way to Success.
While I’m there I’m sharing a tutorial to make these cute coin purses. I’m always a little scared of putting in zippers but these are super easy, so pop over and say hi! Click on the picture to visit.
You could easily use this tutorial to make a bigger zipped bag, so here’s some extra size suggestions for those that want to try something larger.
Pencil cases:
My kids needed pencil cases in two sizes – one for pencils and one big enough for homework books and readers. I used medium weight iron-on interfacing in these rather than fluffier batting and I didn’t quilt them like the little purse, but you could if you wanted to.
Smaller one:
- 8″ (20 cm) zipper
- Fabric rectangles 9″ x 6.5″ (23 x 16.5 cm)
- Interfacing rectangles 8.5″ x 6″ (22 x 15.5 cm)
Bigger one:
- 14″ (35 cm) zipper
- Fabric rectangles 15″ x 11″ (38 x 28 cm)
- Interfacing rectangles 14.5″ x 10.5″ (37 x 27 cm)
Another good size – big enough for a ruler:
- 12″ (30 cm) zipper
- fabric rectangles 13″ x 5″ (33 x 12.5 cm)
- interfacing rectangles 12.5″ x 4.5″ (32 x 11.5 cm)
Make-up bag:
I would use batting on this one to protect your makeup from scratches, and the size is a little deeper to accommodate the bulkiness of make-up cases.
- 7″ (18 cm) zipper
- fabric rectangles 8″ x 7″ (20 x 18 cm)
- interfacing or batting rectangles 7.5″ x 6.5″ (19 x 17 cm)
Hope that gives you some help with sizing. I’d love to see some pictures if you make one using my tutorial.


Oh making purses is something i never get tired of, such a satisfying & speedy result for a product you keep for ages & use everyday. Love Posie
I agree Posie. Quick and useful