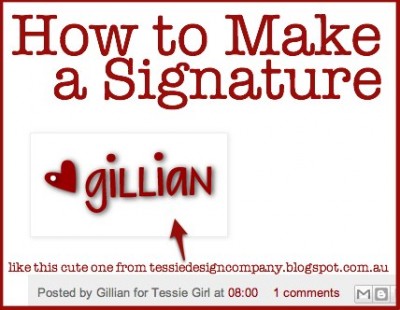
Have you seen some blog posts with cute and curly signatures at the end? Like the one above from Tessie Design Company? Gillian is super clever and I know she draws many of her pictures on a tablet so she may have drawn her cute signature too. But you can have a clever signature with a free software like Picasa and a little blog know-how. Here’s how to add a blog post signature to Blogger or WordPress.
Make your Text Image using Skitch
- Open a new picture in Picasa: File > New
- Set your colour on the right side
- Choose the Text tool on the left (it looks like a small letter a)
- Type your text
- Open the Font tool on the right side to change the font. Remember you want it to be the right size to go on your blog posts.
- If you want more than one font, each one must be in a separate text box. Then you can drag them as close to each other as you want.
- You can also use separate boxes if you want words to be centered, different colours or close to each other.
- Once you are happy with your text, you will want to make your picture as small as you can without cutting off the edges of the text. Click on the corners of the picture and drag it to make it smaller.
- Now you need to make the background clear: Under the Image Menu (at top of screen) choose “Background Color to Transparent”. It will look like a grey and white checkerboard on your editing screen but it will be clear when you put it in your post so your blog background colour will show through.
- Rename the file at the bottom of the screen, then click “Drag Me” and drag the file to your Desktop or into a folder to save it on your computer.
Adding the Signature to your Blog Posts
You could upload the image to each blog post as you write it just as you would add any image to a post in Blogger or WordPress. But it can be added automatically for you in Blogger. First create a new blog post and load the signature into it. Then save it, but don’t publish it. Look in the HTML tab for the post and copy the HTML code in there. You’ll need that to put that code into the Blogger post template.
Editing the Blogger Post Template
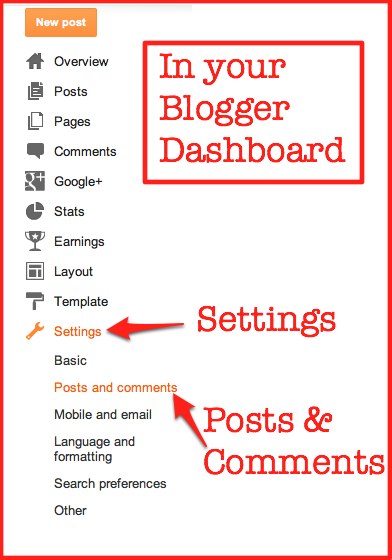
- In your Blogger Dashboard, click on Settings then Posts and Comments.
- One of the boxes in that screen is the Post Template. You can put text or HTML code into there and it will then appear in every new post you write.
- Paste in the code you just copied from your signature post, then “Save Settings” at the top of the screen.
- To check it is working, click “New Post” to open a new post screen. You should see the signature already there. You just write your post above it as usual.
Adding a Signature to Posts in WordPress
The easiest way to add a signature in WordPress is with a plugin like WP Post Signature or WordPress Signature. I have not tried out these plugins so back up your blog first – just in case.
If you are keen, you can edit your PHP code to add the signature automatically without the plugin. Again, I haven’t tried this but there are instructions in this blog post over at SumTips.


Thanks so much for posting this! You’ve helped me out a ton. :))
You’re welcome, Sarah!
This worked a treat! Thanks so much
You’re welcome, Anne! happy to help!
Thank you so much for the tutorial! It worked perfectly!! Love your site. Be well and happy holidays!
Thanks Toni! Glad to help and Merry Christmas!
Hey! Thanks so much for this wonderful tutorial! I have been tearing my hair out trying to work with HTML codes and you just hit the nail on the head. Superstar! I’ve credited you on my blog 🙂
Here’s mine here xox
http://emmieloves.blogspot.com.au/2013/01/prettying-up-my-blog.html
Hello Tonya,
Thanks for the informative post, was looking for same and found you on first page of Google 🙂 I was amazed to see few bloggers to whom I follow adding there signature at the end of blog post, doing this they definitely create some credibility as well as pull attention of readers. Also I wasn’t aware of the plugins that you described here. Thanks again.
Thanks, Sachin. So glad it was helpful to you- and nice to hear that you found it easily on Google.
I was trying to follow the instructions. However, I was unable to find the option of “File – New.” It only allows me to create a new album or folder and only allows me to use uploaded photos.
Hi Gilu,
I use free Picasa downloaded to my Mac, but I think there is an online version as well. Which one are you using? Perhaps the two are a little different?
Thank You so much for explaining this! It helped out a ton!
You’re welcome!
Thank you…