Want your name tag to stand out from the crowd? Sew a personalised lanyard strap to hang your badge – or keys, camera or even your phone!

I’ve got some travel coming up – exciting! I’m heading to the ProBlogger Training Event later in the week and then I’m off to teach at Creative Craft Retreat at the end of the month. At Retreat we always try to wear name tags of some kind for people to get to know everyone and each participant brings their own. One year I wore a lanyard and that was easier than a name tag that pinned to my outfit. So this year I am getting crafty and I’ve made a lanyard. I’m going to throw it in my bag for Melbourne too just in case I can use it there – and show off my “crafty” skills!
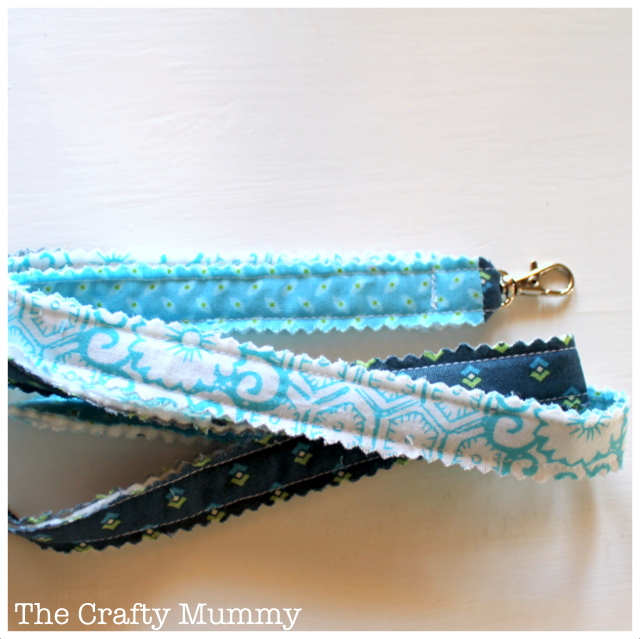
How to Sew a Lanyard
What You Need
- 2 x 112cm strips of fabric, 1″ wide – my strip is a combination of some scraps from this quilt and this quilt
- 112cm strip of wadding, interfacing or pellon, 3/4″ wide
- Lobster clasp swivel clip
- pinking shears
- usual sewing supplies and sewing machine

What To Do
- If you’re using iron on pellon or interfacing, iron on the interfacing strip to the back of one of your fabric strips.
- Layer one fabric strip, right side down, then your pellon/ wadding/ interfacing on top, then the other fabric strip, right side up. Pin to hold.
- Sew the three together. You can stitch 1/4″ in from each long edge or add more rows of stitching up and down the length of your strip.
- Trim the edges with pinking shears.
- Slide the swivel clasp on the strip.
- Fold the ends of the strip to hide the raw edges, then join the ends to create a continuous strip.
- If you want the swivel clasp to stay in one place, stitch across the strap just above the clasp.
Now your lanyard is ready to add a name tag too. Or you would use it for keys, a camera, even your phone!

Disclosure: There are affiliate links in this post.
More small sewing projects


Oh you ARE clever! I love this idea. There’s always the threat of those pins tearing a hole in your shirt/jacket/cardi. Can’t wait to meet you 🙂
Thanks, WorkingWomenAus-who-I’m-sure-has-a-real-name ;o) I’ve spent part of the day trying to work out which clothes to bring – very tricky with such a small suitcase!
It’s Kim 😉 lol
Hi Kim! I’ll be looking for you…
Oooooh this looks good, even easy enough to make for the non crafties like me!!! Look forward to meeting you at PB!
#teamIBOT
Thanks Lyndal. I’m glad I now have some faces to look for!
I’m a huge fan of lanyards! I use them all the time. I think I’ll make a bunch to go with every outfit
They could be the next must-have accessory!
That looks great! Rachel x
Gorgeous fabric and I love the pinked edges!
Thanks Roslyn. I realised the pinked edges are leaving lots of fluff though – I’ll have to be careful about wearing it over a black top!