The Crafty Mummy

Crafts. Sewing. Quilting. Crochet. Tutorials.

  • Start Here
  • Welcome
    • Subscribe
    • About Me
      • Copyright
      • Disclosure
      • Privacy Policies
    • Advertise
    • Sharing
      • Recommendations
      • Shopping & Coupons
      • Books
  • Explore
    • Crafts
      • Beading
      • Kids
      • Paint
      • Storage
      • Christmas Crafts
    • Sewing
    • Quilting
    • Stitching
    • Crochet
      • Yarn
    • Life
      • Food
      • Organisation
    • Blogging
      • How To
      • Social Media
      • WordPress Plugins
      • Photography
  • Tutorials
    • Tips
  • Shop on Etsy
  • Shop on Redbubble

Kids Kitchen Set Tutorial – Part 2

by Tonya Grant |Filed Under: Sewing, Tutorials Tagged With: Apron, Kids, Kitchen, Tutorial Get a Weekly Update of all Articles

kids kitchen set apron tea towel pot holders

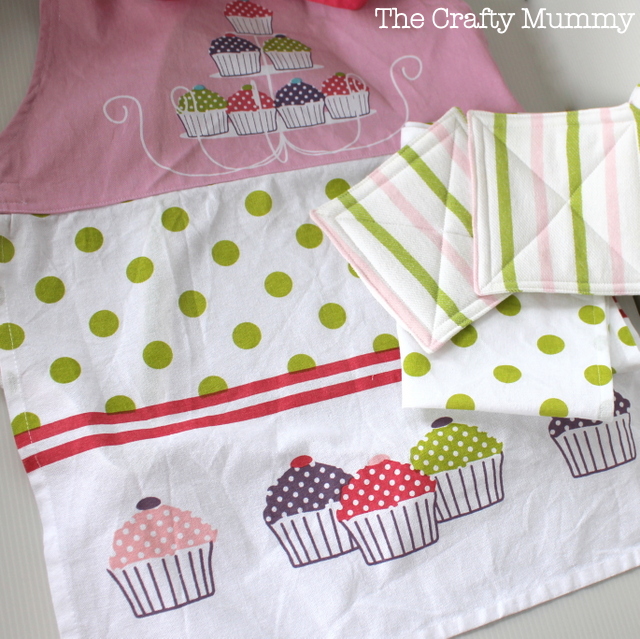
Yesterday I wrote about how to make the first part of my Kids Kitchen Set – the tea towel and the pot holders. Today we’re going to make the apron with the remaining pieces to finish the set.

What You Need

  • One apron – the kind that has a loop around the neck as well as a skirt
  • 2 tea towels
  • 2 pieces of iron-on pellon, 6″ square


kids kitchen set cutting

What To Do

Cutting:

Cut one tea towel in half
Cut the top off the apron
Cut the last tea towel into:

  • Three strips 2.5″ wide
  • 4 squares 6″x 6″
  • Keep the little edge bits 6″ long

Tea Towel and Pot Holders

Click here to see the post about making these: Kids Kitchen Set Tutorial Part 1

sewing kids apron

Sewing the Apron

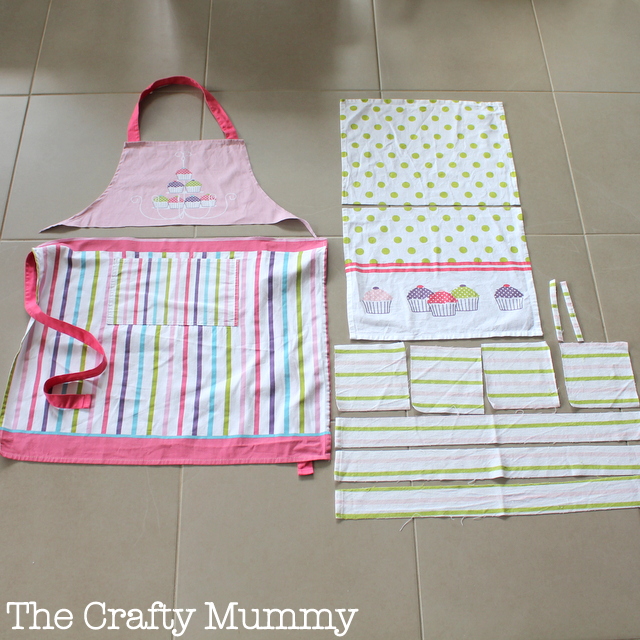
The apron is made from the original apron top, half of a tea towel and the long 2.5″ wide strips.

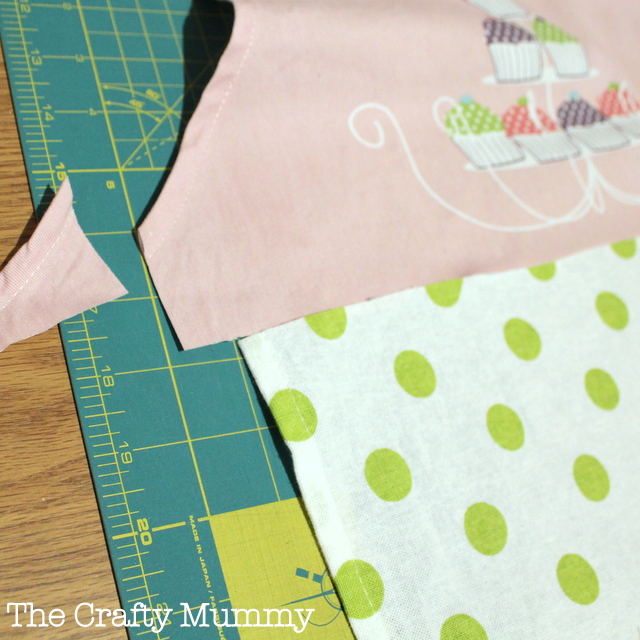
  • Trim the apron top at the sides to the same width as the tea towel plus seam allowance. See photo above: just lay them out, center the apron top and trim leaving about 2cm.
  • Fold the side edge in about 1cm, then fold again and sew to create the seam.
  • Lay the apron top and tea towel raw edge right sides together, pin and sew.
  • Press the seam to one side and top stitch the hold the seam flat. Trim the raw edge with pinking shears.

kids apron tie

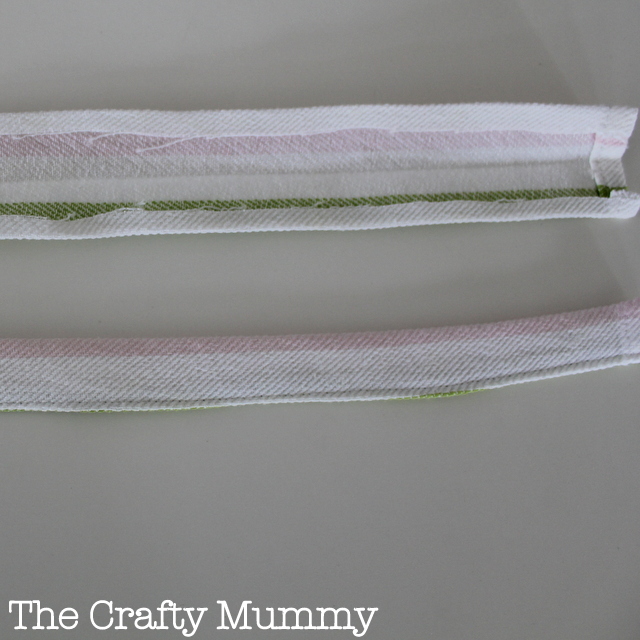
The apron ties are made from the 2.5″ strips.

  • Fold each strip in half lengthways wrong sides together and press to create a crease.
  • Open the fold up and fold in each edge about quarter of an inch and press.
  • Fold the whole strip in half again so that the raw edges are inside the folds. Stitch the open edges closed.

Attach a tie to each side of your apron. The third tie is for the neck loop, although if you prefer you can leave the original neck loop there and perhaps just shorten it a little for a child.

All done!

What about the last piece of apron? Well, we don’t need that bit for the kids set, but if you finish the top edge, you’ll have a new apron for Mummy as well!
parents as teachers

Filed Under: Sewing, Tutorials Tagged With: Apron, Kids, Kitchen, Tutorial

« Kids Kitchen Set Tutorial – Part 1
More Bored Jar Ideas »
Disclosure: There are affiliate links in this post.  This just means that if you click through and choose to purchase something I may get a small commission - at no extra cost to you, of course.  This helps me keep the content here at The Crafty Mummy free for everyone.

I love to chat so please leave me a comment or ask a question.

Don't stress if your comment doesn't appear immediately - sometimes I have to moderate comments thanks to spam visitors, but the comments from real readers will always get published. Scroll down to add your thoughts or ask a question.

Comments

  1. Annaleis says

    January 17, 2013 at 12:16 PM

    You are just too clever Tonya! Love the choice of tea towels and Apron too!

    Thanks for linking up with #TUST

    Annaleis – Blogs and PR Team Member

    • CraftyMummy says

      January 17, 2013 at 8:43 PM

      Thanks Annaleis! I must go back and visit some of those links – where did my day go?!

  2. Yvette @ Little Bento Blog says

    January 17, 2013 at 5:27 PM

    That is just TOOOOOO CUTE!!! Love it!!

    I have a sewing machine.. I really need to learn how to sew…

    Visiting from #TTUT 🙂

  3. Twinkle in the Eye says

    January 24, 2013 at 8:45 PM

    You can never have too many cupcakes! Looks great.

  4. Taelia88 says

    March 5, 2013 at 4:17 AM

    Wonderful tutorial! I loved the outcome!
    Great post!! I included it in my post Βόλτα στη Γειτονιά #24 🙂
    Have a great week!!

    • CraftyMummy says

      March 5, 2013 at 11:10 AM

      Thanks for letting me know, Taelia! Have a great day!

Hi! I’m the CraftyMummy

Tonya is the voice behind The Crafty Mummy. She dabbles in lots of different crafts – patchwork, quilting, cross-stitch, scrapbooking, knitting, crochet and sewing. This is the record of projects she has done, and the projects she dreams of getting to! Read More…

Search

  • Email
  • Facebook
  • Instagram
  • Pinterest
  • Twitter
  • YouTube
Shop my Affiliate Favourites

Fat Quarter Shop for Fabric and More

Grab the Sew Sampler Box Here

AccuQuilt for Cutting Machines and Dies

QuiltyBox for Monthly Treats in the Mail

CreativeBug for Craft Classes

Pretty Darn Cute for Blog Designs like mine

Creative Market for Fonts, Images, Themes and More

OzGameShop for All the Games

Adrift for Fashion you’ll Love

Kindle Unlimited Membership Plans

Kindle Book List

Click to shop my kindle book list
Shop my Amazon Influencer Shop
Join the CrochetU and learn to crochet
New to TheCraftyMummy.com? Click here to see more
Blog Tools I use for TheCraftyMummy.com

Grammarly

Aweber for email newsletter

CoSchedule to stay organised and share

Milotree for social media

Genesis for blog framework

FoodiePro is my theme

Hosting with WPEngine

Powered by

Recent Articles

Disclosure: There are affiliate links on this site. This means that I may get a commission if you choose to purchase after browsing via these links - at absolutely no extra cost to you, of course. I only recommend products which I use and love, or that I think will be quality products that will be useful to my readers. It is the affiliate links in this site that help me keep my tutorials free of charge. Thank you!

Looking for something? Search here:

Copyright 2015 The Crafty Mummy · Built using Genesis Framework & Foodie Pro Theme