The Crafty Mummy

Crafts. Sewing. Quilting. Crochet. Tutorials.

  • Start Here
  • Welcome
    • Subscribe
    • About Me
      • Copyright
      • Disclosure
      • Privacy Policies
    • Advertise
    • Sharing
      • Recommendations
      • Shopping & Coupons
      • Books
  • Explore
    • Crafts
      • Beading
      • Kids
      • Paint
      • Storage
      • Christmas Crafts
    • Sewing
    • Quilting
    • Stitching
    • Crochet
      • Yarn
    • Life
      • Food
      • Organisation
    • Blogging
      • How To
      • Social Media
      • WordPress Plugins
      • Photography
  • Tutorials
    • Tips
  • Shop on Etsy
  • Shop on Redbubble

ModernQAL: Parisian Star Block

by Tonya Grant |Filed Under: Quilting, Tutorials Tagged With: #modernQAL Get a Weekly Update of all Articles

modernqal parisian star

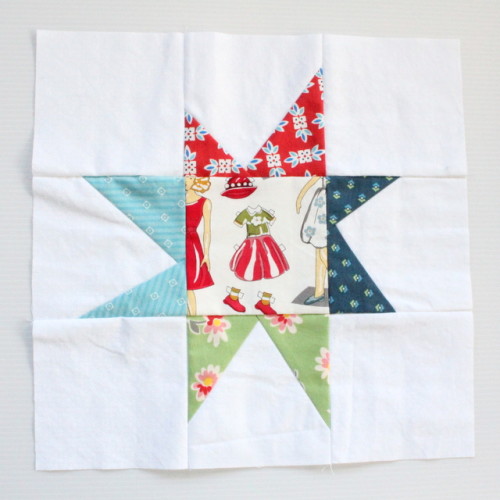
Time for another Modern QAL block and this month it is my turn to share the tutorial. I’ve chosen Parisian Star because I love star blocks and this one has the perfect place to feature my favourite fabric. You might remember that I liked that about the Spool block, too, a few months back.

You will find this block on Page 128 of the Modern Blocks book by Susanne Woods including a lovely example block with a grey background. I’ve once again gone for a crisp white background like my other ModernQAL blocks.

parisian star block modernqal

What You Need

  • Center square: 4.5″ x 4.5″
  • Background fabric: 8 squares: 4.5″ x 4.5″
  • Star Points: 4 squares: 4.5″ x 4.5″ (I’ve done one in each of 4 colours but you could use the same colour for all the points if you prefer)

parisian star points pieces

What To Do

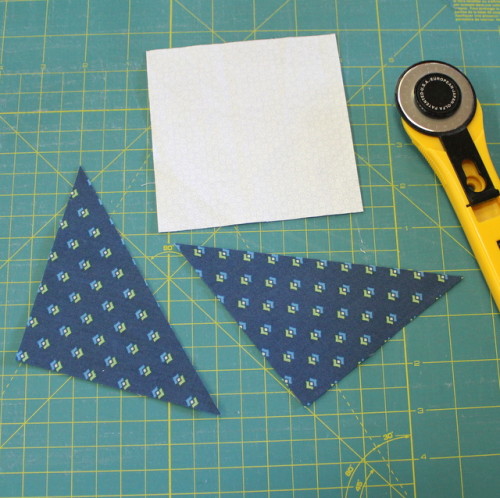
For each set of star points you make a block like this:

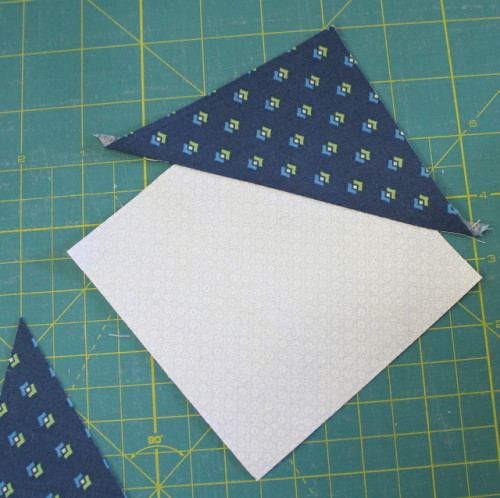
1. Use one background square and one point square. Cut the point square in half to make two triangles.

parisian star points 1

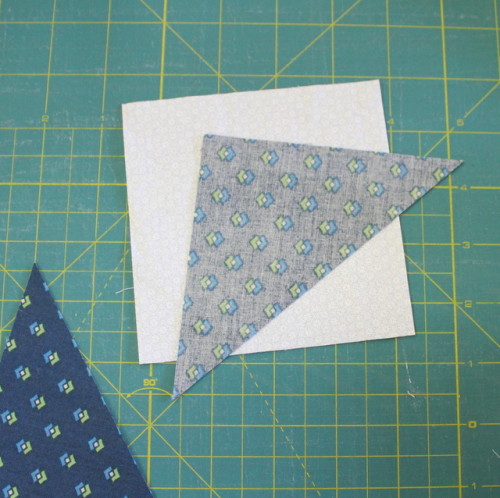
2. Lay one point triangle on the background square, right sides together. The right angle of the triangle needs to on top of the background square and the other two points need to extend past the edges of the background square.

parisian star points 2

3. Stitch the triangle in place along the longest side, using a quarter inch seam. Trim off the excess background fabric.

parisian star points 3

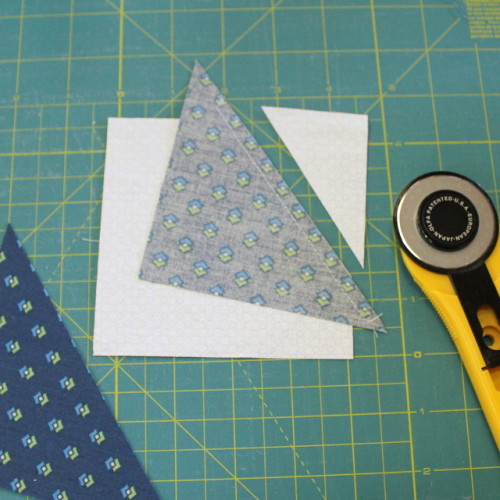
4. Press the seam folding the triangle over to the right side.

parisian star points 4

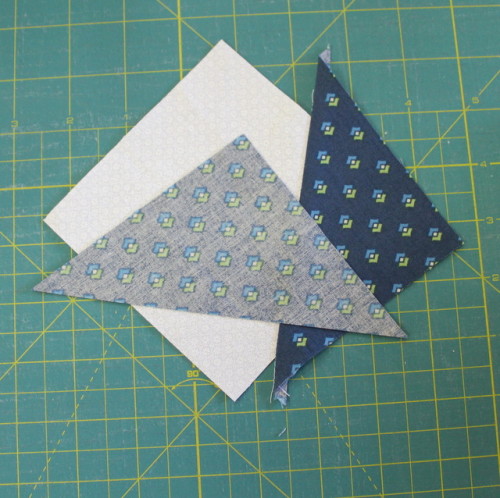
5. Place the second triangle of fabric right side down over the background, again with the right angle in the centre and the other points overlapping the first triangle and another edge and extending past the edges.

parisian star points 5

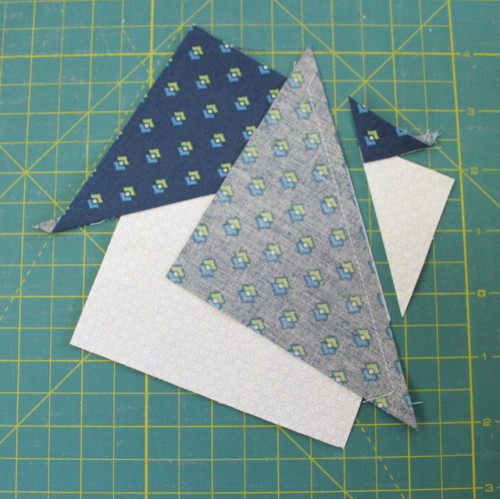
6. Stitch into place along the longest side and trim the excess background fabric.

parisian star points 6

7. Press the triangle to form the second point.

parisian star points 7

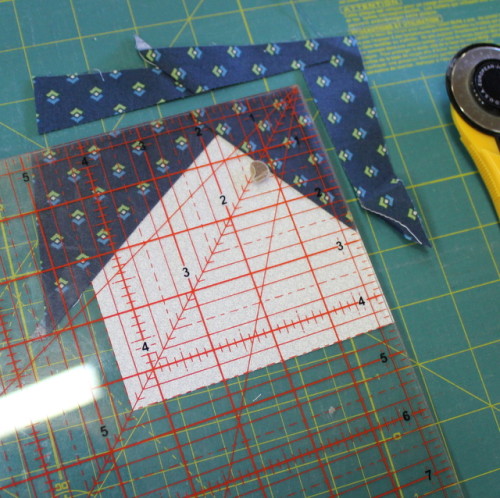
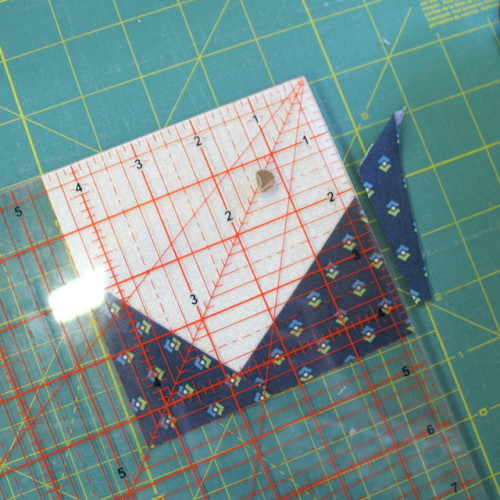
8. Use a quilting ruler to square off the edges to the size of the background fabric – 4.5″ x 4.5″

parisian star points 8

9. Do this for all four points of the star.

lay out parisian star block

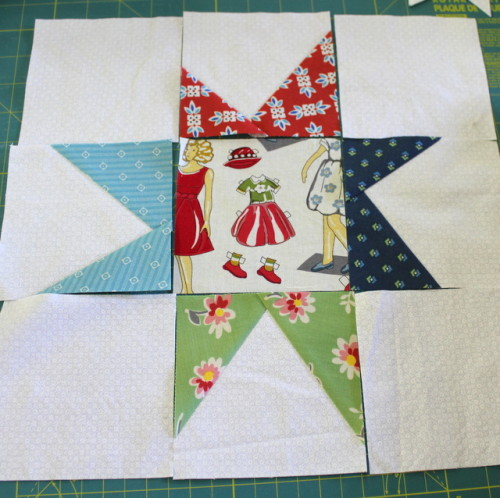
10. Lay out the star pieces and join in rows of three. Press the seams, then join the three rows together to create the finished block.

In case you’ve missed it, this block is a part of a larger project that we are doing over a twelve month period. The team from And Sew We Craft have chosen blocks from the Modern Blocks book and are all taking turns in hosting the tutorials.

Here are my other blocks in this quilt so far:

May: Follow the Leader

June: Spool

July: Megan’s Star

August: Quatrefoil Block

September: Escalator Block

October: Best Friend Block

November: Pogo Stick Block

December: Everything Equal Block

It’s not too late to join in if you’re interested. Visit And Sew We Craft to see links to all the related posts so far. Remember to look out for sharing on Instagram, Pinterest, Facebook, Twitter and Flickr with the hashtag #ModernQAL. When you’ve made your Parisian Star block, we’d love you to link up and show it off over at And Sew We Craft.

modern blocks quilt along

Find it on Amazon: Modern Blocks: 99 Quilt Blocks from Your Favorite Designers (Affiliate links)

Want to try quilting and patchwork? Check out this free Craftsy class to get you started (Affiliate link)

free patchwork quilting class craftsy

Filed Under: Quilting, Tutorials Tagged With: #modernQAL

« Craft Photo a Day
Build Virtual Lego »
Disclosure: There are affiliate links in this post.  This just means that if you click through and choose to purchase something I may get a small commission - at no extra cost to you, of course.  This helps me keep the content here at The Crafty Mummy free for everyone.

I love to chat so please leave me a comment or ask a question.

Don't stress if your comment doesn't appear immediately - sometimes I have to moderate comments thanks to spam visitors, but the comments from real readers will always get published. Scroll down to add your thoughts or ask a question.

Comments

  1. Leanne says

    February 16, 2014 at 9:09 AM

    sweet block – love your fussy cut centre !

    • Tonya Grant says

      February 20, 2014 at 4:29 PM

      Thanks Leanne

  2. Teresa Sinor says

    January 19, 2021 at 7:54 AM

    I would love to make a tumbling block’s quilt. Is there any chance that I could get a free pattern for the 60 degree template. Or directions to make the template myself? Please.

Hi! I’m the CraftyMummy

Tonya is the voice behind The Crafty Mummy. She dabbles in lots of different crafts – patchwork, quilting, cross-stitch, scrapbooking, knitting, crochet and sewing. This is the record of projects she has done, and the projects she dreams of getting to! Read More…

Search

  • Email
  • Facebook
  • Instagram
  • Pinterest
  • Twitter
  • YouTube
Shop my Affiliate Favourites

Fat Quarter Shop for Fabric and More

Grab the Sew Sampler Box Here

AccuQuilt for Cutting Machines and Dies

QuiltyBox for Monthly Treats in the Mail

CreativeBug for Craft Classes

Pretty Darn Cute for Blog Designs like mine

Creative Market for Fonts, Images, Themes and More

OzGameShop for All the Games

Adrift for Fashion you’ll Love

Kindle Unlimited Membership Plans

Kindle Book List

Click to shop my kindle book list
Shop my Amazon Influencer Shop
Join the CrochetU and learn to crochet
New to TheCraftyMummy.com? Click here to see more
Blog Tools I use for TheCraftyMummy.com

Grammarly

Aweber for email newsletter

CoSchedule to stay organised and share

Milotree for social media

Genesis for blog framework

FoodiePro is my theme

Hosting with WPEngine

Powered by

Recent Articles

Disclosure: There are affiliate links on this site. This means that I may get a commission if you choose to purchase after browsing via these links - at absolutely no extra cost to you, of course. I only recommend products which I use and love, or that I think will be quality products that will be useful to my readers. It is the affiliate links in this site that help me keep my tutorials free of charge. Thank you!

Looking for something? Search here:

Copyright 2015 The Crafty Mummy · Built using Genesis Framework & Foodie Pro Theme