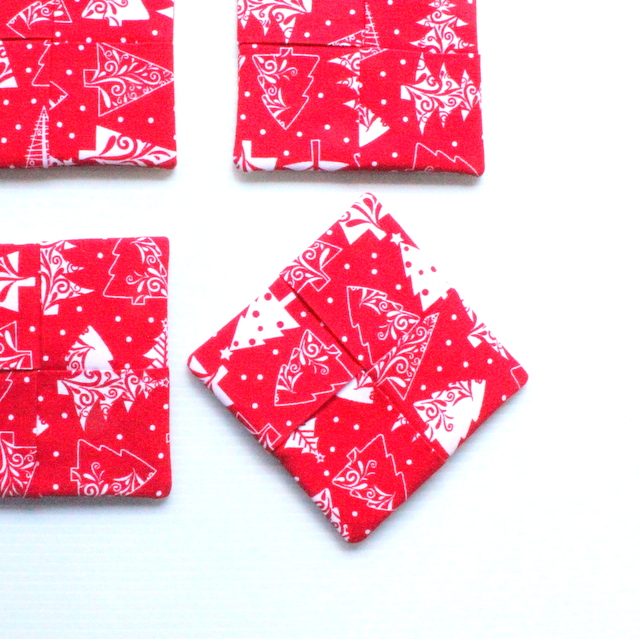
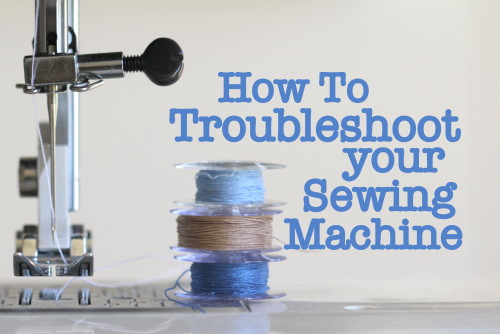
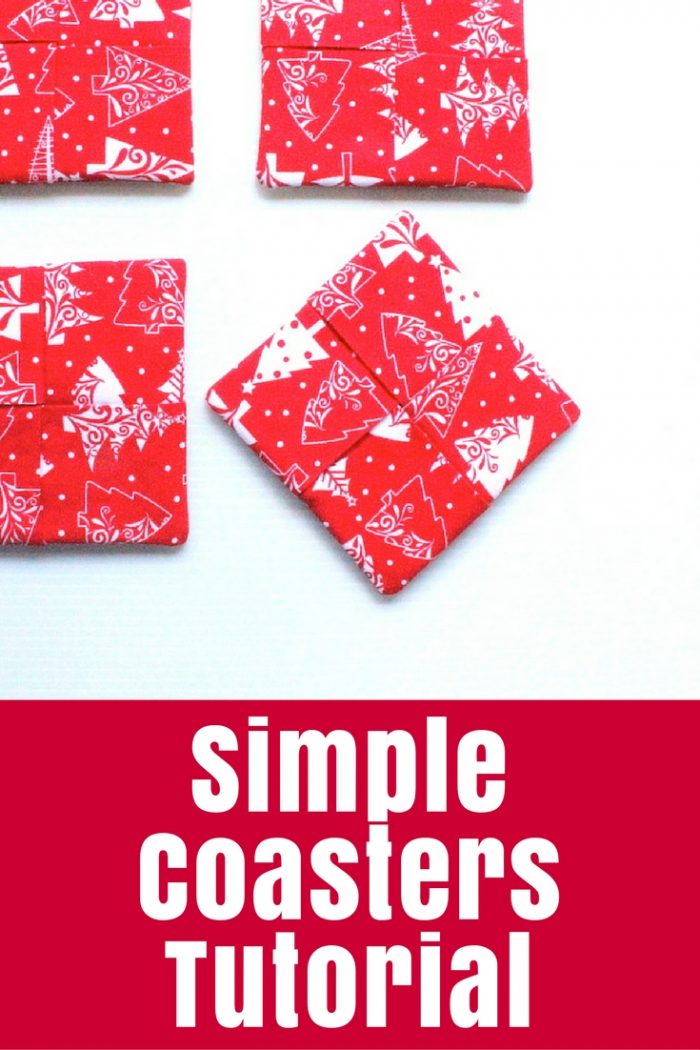
Need new coasters for Christmas? These simple coasters took me less than an hour to create.
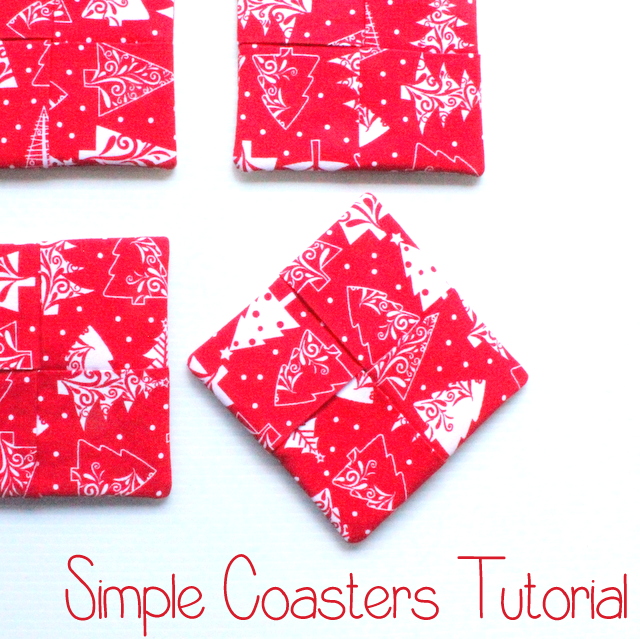
These are great coasters because they look tricky but are really quite easy. Hence the name “Simple Coasters”.
I originally found the tutorial online somewhere a few years ago but I can’t seem to find that original tutorial anymore. So I thought I’d share my version in case you need some new coasters for Christmas like I did! These took me less than an hour to whip up.
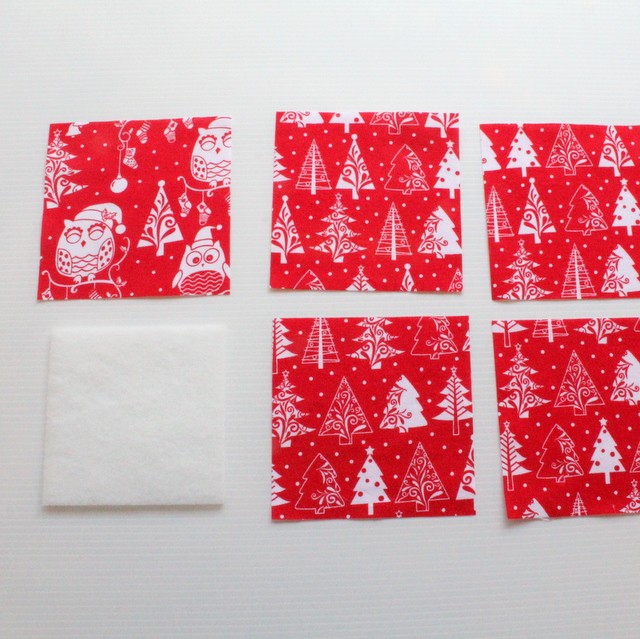
What You Need:
- 5 squares of fabric – 4.5″ square
- 1 square of iron-on Pellon – 4″ square – shop here
What To Do:
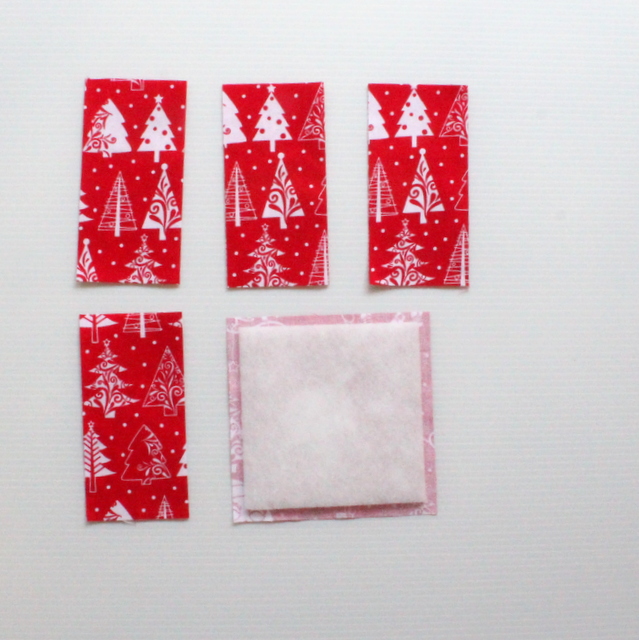
1. Iron the pellon onto the back of the square that you want to use for the back of the coaster.
2. Fold the other four squares of fabric in half and press.
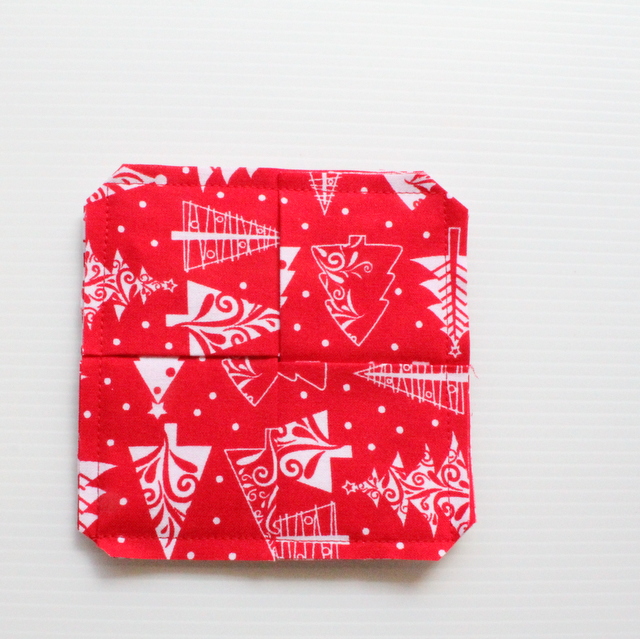
3. Lay the backing piece with the right side up and the pellon side down.
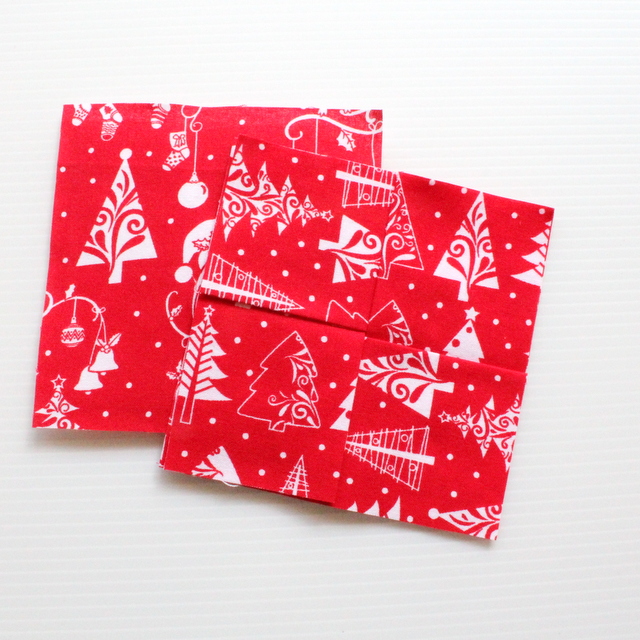
4. Lay the folded pieces on top with the folded edges all facing to the centre of the square.
Lay the four pieces in a circle with the folded edges into the centre then slot them together like the top of a cardboard carton with each piece having one end on top and the other end underneath an adjoining piece.
5. Stitch around the square about a quarter inch from the edge.
6. Clip the corners.
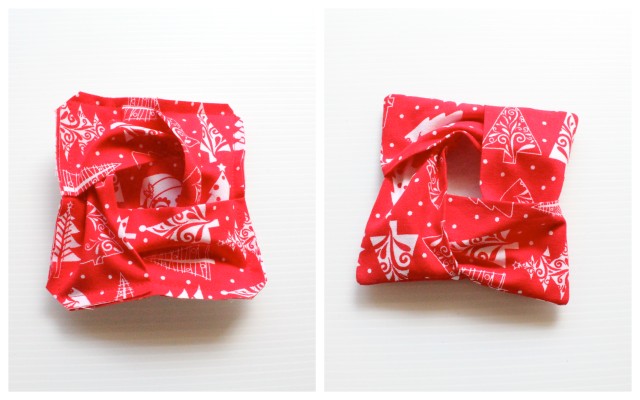
7. Turn through by gently opening up the square and flipping the folded edges to the other side. The pellon should end up in the middle.
8. Push out the corners with a knitting needle and press.
You could easily make these with charm squares too – click here to shop


I love these. They do look so cute.
Thank you, Mary. I’m seriously considering making a matching table runner before Christmas if I can find the time
Wow…I needed this a couple weeks back…but I’m still thankful for it now. I love the simplicity of the pattern. Thanks for the tutorial.
You’re welcome, Anita. Glad you like it!
Yes, I agree – to make them different colors and then people know whose drink is whose if put down for a minute. Bright and a talking point – too good.
Oh you’re full of great ideas today, Lee!
I feel kinda stupid asking this question. How is the coaster used? Do you open the four points & place the drink inside? I love the pattern. Very creative
Hi Susan, You use these coasters just as flat coasters – that’s how I use them. But yes, I have seen them slipped around the base of a wine glass too so that the coasters stays with the glass and is always there when you put the glass down.
Next time, try it by folding the squares into triangles, if you use contrasting fabrics it makes a pinwheel effect. again, it looks more complicated than it is! I’ve made potholders 9×9″ and mug coasters 4.5 x 4.5″
I love the size! Can’t wait to make some. I cut 10″ squares and used pot holder batting to make pot holders for everyone this Christmas. The pattern was identical but I wouldn’t have thought to shrink them for coasters! 🙂
Can you please tell me how to print the simple coasters tutorial without haveing to print all the comments and things to the right on the page? I did print it, but it took 9 pages.
Sorry Mary but when you print a page it will automatically print everything on it. Do you need to print it? Perhaps you could bookmark it in your browser or pin it to Pinterest to save it for later?
You can use 2, 3 or 4 different fabrics on the backs for a different look. Great way to use small pieces from your stash.
I know this is a dumb question but this makes one coaster, right? Thanks for posting such a cute pattern!
Yes, that’s right, Norma. This tutorial is how to make one coaster, but of course I have pictured the set I made.
Hi Thanks for sharing the coaster pattern .I will have ago at making them.Please keep the email coming I really enjoy seeing how creative you are.
Love quick and easy gift projects!
I love the way these “Simple Coasters” look but I can’t down load how to lay them. Can you send me a diagram or something? Thank you!
Thanks for letting me know there was a glitch, Reba. I’ve taken a look and fixed the little video clip that shows you what to do so please take another look.
Hei. Jeg kom tilfeldigvis over din side og fant masse morsomt og fint som du har laget som gav meg masse inspirasjon. Nå vil jeg begynne med å lage de søte “simpel cousters” som er så juleinspirert og mye mer spennende etter hvert. Gleder med til å lese og finne ut mer. Tusen takk .
Hi. I am having great difficulty in keeping the material even as I see. When I turn it right side out, not all the sides are sewn. I have pinned it, used iron on pellon & fabric fusion. What am I doing wrong ? Any suggestions would be greatly appreciated. TIA
Hi Judy,
it is hard to answer without actually seeing your coasters, but it sounds like maybe you’re sewing too close the outer edge of your square or not quite catching all the layers in your line of stitching. Try carefully laying down each piece so that edges are on top of each other and add some pins to hold them in place as you sew. Then make sure you sew about a quarter inch in from the edge. Pull out the pins before you turn through.
I hope that advice helps,
Tonya
Thank you for getting back to me. I am sewing 1/4 ” seam allowance per the tutorial. Yes, I am not catching all the layers because as I sew, the material moves. I have pinned the material, used iron on pellon & fabric fusion. Very frustrating.
Hi. I found a similar tutorial but instead of making a coaster or pot holder, it ends up as a tissue holder!
🙂 Great idea to make it into a coaster or pot holder tho’.