In my less-than-perfect world, I often have less-than-perfect quilt blocks. Learn how to square up a quilt block easily for your patchwork quilts too.
In a perfect world, all my patchwork quilt blocks would turn out perfect. Those perfect squares and strips would come together perfectly to make a 12.5″ block with seams of exactly a quarter-inch and I would not have any crooked edges.
Unfortunately my quilt blocks don’t seem to have been created in my perfect world. Sigh.
Usually my blocks are actually slightly larger than the pattern says they should be and sometimes the seams are just slightly too large or too small, or even {gasp!} slightly crooked. Not enough to ruin the block completely but enough to make the edges a bit crooked and strange-looking.
You know what? This is not that uncommon! Phew! I’m not alone!
Other patchwork quilters find this too which is why there is something that we do called “squaring up” our blocks. This is the way we make the blocks square again – so that the corners are proper right angles like on a square – and trim them back to the required size before we join them all together into a quilt top or some other project.
How to Square Quilt Blocks
First press your block carefully with your iron. Try not to stretch the block but make sure the seams are lying flat on the back and it is as crease free as possible.
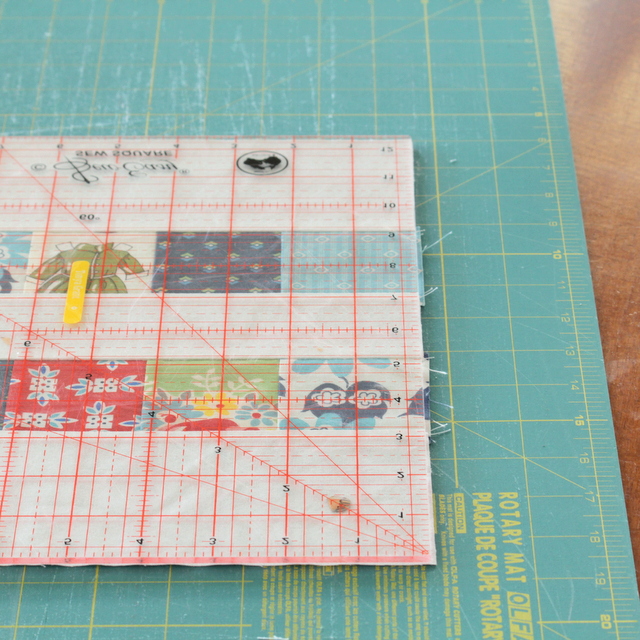
Next lay your block flat on your cutting mat and check the final size that it should be according to your pattern.
Using a square or rectangular quilting ruler, measure your block and see how different it is to the finished sizing.
Squaring up is used for blocks that are slighter larger than the pattern finished size. Smaller blocks are a different issue.
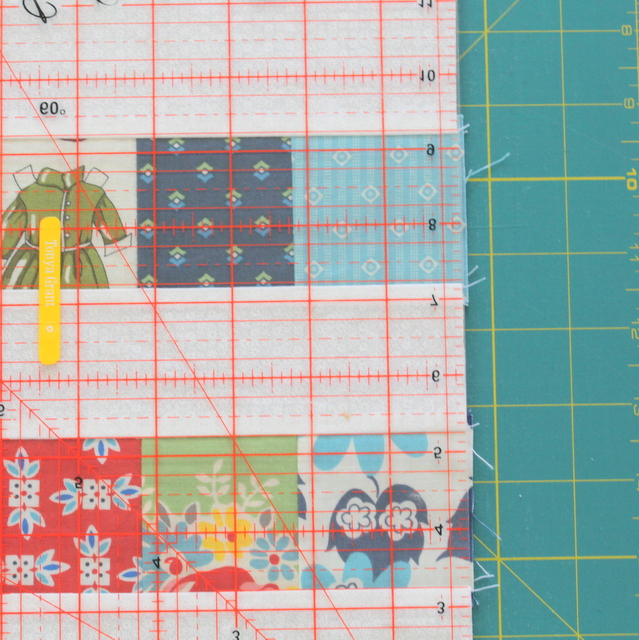
Squaring up is easiest if you have a ruler the size that your finished block should be or larger than that. In my case for these photos I was working on a block that should be 12.5″ finished and I have a large square ruler that is 12.5″ x 12.5″.
Sit the ruler on top of the block and put the centre mark in the centre of your block. This will help you see how much needs trimming. Some patchwork blocks will be very easy to find the centre. Others you may need to fold them in half to find it or use the lines marked on the ruler to find it. Try to line up the lines on the quilt ruler parallel with the seams of the patchwork wherever you can. This will ensure that your block is indeed square.
The more you practice squaring up blocks, the easier it becomes so make it a habit with every block you create. It will make a difference to your finished quilt tops going to together neatly.
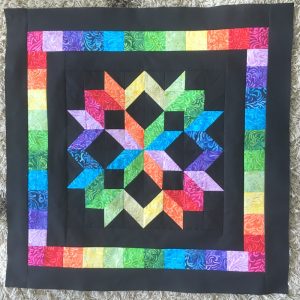
Want some more blocks to practice on?
I did a free class from Craftsy last year and it really expanded my knowledge of quilting techniques and gave me lots of ideas. Craftsy quilt classes generally have a variety of blocks each with a step-by-step video and printable instructions. It would be a great way to practice squaring up and other patchwork techniques. You can see some of my blocks here, or click on the picture below to find a class to try on Craftsy. (Affiliate link)


Any suggestions for squaring a completed pieced top that is crooked?
Hi Gloria, it probably depends how crooked it is. Sometimes a careful press with an iron can gently stretch a quilt top back into shape, so I’d try that first. Just gently press moving the iron in the direction that you need the fabric to move.
Alternatively if you need to just square up the edges of a quilt top to make them all even, I’d carefully fold the whole top in half one way then in half the other way. Then I’d use the central fold as the “square” right angle and square up the other edges from that.
This video might help: http://www.youtube.com/watch?v=DeYAOkl55NY She squares up by squaring the edges with the inner border of her quilt.
Make only one block, check the size, and adjust your sewing or rotary cutting to achieve the desired size. Squaring up after-the-fact may remove the seam allowances so that points are chopped off when the block is stitched to the adjacent block. This method may work fine if there are no points at the outside seams. Sometimes, depending on the design, it may not matter if the blocks are a little smaller than called for, as long as all blocks are the same size. I would not willy-nilly “square up” my too-large quilt blocks with a ruler!
Hi Noel. How obvious! Yet it didn’t occur to me to complete one square and look for the inaccuracies in it before sewing all the blocks.
I’m there now . 42 blocks completed and trying to square them to the same size without losing the points.
Next time…
Thanks for the tip.
I wish there was a print button so I can print this document. 🙁
I don’t want to print with all the ads in the side, etc.
Can you email a link or .pdf document to print?
Thanks!
LouAnn
([email protected]
Sorry, Louann, but it is not designed for printing. Try right clicking on the main content section and choosing ‘print’, then in the print preview just select the pages you want to print. I notice when I do that, the main content appears in the first 4 or 5 pages and the sidebars all appear in the later pages. So then you just tell your printer to print the pages you want and not the sidebars.
Hope this helps,
Tonya
LouAnn … What I do when I want to print something without all the ads or comments is, I open my “WordPerfect” program to a blank page. Then I highlight the part of the article I want to print out or save, and “copy” it.
After copying what I want, I go back to my WP program and “paste” it on to the blank page..
This way I have exactly what I want and nothing else. I can save it (which I normally do in my “Quilting” file) or I can print it and get rid of it.
It’s not that difficult … Trust me, if I can do it anyone can do it.
Good Luck!
Susan
Thank you for your excellent instructions and comforting words!!! I thought I was the only one who ended up with wonky squares!!! No one seems to admit that this can happen. I feel soooo much better!! Again, thanks!!!
thank you for the article on how to square up a quilt block. I just started my first quilt after many years of sewing. I joined a group of veteran quilters and I feel like a complete idiot so I have to search for answers and I found just what I was looking for. Thanks again now I know that I’m not the only one that does always have a perfect block. Pat
So pleased to help, Pat. I’ve learnt so much myself online that I love to share when I can. Enjoy quilting!
Thanks a lot for presenting these wonderful works for us
This is the second squaring up article I’ve read, where the writer has mentioned that the blocks being too small, is a different story. It’s also the second time no advice was given on what to do if that was the issue. I bought a quarter inch piecing foot, and somehow my seams are slightly too large. I didn’t even think to check, and I’ve already pieced all of my blocks… so I guess I’ll go back to scouring google.
Hi Vera, if all your blocks are too small, the next I’d square them up to the size of the smallest block and then join them. Obviously your whole quilt will be slightly smaller too but the only other choice is to start over and that would be such a waste after you’ve done so much work already!
I would also have liked some help offered if the square was smaller than the 12.5″!
I started patchworking in July on a sampler quilt from a shop, but can’t afford to go back for every block and as they’re just photocopying a book (with the author’s permission) I’m now doing it on my own with a borrowed book from the library!
However the initial blocks I made in class are far smaller .. and I’m stuck!
Could I not just sew a small border around the edge to make them a bit larger?
Hi Emma. You don’t say how many blocks you made at the shop but if it’s just a couple you might consider making them into pillow shams or a toss cushion to match your quilt..
Then of course you’ll make extra blocks to replace those.
I’m a beginner too and there’s so much to learn isn’t there?
Good Luck with your project.
Maureen
Hi,
I am a learner quilter attempting to make my first quilt. The blocks are 5X10 rectangles which I have already pieced. To assemble the blocks, it is suggested to do it in a vertical-horizontal-vertical-horizontal. However when
laying the blocks as such, they don’t end up the same size; the verticals are longer than the horizontals.
Do I need to “square” all the blocks first before joining/stitching the together?
Thank you in advance for your guidance.
Cheers,
Donna
Hi Donna, I’m having a little trouble imagining what you describe but perhaps they mean create a row of blocks that are horizontal (ie the rectangle block is lying with the long side at the bottom), then a row of blocks that are vertical (ie the rectangle has the short side at the bottom), then join all the rows one above the other? As you join the blocks they will naturally become smaller as some of the fabric becomes the seams so you need to keep all the seams the same size (eg quarter of an inch.)
Thinking a little more about this, perhaps they simply mean join a row of blocks together (ie working across the row horizontally) then a second row, then join the two rows together (ie creating a vertical stack of rows). So it is not about the orientation of the rectangle-shaped blocks, but more about the order of joining them together.
I hope that helps,
Tonya