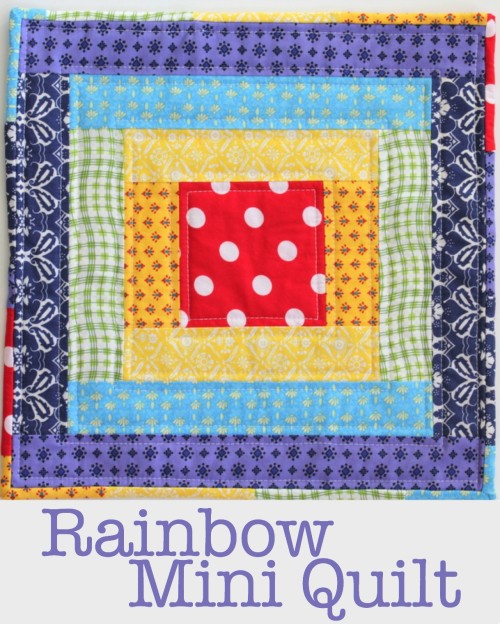
Mini Quilts.
Cute. Small. Quick to make. Great for making a single block rather than a whole quilt top.
We decided – the Team at And Sew We Craft, that is – that we’d have a 12 months of Mini Quilts, sharing the designing and creating around the group.
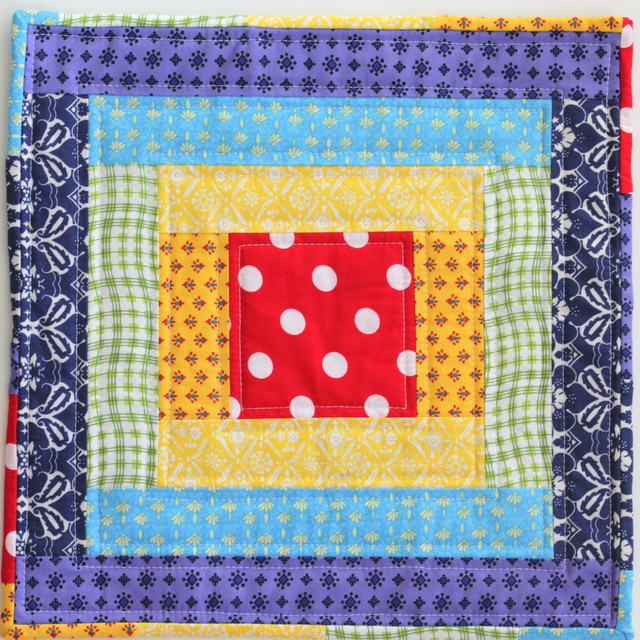
My quilt is based on one of the blocks from my Cross Stitch Rainbow Blocks series – number 2. If you haven’t checked these out before, I made a series of cross stitch blocks all based on quilt blocks. I’m still working on releasing nine blocks in a single PDF pattern for you, but in the meantime they are all free to download here on the blog. This block is called “Courthouse Steps” in the quilt world and is simple to create.
Mini quilts are generally considered to be smaller than 24″ in size. My quilt is about 13″ finished. Why 13″? Because my cross stitch patterns were each 26 stitches square so working with 13″ finished made the maths easier!
Here’s the Rainbow Mini Quilt Tutorial so you can make one too.
What You Need
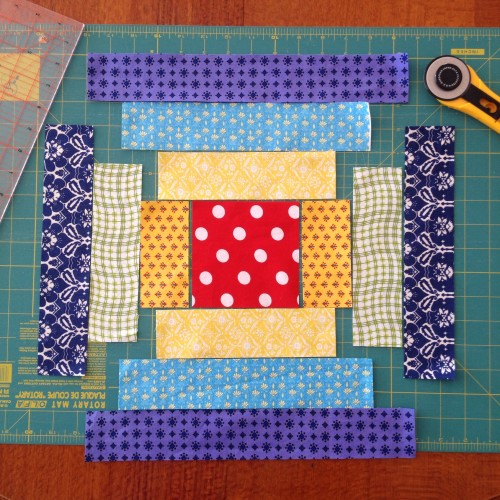
- Fabric in rainbow colours – cut these sizes:
- Red: 4.5″ x 4.5″
- Orange: 2″ x 4.5″
- Yellow: 2″ x 7.5″
- Green: 2″ x 7.5″
- Blue: 2″ x 10.5″
- Indigo (dark blue): 2″ x 10.5″
- Violet: 2″ x 13.5″
- Backing fabric: 15″ x 15″
- Wadding: 15″ x 15″
- Binding: 2″ x about 76″ (see note below about how I created my binding)
Piecing the Quilt Top
For all steps use quarter-inch seams and press the seams carefully before adding the next pair of fabric strips. I pressed all my seams away from the centre block. Use the pictures to see placement of strips as you go.
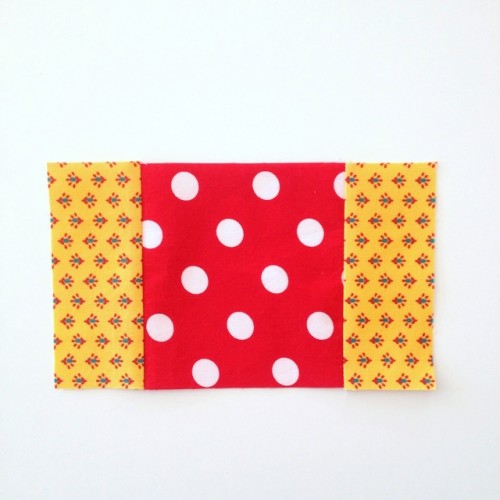
1. Join the two orange pieces to either side of the red square.
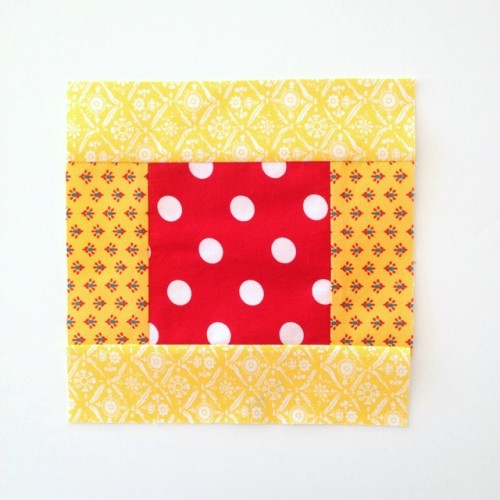
2. Add the yellow strips as shown in the picture above.
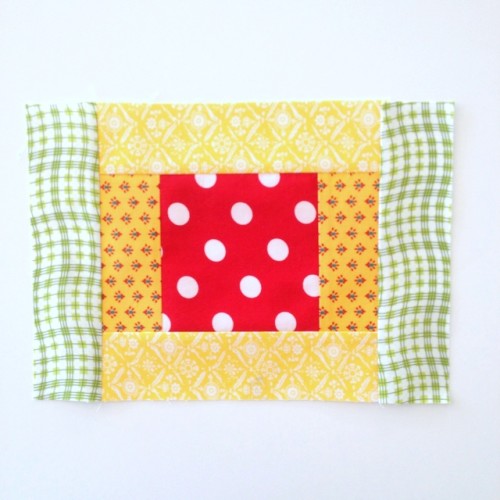
3. Next add the two green strips.
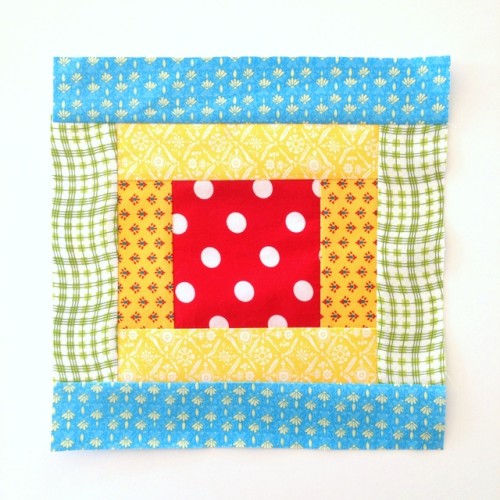
4. Then add the two blues strips.
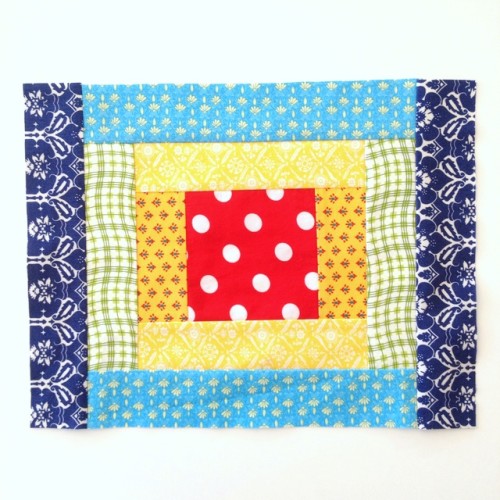
5. Add the two indigo strips next.
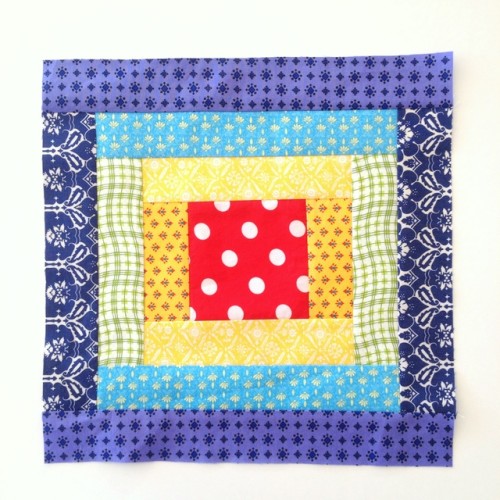
6. Finally add the violet strips and carefully press the finished mini quilt top.
Backing & Binding:
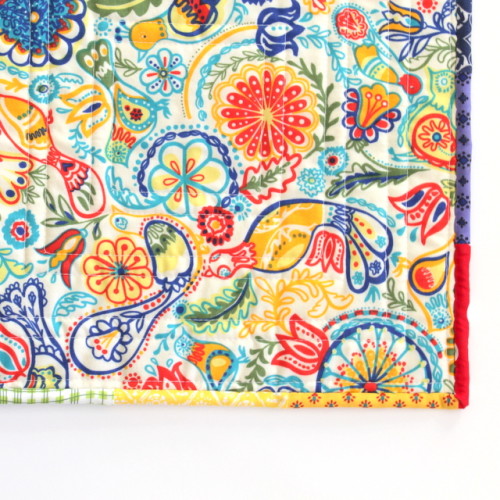
Once your quilt top is finished you need wadding and backing. My backing fabric was actually the basis for my choice of other fabrics. Originally I was going to use these fabrics to make an Easy Baby Strip Quilt like this one, but I decided the fabrics would be perfect for this instead (and they have been sitting in my stash for a couple of years now!)
I made the binding with some of the leftover 2″ strips from my block. I cut them to 4.5″ pieces then joined them in rainbow order (ROYGBIV) to make a long strip. I used all of the colours twice plus three extra 4.5″ pieces to give me about 76″ in length.
Baste the three layers together. I use basting spray to stick my backing (right side down), then my wadding, then my quilt top (right side up) together. For more detail check out this post: How to Baste a Quilt
Let the spray dry then quilt (which is really just “stitch”) the three layers together. I used simple squares for mine.
Finish with your binding strip around the outside. I use this method to apply my binding:
Here’s the back view. I love the rainbow binding! I’m so happy with this cute little project and I did the whole thing in two days, so it really is a quick project. You could easily make one in a weekend. (Hmmm… maybe we should make one of these at Creative Craft Retreat one year…)
BONUS!
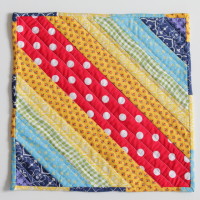
I’ve just posted a second mini quilt tutorial over at And Sew We Craft: Rainbow Stripes Mini Quilt
If you’ve never quilted before, I’d suggest checking out the free classes over at Craftsy to get you started: (affiliate link)

Update:
I’ve since published some more Rainbow Mini Quilts so see them all here:


Love the rainbow colours. I’ve just discovered mini quilts and am keen to see what others you’ve got coming up.
I love how you’ve created this from your cross stitch. They’d make gorgeous cushion covers too.
Yes! Cushion covers would be lovely! I think I’m going to make a couple more of them and then hang them in above my sewing table
Can you pretty, pretty please teach me how to sew! I’m absolutely hopeless!! These quilts are just gorgeous – you are very talented! 🙂
Awww, thanks Lucy. I only show off the projects that look good, remember!
Wow what a great idea! When I was little my grandma made me a special quilt and I just loved it. It went with me everywhere. I love the idea of being able to make my own kids an individual patchwork quilt too one day. Thanks for sharing. xx
I’ve made quilts for each of my kids -in fact more than one each now! – and I love to think that they will keep them for years. Especially in this age when things are not always treasured and kept the way they used to be.
I look forward to reading your weekly email to me! And this darling mini quilt is making me run to my craft room! But I have a question – you said “I’m still working on releasing nine blocks in a single PDF pattern for you, but in the meantime they are all free to download here on the blog” Where do I go to download the other mini quilts? And how does this mini quilt tie in to “a series of cross stitch blocks”? Please keep doing what you are doing – I LOVE IT!
Hi Cheryl,
Sorry to be confusing! I have already created the cross stitch patterns as individual patterns, and they are all on the blog already for free, and I plan to put them together in a PDF. I haven’t created all the mini quilts yet but I plan to so stay tuned.
Tonya
I’ve never made a quilt.. hang on i’ve never done any quilting. You make it look so easy. I’ll put it on my list and i’ll start with a mini quilt i think.
Thank you for linking up for Sunday Brunch! lovely to see you xx
What a great idea! I would love to make something like this for my kids.
You are truly talented and I’m having a wonderful time with your tutorials. True, Craftsy is great and it is right here in Colorado with me. Do you sell your patterns? So far all I’ve got are your tutes. I’ll check. Thanks again for sharing your talents.
Thanks, Betty.
I don’t sell patterns at the moment although I have thought about it. Thanks for the encouragement!
Tonya
Love your mini quilt patterns!! Thank you for sharing them!