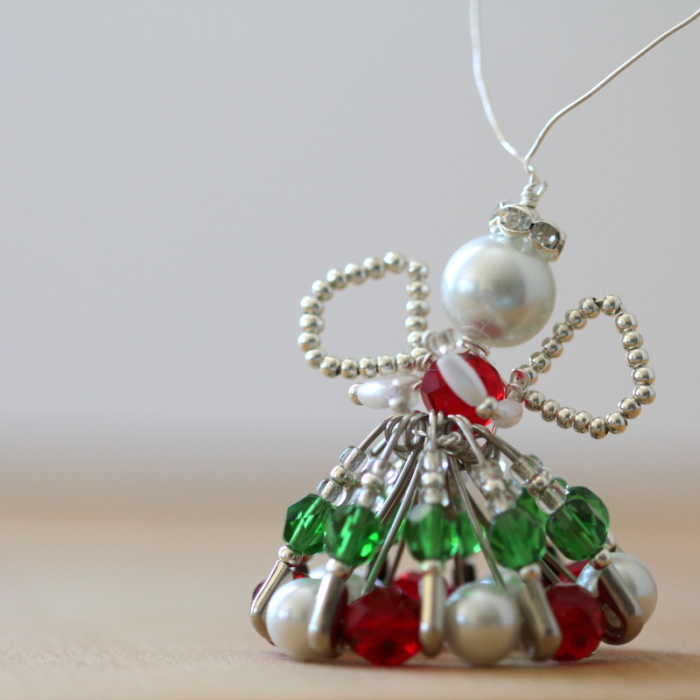
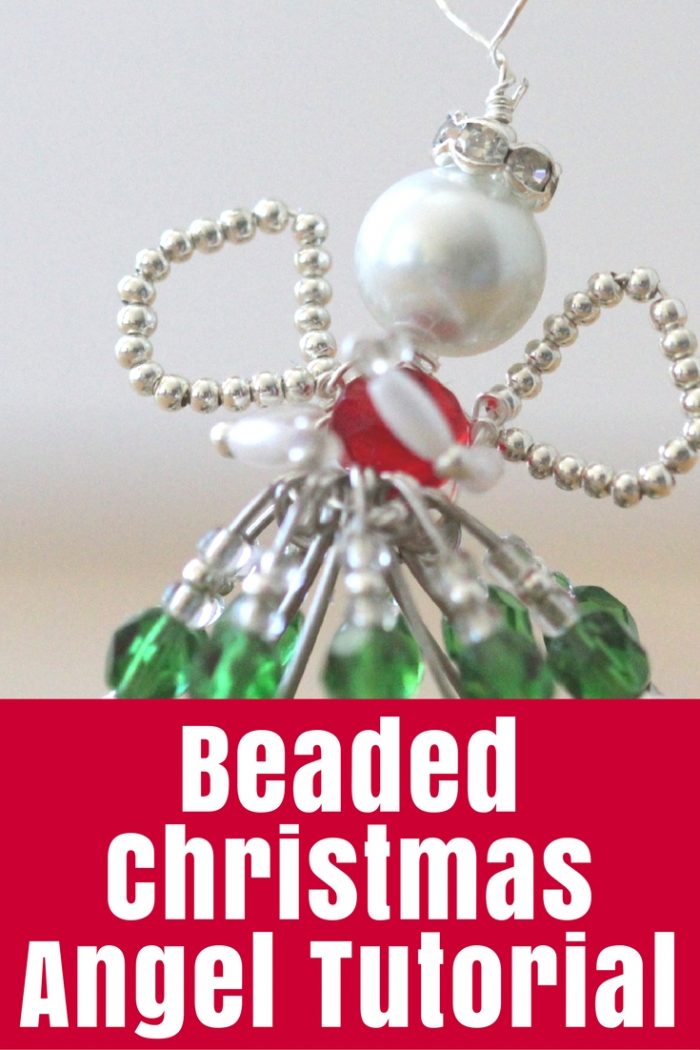
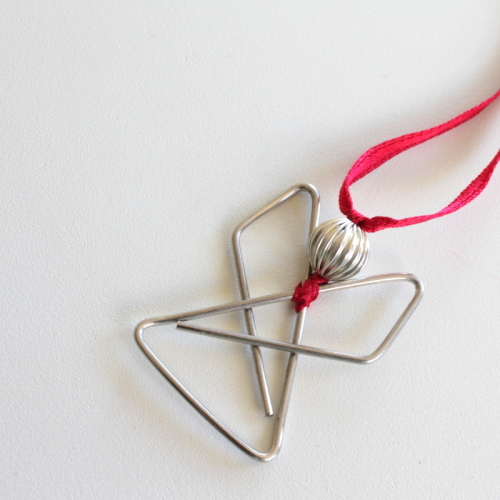
I have had so many requests for this tutorial! A couple of years ago now I made pretty beaded Christmas Angels using safety pins and beads. My original angels had golden wings and the safety-pins formed the skirt.
Since then I have shared them each year when they are on our Christmas tree and they have been a super popular post despite just showing a couple of pictures.
Finally I have gotten around to making some more angels and taking photos of the process for you with step-by-step instructions.
I have also been to Amazon and put together a widget with all the things you need to make these, which you will find after the tutorial. These angels are made with silver beads, but you could easily switch the silver metal seed beads and silver rondelle beads for gold ones, so I’ve added those to the Amazon widget as well.
What You Need
- 10 safety-pins – mine are about 27mm or 1 1/16″ which is size 1
- 63 metal seed beads – mine are silver
- 22 glass seed beads – mine are clear
- 10 medium round beads – mine are green 6mm faceted round beads
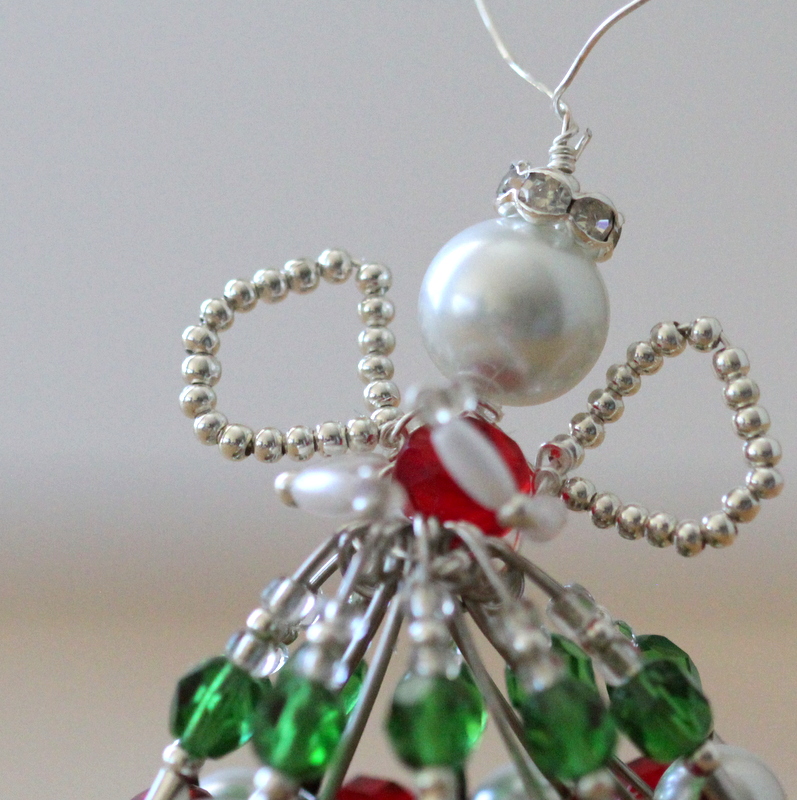
- 11 large round beads – I used 5 pearl and 5 red for the skirt, and a red one for the body – mine are 8mm beads
- 4 oval beads for the arms – mine are pearly
- 1 very large bead for the head – mine is a 10mm pearl bead
- 1 rondelle for the halo – mine is 6mm – gold or silver
- Wire – about 1 metre or 40″ – super thin and bendable is good, mine was 28 gauge
- Wire cutters
Note: These are what I used. You could easily make these with larger safety pins and increase the sizes of the beads as well. You could also use different coloured beads, of course. They’d be pretty in blues or pinks too!
What To Do
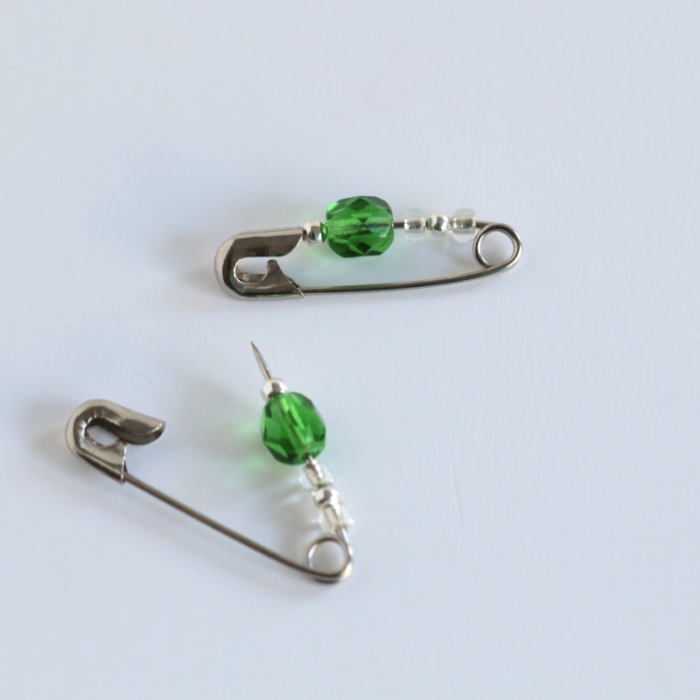
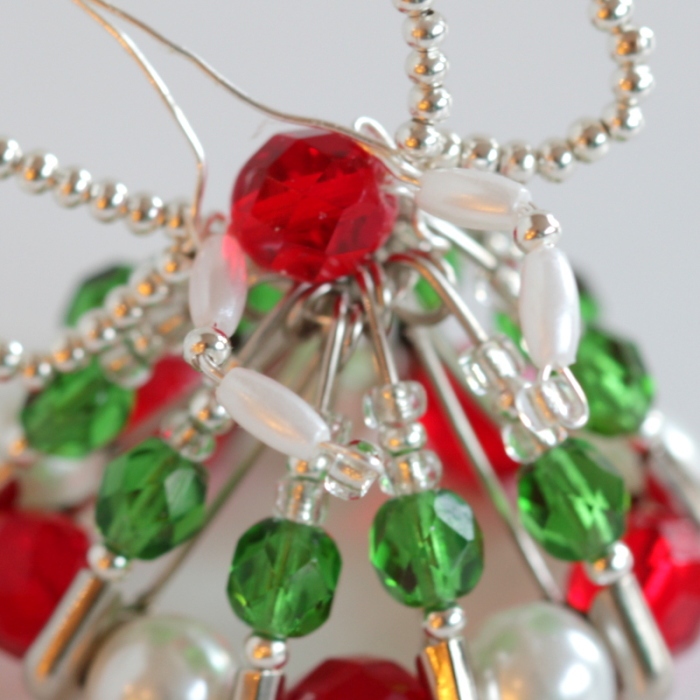
Step 1: Onto each safety-pin thread these beads: glass seed bead, metal seed bead, glass seed bead, medium round bead, metal seed bead.
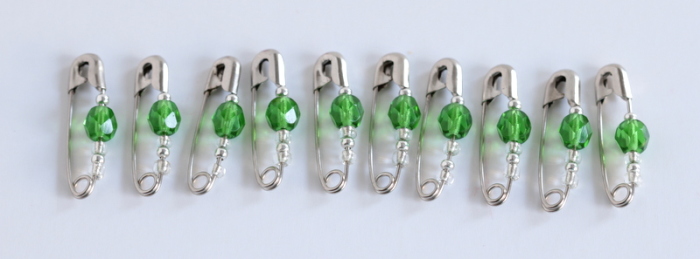
Your ten safety-pins will then look like this.
Step 2: Cut a piece of wire about 20cm (8″). Create a loop on one end to stop beads falling off as your thread.
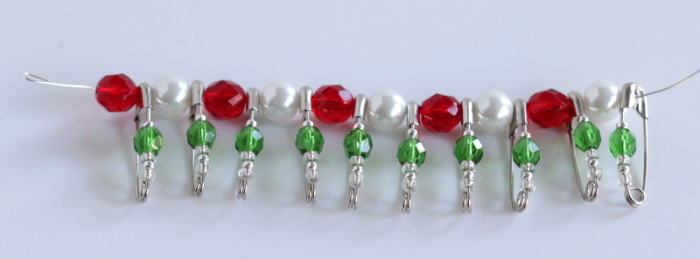
Step 3: The Skirt: Thread a large bead then a safety-pin – through the large end. Continue to thread alternating beads and safety-pins, finishing with a pin, making sure that all your safety-pins are around the same way so that beads will all face outwards in the next step.
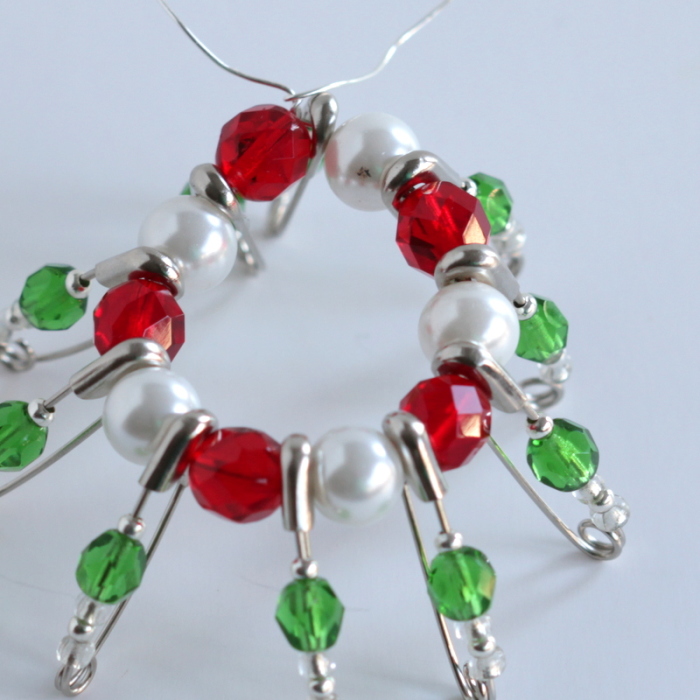
Step 4: Bring the ends of the wire together to form a circle with the beads on the outside of the skirt. Twist the wire around itself a couple of times to secure then trim off the excess.
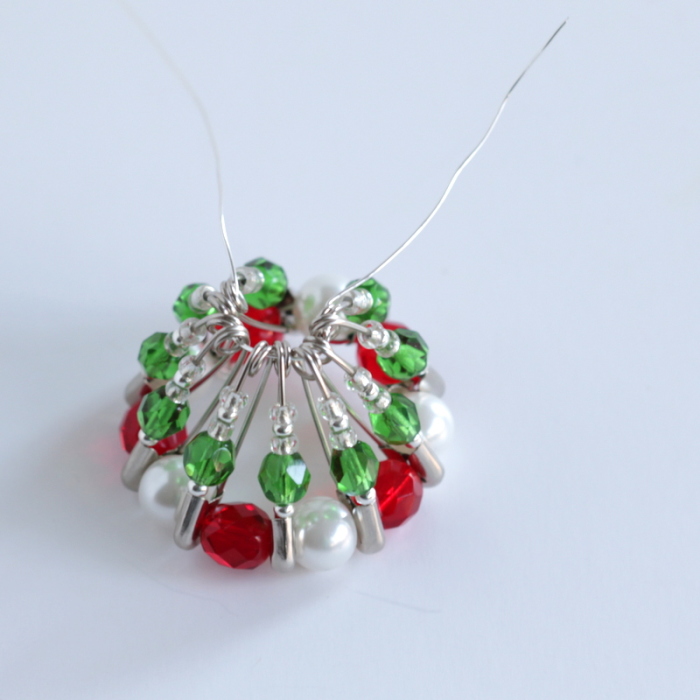
Step 5: Cut a 10cm (4″) piece of wire. Thread this piece through the other end of each of the safety-pins, drawing them together to create the top of the skirt. Again twist the ends of the wire around each other to secure them and trim the excess.
Step 6: Cut a long piece of wire – mine was about 70cm (28″). Loop this piece through the skirt so you have about half on each side.
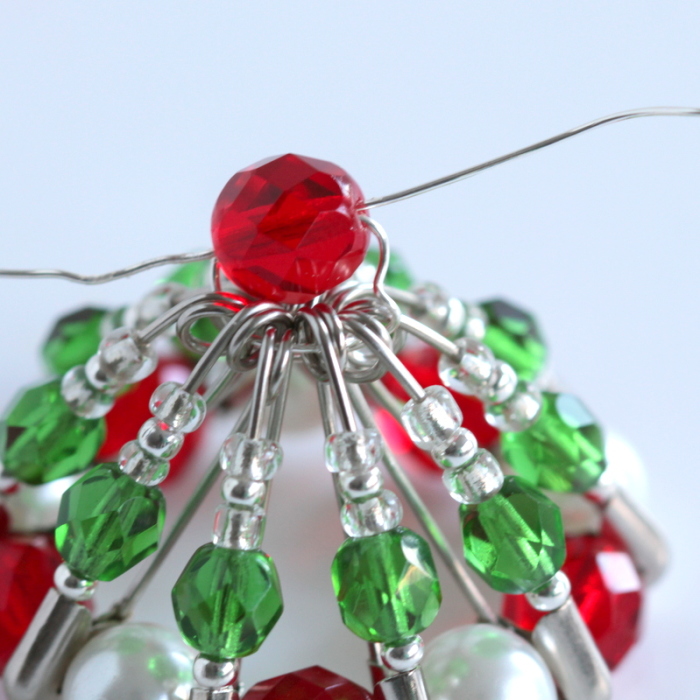
Step 7: The Body: Thread the remaining medium bead onto one side of the wire. Then thread the other end of the wire through the bead the other way so that the bead sits across the top of the skirt.
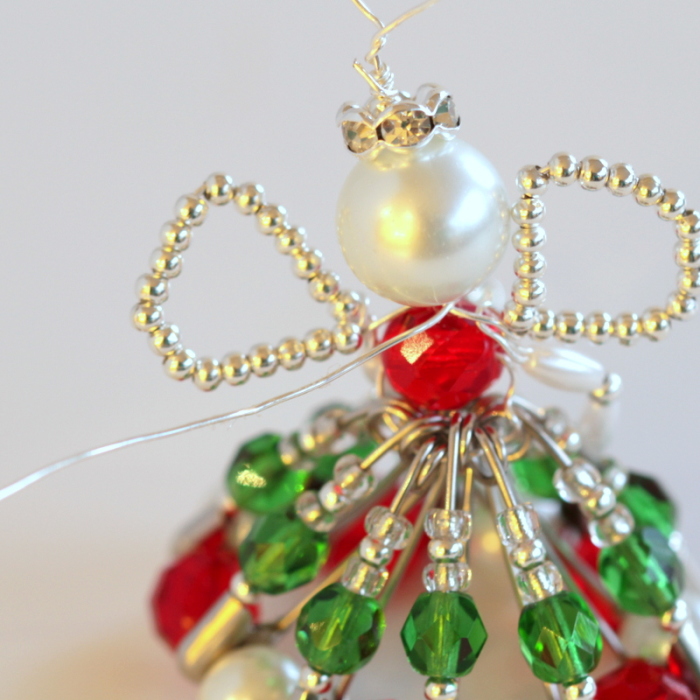
Step 8: The Wings: Thread 20 metal seed beads onto each piece of wire and bend to form the wings. Twist each wing near the body to secure it.
Note: If you use larger safety-pins, you may choose to make bigger wings by adding more metal beads in this step. Or you may just prefer larger wings! If you want super large wings, you may need to use a longer piece of wire to start with.
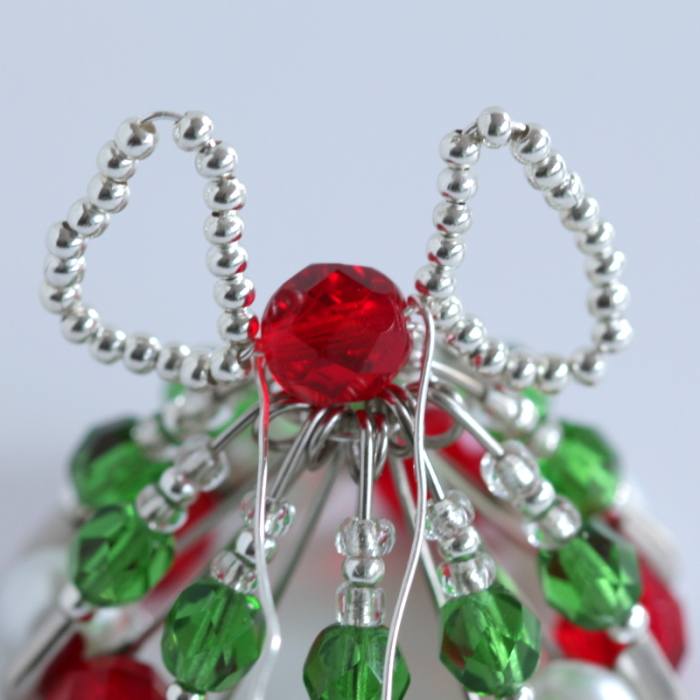
Step 9: The Arms: Onto each wire thread an oval bead, a metal bead, another oval bead and a glass seed bead. Fold the wire back around and through the first three beads to create the arms.
Loop the wire once around the base of the wings so that the wire pints upwards ready for the head.
Note: I found it quite difficult to thread the wire back through these beads – small holes don’t easily take two strands of wire! – so take it carefully. If your wire gets too bent at the ends, just trim them a little to remove the kinks.
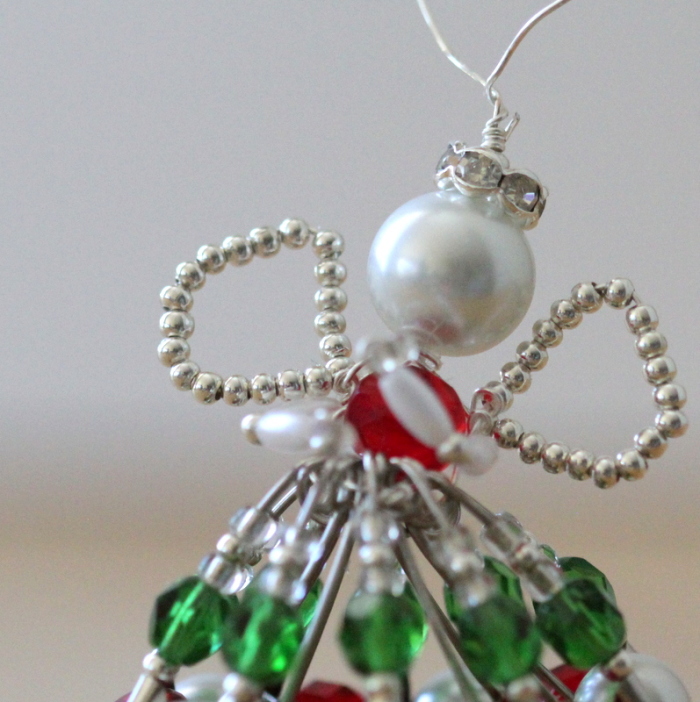
Step 10: The Head: Thread both pieces of wire through the very large pearl bead for the head. Next thread on the rondelle for the halo and finish with a metal seed bead.


Note: I could not get both my pieces of wire through the very large pearl! (I haven’t had this problem previously but this bead just had a small hole.) So I threaded only one piece to finish the head and halo, then wrapped the remaining piece around the “neck” of my angel a couple of times to secure it and trimmed it off.

Please do not use this tutorial to make items to sell. This is for personal use only.
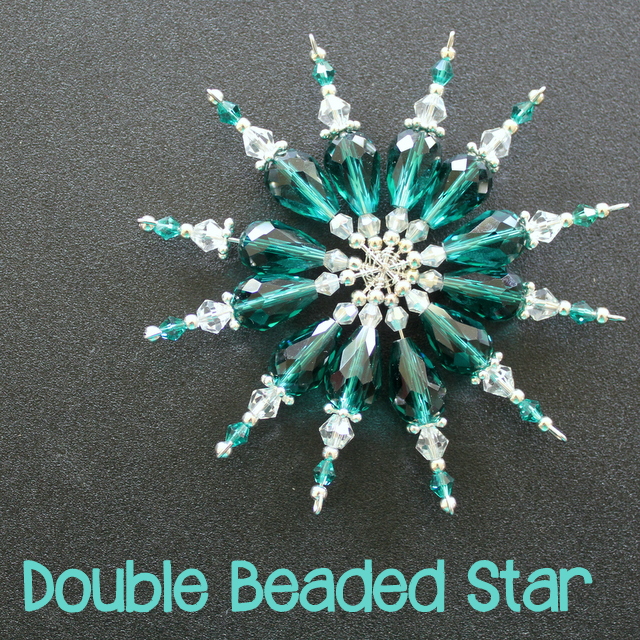
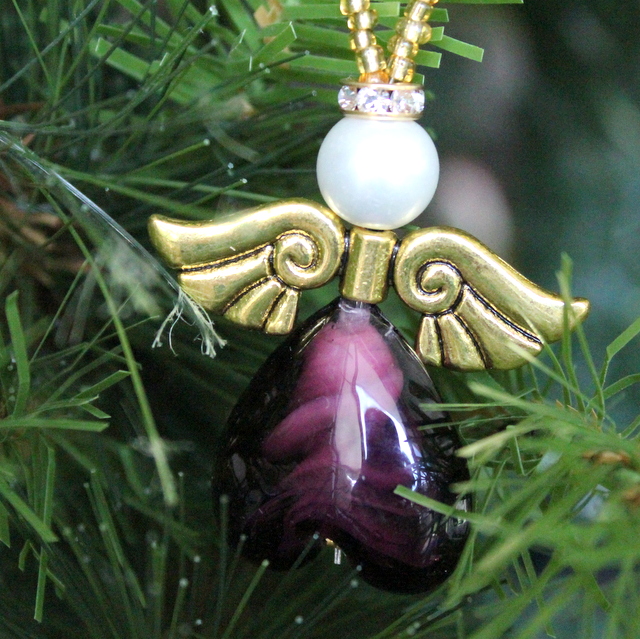
More Christmas Beading


Tonya, that is a great tutorial. Many years ago I bought a kit to make this little angel at the Stitches and Craft Show but couldn’t remember making it with safety pins so just dragged mine out of the Christmas decoration box and it certainly was made with little gold safety pins. I think I bought the smallest one as it was the cheapest of course 🙂 They are certainly very cute and worth the effort.
By the way, I emailed you last night. I know you are probably busy but could you let me know if you received it as my computer is playing up and doing all kinds of strange things. Thanks heaps.
Thanks, Chel. I got your email too – I suspect we know lots of the same people! – having a crazy week but I will answer it today – I hope!
No hurry, Tonya. I just wanted to make sure you got the email. Hope you have a relaxing weekend.
Chel
Tonya, many thanks for so many fantastic tutorials!
Cheers; hope your weekend will be blessed with peace and sunshine.
Jeanneke.
I too have one of these that I made in a Mommy and me craft class with the kid who is now 32! Needless to say I had forgotten how, thanks so much for an easy Tutorial, with great pictures!
Thank you, Kathy – I’ve been especially working on my photography skills lately so it is nice to have it noticed.
What a stunning lil angel. Thank you for sharing 🙂 I am in awe of the crafty ones and I know just who to pass this along to (hoping I’ll get one for my own tree in return <3 ) 😉 (not crafty, just sneaky, lol) Happy Holidays!
Hi Tonya, I would like to talk to you about this pattern. Would you please email me? owner@walkthebeadedpath.
Thank you,
Terry
Hi Terry, This reply on your comment should come to your email address from my address so feel free to email me back. Alternatively my email address is tonya(at)thecraftymummy.com
Talk soon, Tonya
I was so happy to see this Angle ornament. I am at the Hospital with my Husband. We have been here over a week and will be here at least another one. Anyway, I was looking for a way to say THANK YOU to ALL the nurses and can’ sand the people who clean the rooms and bring the meals up. I need to get to the craft store and get busy. Thank you so much!
What a lovely idea! I hope your husband is recovering from whatever has landed him in hospital. All the best, Tonya
I would very much like to make the angels for Christmas. Is there any way I can buy kits?
Thanks for any information
I have not come across kits anywhere recently but I will let you know if I find some.
Wonderful clear photographs. Thank you for such a great tutorial.
Hi. I made bunches of these years ago. Had forgotten how to do the top half. Wish I could send you a pic.the old one I found has a doll head, no wings, & was glued on. I can’t remember the name of the beads I used at the base of the skirt….8-10 mm. Looks like seeds. Looking for my supplies, will experiment. Try to jog my memory. I remember my dad & I sat up late one night. Made a lot of them. Grandkids have them all now. I want to make some more if I can find my things.