The Crafty Mummy

Crafts. Sewing. Quilting. Crochet. Tutorials.

  • Start Here
  • Welcome
    • Subscribe
    • About Me
      • Copyright
      • Disclosure
      • Privacy Policies
    • Advertise
    • Sharing
      • Recommendations
      • Shopping & Coupons
      • Books
  • Explore
    • Crafts
      • Beading
      • Kids
      • Paint
      • Storage
      • Christmas Crafts
    • Sewing
    • Quilting
    • Stitching
    • Crochet
      • Yarn
    • Life
      • Food
      • Organisation
    • Blogging
      • How To
      • Social Media
      • WordPress Plugins
      • Photography
  • Tutorials
    • Tips
  • Shop on Etsy
  • Shop on Redbubble

Quick Tip: Mend a Necklace

by Tonya Grant |Filed Under: Crafts, Tutorials Get a Weekly Update of all Articles

How to Mend a Necklace with a Paperclip

Have you ever caught a long necklace on the edge of your desk and pulled the pendant off? Maybe hooked the beads on a drawer handle accidentally or somehow gotten the lot wrapped around your handbag?

I managed to catch this long necklace on a desk as I stood up a couple of weeks ago before I even made it to work. I didn’t have time to go home and grab another one – and I didn’t really want to wear the chain with two lone beads all day.

mend necklace

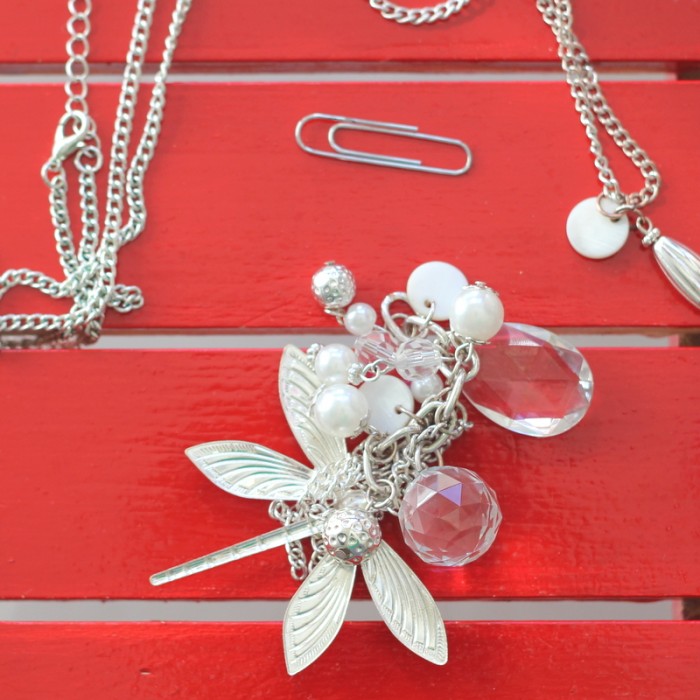
The answer to this dilemma?

A paperclip, of course!

Silver like my necklace and easy to slide onto the remaining loops.

mend necklace paperclip

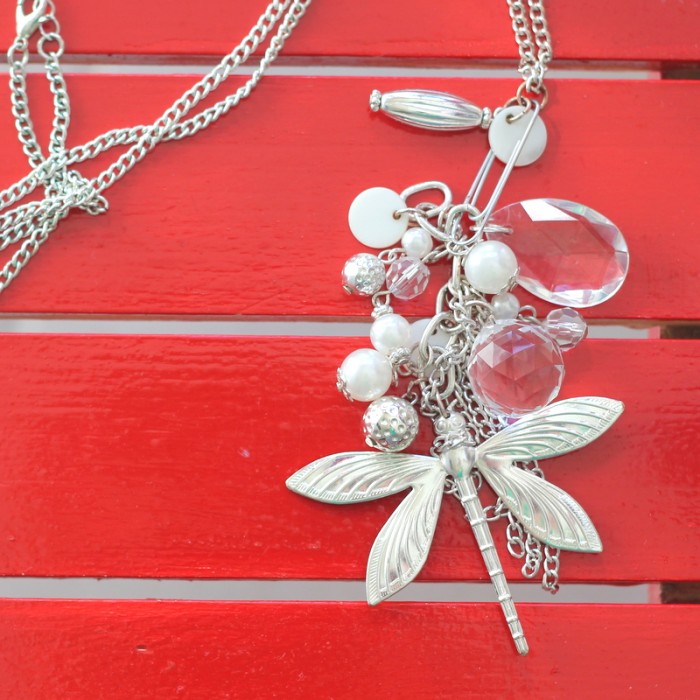
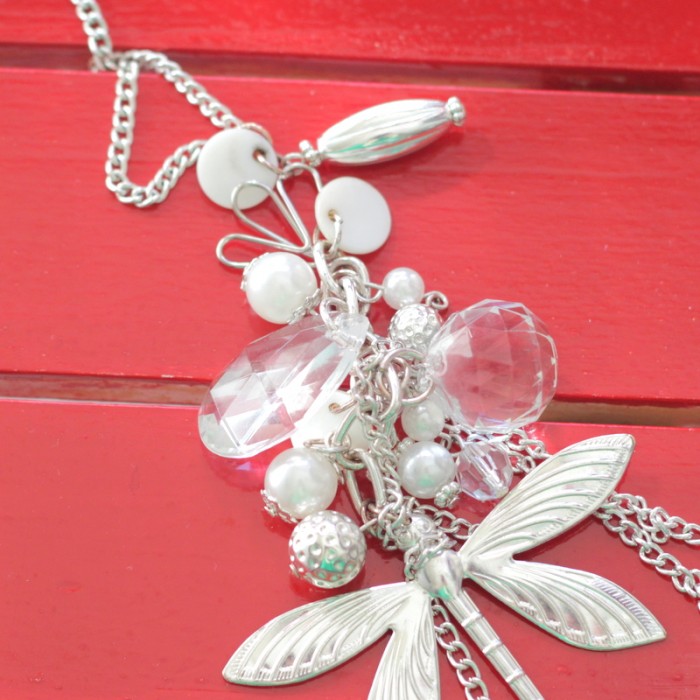
Just open one side of the paperclip gently and slide the chain around the loops until it sits in the curved section. Then do the same thing with a loop of the pendant section – in my case a bunch of beads and pretty dangles – and slide them around until they sit in the opposite curved end.

All set to look lovely for the day!

No one will even notice unless you point it out to them.

paperclip heart join

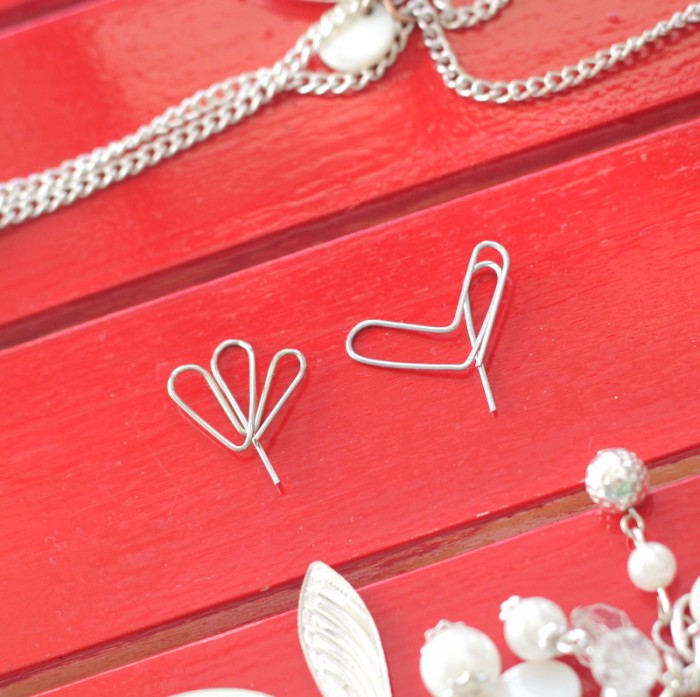
In the longer term you might go and find some bead fixings from the local craft store or Amazon and fix the necklace. These slip rings would do the trick: Small silver plated split rings on Amazon (affiliate link)

Instead I opted for the more creative paperclip option.

I bent my paperclip a little and played with the shape. I was aiming for a heart shape, but in the end I was happier with the triple loop version.

What do you think? I think it now just looks like part of the necklace!

necklace mend heart paperclip


Filed Under: Crafts, Tutorials

« Crochet: Rainbow Heart Blanket
Dotted Painted Canvas »
Disclosure: There are affiliate links in this post.  This just means that if you click through and choose to purchase something I may get a small commission - at no extra cost to you, of course.  This helps me keep the content here at The Crafty Mummy free for everyone.

I love to chat so please leave me a comment or ask a question.

Don't stress if your comment doesn't appear immediately - sometimes I have to moderate comments thanks to spam visitors, but the comments from real readers will always get published. Scroll down to add your thoughts or ask a question.

Comments

  1. Kate says

    May 14, 2015 at 6:33 AM

    Very clever, looks cute too!

  2. dianadeluxe says

    May 22, 2015 at 12:23 AM

    Ohh, such an amazingly simple yet genius tip! Love it!

  3. Elena says

    May 28, 2015 at 9:01 AM

    I thought I am the only one who uses the paper clips for small mending jobs.

Hi! I’m the CraftyMummy

Tonya is the voice behind The Crafty Mummy. She dabbles in lots of different crafts – patchwork, quilting, cross-stitch, scrapbooking, knitting, crochet and sewing. This is the record of projects she has done, and the projects she dreams of getting to! Read More…

Search

  • Email
  • Facebook
  • Instagram
  • Pinterest
  • Twitter
  • YouTube
Shop my Affiliate Favourites

Fat Quarter Shop for Fabric and More

Grab the Sew Sampler Box Here

AccuQuilt for Cutting Machines and Dies

QuiltyBox for Monthly Treats in the Mail

CreativeBug for Craft Classes

Pretty Darn Cute for Blog Designs like mine

Creative Market for Fonts, Images, Themes and More

OzGameShop for All the Games

Adrift for Fashion you’ll Love

Kindle Unlimited Membership Plans

Kindle Book List

Click to shop my kindle book list
Shop my Amazon Influencer Shop
Join the CrochetU and learn to crochet
New to TheCraftyMummy.com? Click here to see more
Blog Tools I use for TheCraftyMummy.com

Grammarly

Aweber for email newsletter

CoSchedule to stay organised and share

Milotree for social media

Genesis for blog framework

FoodiePro is my theme

Hosting with WPEngine

Powered by

Recent Articles

Disclosure: There are affiliate links on this site. This means that I may get a commission if you choose to purchase after browsing via these links - at absolutely no extra cost to you, of course. I only recommend products which I use and love, or that I think will be quality products that will be useful to my readers. It is the affiliate links in this site that help me keep my tutorials free of charge. Thank you!

Looking for something? Search here:

Copyright 2015 The Crafty Mummy · Built using Genesis Framework & Foodie Pro Theme