
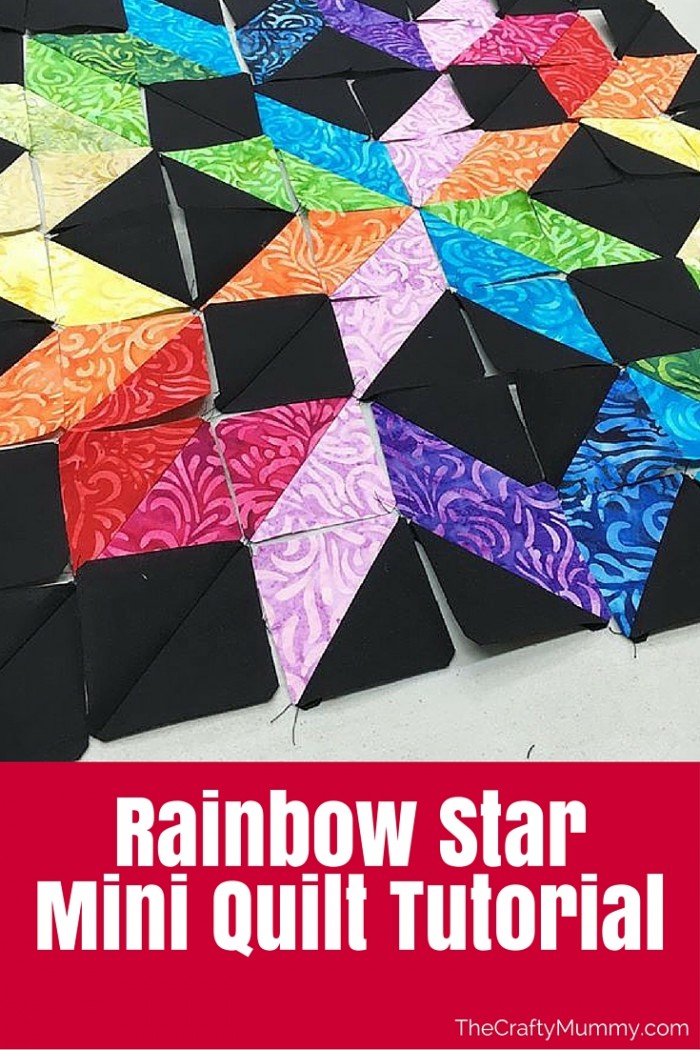
On Saturday, I spent a glorious day making this rainbow star. It was a Ladies Day Off organised by one of the ladies from my church family, a whole day with lunch provided to get creative and hang out with a bunch of friends. That in itself would have been fantastic but I was so excited to create this lovely mini quilt top as well.
I used some of the great supplies that I been gifted by the folks at QuiltyBox, a monthly subscription box that I can highly recommend. Each month the quality of the fabrics and notions have been top notch, while the inspirational patterns and books have been making me itch to get started each time they show up on my doorstep.
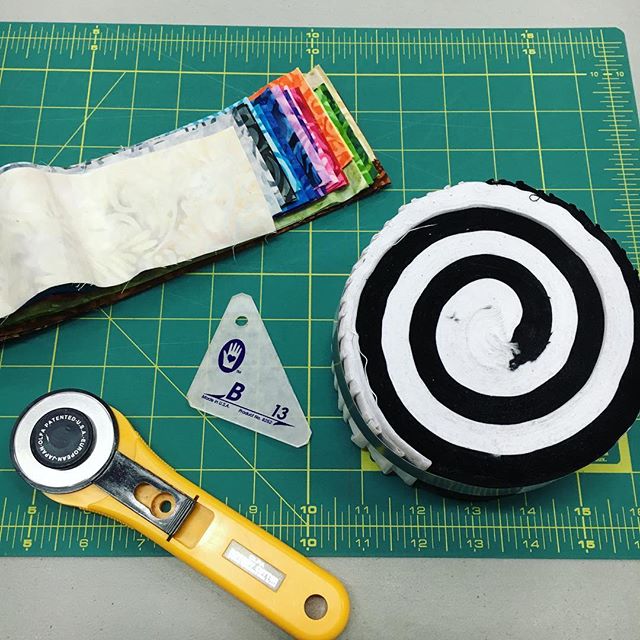
This project has used a mixture of fabric from two recent boxes: a Black and White Kona Solids jelly roll, and a Flourish Batik Strip Set by Wilmington Prints. Both of these are 2.5″ strip sets so each strip is 2.5″ wide and the whole width of the fabric, usually around 42″.
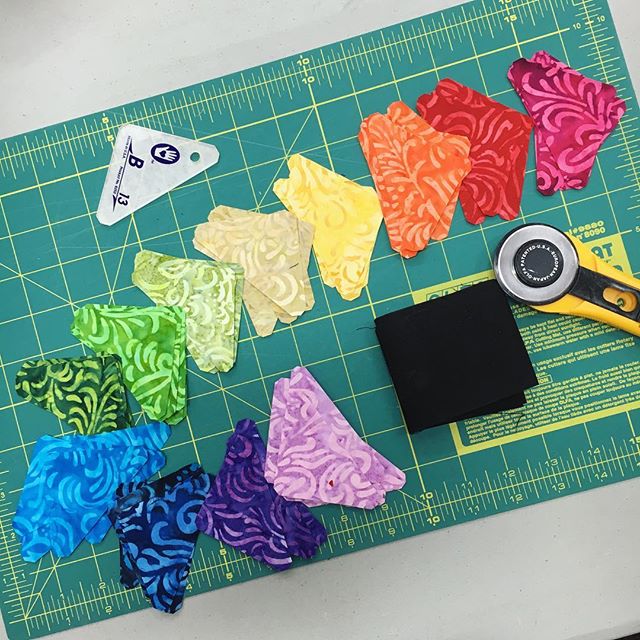
The pattern was inspired by a picture I saw on Pinterest. The link for the image went to a page of free PDF patterns but none of the pictures would load so rather than click through all the patterns to find this one, I decided to create my own version. I used a Marti Michell template from the B Set which is 2.5″ tall to cut the triangles I needed. Then I created a bunch of half square triangles and arranged them to create the rainbow pattern I wanted.
I’m considering adding some borders around my star but here’s how to create the Rainbow Star Mini Quilt.
What You Need
- Kona Cotton black jelly roll strips – I used 3 black strips for the triangles
- Flourish Batik Strip Set – you could use any rainbow strip set or jelly roll, or even cut the pieces from your rainbow stash if you prefer.
- Marti Michell template – #13 from the B Set – I’ve been using these templates for the Farmer’s Wife Quilt Along and loving them.
- Usual cutting and sewing supplies
Cutting
Here’s a list of the triangles I cut from my strips:
- Red – 4
- Orange – 8
- Yellow – 4
- Lemon – 4
- Light Green – 4
- Medium Green – 8
- Dark Green – 4
- Light Blue – 8
- Dark Blue – 4
- Purple – 4
- Mauve –
- Pink – 4
- Black – 64
Note: Some of the black triangles were then sewn together again to create the squares in the corners so I could have just cut 2.5″ squares for these. My brain was in “triangle mode” but you might want to avoid extra cutting and sewing!
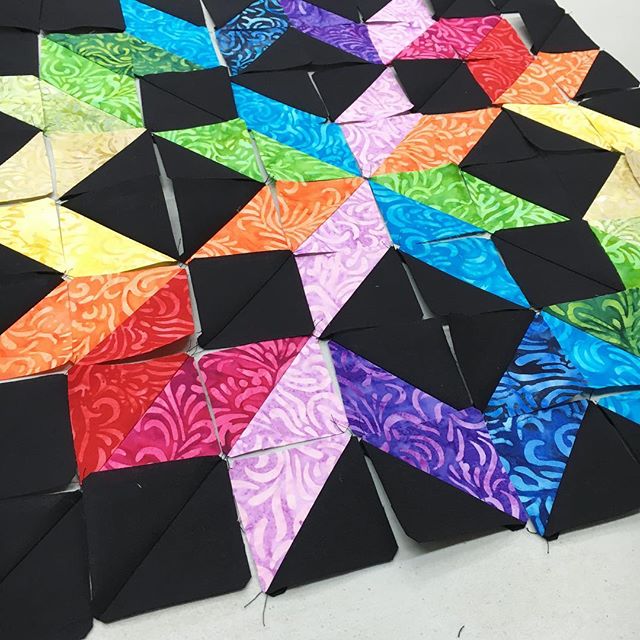
Also you could adjust the colours in the central star by sort of rotating your rainbow so that different colours fall in the middle section. I would be tempted to put the darker jewel tone sin the centre next time. Work out your arrangement first as you need to cut 8 triangles for the colours that fall in the central star.
Sewing
- Once you’ve cut your triangles, it is best to lay them all out in the design.
- Next sew pairs of triangles together to create squares and press them all.
- Then join pairs of squares. At this point I planned to join the pairs into squares next so I pressed the seams in pairs so that I would be able to nest them together in the next step. This helps get the points to match up accurately. Read more about nesting seams here.
- Continue to work in pairs then squares until you have the whole block pieced, pressing after every seam. I started out pressing seams to the side and nesting them, but for the larger sections I pressed the seams open to avoid bulky bumpy points.
Done!
Stay tuned for an update when I add the borders.
Update: I finally added the borders! Read about it here.


Love this quilt, want to make it for my grandaughter. Such a pretty thing.
You dont have to post this.
I love this! I am a novice quilter. If I weaned to make a larger quilt could I use 5″ precuts?
Yes you absolutely could use 5″ precuts!
Could you help me? Our guild has a challenge out right now to make a rainbow mini quilt and I love this one. I’m not very experienced so if I don’t need the template please let me know. We all shared 5” squares of bright colors so this is perfect except I may not have 2 matching patterns. So what is the finished size? Mine can’t be bigger than 36 x 36”
Hi Kim,
Mine was finished at 28″ x 28.5″ but you could adjust the black borders to make it larger or smaller.
Do I need a template to make a triangle? Or having a square and cutting it diagonal? I need to study your picture
More!!
i would also like to know if it would work without a template and just cutting a square on an angle. Or is it a different angle?
They are just half square triangles so you create them without a template
I would also like to make this. It’s sooooo beautiful
But I don’t have the template either. Can it be made without one?
Yes it can be made without any template