The Crafty Mummy

Crafts. Sewing. Quilting. Crochet. Tutorials.

  • Start Here
  • Welcome
    • Subscribe
    • About Me
      • Copyright
      • Disclosure
      • Privacy Policies
    • Advertise
    • Sharing
      • Recommendations
      • Shopping & Coupons
      • Books
  • Explore
    • Crafts
      • Beading
      • Kids
      • Paint
      • Storage
      • Christmas Crafts
    • Sewing
    • Quilting
    • Stitching
    • Crochet
      • Yarn
    • Life
      • Food
      • Organisation
    • Blogging
      • How To
      • Social Media
      • WordPress Plugins
      • Photography
  • Tutorials
    • Tips
  • Shop on Etsy
  • Shop on Redbubble

Sew a Brown Paper Envelope

by Tonya Grant |Filed Under: Crafts, Tutorials Tagged With: Paper, Sewing, Tops of 2015 Get a Weekly Update of all Articles

sew a brown paper envelope

It is so nice to receive a handmade gift, and handmade packaging can make it even more special. Handmade packaging doesn’t have to be elaborate and time-consuming. I’ll be sending out my pencil cases and coin purses in brown paper envelopes just to make them a little bit more special. So I thought I’d share how to make these easy envelopes.

sew a brown paper envelope

What You Need

  • brown paper
  • scissors
  • pinking shears
  • sewing machine and thread

What To Do

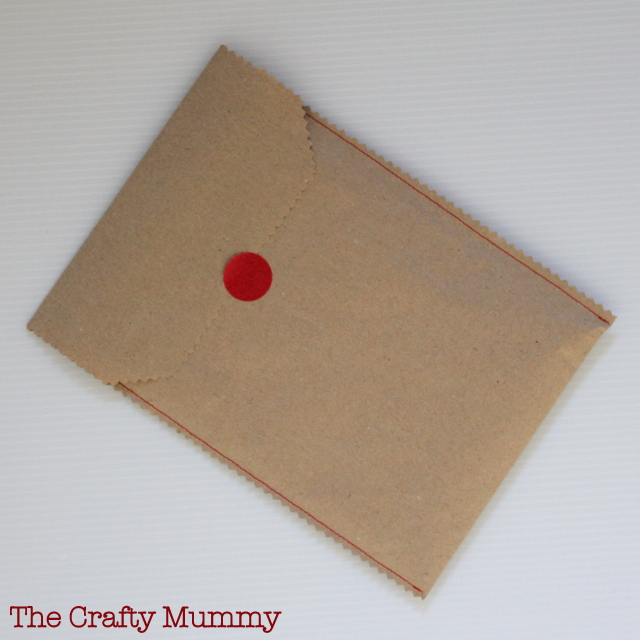
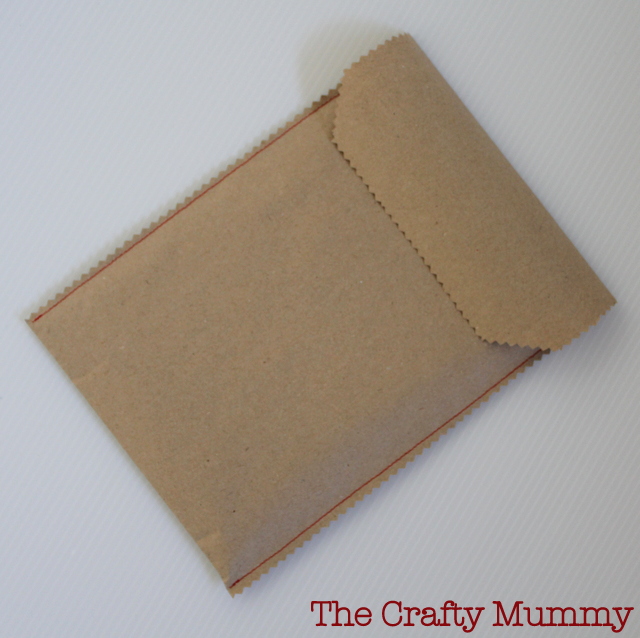
  1. Start with a rectangle of paper. Mine was 54cm x 17cm but you could adjust it to fit your item. The finished size of this envelope is just smaller than a C5 size envelope.
  2. Trim both the short ends with your pinking shears for a pretty edge.
  3. Fold one end up about 23cm.
  4. Stitch down each side of the folded section to hold it in place. I used red thread to contrast with my paper. Paper will make your sewing machine needle blunt over time, so I keep a separate needle for paper sewing.
  5. Trim the long edges with your pinking shears too.
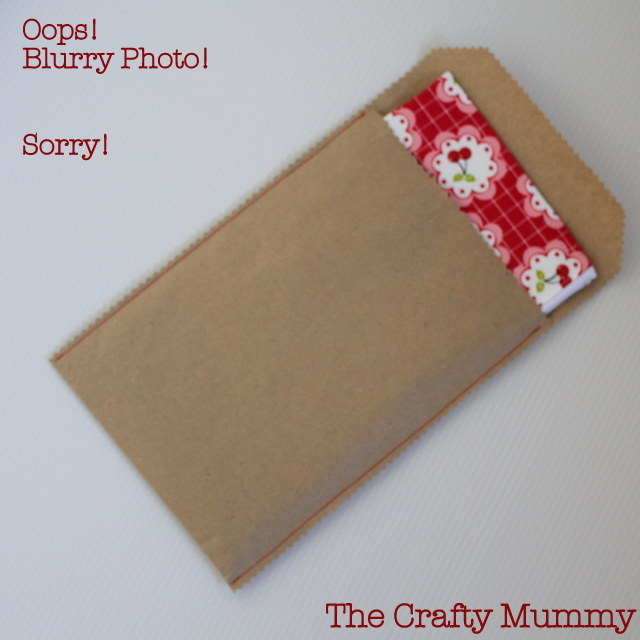
  6. Fold down the top flap and secure with a sticker.

sew a brown paper envelope

More Ideas

  • You could do the same thing with wrapping paper or freezer paper.
  • If you don’t have a sewing machine, you could hand stitch these envelopes easily.
  • Get the kids to decorate the envelope with stickers, stamps or drawings.
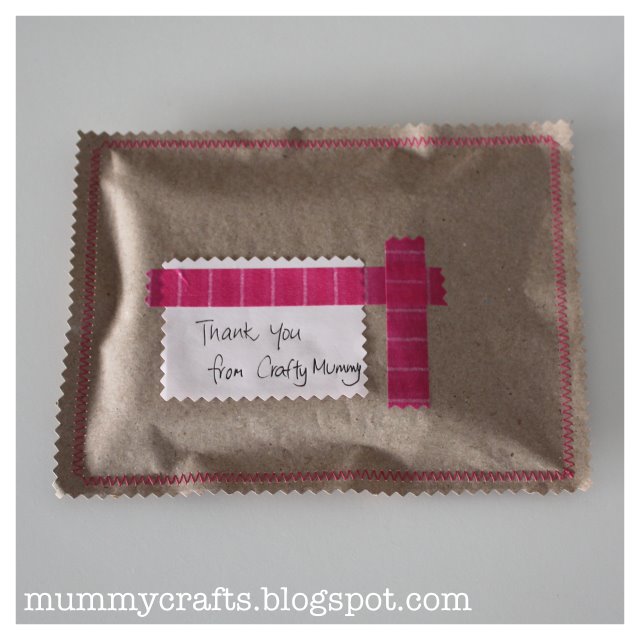
  • Add a matching tag or label to your package with washi tape.

brown paper package pink stitching

When I first started selling from my Madeit store I used to send out my products in brown paper envelopes like this, but I was worried they might not stand up to travel very well so I stopped. These new envelopes I intend to slip inside a standard envelope for mailing.


Filed Under: Crafts, Tutorials Tagged With: Paper, Sewing, Tops of 2015

« Crafty Inspirations – Russian Dolls
Crafty Kids: Obstacle Course »
Disclosure: There are affiliate links in this post.  This just means that if you click through and choose to purchase something I may get a small commission - at no extra cost to you, of course.  This helps me keep the content here at The Crafty Mummy free for everyone.

I love to chat so please leave me a comment or ask a question.

Don't stress if your comment doesn't appear immediately - sometimes I have to moderate comments thanks to spam visitors, but the comments from real readers will always get published. Scroll down to add your thoughts or ask a question.

Comments

  1. Cassandra says

    April 8, 2013 at 2:22 PM

    Such a cute idea Tonya. I recently got myself a pair of scalloped edged scissors, which would look cute for this too… ooh and perhaps with old pattern paper 🙂

    • CraftyMummy says

      April 8, 2013 at 3:48 PM

      Yes! Scallops would be cute too – and I love the idea of old pattern paper!

  2. Bettina says

    April 8, 2013 at 7:30 PM

    I love this! Especially for store packaging, I usually just wrap in brown paper, then in cellophane to protect. Maybe I could do this instead. Thanks for sharing,

  3. Susan@Organized31 says

    April 9, 2013 at 1:46 AM

    Love this idea – makes the item just that much more special. Thanks.

  4. Belinda Gustafson says

    April 20, 2013 at 1:30 PM

    Awesome idea and so true that i love opening new purchases – so many things these days are just thrown in a satchel – people always remember the extra effort 🙂

Hi! I’m the CraftyMummy

Tonya is the voice behind The Crafty Mummy. She dabbles in lots of different crafts – patchwork, quilting, cross-stitch, scrapbooking, knitting, crochet and sewing. This is the record of projects she has done, and the projects she dreams of getting to! Read More…

Search

  • Email
  • Facebook
  • Instagram
  • Pinterest
  • Twitter
  • YouTube
Shop my Affiliate Favourites

Fat Quarter Shop for Fabric and More

Grab the Sew Sampler Box Here

AccuQuilt for Cutting Machines and Dies

QuiltyBox for Monthly Treats in the Mail

CreativeBug for Craft Classes

Pretty Darn Cute for Blog Designs like mine

Creative Market for Fonts, Images, Themes and More

OzGameShop for All the Games

Adrift for Fashion you’ll Love

Kindle Unlimited Membership Plans

Kindle Book List

Click to shop my kindle book list
Shop my Amazon Influencer Shop
Join the CrochetU and learn to crochet
New to TheCraftyMummy.com? Click here to see more
Blog Tools I use for TheCraftyMummy.com

Grammarly

Aweber for email newsletter

CoSchedule to stay organised and share

Milotree for social media

Genesis for blog framework

FoodiePro is my theme

Hosting with WPEngine

Powered by

Recent Articles

Disclosure: There are affiliate links on this site. This means that I may get a commission if you choose to purchase after browsing via these links - at absolutely no extra cost to you, of course. I only recommend products which I use and love, or that I think will be quality products that will be useful to my readers. It is the affiliate links in this site that help me keep my tutorials free of charge. Thank you!

Looking for something? Search here:

Copyright 2015 The Crafty Mummy · Built using Genesis Framework & Foodie Pro Theme