
Musicals.
I love them.
As a kid, I used to watch old musical movies with Dad. Singing in the Rain. High Society. Anything with Fred Astaire and Ginger Rogers.
I tried to copy the dances and sang all the lyrics from memory. I can probably still sing some!
As I got older, I got to see shows live on stage. I vividly remember sitting in the dark theatre with lights all over the ceiling on a school music trip to Sydney before Cats started and being just entranced by it.
I shared this love with my husband who didn’t quite get it until we went to see Les Miserables. The way the music and lyrics told an epic story with layers on layers of meaning appealed to him in a way that other shows hadn’t.
More recently, my girl has also developed a love of the stage and it has been so fun to take her to shows in the Big Smoke. Last year it was The Sound of Music for her birthday and this year we saw Matilda – probably my favourite show in years.
It was no big surprise that she auditioned for the school musical, her first chance now that she is in high school. She lined up as a dancer even though she also loves to sing. What a fabulous experience for a 13-year-old. She learnt so much and is keen for the next chance.
Her school put on High School Musical and it was FUN. As a Mum, I enjoyed helping out backstage and have certainly honed my eyeliner skills after dress rehearsals and 4 performances drawing ‘wings’ for cheerleaders!
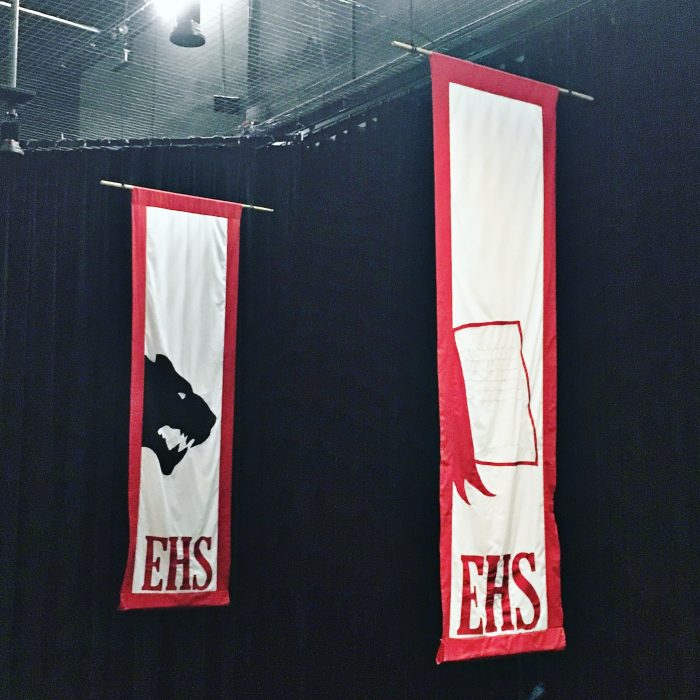
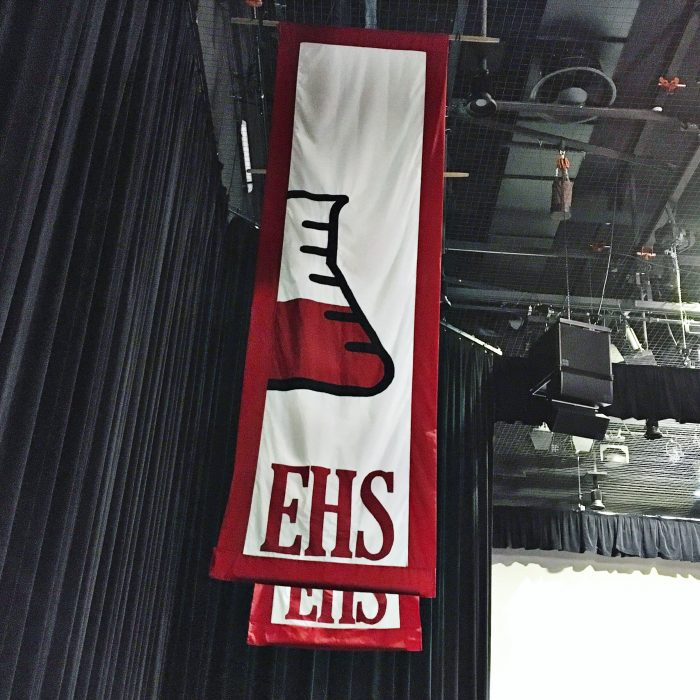
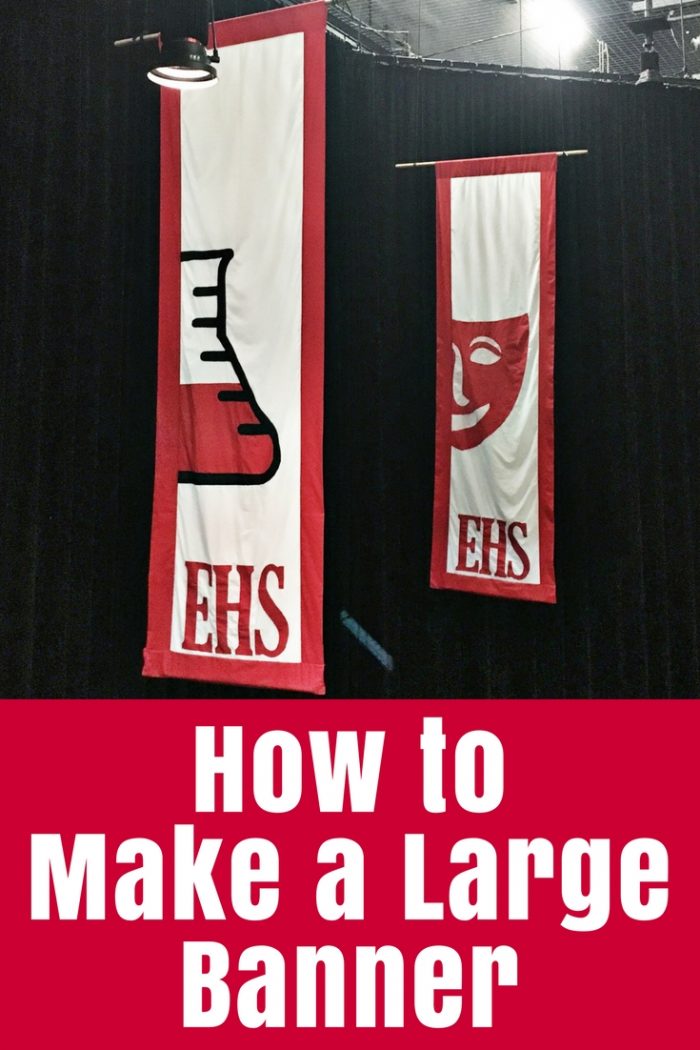
Today I want to share the banners that I made for the set. The Director had a vision of large banners hanging at the front sides of the space that would be seen by the audience as they walked in, then add to the look of the whole set for the show. We were lucky enough to have a theatre space where they could be hung from above pretty much wherever we wanted them.
You may have seen them as I shared them on social media during the process a couple of months ago. Did you know you can always click through from my Instagram account to my special Instagram page to find out more about my projects?
The Basics
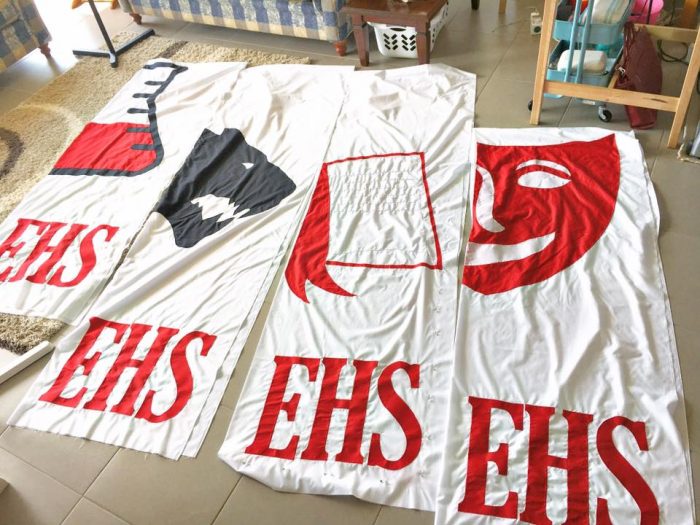
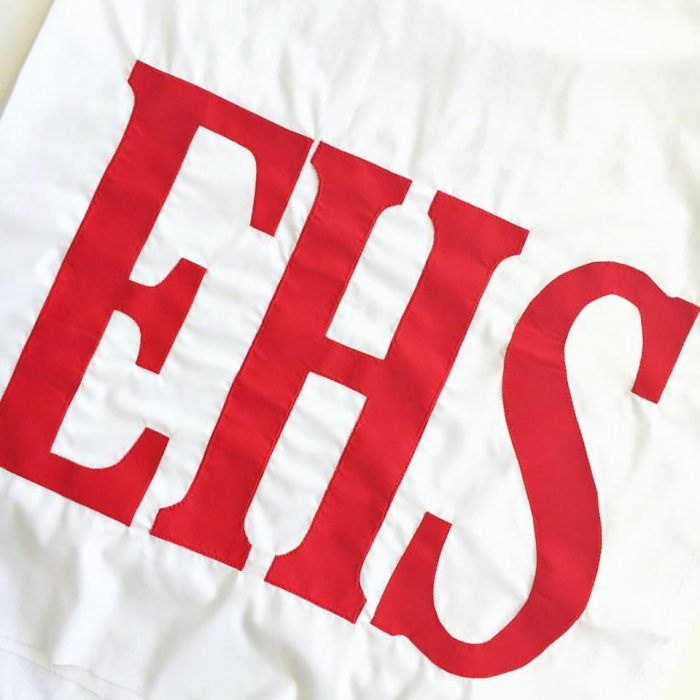
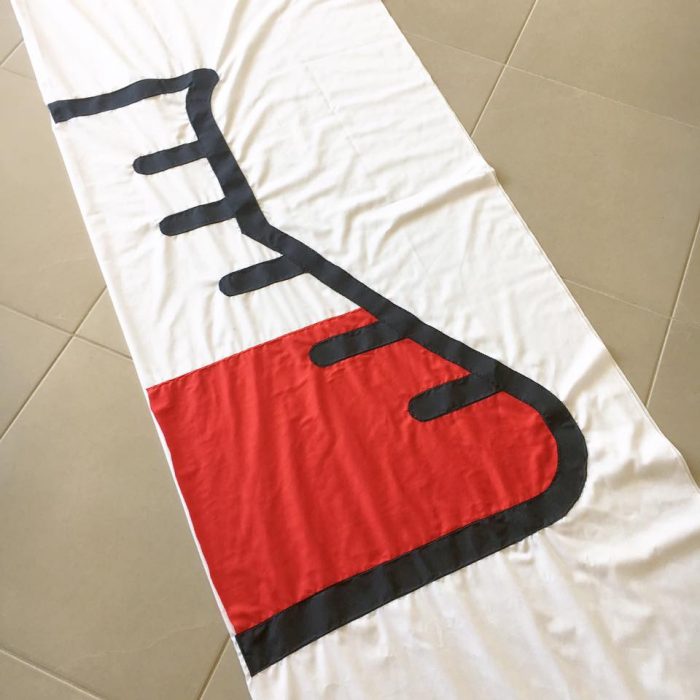
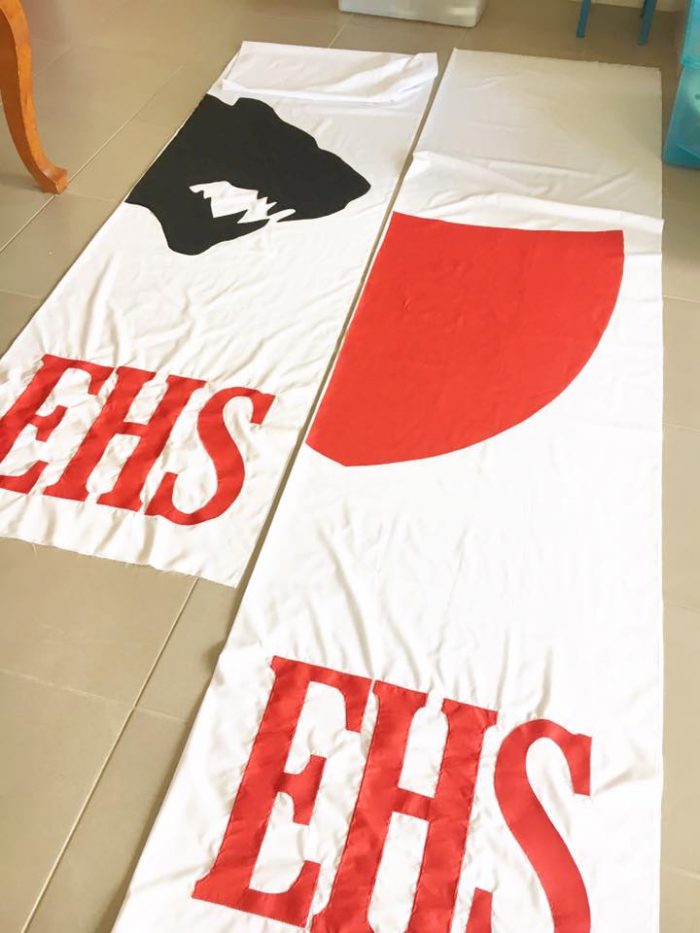
I created 4 large banners, each one approximately 3m x 1m. There were large letters at the bottom of each one – EHS for East High School, the high school in the show. Then each one had an image above it relating to different aspects of the school life. There was a wildcat head referring to the name of the basketball team in the school. Next, there was a science beaker. Finally, there was an open book page on the next one and a drama mask on the last.
As a quilter, I immediately thought of these banners as a similar process to making a quilt. The letters and images are machine appliqued and the backing fabric has a second layer to cover the stitching on the back giving them a clean finish.
What I Used
The fabrics I used were all basic poplins from our local Spotlight store. The budget wasn’t huge and I needed a lot of fabric so this was a budget choice. A heavier weight fabric would have also worked and helped the banners hang better so consider that if you have the budget.
I used Vliesofix to iron on the smaller applique pieces. This product is an iron on adhesive that comes on a paper backing.
For the larger pieces of applique, like the wildcat head, I used quilt basting spray to hold them in place while I stitched around them. It would have been very expensive to use Vliesofix for those large pieces. Quilt basting spray is basically a spray adhesive so another spray adhesive would also work.
The Background
The white background fabric was wider than usual – around 2 metres. I asked the staff in the store to cut it in 3m lengths for me as they measured it out. This saved me time measuring such large lengths later on at home. Each 3m was folded in half lengthways to create the banner around 1m wide. I appliqued the shapes on first then folded the back half over to cover the stitching and create a plain white back on each banner.
The Applique
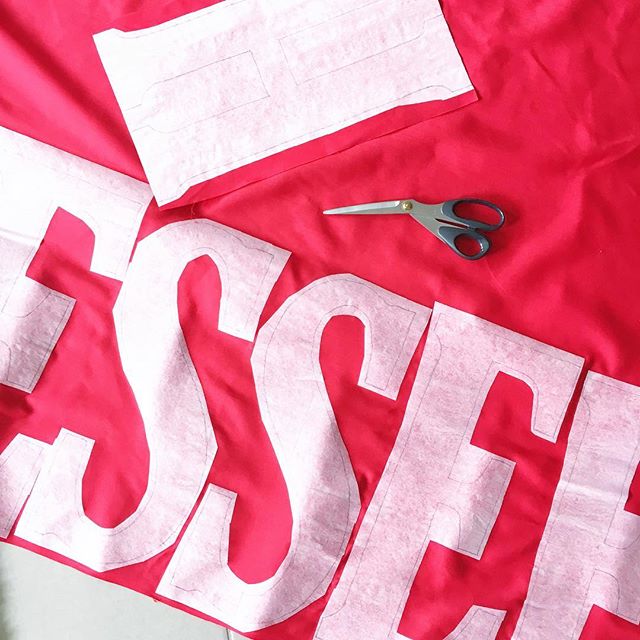
The applique letters were about 30cm or 12″ tall. To used Vliesofix on the letters. You need to print them out mirror imaged. After some trial and error, I found I could do this using Canva and Word.
Creating huge letters in Canva
In Canva, I created an A4 size document then typed in my first letter. I chose the Old Standard font which is tall and skinny with serifs – those little strokes or lines at the ends of the lines on the letters. Then I changed the font size until it filled the page.
Copy the page twice and change the letters. This will duplicate the font and font size for you automatically.
Pro Tip: If you use Canva for Work, you can even upload exactly the font you want instead of choosing from the ones provided.
Next, download your letter document as a PDF file. This basically turns your letters into images that will stay the same size in any other program.
Creating mirror image letters in Word
Open up a new document in Word.
Under the Insert menu, choose Photo, then “picture from file”. Choose your PDF that you downloaded from Canva.
Using the corner of the image, resize it to fill your page.
Pro Tip: If you want letters larger than an A4 page, you can use the method described below for large images to create larger letters.
Then in the Format Picture tab, choose the circular arrow nex to the Align option. This will let you Flip or Rotate your image. You need to “Flip Horizontal” to create a mirror image of the letters.
Print them out and they’re ready to trace onto the Vliesofix.
ProTip: Some letters won’t need to be flipped because they look the same mirror imaged. Just print them out and they will be ready to go.
Applique the Letters
Trace the letters onto you Vliesofix, trim them roughly, then iron onto your fabric.
Cut the letters out carefully.
Peel off the Vliesofix backing paper and iron into place on your white banner backing.
I machine stitched around my letters using a small blanket stitch.
The Large Images
The large images on the banners were found online. Download your images and save them as PDFs. ON a Mac, yo can open an image in Preview then “Export as PDF” under the File menu.
In Word, create a new document. Under File > Page Setup, choose a Custom Paper Size and set it to the size you want your finished images to be. You can put in measurements in millimetres here in Australia so presumably in inches in the U.S.
Insert your PDF image just like you did earlier with the letters. Drag to resize to the large paper size.
Save as a PDF file.
Open this PDF in Adobe Acrobat Reader. Go to the Print menu and choose Poster. This will print your large image across a number of pieces of paper on your home printer.
Once I had printed my images out, I laid out the pages and taped them together.
Depending on the original image, the edges of your image may be quite jagged when they are resized so much larger. I used a Sharpie pen to draw sharp outlines for cutting.
I cut out the shapes then used them as templates to cut my fabric pieces for applique.
I used spray adhesive (quilt basting spray) to hold my applique pieces in place while I machine stitched around the edges in matching threads.
The Borders
I added borders on two sides that were about 5″ wide. I cut the red fabric strips 10″ wide
My red fabric is cut into strips 10″ wide and joined as needed for the 3m long sides of the banners.
Then I folded them lengthways and pressed them.
With all the applique finished on the banner panels, I folded them in half lengthways so that all the stitching on the background was hidden inside the two layers.
Then I pinned the red borders to the two long sides and stitched with my overlocker (serger) to finish the seams.
The Hanging Pockets
On the top and bottom of each banner, I also added red borders that doubled as pockets. Each one had a broomstick handle threaded into them for hanging at the top, and another piece of timber in the bottom pocket to give weight so they hung straight.
These borders were cut 10″ wide and folded in half as well. Before folding and pressing in half, I hemmed each end to prevent fraying. Then they were folded and attached with the overlocker so all the seams were finished.
Finally, a couple of screw eyes were added so rope could be attached for hanging.


Thank you so much! I was trying to figure out how to print out a large image and your instructions look simple enough.
Wow! These are phenomenal. What a great job you did. And they can be used by that school for years to come. You are a super neat, accomplished mom! Your daughter must’ve been (possibly secretly) proud. 🙂