The Crafty Mummy

Crafts. Sewing. Quilting. Crochet. Tutorials.

  • Start Here
  • Welcome
    • Subscribe
    • About Me
      • Copyright
      • Disclosure
      • Privacy Policies
    • Advertise
    • Sharing
      • Recommendations
      • Shopping & Coupons
      • Books
  • Explore
    • Crafts
      • Beading
      • Kids
      • Paint
      • Storage
      • Christmas Crafts
    • Sewing
    • Quilting
    • Stitching
    • Crochet
      • Yarn
    • Life
      • Food
      • Organisation
    • Blogging
      • How To
      • Social Media
      • WordPress Plugins
      • Photography
  • Tutorials
    • Tips
  • Shop on Etsy
  • Shop on Redbubble

Painted Canvas Art

by Tonya Grant |Filed Under: Crafts, Paint Get a Weekly Update of all Articles

blue green painted canvas

I’m not a painter.

I have zero art training and my only knowledge is what I have gleaned from the internet.

So why I suddenly decided I would try my hand at canvas art is a mystery!

painted canvas green blue

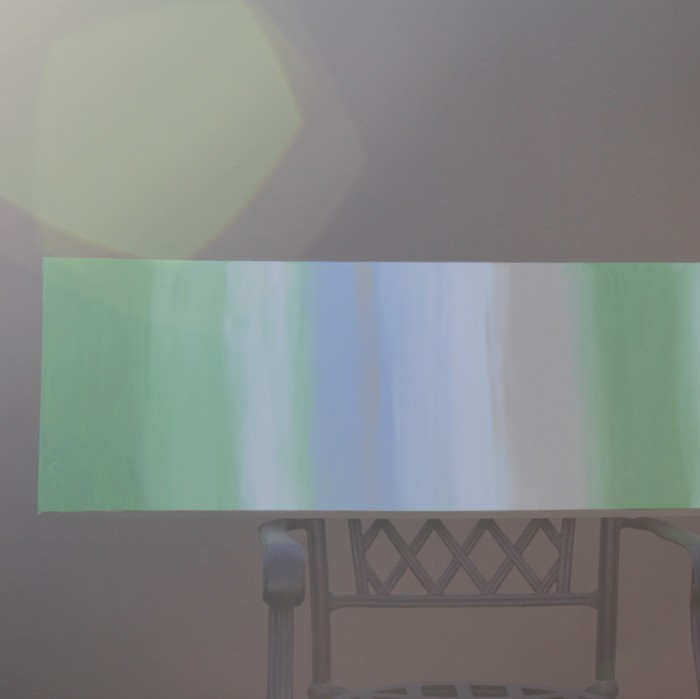
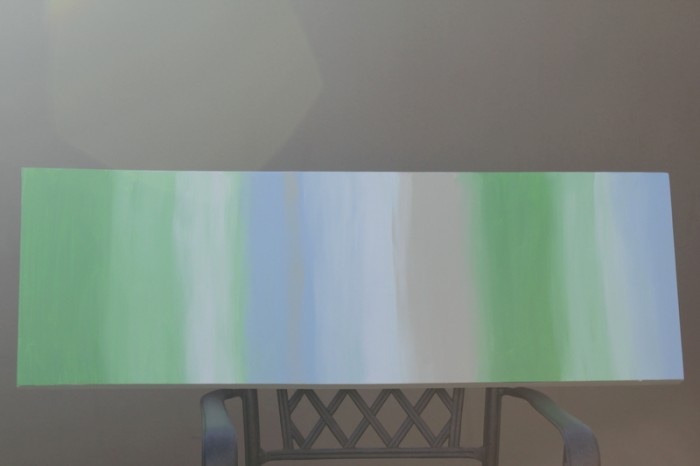
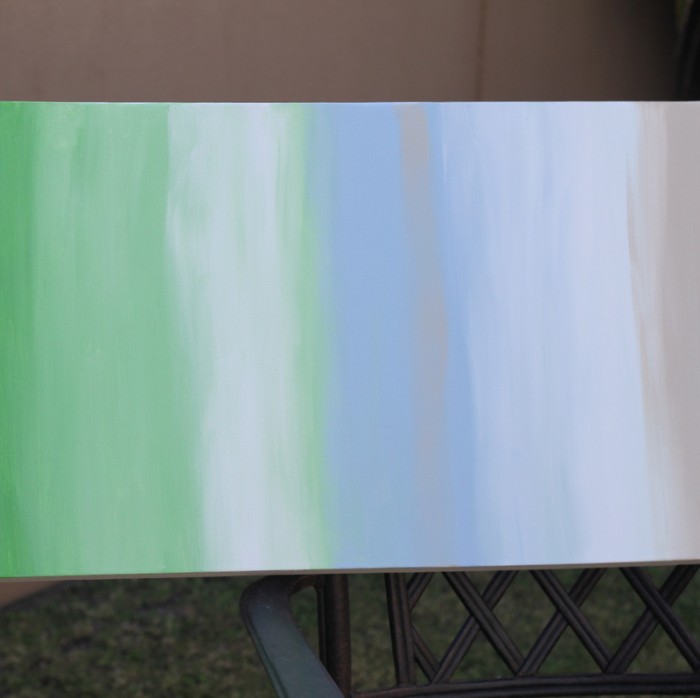
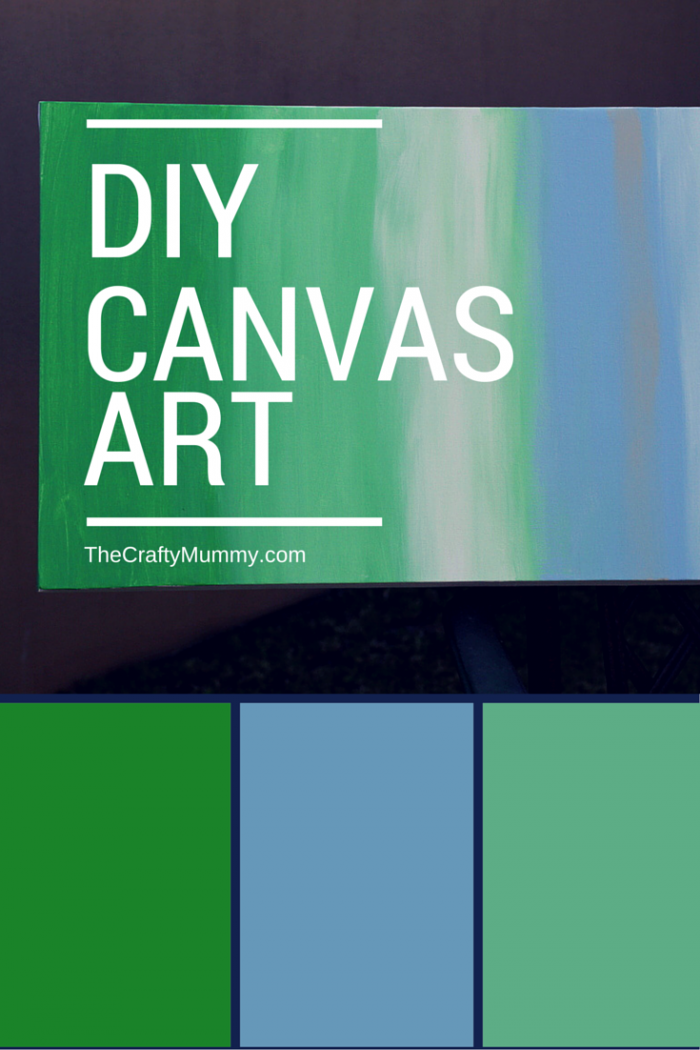
Nevertheless here is my first attempt.

And I must say I’m pretty happy with it!

What You Need

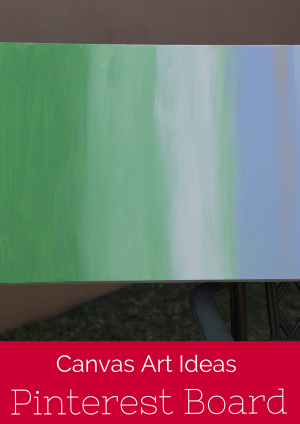
  • Large canvas – mine is 15″ x 45″ (38cm x 114cm)
  • Paint – I used chalk paint but any paint would work
  • Large flat brush – mine is size 12

canvas art blue

What To Do

I started with all the little pots of Annie Sloan Chalk Paint that I had collected last year – some from the ProBlogger Event and others that were gifted to me for my Painted Basket project. I had four colours: Antibes Green, Louis Blue, Country Grey and Pure White.

I wanted a mix of these so I grabbed a plastic paint tray with sections that my kids use for painting and poured a little of each colour into it. I put the white into the middle section so that I could easily mix it into each of the other colours.

Then I grabbed a thick flat brush and just started painting!

Painted Canvas Art

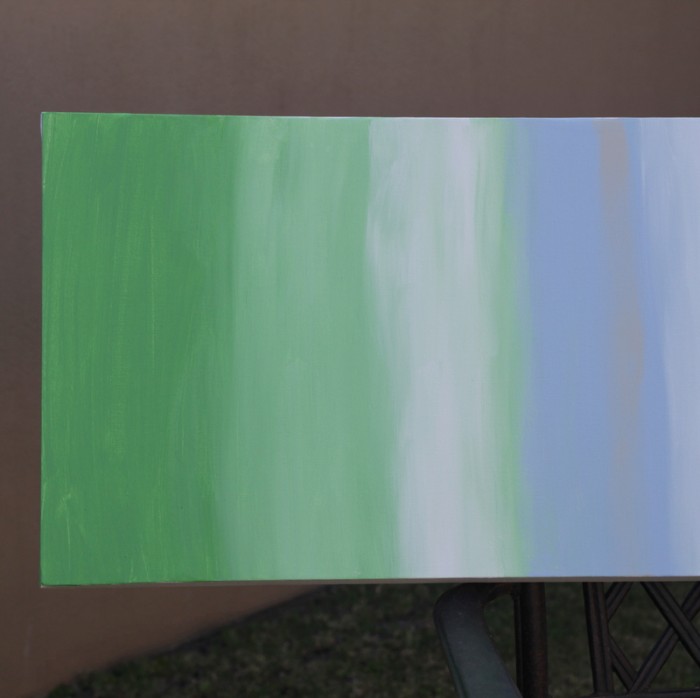
I started with the green and created a stripe. Then I added some white so that my green got lighter and lighter. Eventually I did a little of just the white paint, overlapping the wet edges of the stripes so that the paint blended.

I continued across the whole canvas switching colours when I felt like it. I used the same brush the whole time and didn’t clean it at all other than by painting with it until I needed to dip it in more paint. This really made the stripes blend together.

I didn’t paint down the edges of my canvas but I’m thinking now that I should go back and do that. The sides will be seen once the canvas is on the wall so I think it will look better.

What do you think? I’d love your feedback.

This whole project took me an hour or so one afternoon, then it had to dry overnight. The chalk paint is super easy to use and comes in lots of different colours. Read more about it here at Paint Me White.

If you’re looking to paint furniture, check out this article: How to Chalk Paint Furniture

Project Tips

  • Blending the stripes is key so you need to paint the whole canvas at one time without letting the paint dry
  • Pour out your paint beforehand so that you can mix easily
  • Watch out for drips! I had to do some creative blending after dripping paint from my brush across the canvas.
  • Consider painting the edges of the canvas as you go – I didn’t but I think now I should have!


DIY Canvas Art

More Paint Projects

how to paint chairs part 1  Painted Chairs with Spray Paint  Laundry Basket DIY

More Canvas Art Ideas


Check out my Canvas Art Ideas Board on Pinterest

Canvas Art Ideas Pinterest Board

Filed Under: Crafts, Paint

« Library Bags
Crochet: Foundation Row without Chain »
Disclosure: There are affiliate links in this post.  This just means that if you click through and choose to purchase something I may get a small commission - at no extra cost to you, of course.  This helps me keep the content here at The Crafty Mummy free for everyone.

I love to chat so please leave me a comment or ask a question.

Don't stress if your comment doesn't appear immediately - sometimes I have to moderate comments thanks to spam visitors, but the comments from real readers will always get published. Scroll down to add your thoughts or ask a question.

Comments

  1. Kate says

    February 16, 2015 at 8:31 AM

    Great start, love that you’ve jumped in the deep end and started painting. Best way to learn!

  2. Peta says

    February 16, 2015 at 11:06 AM

    Hi again. I once attended art school. One of the task given to us was using oil crayons on canvas & paper. Not only can you melt crayon (which personally I’ve never liked the effect, but that’s just me) you can disperse it like water colour using turps. I also get a terrible reaction to normal turps but I can use gum turpentine, which is what artists use. I get it from Masters or Bunnings. A lot more bang for you buck than buying it from an art store.It has a eucalyptus leaf on the label & that’s what it smells like. You load you brush with the turps & rub the crayon. You can load it with a lot (really runny affect) or you can remove excess turps & scrub at the crayon. I’ve never forgotten this project as it has so many possibilities.

    • Tonya Grant says

      February 16, 2015 at 4:16 PM

      Thanks, Peta! You sound like a much more accomplished artist than I so it is great to hear your tips!

  3. Kerry says

    February 16, 2015 at 10:03 PM

    great work and super simple idea.. this would make a great piece on its own or the back drop to a mixed media piece 🙂

  4. Lalanie Herath says

    February 17, 2015 at 6:55 AM

    Beautiful Tonya, I love this.

  5. Carrie This Home says

    July 2, 2015 at 10:18 PM

    I love it!! The colors you chose are so calm and beautiful! I’m going to have to try this sometime.

Hi! I’m the CraftyMummy

Tonya is the voice behind The Crafty Mummy. She dabbles in lots of different crafts – patchwork, quilting, cross-stitch, scrapbooking, knitting, crochet and sewing. This is the record of projects she has done, and the projects she dreams of getting to! Read More…

Search

  • Email
  • Facebook
  • Instagram
  • Pinterest
  • Twitter
  • YouTube
Shop my Affiliate Favourites

Fat Quarter Shop for Fabric and More

Grab the Sew Sampler Box Here

AccuQuilt for Cutting Machines and Dies

QuiltyBox for Monthly Treats in the Mail

CreativeBug for Craft Classes

Pretty Darn Cute for Blog Designs like mine

Creative Market for Fonts, Images, Themes and More

OzGameShop for All the Games

Adrift for Fashion you’ll Love

Kindle Unlimited Membership Plans

Kindle Book List

Click to shop my kindle book list
Shop my Amazon Influencer Shop
Join the CrochetU and learn to crochet
New to TheCraftyMummy.com? Click here to see more
Blog Tools I use for TheCraftyMummy.com

Grammarly

Aweber for email newsletter

CoSchedule to stay organised and share

Milotree for social media

Genesis for blog framework

FoodiePro is my theme

Hosting with WPEngine

Powered by

Recent Articles

Disclosure: There are affiliate links on this site. This means that I may get a commission if you choose to purchase after browsing via these links - at absolutely no extra cost to you, of course. I only recommend products which I use and love, or that I think will be quality products that will be useful to my readers. It is the affiliate links in this site that help me keep my tutorials free of charge. Thank you!

Looking for something? Search here:

Copyright 2015 The Crafty Mummy · Built using Genesis Framework & Foodie Pro Theme