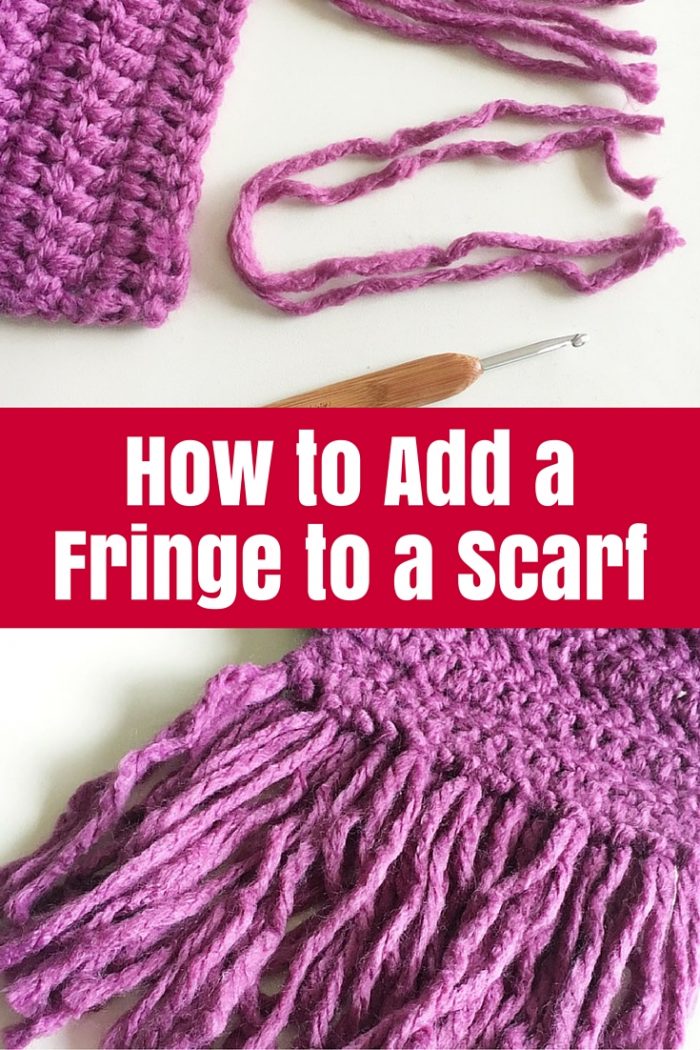
Learn how to add a simple fringe to a scarf or any other handmade yarn project.
Love the yarn but not sure what to make with it?
Looking for a quick easy project that you can finish in a day or two?
Need a yarn project that you can take with you?
Got a ball or two of yarn leftover from a larger project?

When I think any of these things, my ‘Go To’ project is another scarf. I live in a pretty country town on top of a mountain that gets cold for a good three months a year so I can never have enough scarves to try to keep warm on the school run or at the kids’ tennis training.
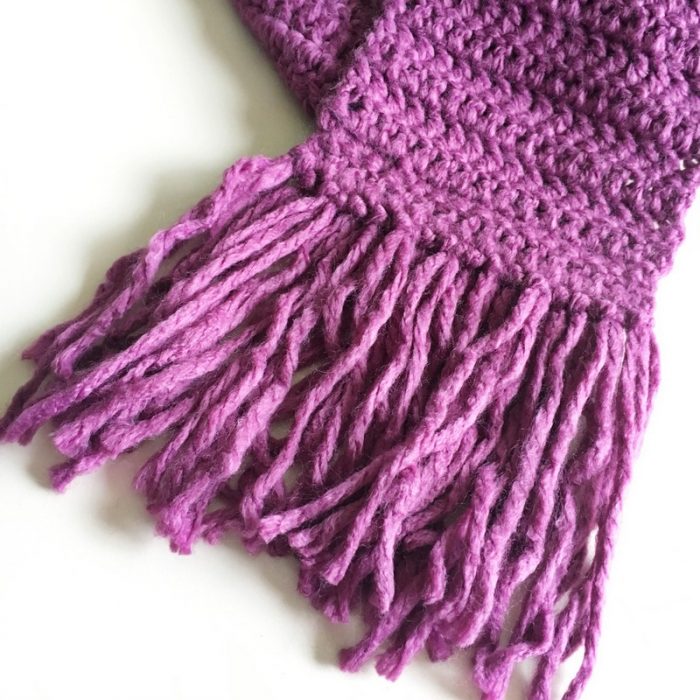
Nothing finishes off a scarf better than a fringe so today I’m going to teach you how to add one.
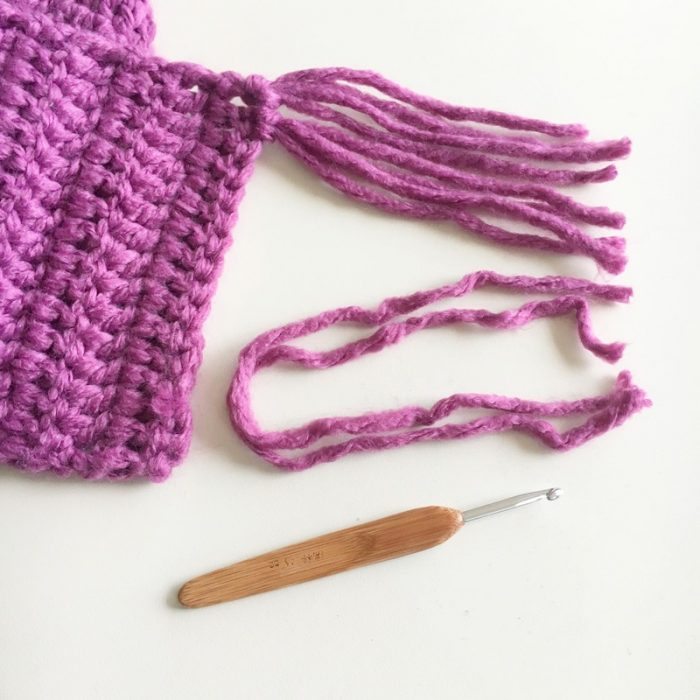
What You Need
- Yarn – either more of your scarf yarn or something else! It really is up to you
- Crochet hook
- Scissors
- Measuring tape or ruler
What To Do
The first step is cut your yarn into lengths twice as long as you want the finished fringe. My scarf is approximately 6.5″ wide and I decided I wanted my fringe to be a similar length to the width of the scarf. So I cut my yarn in lengths of about 13″.
Look at your scarf to work out how many lengths of yarn you will need. My scarf is 16 crochet stitches across and I want two pieces of fringe per stitch so I need 32 pieces of yarn. If I want to fringe both ends of the scarf – which I did – I need 64 pieces of yarn.
Quick Tip: Measure and cut your first piece of yarn then use that piece to measure the rest: Hold one end of the cut piece with the end of the ball of yarn, run your fingers down the two to the end of the cut piece and cut the new piece the same length. It is quicker than measuring each piece with the tape measure or ruler.
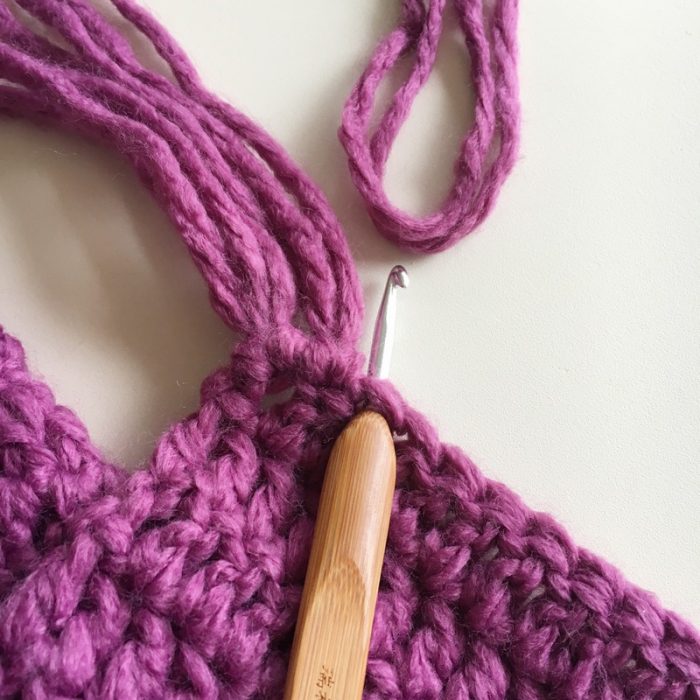
Take two pieces of fringe yarn and fold them in half.
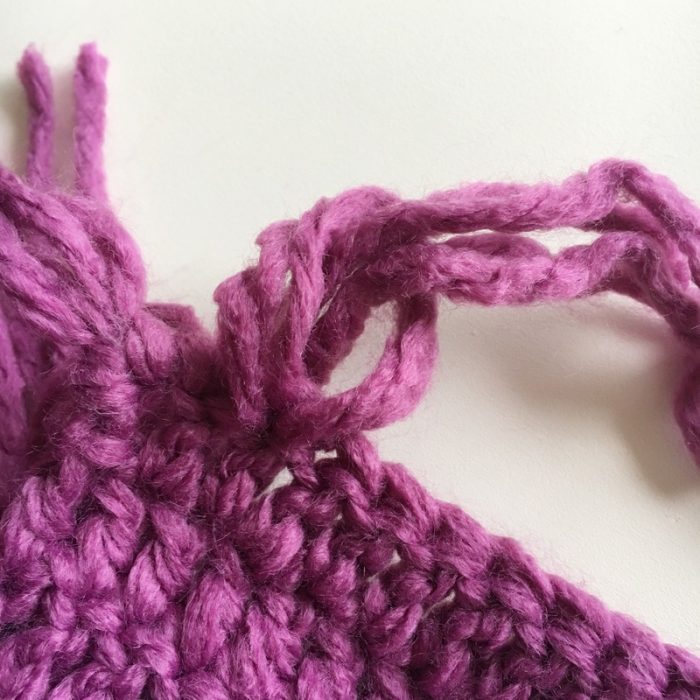
Insert the crochet hook into the first stitch and hook the folded yarn loop.
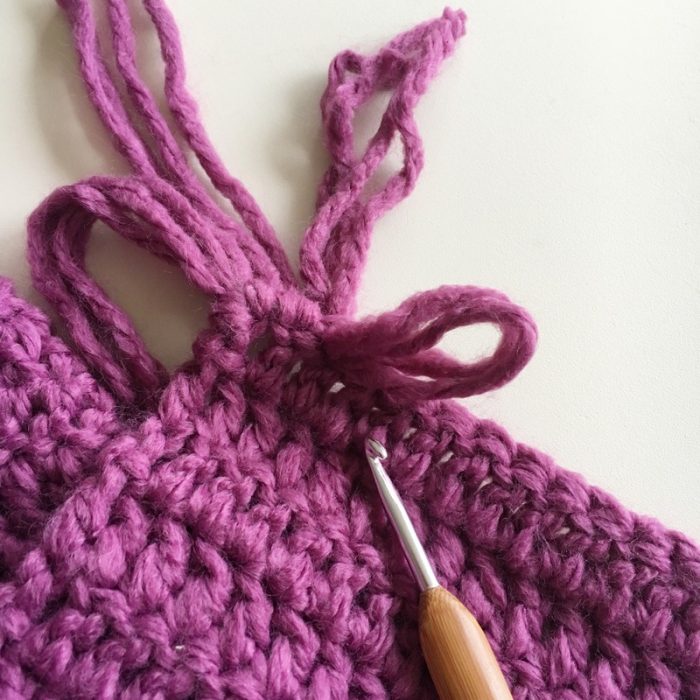
Pull the loop through about a third of the way. Now open up the loop (both pieces of yarn) and slip the ends of the yarn (all 4 ends) through the loop.
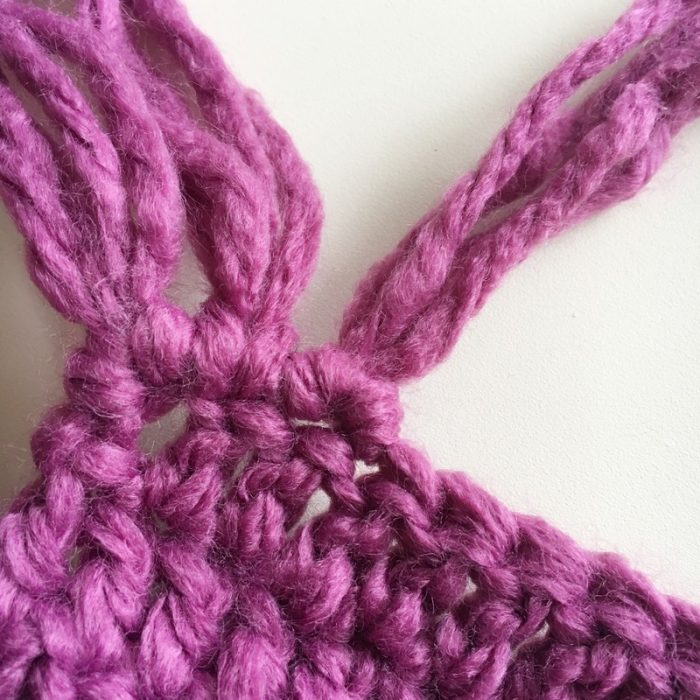
Gently pull it tight to create the first piece of fringe. You may need to adjust the ends as you tighten to get them all even.
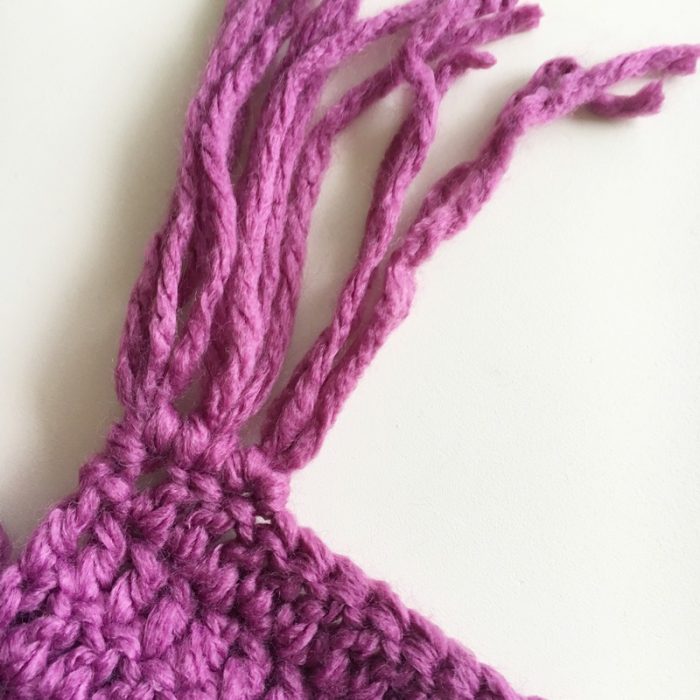
Continue adding two pieces of yarn to each stitch along the end of the scarf.
You may want to trim the ends all the same length once you’ve finished. Just lay the fringe flat and trim with scissors. As you can see I left mine as they were.
Then do the same to the other end of the scarf.

Need to see what I mean? I made a video! (Be kind – I’m new at video making but I figure I need to just make myself start trying to make them.)
See the other projects I have made with this yarn:


Can you machine wash these fringes without their coming undone?
Hi Gloria,
I think it would depend on the length of the fringe. If it was long enough I should think it should stay together just fine, especially with a gentle hand wash.
Thank You for this page. Excited about doing a scarf fringe.
Hi Tonya,
I love whatever pattern you used for the scarf. Can you tell me what it is?