CLICK HERE TO PIN NOW AND SAVE FOR LATER
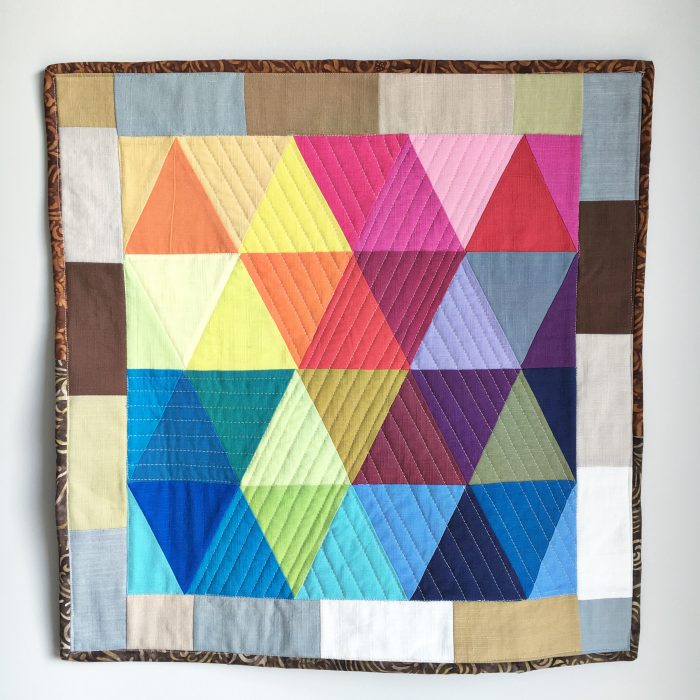
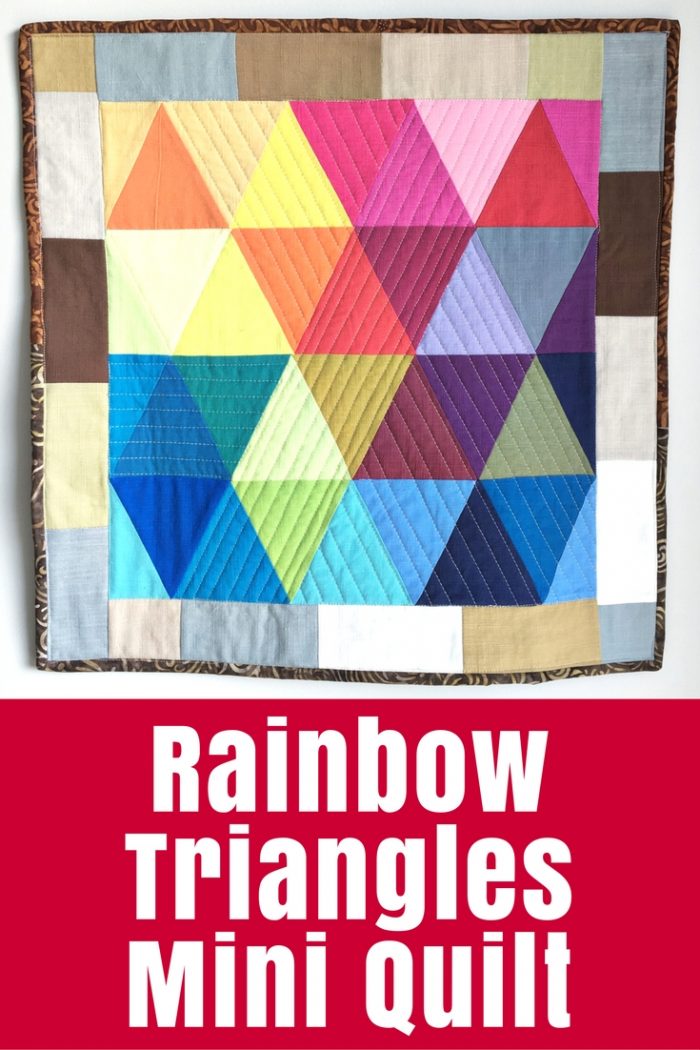
Time for another new project – Yay! Introducing my Rainbow Triangles Mini Quilt.
I’m so excited to be taking part in the Marti Michell Mini Quilt Blog Hop with Angie from GnomeAngel. This is going to be such a great way to get more value from all those templates you might have acquired for the Farmer’s Wife 1930’s Sew Along. There were a bunch of basic sets that were recommended for that sew along and many quilters have been commenting that they wanted to get more use from them. So 13 of us have a master plan to create some mini quilts using the templates from the sets and share the tutorials so you can create them too.
If you haven’t been a part of the Farmer’s Wife Sew Along, you can still grab the templates and join in this blog hop, of course. We’re using these templates, Sets A, B, D, N and S – just click each picture to find more info on Amazon:


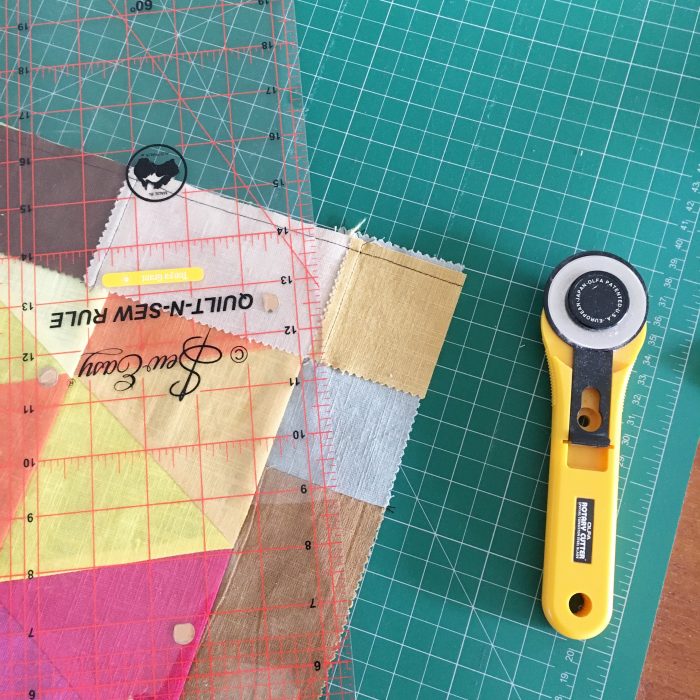
I’ve used the large triangle and its counterpart in Set D to create a super simple triangle mini quilt. I wanted something that would be quick and easy but also give plenty of chance for practising cutting with the templates. They really are worth using and make a huge difference to how accurately the triangles come together.
I also wanted to use some of the fabric in my stash rather than shopping so I grabbed a 5″ charm square pack that came from the lovely folk at QuiltyBox. My charm squares are Textured Solids from Andover that were part of the January 2016 QuiltyBox – which is still available in their Shop I believe. The fabric looks like linen and includes a gorgeous range of colours. Each of my triangles was cut from one 5″square so they are the perfect size for this project. The border was created from the leftover charm squares.

What You Need
- 28 x 5″ charm squares for the triangles
- 8 scraps from these for the end triangles on each row – or 4 more charm squares
- 9 charm squares for the border
- Note: that’s 41 charm squares altogether – or one charm pack
- backing fabric – 25″x 25″
- binding fabric – 2.5″ x 100″ strip (I used two batik jelly roll strips leftover from this project which was shorter than 100″ but just enough)
- batting – 23″ x 23″
- Marti Michelle Set D Templates
- sewing machine and supplies
Finished Quilt Size: 20.5″ x 21″
What To Do
Cutting
Use the D 22 triangle from the Marti Michell Set D Templates to cut 28 triangles. Make sure you carefully cut the corner notches on the template as these are the key to getting great joins later on.
Note: If you slide the template as far to one corner of your charm squares as you can before you cut, then you will have scraps left large enough to cut the end of row triangles.
Use the D 23 triangle from the same set to cut 8 triangles for the ends of the rows. If you can’t fit the template on your scraps, then just use 4 more charm squares – cutting 2 triangles from each square.
Cut 9 more charm squares in half to create rectangles 2.5″ x 5″ for the border. You need 18 rectangles.

Piecing
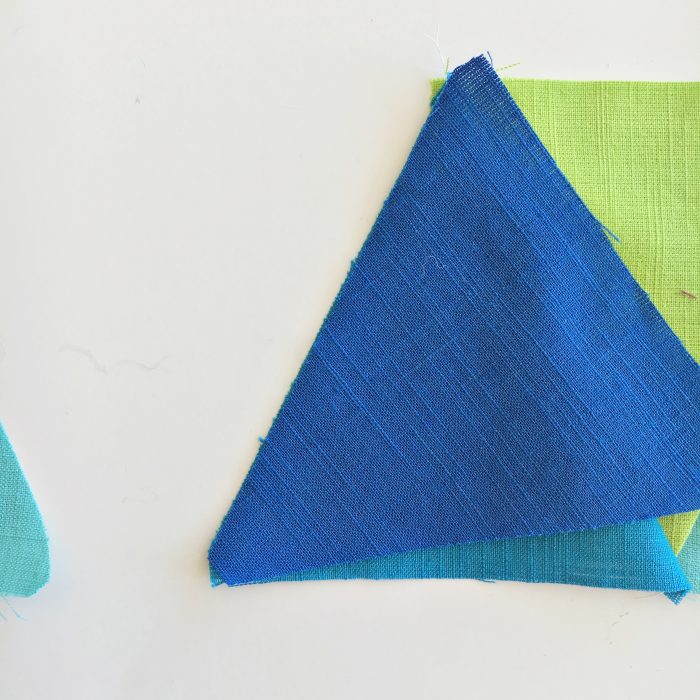
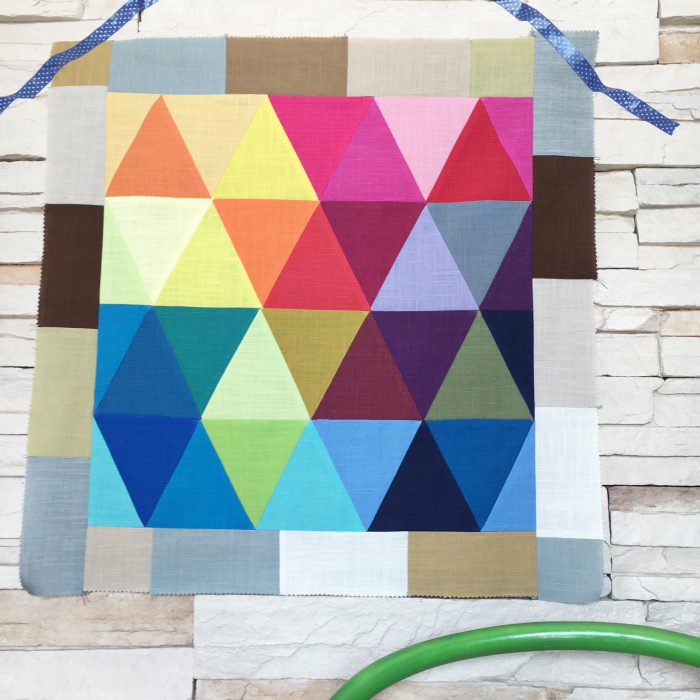
Lay out all your triangles into rows of 7 using the pictures as a guide. Add the end of row triangles and make sure you’re happy with the distribution of your patterns and colours.
Join each row of triangles together pressing each seam as you go along. I used a quarter-inch seam and pressed all my seams to one side.
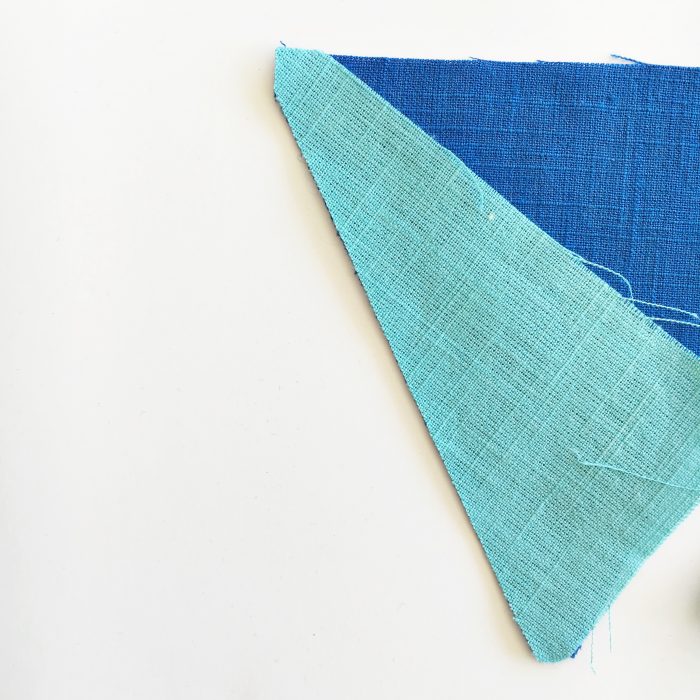
Flip one triangle right side down onto the triangle beside it. Line up the corners from the template and stitch. When you press the seam open you should find they line up beautifully – the trick is in the corners of the templates!
Work along each row of triangles, joining them and pressing the seams. Then join the four rows to create your quilt top.
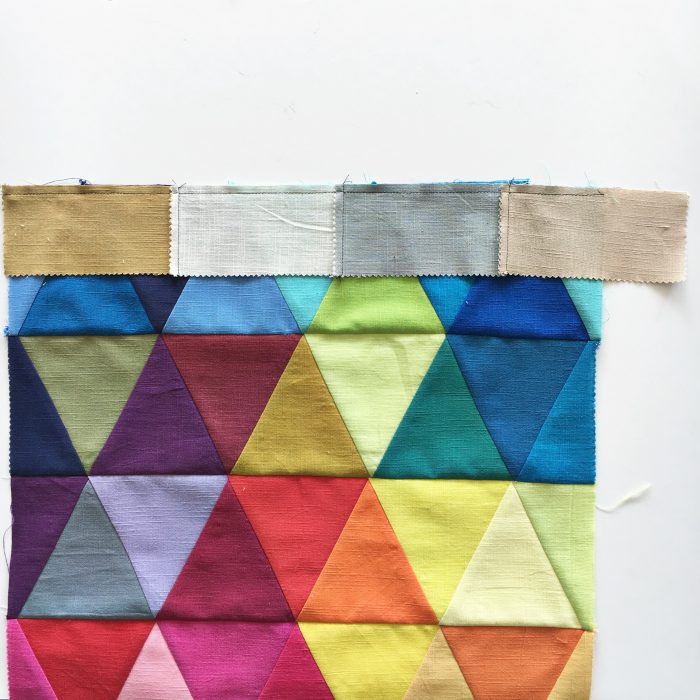
For the border, join the rectangles in sets to create two strips of 4 pieces and two strips of 5 pieces. Press the seams.
Start with the two strips of 4 and attach them to the top and bottom of your quilt top. One end will be longer and hang over.Trim this carefully before you press the seam.
Attach the second strip to the bottom of your quilt top and again trim and press.
Now add the two strips with 5 pieces each to the sides of the quilt. These two will be too long and need trimming before you press.
Note: You can see in my finished quilt top that I attached my border strips so that the trimmed ends were not in the same corners of the quilt top.
Finishing
Complete your quilt as desired.
The first step is basting the layers – quilt top, batting and backing fabric. A small quilt like this is perfect for basting with spray – read the ‘how to’ here.
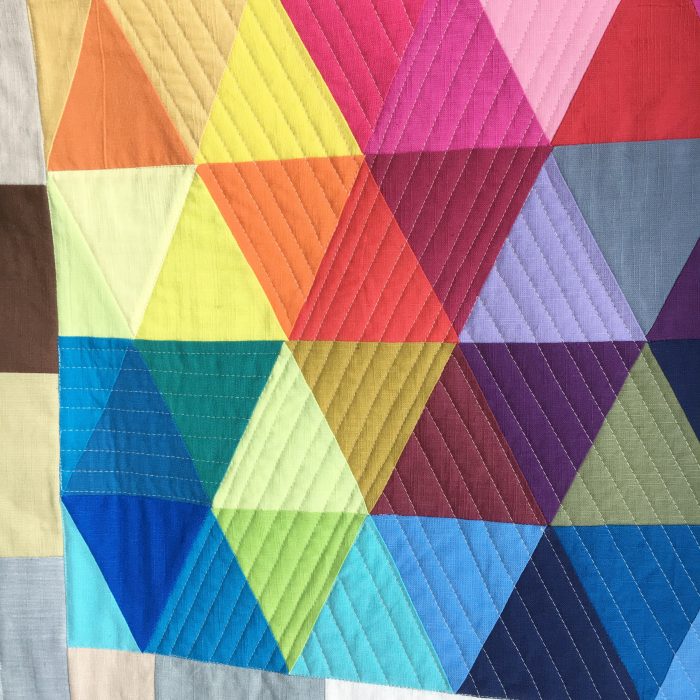
Then the quilting. I’ve quilted mine with straight lines over the triangles following the angles created by the pieces but changing directions to create interest. I love the look of straight line quilting after doing a class on the basics over on Craftsy: Creative Quilting With Your Walking Foot. I’ve used a neutral thread that matches the tones of the border fabrics.
Finally, I used 2 jelly roll strips to bind my mini quilt – because they are already cut to 2.5″ and I’m all for easy this week! Find my tutorial for getting neat binding corners here and a video for joining the ends here.
I would LOVE to see your mini quilt!
Make sure you tag me on Instagram or Facebook – @CraftyMummy – or send me an email with a picture. Perhaps I’ll even share a follow-up post with your pictures in the next few weeks so let me know if it is OK to share your mini quilt.
JOIN IN – there are prizes!!
Angie has organised a number of cool sponsors for this mini quilt adventure who will be giving some quilty prizes. You will be able to share your mini quilt creations on our linky party from November 18 to enter so get sewing.
Look for more quilts using the hashtag #MartiMichellMiniQuiltmania on social media.
UPDATE: Read about the prizes you can win and find out how to enter here.


Triangles can be tricky so using the templates is a great idea, Tonya. This is so bright and happy – and I love how the triangle lines give the opportunity to try out some funky straight line quilting, as you have 🙂
Fabulous quilt! Don’t forget that people can win prizes for making their own versions of this mini (or any of the mini’s in the blog hop). They can find out more information on my blog, or you might like to share it with them as well. Don’t forget the hashtag #MartiMichellMiniQuiltmania.
Bonjour,
Ce n’est pas évident de travailler avec des triangles. Votre mini quilt est très joli, j’aime beaucoup les couleurs. Je fais en ce moment un dessus de lit pour ma fille avec des triangles isocèles, c’est très long mais je prends beaucoup de plaisir. Très bonne continuation.
Thank you!
And a special thank you for writing your comment in French so I could encourage my daughter to get some real life practice – she is learning French at school!
Bonjour,
Merci pour votre réponse très rapide. Je regrette de ne pas parler l’anglais. J’espère que votre fille apprendra le français, cela lui sera, je le pense, très utile. Ma fille a appris l’anglais et cela lui sert énormément. J’utilise systématiquement Google pour la traduction (ce n’est pas parfait) mais, au moins, je peux lire ce que vous écrivez. J’adore le patchwork, je suis une débutante qui a 65 ans.
Je vous souhaite une très bonne soirée et de bonnes études pour votre fille.
Cordialement.
Gisèle
Finally getting round to making one of these – got to love a rainbow!
My rainbow scraps aren’t big enough to fit the D triangles on though, so am going to attempt to follow the tutorial but use a triangle from a different Marti Michell set, so I’m thinking it should look the same but just be a bit smaller overall! We’ll see how that goes 🙂