The Crafty Mummy

Crafts. Sewing. Quilting. Crochet. Tutorials.

  • Start Here
  • Welcome
    • Subscribe
    • About Me
      • Copyright
      • Disclosure
      • Privacy Policies
    • Advertise
    • Sharing
      • Recommendations
      • Shopping & Coupons
      • Books
  • Explore
    • Crafts
      • Beading
      • Kids
      • Paint
      • Storage
      • Christmas Crafts
    • Sewing
    • Quilting
    • Stitching
    • Crochet
      • Yarn
    • Life
      • Food
      • Organisation
    • Blogging
      • How To
      • Social Media
      • WordPress Plugins
      • Photography
  • Tutorials
    • Tips
  • Shop on Etsy
  • Shop on Redbubble

Tutorial: Wonky Cross Block

by Tonya Grant |Filed Under: Quilting, Tutorials Tagged With: QuiltyBox, Tops of 2015 Get a Weekly Update of all Articles

Wonky Cross Block Tutorial: See a brand new quilt block tutorial using the 10" Slicer from Crafty Gemini and Quilty Box: the Wonky Cross Block

The lovely folks from Quilty Box sent me another surprise package a couple of weeks ago and I couldn’t wait to play with the new tool. This one is a very special release from Crafty Gemini called the 10″ Slicer. It is a new acrylic ruler for cutting patchwork pieces and it is unlike any other tool I own.

The idea is that it is 10 inches tall to work easily with 10″ square pieces of fabric, often known as Layer Cakes. There are a couple of exclusive tutorials available but I wanted to create something extra as a way of saying thank you to Quilty Box. I have loved working with them this year and can’t praise their monthly box of quilting products enough.

Wonky Cross Block 10 inch slicer

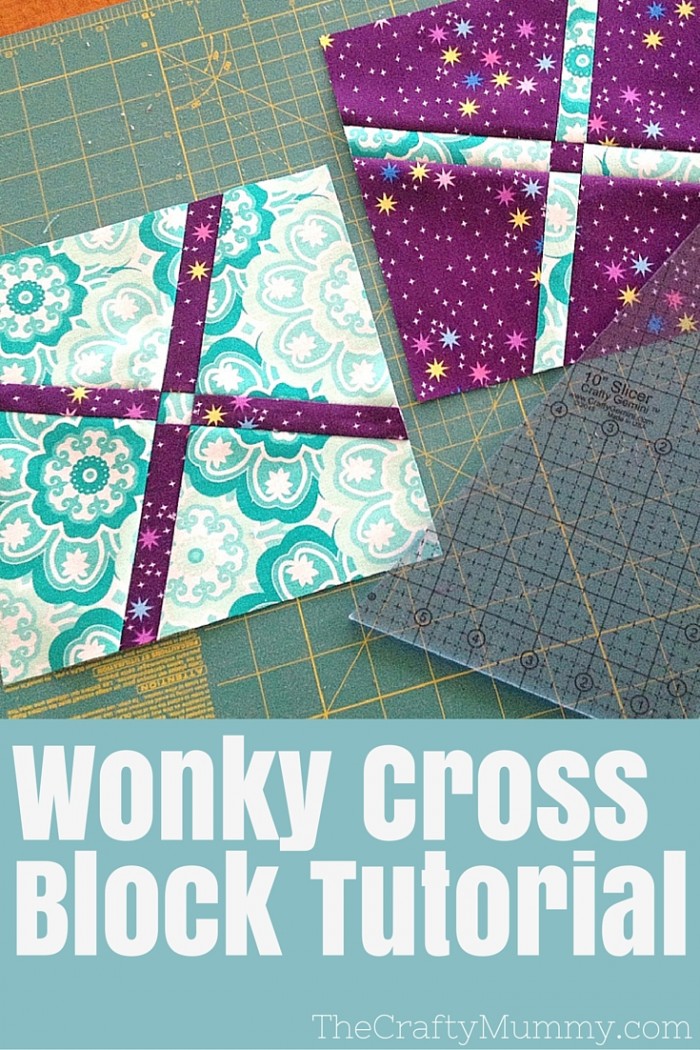
So here is a special tutorial to make a Wonky Cross Block with the new 10″ Slicer from Crafty Gemini.

What You Need

  • 2 x 10″ squares of fabric
  • 10″ Slicer – available from Crafty Gemini
  • Cutting mat and Rotary Cutter
  • Usual sewing supplies to piece your block

We are going to end up with two Wonky Cross Blocks with this method.

10 inch slicer

What To Do

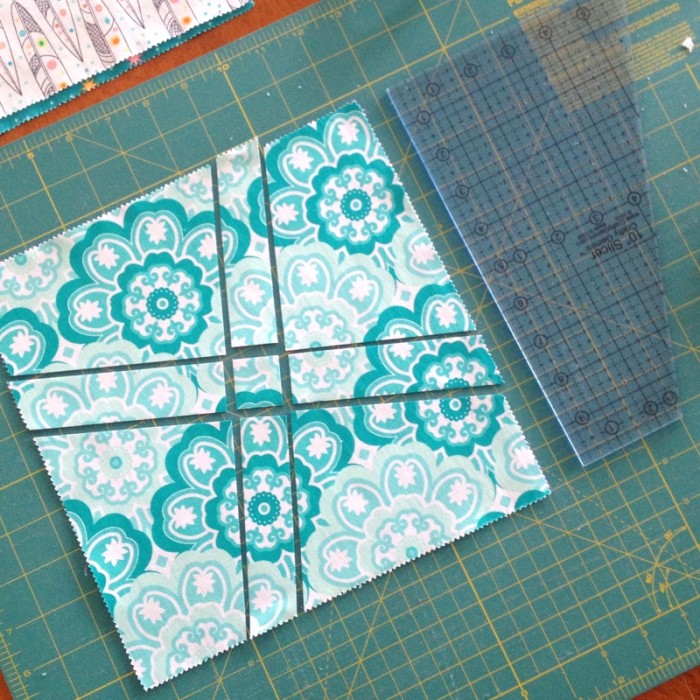
Lay your two squares carefully on top of each other both right side up and line up the edges. We are going to cut them together so they match.

Line up the 10″ Slicer along one edge and cut along the angled edge.

Without moving the fabric, rotate the ruler 90 degrees to line up along the next edge. Again slice along the angled edge.

Rotate the ruler again 90 degrees and cut again. Finally rotate it once more and cut one more long cut.

Wonky Cross Block cutting

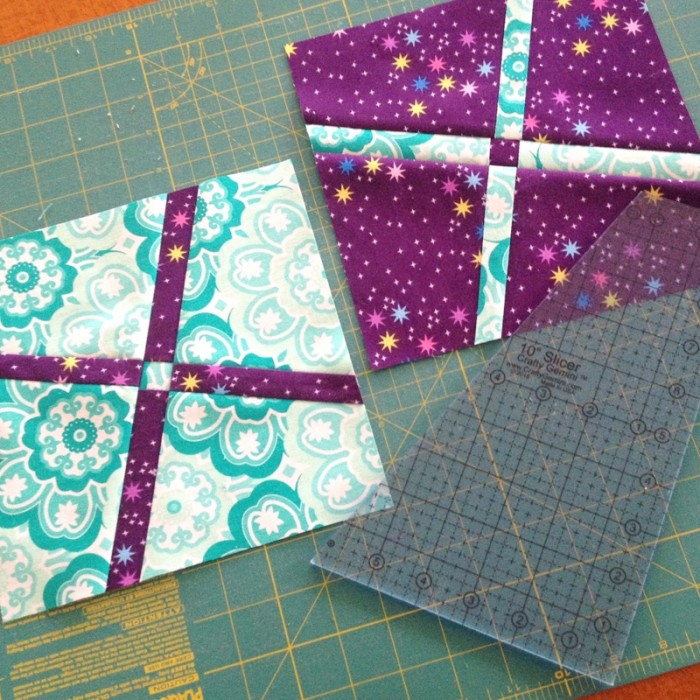
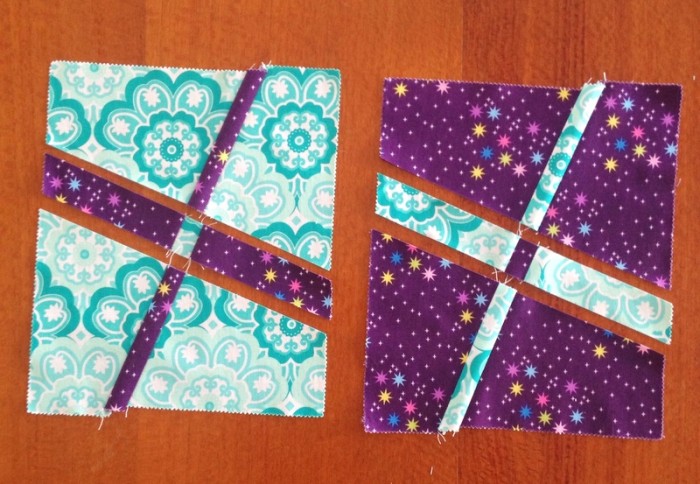
You should now have 9 pieces that look like those in the picture above from each square.

Wonky Cross block pieces

Now to shuffle the pieces! Switch all the long narrow pieces from one set of pieces to the other so you end up with two sets like these. We’re going to create two Wonky Cross Blocks that sort of match each other.

NOTE: If you wanted to create a whole quilt with this block, you could cut all your squares and then mix all the sets of pieces to end up with an interesting variety of blocks. I would cut them all first then lay them out on the floor and start switching. Keep going until you are happy with the look of all the blocks and placement of colours.

Wonky Cross Block join

Now to stitch the blocks together:

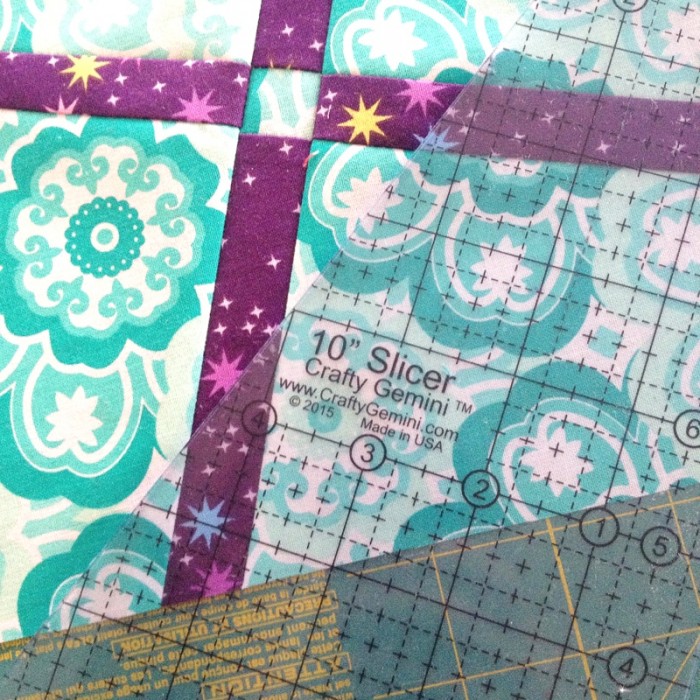
Start by joining the pieces in sets of three – top, middle and bottom of the block. (See picture above) You can see that I lined up the inner edges of the block in each set.

Pressing:

I pressed the middle set with seams going away from the centre, and the outer sets of three with seams going towards the Centre. This means that when we go to the next step, the seams will nest together nicely. Read more about nesting seams here.

Wonky Cross Block done

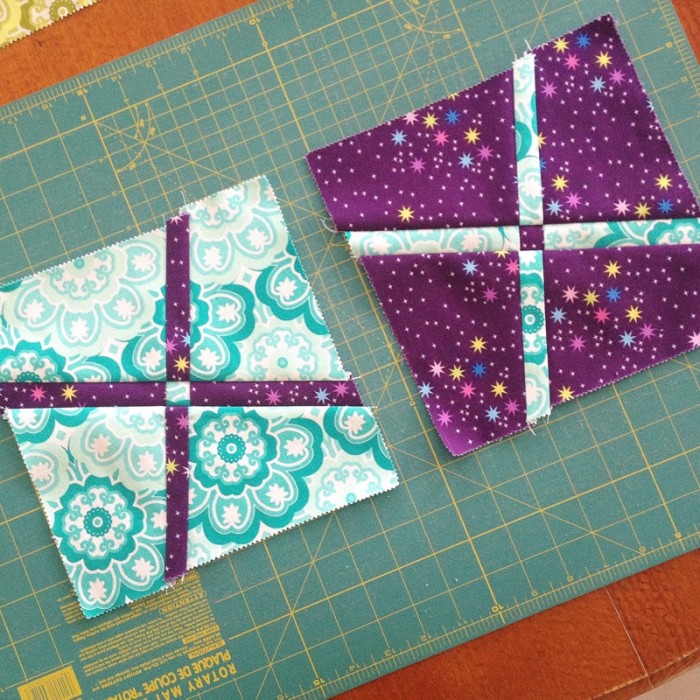
Finally join the sets together to form the block.

Square up the block by trimming the edges. My finished blocks are 8.25″. Learn more about squaring up blocks here.

Read more about Quilty Box here and here

Find more Quilting projects here.

Filed Under: Quilting, Tutorials Tagged With: QuiltyBox, Tops of 2015

« Tutorial: Felt Triangle Coasters
Rainbow Margaret Block – Almost! »
Disclosure: There are affiliate links in this post.  This just means that if you click through and choose to purchase something I may get a small commission - at no extra cost to you, of course.  This helps me keep the content here at The Crafty Mummy free for everyone.

I love to chat so please leave me a comment or ask a question.

Don't stress if your comment doesn't appear immediately - sometimes I have to moderate comments thanks to spam visitors, but the comments from real readers will always get published. Scroll down to add your thoughts or ask a question.

Comments

  1. Lisa C in Dallas says

    January 19, 2016 at 4:24 AM

    I found this tutorial from looking at the 10″ template on Crafty Gemini. This is a great idea. I’ve got a stack of 10″ gray squares from a swap that have just been sitting on the shelf. I think I’ll order the template and mix the gray with some brighter colors. Thanks so much for the tutorial.

  2. variadee says

    August 3, 2016 at 10:38 AM

    I saw this great idea from you on the Crafty Gemini site. Am looking forward to trying your idea.

  3. Michele T says

    February 27, 2021 at 5:34 AM

    Not only do I love this block design… but the fabrics you chose are awesome!!!

Hi! I’m the CraftyMummy

Tonya is the voice behind The Crafty Mummy. She dabbles in lots of different crafts – patchwork, quilting, cross-stitch, scrapbooking, knitting, crochet and sewing. This is the record of projects she has done, and the projects she dreams of getting to! Read More…

Search

  • Email
  • Facebook
  • Instagram
  • Pinterest
  • Twitter
  • YouTube
Shop my Affiliate Favourites

Fat Quarter Shop for Fabric and More

Grab the Sew Sampler Box Here

AccuQuilt for Cutting Machines and Dies

QuiltyBox for Monthly Treats in the Mail

CreativeBug for Craft Classes

Pretty Darn Cute for Blog Designs like mine

Creative Market for Fonts, Images, Themes and More

OzGameShop for All the Games

Adrift for Fashion you’ll Love

Kindle Unlimited Membership Plans

Kindle Book List

Click to shop my kindle book list
Shop my Amazon Influencer Shop
Join the CrochetU and learn to crochet
New to TheCraftyMummy.com? Click here to see more
Blog Tools I use for TheCraftyMummy.com

Grammarly

Aweber for email newsletter

CoSchedule to stay organised and share

Milotree for social media

Genesis for blog framework

FoodiePro is my theme

Hosting with WPEngine

Powered by

Recent Articles

Disclosure: There are affiliate links on this site. This means that I may get a commission if you choose to purchase after browsing via these links - at absolutely no extra cost to you, of course. I only recommend products which I use and love, or that I think will be quality products that will be useful to my readers. It is the affiliate links in this site that help me keep my tutorials free of charge. Thank you!

Looking for something? Search here:

Copyright 2015 The Crafty Mummy · Built using Genesis Framework & Foodie Pro Theme