The Crafty Mummy

Crafts. Sewing. Quilting. Crochet. Tutorials.

  • Start Here
  • Welcome
    • Subscribe
    • About Me
      • Copyright
      • Disclosure
      • Privacy Policies
    • Advertise
    • Sharing
      • Recommendations
      • Shopping & Coupons
      • Books
  • Explore
    • Crafts
      • Beading
      • Kids
      • Paint
      • Storage
      • Christmas Crafts
    • Sewing
    • Quilting
    • Stitching
    • Crochet
      • Yarn
    • Life
      • Food
      • Organisation
    • Blogging
      • How To
      • Social Media
      • WordPress Plugins
      • Photography
  • Tutorials
    • Tips
  • Shop on Etsy
  • Shop on Redbubble

How to Sew a Maid Marion Costume

by Tonya Grant |Filed Under: Sewing, Tutorials Tagged With: Book Week, Clothes, Costumes, Halloween Get a Weekly Update of all Articles

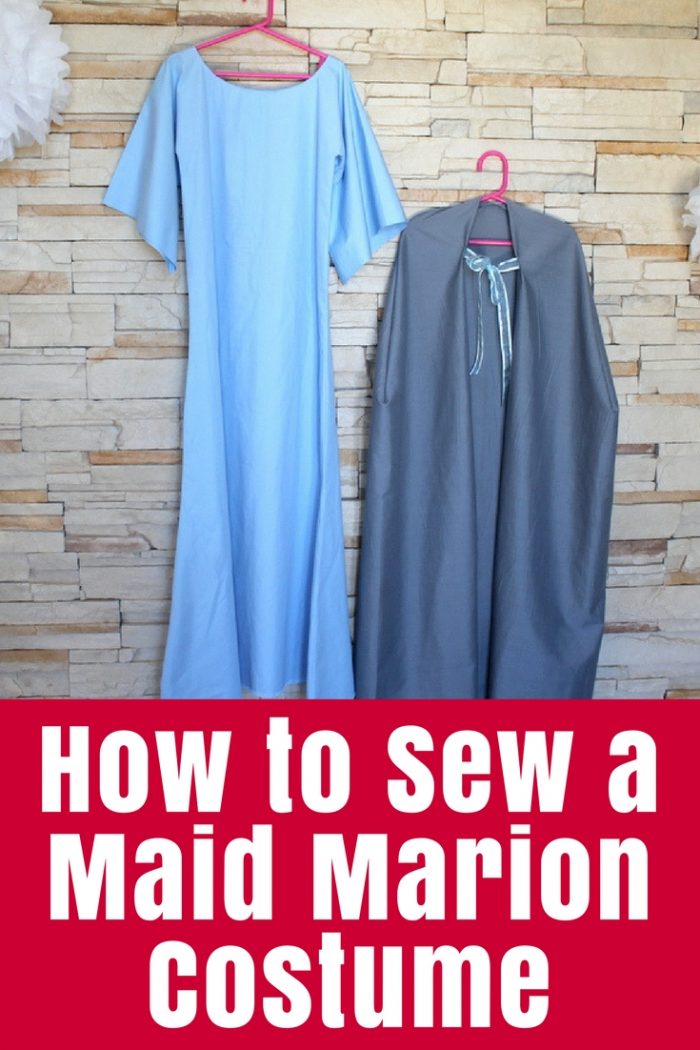
My Little Miss wanted a Maid Marion costume for Book Week so here’s how I made it. This would also be great for Halloween.

maid marion costume dress and cape

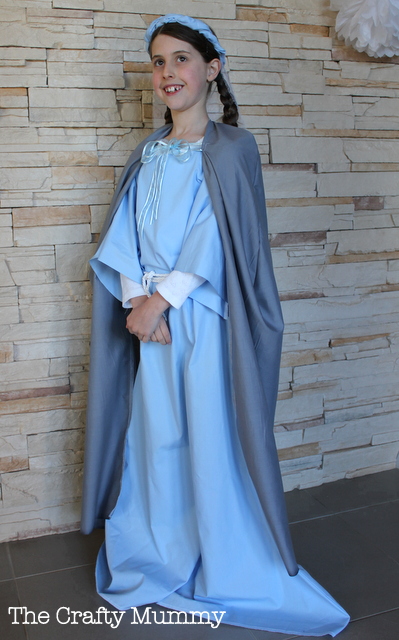
Back to Book Week costumes – I know, bit late now but I still have to share! Remember Mr Happy went as Obi Wan Kenobi? Little Miss decided she wanted to be Maid Marion this year, and naturally, she expected that her Crafty Mummy would be creating something special to wear. So I thought a bit (and googled a bit) and made a dress, a cape and a head-dress. The pale blue fabric was inherited from my lovely Mother-in-law’s stash and was just enough for a floor length dress.

Maid Marion’s Dress

making a maid marion dress

What I Used

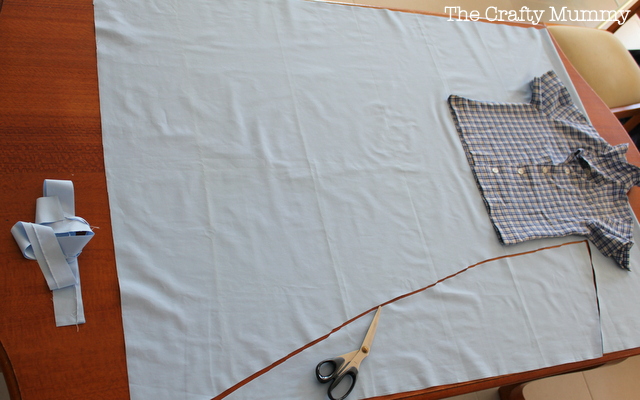
  • Fabric – wide enough to be body and sleeves, and long enough to be shoulder to floor when folded in half
  • Scissors, thread, etc

What I Did

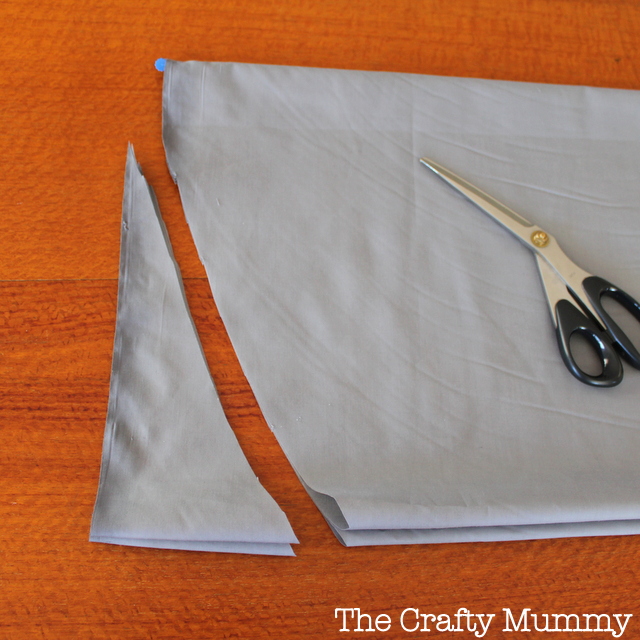
1. I folded the length of fabric in half with right sides together and laid a shirt in the centre top to give an idea of size.

2. I cut the sleeve and body shape then down to the bottom creating a wide skirt on one half of the fabric.

making a maid marion dress

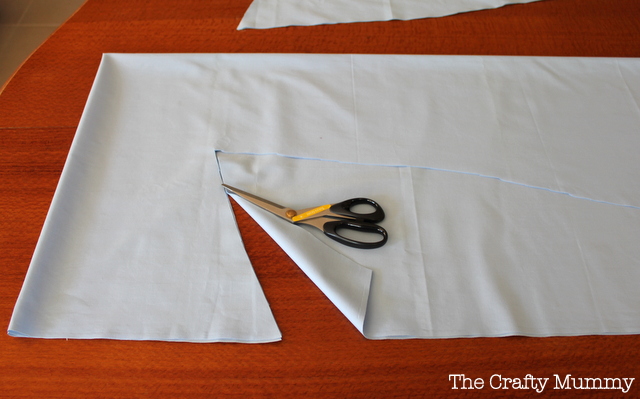
3. I folded the cut half on to the top of the uncut half and cut the second half the same.

making a maid marion dress

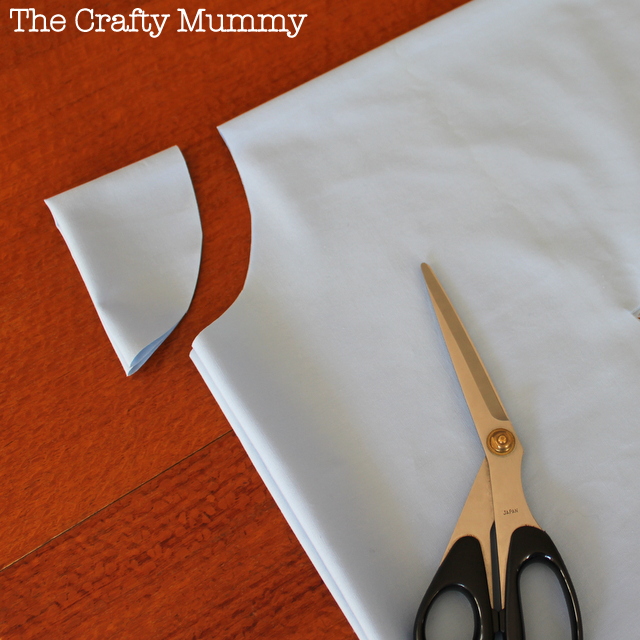
4. Next I cut a hole for the neck.

making a maid marion dress

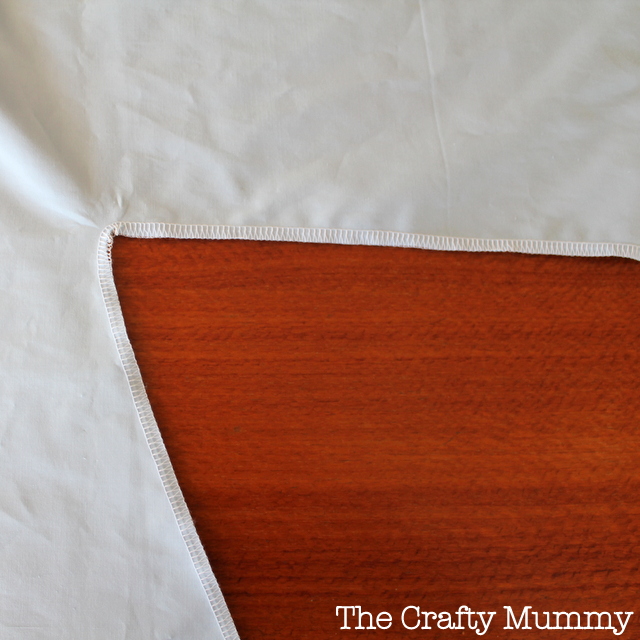
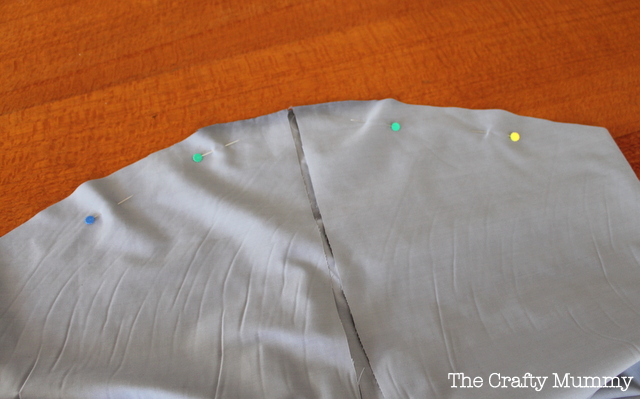
5. I stitched up each side and along the sleeves. (You can see my not-so-great overlocking but I really wanted to play with my new machine. Luckily I’ve done a class since then and learnt how to create a much better corner.)

making a maid marion dress

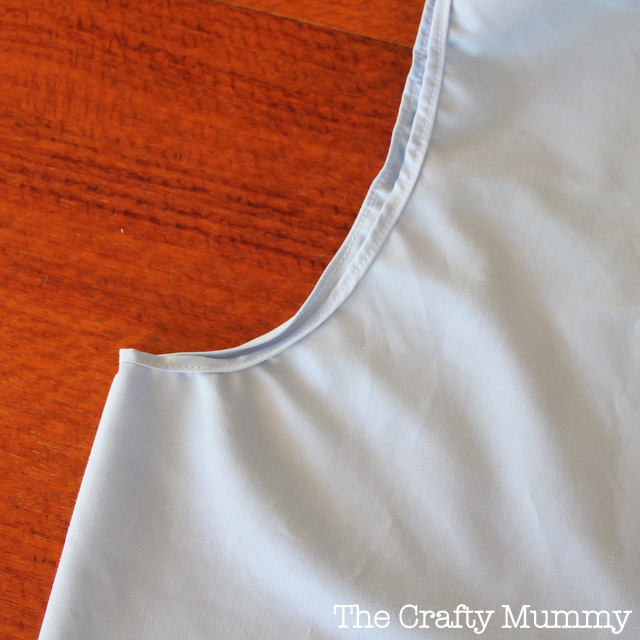
6. I also stitched a hem on the neck line and hemmed the skirt.
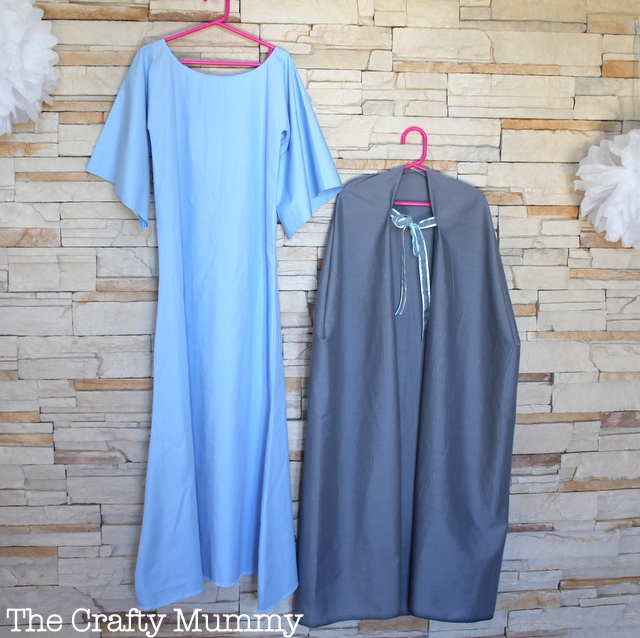
maid marion costume dress cape

Maid Marion’s Cape

What I Used

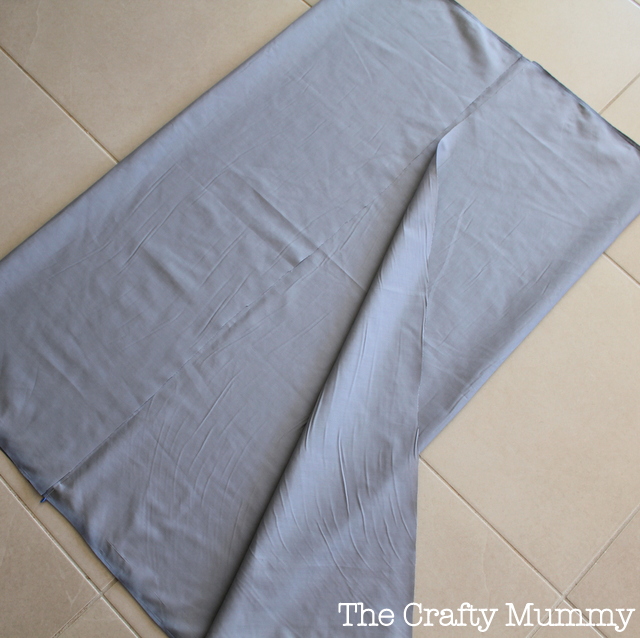
  • Grey fabric – 132cm x 108cm
  • 20cm of ribbon

sew a simple cape

What I Did

1. I marked the centre of the longer side of the fabric and folded the edges in to meet in the centre, right sides together.

sew a simple cape

2. I folded the fabric in half with the ends tucked inside.

3. I cut a curve at the top like the shape of the top of the shoulder.

sew a simple cape cloak

4. I pinned the curve and stitched.

5. Then I hemmed all the raw edges.

sew a simple cloak cape

6. I added some ribbon for tying.

The head-dress was just as easy. Find the tutorial here: Maid Marion’s Head Dress

My Little Miss wanted a Maid Marion costume for Book Week so here's how I made it. This would also be great for Halloween.

Summary
How to Sew a Maid Marion Costume
Article Title
How to Sew a Maid Marion Costume
Description
My Little Miss wanted a Maid Marion costume for Book Week so here's how I made it. This would also be great for Halloween.
Author
Tonya Grant
Published on
TheCraftyMummy.com

Filed Under: Sewing, Tutorials Tagged With: Book Week, Clothes, Costumes, Halloween

« Mini Embroidery Hoop Necklace
Theme of the Week: Father’s Day »
Disclosure: There are affiliate links in this post.  This just means that if you click through and choose to purchase something I may get a small commission - at no extra cost to you, of course.  This helps me keep the content here at The Crafty Mummy free for everyone.

I love to chat so please leave me a comment or ask a question.

Don't stress if your comment doesn't appear immediately - sometimes I have to moderate comments thanks to spam visitors, but the comments from real readers will always get published. Scroll down to add your thoughts or ask a question.

Comments

  1. Valerie says

    September 1, 2013 at 11:48 AM

    Very cute! I love how you put the shirt up to the fabric to give you an idea of the size! Brilliant! 😀
    Btw, I found your blog through Top Mommy Blogs. 😉

  2. lanea says

    November 19, 2013 at 9:10 PM

    wow did you do that by hand, it looks great

Hi! I’m the CraftyMummy

Tonya is the voice behind The Crafty Mummy. She dabbles in lots of different crafts – patchwork, quilting, cross-stitch, scrapbooking, knitting, crochet and sewing. This is the record of projects she has done, and the projects she dreams of getting to! Read More…

Search

  • Email
  • Facebook
  • Instagram
  • Pinterest
  • Twitter
  • YouTube
Shop my Affiliate Favourites

Fat Quarter Shop for Fabric and More

Grab the Sew Sampler Box Here

AccuQuilt for Cutting Machines and Dies

QuiltyBox for Monthly Treats in the Mail

CreativeBug for Craft Classes

Pretty Darn Cute for Blog Designs like mine

Creative Market for Fonts, Images, Themes and More

OzGameShop for All the Games

Adrift for Fashion you’ll Love

Kindle Unlimited Membership Plans

Kindle Book List

Click to shop my kindle book list
Shop my Amazon Influencer Shop
Join the CrochetU and learn to crochet
New to TheCraftyMummy.com? Click here to see more
Blog Tools I use for TheCraftyMummy.com

Grammarly

Aweber for email newsletter

CoSchedule to stay organised and share

Milotree for social media

Genesis for blog framework

FoodiePro is my theme

Hosting with WPEngine

Powered by

Recent Articles

Disclosure: There are affiliate links on this site. This means that I may get a commission if you choose to purchase after browsing via these links - at absolutely no extra cost to you, of course. I only recommend products which I use and love, or that I think will be quality products that will be useful to my readers. It is the affiliate links in this site that help me keep my tutorials free of charge. Thank you!

Looking for something? Search here:

Copyright 2015 The Crafty Mummy · Built using Genesis Framework & Foodie Pro Theme